2011 Hyundai Accent oil temperature
[x] Cancel search: oil temperaturePage 10 of 232
YOUR VEHICLE AT A GLANCE
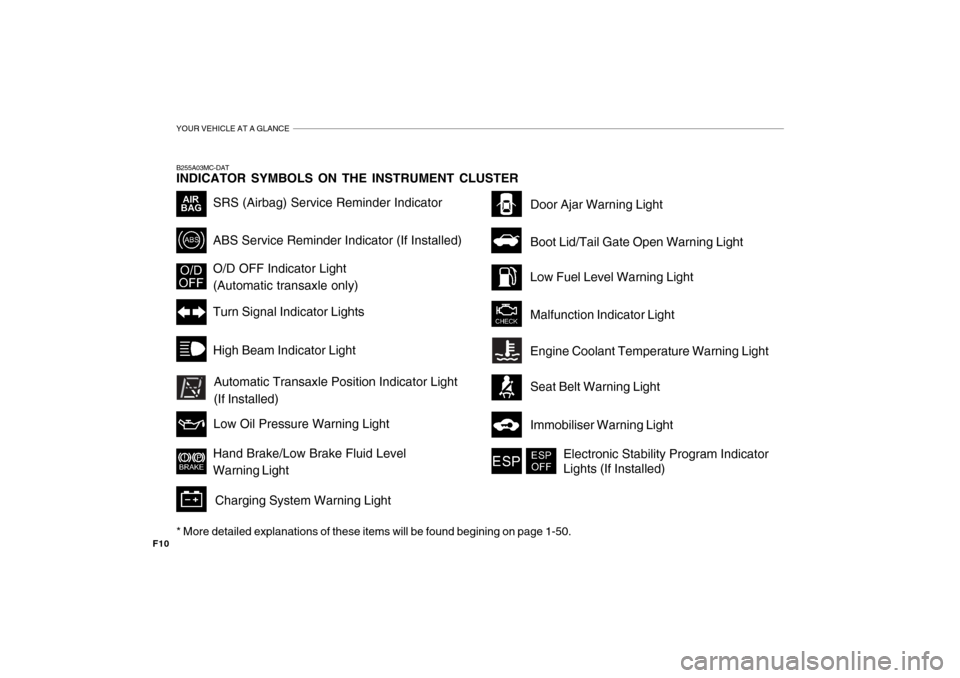
F10B255A03MC-DAT INDICATOR SYMBOLS ON THE INSTRUMENT CLUSTER * More detailed explanations of these items will be found begining on page 1-50.
Turn Signal Indicator Lights
SRS (Airbag) Service Reminder Indicator O/D OFF Indicator Light (Automatic transaxle only) High Beam Indicator Light
Low Oil Pressure Warning Light
ABS Service Reminder Indicator (If Installed)
Door Ajar Warning Light
Hand Brake/Low Brake Fluid Level Warning Light Charging System Warning Light Low Fuel Level Warning Light Malfunction Indicator Light
Immobiliser Warning Light
Boot Lid/Tail Gate Open Warning Light
Engine Coolant Temperature Warning Light Seat Belt Warning Light
Electronic Stability Program Indicator Lights (If Installed)
Automatic Transaxle Position Indicator Light (If Installed)
Page 58 of 232
1
FEATURES OF YOUR HYUNDAI
47
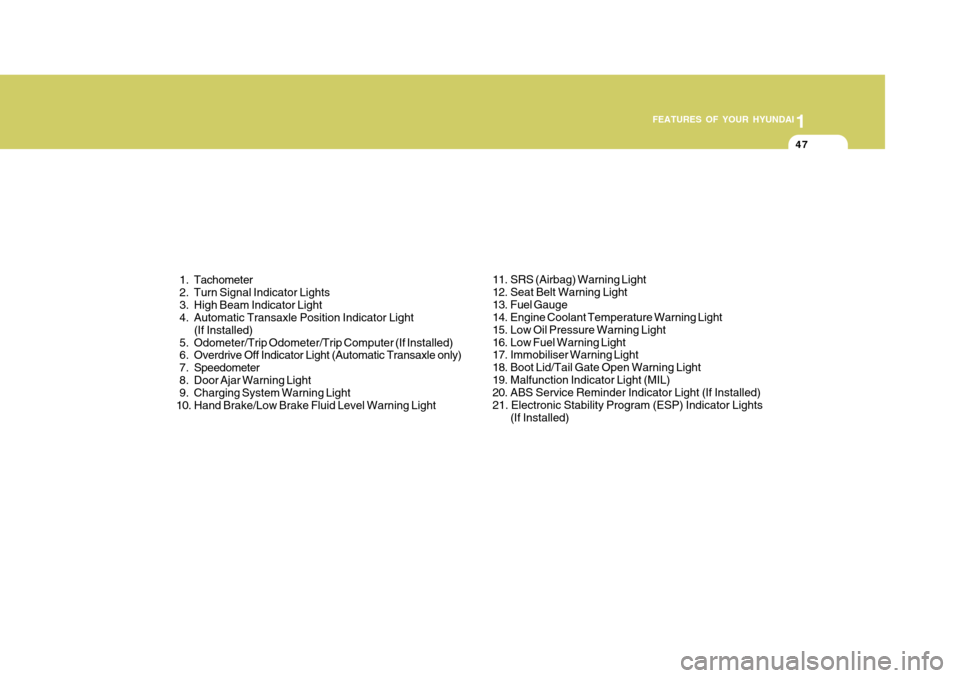
1. Tachometer
2. Turn Signal Indicator Lights
3. High Beam Indicator Light
4. Automatic Transaxle Position Indicator Light (If Installed)
5. Odometer/Trip Odometer/Trip Computer (If Installed)
6. Overdrive Off Indicator Light (Automatic Transaxle only)
7. Speedometer
8. Door Ajar Warning Light
9. Charging System Warning Light
10. Hand Brake/Low Brake Fluid Level Warning Light 11. SRS (Airbag) Warning Light
12. Seat Belt Warning Light
13. Fuel Gauge
14. Engine Coolant Temperature Warning Light
15. Low Oil Pressure Warning Light
16. Low Fuel Warning Light
17. Immobiliser Warning Light
18. Boot Lid/Tail Gate Open Warning Light
19. Malfunction Indicator Light (MIL)
20. ABS Service Reminder Indicator Light (If Installed) 21. Electronic Stability Program (ESP) Indicator Lights
(If Installed)
Page 60 of 232
1
FEATURES OF YOUR HYUNDAI
49
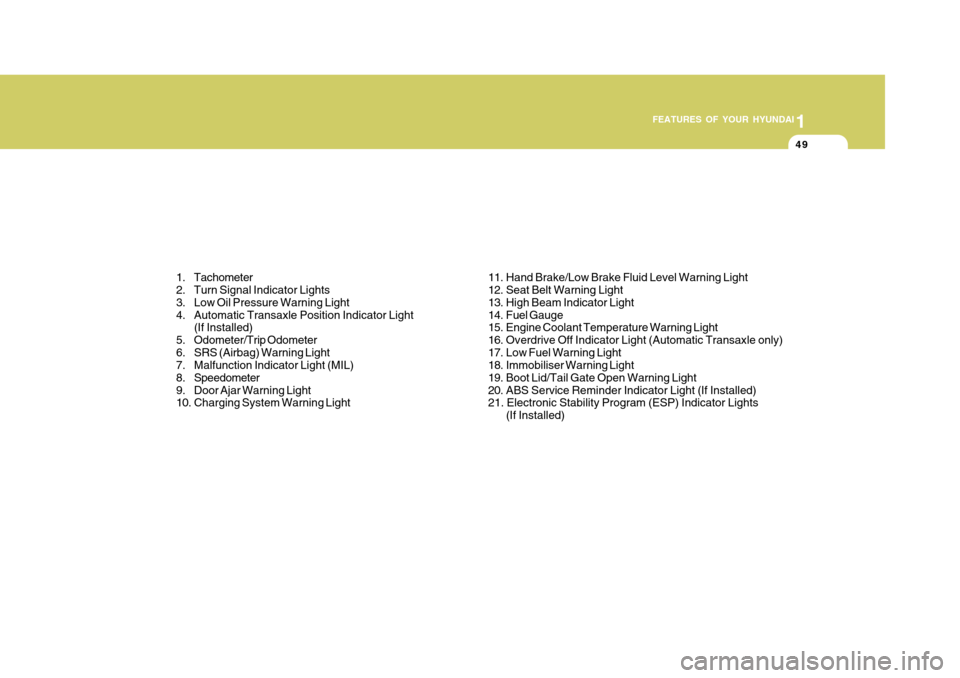
1. Tachometer
2. Turn Signal Indicator Lights
3. Low Oil Pressure Warning Light
4. Automatic Transaxle Position Indicator Light (If Installed)
5. Odometer/Trip Odometer
6. SRS (Airbag) Warning Light
7. Malfunction Indicator Light (MIL)
8. Speedometer
9. Door Ajar Warning Light
10. Charging System Warning Light 11. Hand Brake/Low Brake Fluid Level Warning Light
12. Seat Belt Warning Light
13. High Beam Indicator Light
14. Fuel Gauge
15. Engine Coolant Temperature Warning Light
16. Overdrive Off Indicator Light (Automatic Transaxle only)
17. Low Fuel Warning Light
18. Immobiliser Warning Light
19. Boot Lid/Tail Gate Open Warning Light
20. ABS Service Reminder Indicator Light (If Installed) 21. Electronic Stability Program (ESP) Indicator Lights
(If Installed)
Page 171 of 232
44CORROSION PREVENTION AND APPEARANCE CARE
6CLEANING THE INTERIOR
Fine leather needs care, and should be cleaned when necessary. Washingleather thoroughly with soap and water will keep your leather lustrous, beautiful and ensure you have many years ofusage. Take a piece of cheese cloth and using any mild soap and lukewarm water, work up a good lather. Thoroughly wash the leather. Wipe clean with aslightly damp cloth and dry with soft cloth. Do this as often as the leather becomes soiled.Consult your Hyundai dealer for recom- mended leather treatment products. During tanning operations, sufficient oils are incorporated through process- ing that none need be applied duringthe life of the leather. Oil applied to the finished surface will in no way help the leather and may do more harm thangood. Varnishes and furniture polishes should never be used under any con- ditions.
E040A01A-DAT To Clean the Vinyl Upholstery To clean the vinyl upholstery, first re- move loose dirt and dust with a vacuumcleaner. Then apply a solution of mild soap or detergent and water using a clean sponge or soft cloth. Allow this tostay on the surface to loosen the dirt, then wipe with a clean damp sponge or cloth. If all the dirt stains are not re-moved, repeat this procedure until the upholstery is clean. Do not use petrol, solvent, paint thinner or other strongcleaners. E040B01A-DAT To Clean the Leather Upholstery (If Installed) In the normal course of use, leather upholstered surfaces will, like any material, pick-up dust and dirt. Thisdust and dirt must be cleaned off or it may work into the surface of the leather, causing damage.
E030D01A-AAT When to Wax Again You should polish and wax the car again when water no longer beads ona clean surface but spreads out over a larger area. E030E01A-AAT Maintaining Bumpers Special precautions must be observed to preserve the appearance of the bumpers on your Hyundai. They are:
o Be careful not to spill battery elec-
trolyte or hydraulic brake fluid on the bumpers. If you do, wash it off im- mediately with clear water.
o Be gentle when cleaning the bumper surfaces. They are made of softplastic and the surface can be dam-aged if mistreated. Do not use abra- sive cleaners. Use warm water and mild soap or car-washing solution.
o Do not expose the bumpers to high temperatures. For example, if youhave your car repainted, do notleave the bumpers on the car if the car is going to be placed in a high- temperature paint booth.
Page 178 of 232
5VEHICLE MAINTENANCE REQUIREMENTS
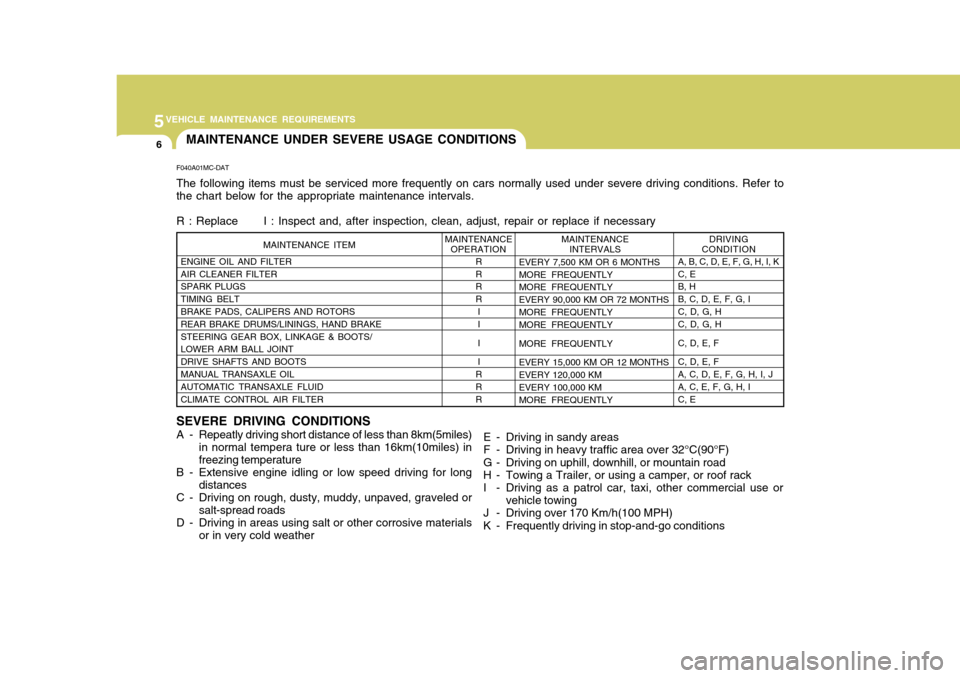
6MAINTENANCE UNDER SEVERE USAGE CONDITIONS
SEVERE DRIVING CONDITIONS
A - Repeatly driving short distance of less than 8km(5miles) in normal tempera ture or less than 16km(10miles) in freezing temperature
B - Extensive engine idling or low speed driving for long
distances
C - Driving on rough, dusty, muddy, unpaved, graveled or salt-spread roads
D - Driving in areas using salt or other corrosive materials or in very cold weather RR R R
I I I I
R R R
ENGINE OIL AND FILTERAIR CLEANER FILTER SPARK PLUGS TIMING BELTBRAKE PADS, CALIPERS AND ROTORS REAR BRAKE DRUMS/LININGS, HAND BRAKE STEERING GEAR BOX, LINKAGE & BOOTS/ LOWER ARM BALL JOINT DRIVE SHAFTS AND BOOTSMANUAL TRANSAXLE OIL AUTOMATIC TRANSAXLE FLUID CLIMATE CONTROL AIR FILTER
F040A01MC-DAT The following items must be serviced more frequently on cars normally used under severe driving conditions. Refer to the chart below for the appropriate maintenance intervals. R : Replace I : Inspect and, after inspection, clean, adjust, repair or replace if necessary
MAINTENANCE ITEM
EVERY 7,500 KM OR 6 MONTHS MORE FREQUENTLY MORE FREQUENTLY EVERY 90,000 KM OR 72 MONTHSMORE FREQUENTLY MORE FREQUENTLY MORE FREQUENTLY EVERY 15,000 KM OR 12 MONTHS EVERY 120,000 KMEVERY 100,000 KM MORE FREQUENTLY
A, B, C, D, E, F, G, H, I, K C, E B, H B, C, D, E, F, G, IC, D, G, H C, D, G, H C, D, E, F C, D, E, F A, C, D, E, F, G, H, I, J A, C, E, F, G, H, I C, E
MAINTENANCE
INTERVALS DRIVING
CONDITION
MAINTENANCE
OPERATION
E - Driving in sandy areas
F - Driving in heavy traffic area over 32°C(90°F)
G - Driving on uphill, downhill, or mountain road
H - Towing a Trailer, or using a camper, or roof rack
I - Driving as a patrol car, taxi, other commercial use or
vehicle towing
J - Driving over 170 Km/h(100 MPH)
K - Frequently driving in stop-and-go conditions
Page 180 of 232
5VEHICLE MAINTENANCE REQUIREMENTS
8
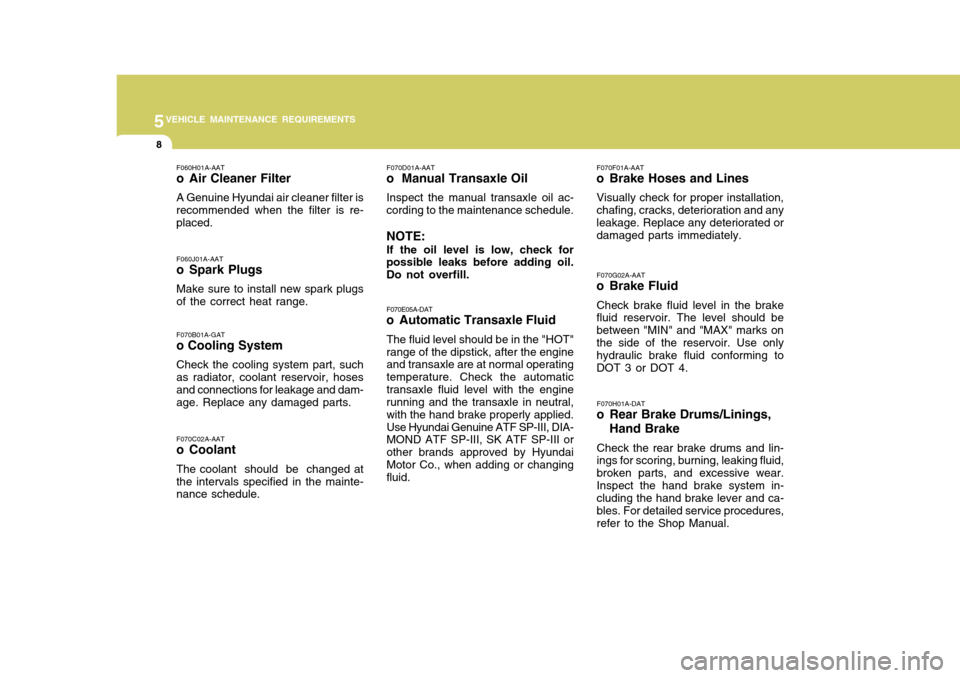
F070H01A-DAT
o Rear Brake Drums/Linings,
Hand Brake
Check the rear brake drums and lin- ings for scoring, burning, leaking fluid, broken parts, and excessive wear.Inspect the hand brake system in- cluding the hand brake lever and ca- bles. For detailed service procedures,refer to the Shop Manual.
F060H01A-AAT
o Air Cleaner Filter A Genuine Hyundai air cleaner filter is recommended when the filter is re- placed. F060J01A-AAT
o Spark Plugs Make sure to install new spark plugs of the correct heat range. F070C02A-AAT
o Coolant The coolant should be changed at the intervals specified in the mainte- nance schedule.
F070E05A-DAT
o Automatic Transaxle Fluid
The fluid level should be in the "HOT" range of the dipstick, after the engine and transaxle are at normal operating temperature. Check the automatictransaxle fluid level with the engine running and the transaxle in neutral, with the hand brake properly applied.Use Hyundai Genuine ATF SP-III, DIA- MOND ATF SP-III, SK ATF SP-III or other brands approved by HyundaiMotor Co., when adding or changing fluid. F070F01A-AAT
o Brake Hoses and Lines
Visually check for proper installation, chafing, cracks, deterioration and any leakage. Replace any deteriorated or damaged parts immediately. F070G02A-AAT
o Brake Fluid
Check brake fluid level in the brake fluid reservoir. The level should be between "MIN" and "MAX" marks onthe side of the reservoir. Use only hydraulic brake fluid conforming to DOT 3 or DOT 4.
F070B01A-GAT o Cooling System Check the cooling system part, such as radiator, coolant reservoir, hoses and connections for leakage and dam- age. Replace any damaged parts. F070D01A-AAT
o Manual Transaxle Oil
Inspect the manual transaxle oil ac-
cording to the maintenance schedule. NOTE:
If the oil level is low, check for
possible leaks before adding oil. Do not overfill.
Page 186 of 232
6
DO-IT-YOURSELF MAINTENANCE
5
!
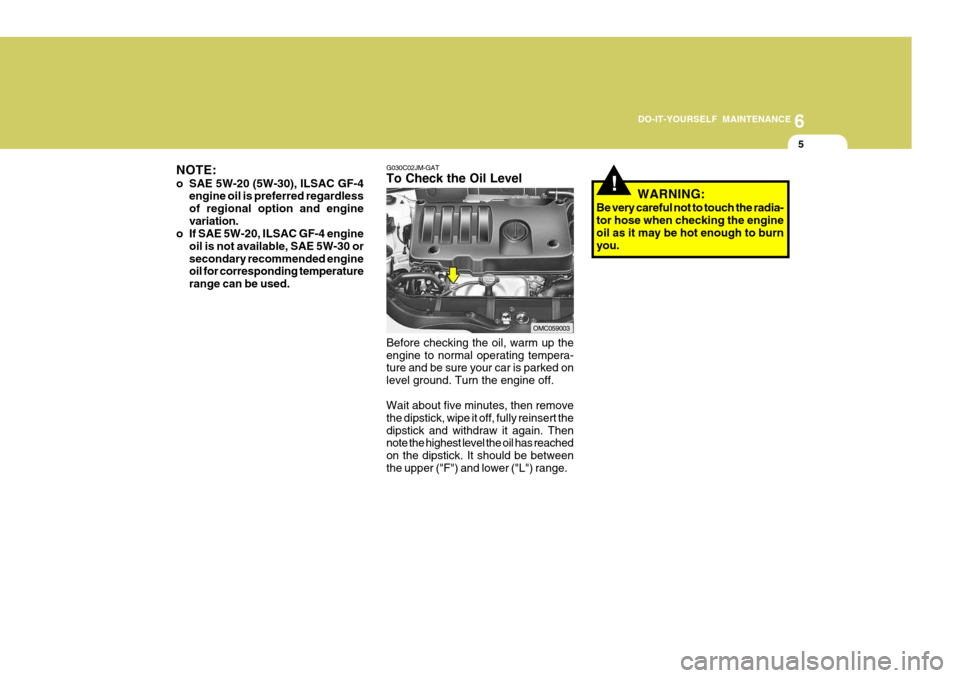
G030C02JM-GAT To Check the Oil Level Before checking the oil, warm up the engine to normal operating tempera- ture and be sure your car is parked on level ground. Turn the engine off. Wait about five minutes, then remove the dipstick, wipe it off, fully reinsert thedipstick and withdraw it again. Then note the highest level the oil has reached on the dipstick. It should be betweenthe upper ("F") and lower ("L") range.
OMC059003 WARNING:
Be very careful not to touch the radia- tor hose when checking the engine oil as it may be hot enough to burnyou.
NOTE:
o SAE 5W-20 (5W-30), ILSAC GF-4
engine oil is preferred regardless of regional option and enginevariation.
o If SAE 5W-20, ILSAC GF-4 engine
oil is not available, SAE 5W-30 orsecondary recommended engine oil for corresponding temperature range can be used.
Page 230 of 232

10
INDEX
3
E Electronic Stability Program (ESP) ...........................2-12
Emission Contro l System ............................................ 7-2
Engine Before starting the engine ........................................ 2-3Compartment ............................................................ 6-2
Coolant ..................................................................... 6-7
If the engine overheats ............................................. 3-4
Number ..................................................................... 8-3
Oil ............................................................................. 6-4 Starting ..................................................................... 2-5
Engine Exhaust Can Be Dangerous ............................ 2-2
FFog Light Front ....................................................................... 1-67
Rear ........................................................................ 1-67
Front Seats Adjustable front seats ............................................. 1-14
Adjustable headrests .............................................. 1-15
Adjusting seat forward and rearward .......................1-14
Adjusting seatback angle ....................................... 1-14
Fuel
Capacity ................................................................... 9-2
Gauge ..................................................................... 1-55
Recommendations .................................................... 1-2
Fuel Filler Lid
Remote release ...................................................... 1-80
Fuses ........................................................................ 6-17
Fuse Panel description .............................................. 6-30G General Checks
........................................................... 6-3
Glove Box ................................................................. 1-75
H Hand Brake ................................................................ 1-78
Hazard Warning System ............................................ 1-66
Headlight Aiming Adjustment..................................... 6-22
Heating and Cooling Control ......................................1-89
Heating and Ventilation .............................................. 1-90
Air flow control ........................................................ 1-91
Air intake control .................................................... 1-90
Bi-level heati ng ....................................................... 1-94
Demisting/Defogging ............................................... 1-94
Fan speed control ................................................... 1-90
Temperature control ................................................ 1-93
High-Mounted Rear Stop Light................................... 1-79
Horn ........................................................................... 1-87
IImmobiliser System ..................................................... 1-3
Instrument Cluster and Indicator Lights ..................... 1-46
Instrument Panel Light Control (Rheostat) .................1-66
Interior Light
Interior light ............................................................. 1-73
Map light ................................................................. 1-73
JJump Starting .............................................................. 3-3