2011 Hyundai Accent clock
[x] Cancel search: clockPage 9 of 232
F9
CAUTION:
When installing a container of liquid air freshener inside the vehicle, do not place it near the instrument cluster nor on the instrument panel pad surface. If there is any leakage from the air freshener onto these areas (Instrument cluster, instrument panel pad or air ventilator), it may damage these parts. If the liquid from air freshener does leak onto these areas, wash them withwater immediately.
!
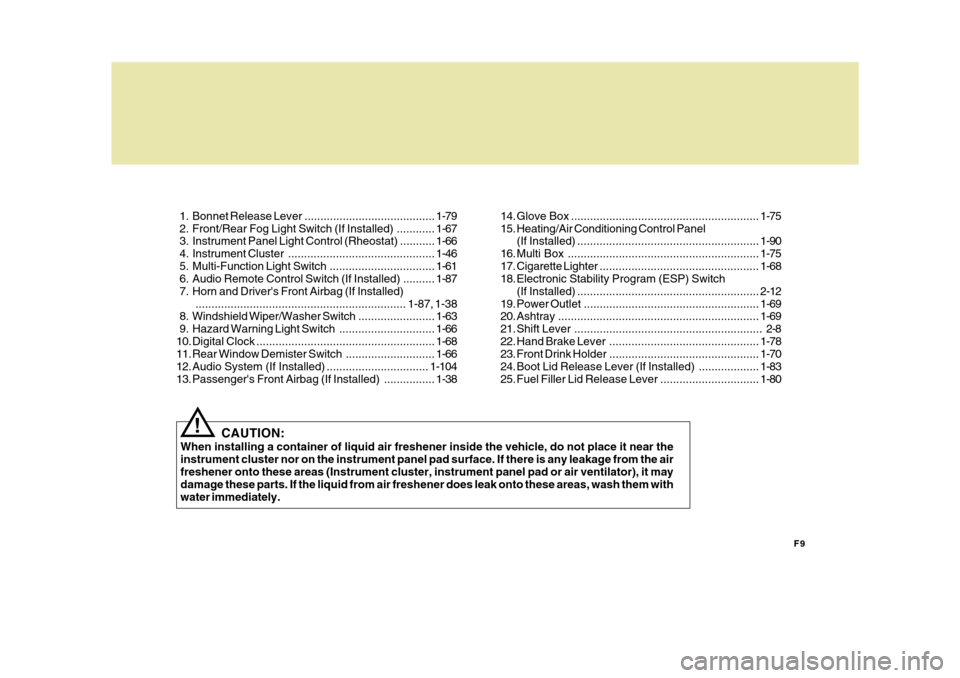
1. Bonnet Release Lever .........................................
1-79
2. Front/Rear Fog Light Switch (If Installed) ............ 1-67
3. Instrument Panel Light Control (Rheostat) ........... 1-66
4. Instrument Cluster.............................................. 1-46
5. Multi-Function Light Switch................................. 1-61
6. Audio Remote Control Switch (If Installed) .......... 1-87
7. Horn and Driver's Front Airbag (If Installed) .................................................................. 1-87, 1-38
8. Windshield W iper/Washer Switch ........................1-63
9. Hazard Warning Light Switch.............................. 1-66
10. Digital Clock ........................................................ 1-68
11. Rear Window Demist er Switch ............................ 1-66
12. Audio System (If Installed) ................................ 1-104
13. Passenger's Front Airbag (If Installed) ................1-3814. Glove Box ...........................................................
1-75
15. Heating/Air Conditioning Control Panel (If Installed) ......................................................... 1-90
16. Multi Box ............................................................ 1-75
17. Cigarette Lighter .................................................. 1-68
18. Electronic Stability Program (ESP) Switch
(If Installed) ......................................................... 2-12
19. Power Outlet ....................................................... 1-69
20. Ashtray ............................................................... 1-69
21. Shift Lever ........................................................... 2-8
22. Hand Brake Lever ............................................... 1-78
23. Front Drink Holder ............................................... 1-70
24. Boot Lid Release Lever (If Installed) ................... 1-83
25. Fuel Filler Lid Release Lever ...............................1-80
Page 22 of 232
1
FEATURES OF YOUR HYUNDAI
11
!
WINDOW GLASS
B050A01MC-AAT
To lower or raise the window, turn the window regulator handle clockwise or counterclockwise. WARNING:
When opening or closing the win-dows, make sure your passenger's arms, hands and body are safely out of the way.
3. Remove the battery cover with a
coin.
4. Remove the old battery from the case and note the polarity. Makesure the polarity of the new batteryis the same (+side facing up), then insert it in the transmitter.
3FDA2015
CAUTION:
An inappropriately disposed battery can be harmful to the environmentand human health. Dispose the bat- tery according to your local law(s) or regulation.
! B060A01MC-GAT POWER WINDOWS (If Installed)
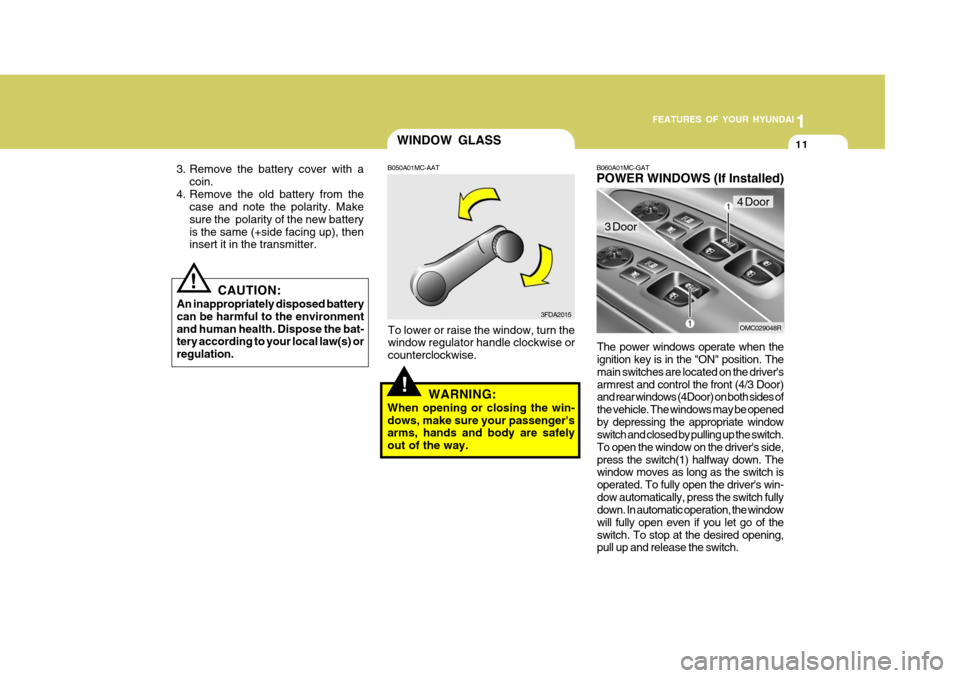
The power windows operate when the ignition key is in the "ON" position. The main switches are located on the driver's
armrest and control the front (4/3 Door)
and rear windows (4Door) on both sides of the vehicle. The windows may be openedby depressing the appropriate window switch and closed by pulling up the switch. To open the window on the driver's side,press the switch(1) halfway down. The window moves as long as the switch is operated. To fully open the driver's win-dow automatically, press the switch fully down. In automatic operation, the window will fully open even if you let go of theswitch. To stop at the desired opening, pull up and release the switch.
3 Door
4 Door
OMC029048R
Page 53 of 232
1FEATURES OF YOUR HYUNDAI
42
!o Use of seat covers could reduce or
prevent the effectiveness of the system.
o Do not install any accessories on
the side or near the side impactairbag.
o Do not use excessive force on the
side of the seat.
o Do not place any objects over the airbag or between the airbag andyourself.
o Do not place any objects (an um- brella, bag, etc.) between the frontdoor and the front seat. Such ob-jects may become dangerous pro- jectiles and cause injury if the supplemental side impact airbaginflates.
o To prevent unexpected deploy-
ment of the side impact airbagthat may result in personal in- jury, avoid impact to the side airbag sensor when the ignitionkey is on.
WARNING:
o The side impact airbag is supple- mental to the driver's and the passenger's seat belt systems and is not a substitute for them. There-fore your seat belts must be worn at all times while the vehicle is in motion. The airbags deploy onlyin certain side impact conditions severe enough to cause signifi- cant injury to the vehicle occu-pants.
o For best protection from the side
impact airbag system and to avoid being injured by the deploy- ing side impact airbag, both frontseat occupants should sit in an upright position with the seat belt properly fastened. The driver'shands should be placed on the steering wheel at the 9:00 and 3:00 o'clock positions. The passenger'sarms and hands should be placed on their laps.
o Do not use any accessory seat covers.
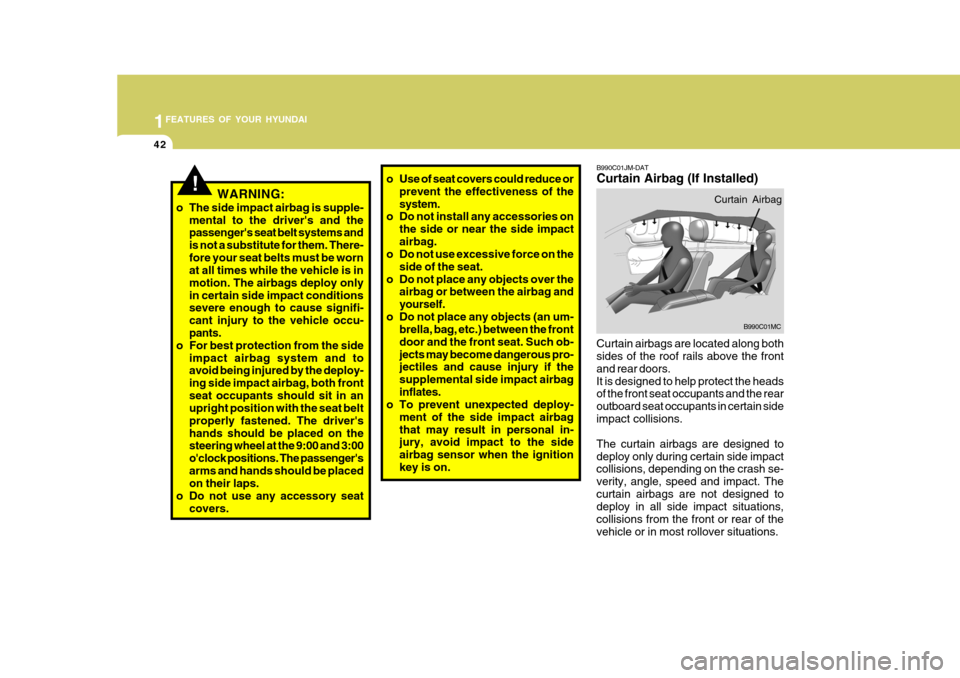
B990C01JM-DAT Curtain Airbag (If Installed)
Curtain airbags are located along both sides of the roof rails above the front and rear doors.It is designed to help protect the heads of the front seat occupants and the rear outboard seat occupants in certain sideimpact collisions. The curtain airbags are designed to deploy only during certain side impact collisions, depending on the crash se- verity, angle, speed and impact. Thecurtain airbags are not designed to deploy in all side impact situations, collisions from the front or rear of thevehicle or in most rollover situations. B990C01MC
Curtain Airbag
Page 79 of 232
1FEATURES OF YOUR HYUNDAI
68CIGARETTE LIGHTERDIGITAL CLOCK
B420A02A-AAT For the cigarette lighter to work, the key must be in the "ACC" position or the "ON" position.To use the cigarette lighter, push it all the way into its socket. When the ele- ment has heated, the lighter will pop outto the "ready" position. Do not hold the cigarette lighter pressed in. This can damage the heating ele-ment and create a fire hazard. If it is necessary to replace the ciga- rette lighter, use only a genuine Hyundaireplacement or its approved equiva- lent.
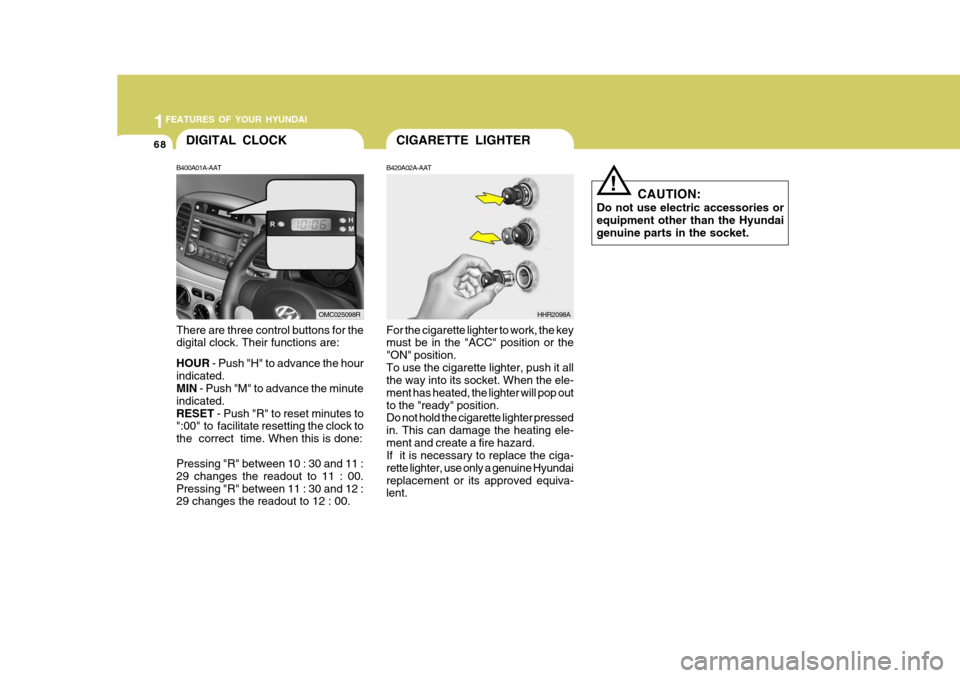
B400A01A-AAT There are three control buttons for the digital clock. Their functions are: HOUR
- Push "H" to advance the hour
indicated. MIN - Push "M" to advance the minute
indicated. RESET - Push "R" to reset minutes to
":00" to facilitate resetting the clock tothe correct time. When this is done: Pressing "R" between 10 : 30 and 11 : 29 changes the readout to 11 : 00.Pressing "R" between 11 : 30 and 12 : 29 changes the readout to 12 : 00.
OMC025098RHHR2098A CAUTION:
Do not use electric accessories or equipment other than the Hyundaigenuine parts in the socket.
!
Page 94 of 232
1
FEATURES OF YOUR HYUNDAI
83
OMC025010
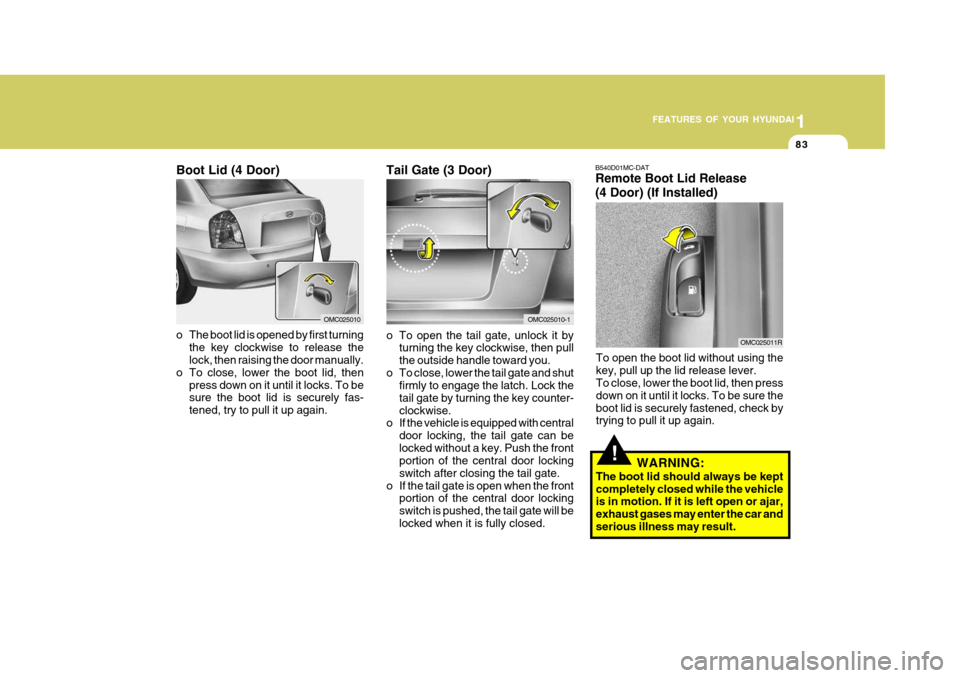
Boot Lid (4 Door)
B540D01MC-DAT Remote Boot Lid Release (4 Door) (If Installed)
To open the boot lid without using the key, pull up the lid release lever. To close, lower the boot lid, then press down on it until it locks. To be sure theboot lid is securely fastened, check by trying to pull it up again.
OMC025011R
!WARNING:
The boot lid should always be kept completely closed while the vehicle is in motion. If it is left open or ajar, exhaust gases may enter the car andserious illness may result.
o The boot lid is opened by first turning
the key clockwise to release the lock, then raising the door manually.
o To close, lower the boot lid, then
press down on it until it locks. To besure the boot lid is securely fas- tened, try to pull it up again. Tail Gate (3 Door)
o To open the tail gate, unlock it by
turning the key clockwise, then pull the outside handle toward you.
o To close, lower the tail gate and shut firmly to engage the latch. Lock thetail gate by turning the key counter-clockwise.
o If the vehicle is equipped with central
door locking, the tail gate can belocked without a key. Push the front portion of the central door locking switch after closing the tail gate.
o If the tail gate is open when the front portion of the central door lockingswitch is pushed, the tail gate will belocked when it is fully closed.
OMC025010-1
Page 114 of 232
1
FEATURES OF YOUR HYUNDAI
103
NOTE: Look at a tape before you insert it. If the tape is loose, tighten it byturning one of the hubs with a pencil or your finger. If the label is peeling off, do not putit in the drive mechanism. Do not leave tapes sitting where they are exposed to hot, warm, or highhumidity, such as on top of the dash- board or in the player. If a tape is excessively hot or cold, letit reach a moderate temperature be- fore putting it in the player. B860A03L
ANTENNA
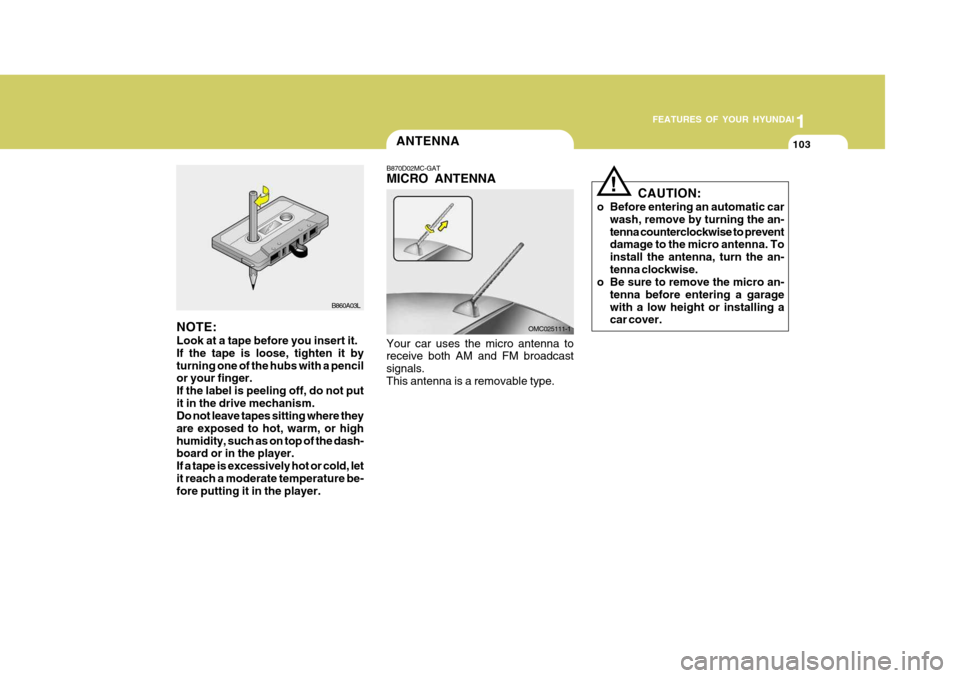
B870D02MC-GAT MICRO ANTENNA
Your car uses the micro antenna to receive both AM and FM broadcast signals.This antenna is a removable type. OMC025111-1CAUTION:
o Before entering an automatic car wash, remove by turning the an-tenna counterclockwise to prevent damage to the micro antenna. To install the antenna, turn the an-tenna clockwise.
o Be sure to remove the micro an-
tenna before entering a garagewith a low height or installing a car cover.
!
Page 116 of 232
1
FEATURES OF YOUR HYUNDAI
105
1
FEATURES OF YOUR HYUNDAI
105
1
FEATURES OF YOUR HYUNDAI
105
1
FEATURES OF YOUR HYUNDAI
105
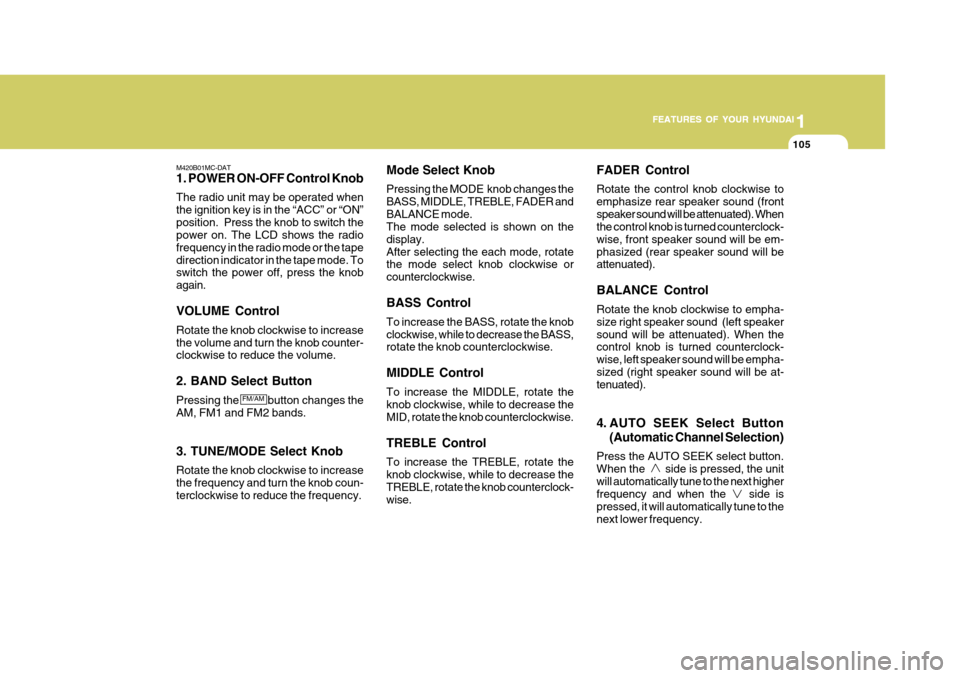
M420B01MC-DAT 1. POWER ON-OFF Control Knob The radio unit may be operated when the ignition key is in the “ACC” or “ON”position. Press the knob to switch the power on. The LCD shows the radio frequency in the radio mode or the tapedirection indicator in the tape mode. To switch the power off, press the knob again. VOLUME Control Rotate the knob clockwise to increase the volume and turn the knob counter- clockwise to reduce the volume. 2. BAND Select Button Pressing the button changes the AM, FM1 and FM2 bands. 3. TUNE/MODE Select Knob Rotate the knob clockwise to increase the frequency and turn the knob coun- terclockwise to reduce the frequency. Mode Select Knob Pressing the MODE knob changes the BASS, MIDDLE, TREBLE, FADER andBALANCE mode. The mode selected is shown on the display.After selecting the each mode, rotate the mode select knob clockwise or counterclockwise. BASS Control To increase the BASS, rotate the knob clockwise, while to decrease the BASS, rotate the knob counterclockwise. MIDDLE Control To increase the MIDDLE, rotate the knob clockwise, while to decrease the MID, rotate the knob counterclockwise. TREBLE Control To increase the TREBLE, rotate the knob clockwise, while to decrease the TREBLE, rotate the knob counterclock- wise.FADER Control Rotate the control knob clockwise to emphasize rear speaker sound (frontspeaker sound will be attenuated). When the control knob is turned counterclock- wise, front speaker sound will be em-phasized (rear speaker sound will be attenuated). BALANCE Control Rotate the knob clockwise to empha- size right speaker sound (left speakersound will be attenuated). When the control knob is turned counterclock- wise, left speaker sound will be empha-sized (right speaker sound will be at- tenuated).
4. AUTO SEEK Select Button
(Automatic Channel Selection)
Press the AUTO SEEK select button. When the side is pressed, the unitwill automatically tune to the next higher frequency and when the side is pressed, it will automatically tune to thenext lower frequency.
FM/AM
Page 121 of 232
1FEATURES OF YOUR HYUNDAI
110
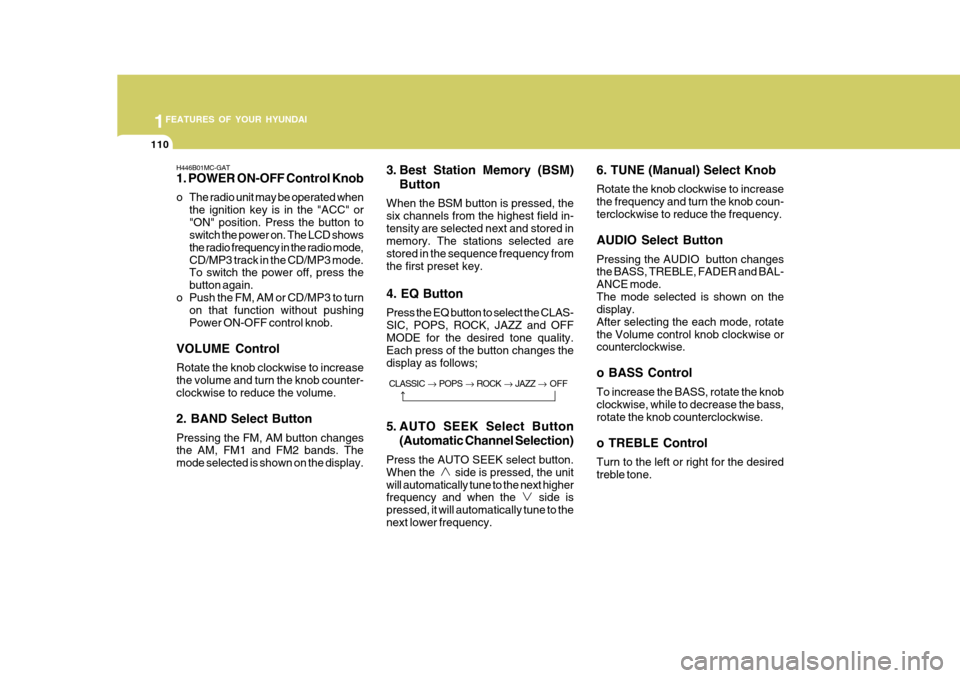
H446B01MC-GAT 1. POWER ON-OFF Control Knob
o The radio unit may be operated when
the ignition key is in the "ACC" or "ON" position. Press the button to switch the power on. The LCD shows the radio frequency in the radio mode,CD/MP3 track in the CD/MP3 mode. To switch the power off, press the button again.
o Push the FM, AM or CD/MP3 to turn on that function without pushingPower ON-OFF control knob.
VOLUME Control Rotate the knob clockwise to increase the volume and turn the knob counter- clockwise to reduce the volume. 2. BAND Select Button Pressing the FM, AM button changes the AM, FM1 and FM2 bands. The mode selected is shown on the display. 3. Best Station Memory (BSM)
Button
When the BSM button is pressed, thesix channels from the highest field in-tensity are selected next and stored in memory. The stations selected are stored in the sequence frequency fromthe first preset key. 4. EQ Button Press the EQ button to select the CLAS- SIC, POPS, ROCK, JAZZ and OFFMODE for the desired tone quality. Each press of the button changes the display as follows;
5. AUTO SEEK Select Button (Automatic Channel Selection)
Press the AUTO SEEK select button. When the side is pressed, the unitwill automatically tune to the next higher frequency and when the side is pressed, it will automatically tune to thenext lower frequency. 6. TUNE (Manual) Select Knob Rotate the knob clockwise to increase the frequency and turn the knob coun-terclockwise to reduce the frequency. AUDIO Select Button Pressing the AUDIO button changes the BASS, TREBLE, FADER and BAL- ANCE mode.The mode selected is shown on the display. After selecting the each mode, rotatethe Volume control knob clockwise or counterclockwise. o BASS Control To increase the BASS, rotate the knob clockwise, while to decrease the bass, rotate the knob counterclockwise. o TREBLE Control Turn to the left or right for the desired treble tone.
CLASSIC
� POPS � ROCK � JAZZ � OFF