Page 86 of 722

�Û
�Ý
�Û�Ý
CONT INUED
The multi-inf ormation display in the
instrument panel displays various
inf ormation and messages when the
ignition switch is in the ON (II)
position. Some of the messages help
you operate your vehicle more
comf ortably. Others help to keep
you aware of the periodic
maintenance your vehicle needs f or
continued trouble-f ree driving.
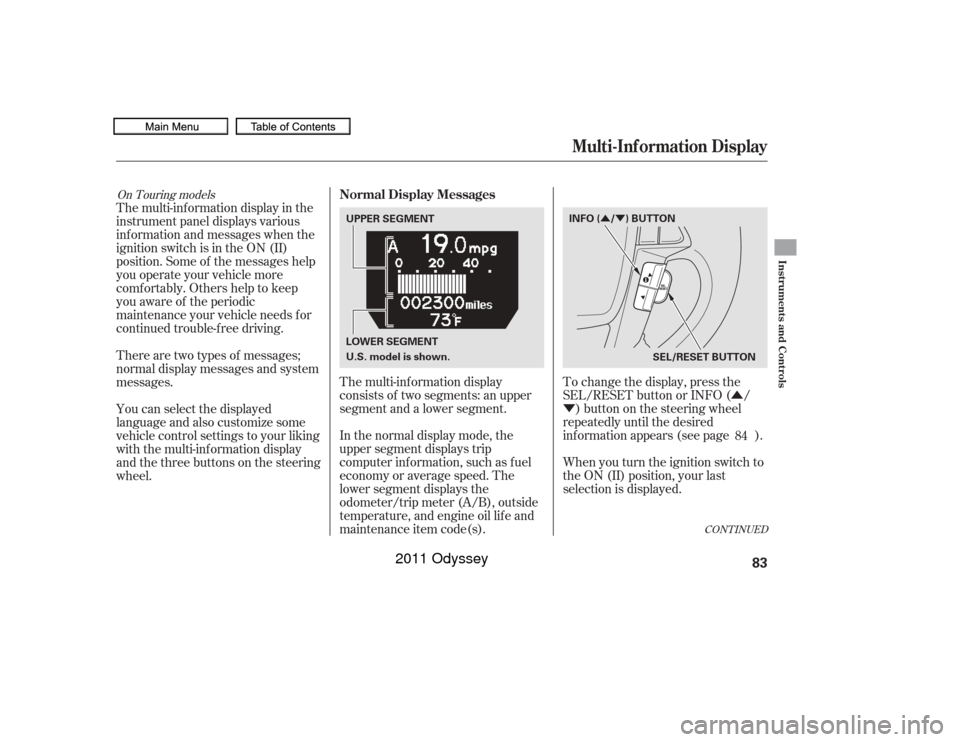
To change the display, press the
SEL/RESET button or INFO ( /)buttononthesteeringwheel
repeatedly until the desired
information appears (see page ).
When you turn the ignition switch to
the ON (II) position, your last
selection is displayed.
The multi-inf ormation display
consists of two segments: an upper
segment and a lower segment.
In the normal display mode, the
upper segment displays trip
computer inf ormation, such as f uel
economy or average speed. The
lower segment displays the
odometer/trip meter (A/B), outside
temperature, and engine oil lif e and
maintenance item code(s).
There are two types of messages;
normal display messages and system
messages.
You can select the displayed
language and also customize some
vehicle control settings to your liking
with the multi-information display
and the three buttons on the steering
wheel.
84On Touring models
Multi-Inf ormation Display
Normal Display Messages
Instruments and Controls
83
INFO ( / ) BUTTON
SEL/RESET BUTTON
UPPER SEGMENT
LOWER SEGMENT
U.S. model is shown.
10/07/17 09:45:40 31TK8600_088
2011 Odyssey
Page 92 of 722

�Û�Ý
The system message(s) triggers the
appropriate indicator(s) on the
instrument panel, including the
system message indicator, to come
on. The system message indicator
does not go of f until the problem(s)
is corrected.
You will also hear a beep when the
system message comes on f or the
first time.
If there is a problem with your
vehicle, f or example the engine oil
level is low or a door is not f ully
closed, the multi-inf ormation display
will show you the problem. It does
this by interrupting the current
display with one or more messages.
This shows the accumulated
traveling time since you last reset it.
When you turn the ignition switch to
the ON (II) position, ELAPSED
TIME is reset.
If you want to reset the ELAPSED
TIME manually, go to the trip
computer’s ELAPSED TIME display,
andpressandholdtheSEL/RESET
button until the number resets.
You can customize the ELAPSED
TIME reset conditions on the multi-
inf ormation display (see page ).
This shows the average speed you
are traveling in miles per hour (mph)
forU.S.modelsorkilometersper
hour (km/h) f or Canadian models.
To reset the AVERAGE SPEED you
have traveled, press and hold the
SEL/RESET button until the
number resets.
If there are several messages, each
message is displayed f or about 5
seconds.
To switch the message(s) bef ore 5
seconds elapsed or select the normal
display, press the INFO ( / )
buttononthesteeringwheel
repeatedly.
107
Multi-Inf ormation Display
System Messages
EL A PSED T IME
A VERA GE SPEED
Instruments and Controls
89
SYSTEM MESSAGE INDICATOR
10/07/17 09:46:28 31TK8600_094
2011 Odyssey
Page 137 of 722
�Î
�Î
�Î
�Î
�Î
�Î �Î �Î�Î
�Î
�Î
�Î
�Î
�Î
�ΠTo use the horn, press the center pad of the steering wheel.
If equipped
1:
2:Controls Near the Steering Wheel134
HAZARD WARNING
BUTTON
AUXILIARY INPUT JACK
HORN WINDSHIELD
WIPERS/WASHERS
CRUISE CONTROL
BUTTONS
PASSENGER AIRBAG
OFF INDICATOR
Vehicle with navigation system is shown. (P.136)
(P.169)
(P.163)
(P.486)
STEERING WHEEL
ADJUSTMENTS
(P.143)(P.83) (P.209)(P.412) (P.414,
442)
(P.189)
AUDIO SYSTEM
(P.234)
(P.33)
(P.142)
(P.135)
(P.480)
(P.411)
(P.571)
(P.585)
(P.496, 517)
(P.496,517)
HEADLIGHT/TURN SIGNAL/
FOG LIGHTS
BLIND SPOT
INFORMATION SYSTEM
(BSI) OFF SWITCH
POWER SLIDING
DOOR SWITCHES
PARKING SENSOR
SYSTEM SWITCH
VOICE CONTROL
BUTTONS
BLUETOOTH
HANDSFREELINK
BUTTONS MULTI-INFORMATION
BUTTONS
COOL BOX SWITCHREAR ENTERTAINMENT
SYSTEM
SEAT HEATER
SWITCHES
REMOTE AUDIO
CONTROLS
POWER TAILGATE
SWITCH VEHICLE STABILITY ASSIST
(VSA) OFF SWITCH
1
2
2
2
2
2 2 22
2
2
2
2
10/07/19 15:50:55 31TK8600_139
2011 Odyssey
Page 146 of 722
Push the lever under the steering
column all the way down.Push the lever up to lock the
steering wheel in position.
Make sure you have securely
locked the steering wheel in place
by trying to move it up, down, in,
and out.
Make any steering wheel
adjustments bef ore you start driving.
Move the steering wheel up or
down, and in or out, so it points
toward your chest, not toward
your f ace. Make sure you can see
the instrument panel gauges and
indicators.3.
4.
1.
2.
Steering Wheel A djustments
Instruments and Controls
143
LEVER
Adjusting the steering wheel
position while driving may
cause you to lose control of the
vehicle and be seriously injured
inacrash.
Adjust the steering wheel only
when the vehicle is stopped.
10/07/17 09:52:56 31TK8600_148
2011 Odyssey
Page 150 of 722

�µ
�µ �µ�µ
Use this position
only to start the engine. The switch
returns to the ON (II) position when
you let go of the key.
You will hear a reminder beeper if
you leave the key in the ignition
switch in the LOCK (0) or the
ACCESSORY (I) position and open
the driver’s door. Remove the key to
turn of f the beeper.
The ignition switch has f our
positions: LOCK (0), ACCESSORY
(I), ON (II), and START (III). TheshiftlevermustbeinPark
bef ore you can remove the key f rom
the ignition switch. You will also see a ‘‘REMOVE KEY’’
message on the multi-information
display.
You can insert or
remove the key only in this position.
To turn the key to the LOCK (0)
position, the shif t lever must be in
Park, and you must push the key in
slightly. This is the normal key
position when driving. Several of the
indicators on the instrument panel
come on as a test when you turn the
ignition switch f rom the
ACCESSORY (I) to the ON (II)
position. If the f ront wheels are turned, the
anti-theft lock may make it difficult
to turn the key. Firmly turn the
steering wheel to the lef t or right as
you turn the key.
You can
operate the audio system and the
accessory power sockets in this
position.
If you turn the ignition key to the
ACCESSORY (I) position with the
driver’s door closed, you will see an
‘‘ACCESSORY (I) POSITION’’
message on the multi-inf ormation
display to inf orm you of the key
position.
On Touring modelsST A RT (III)
LOCK (0) ON (II) A CCESSORY (I)
Ignition Switch
Instruments and Controls
147
10/07/17 09:53:25 31TK8600_152
2011 Odyssey
Page 296 of 722

�Î
�ÎThe displayed message may
vary on models or versions. On
some models, there is no
message to disconnect.
You can disconnect the iPod at any
time when you see the ‘‘OK to
disconnect’’ message in the iPod
display. Always make sure you see
‘‘OK to disconnect’’ message in the
iPod display bef ore you disconnect it.
Make sure to f ollow the iPod’s
instructions on how to disconnect
the dock connector f rom the USB
adapter cable. You can also press the MODE
buttononthesteeringwheelto
change modes. To take the system out of the iPod
mode, press one of the other source
buttons than the USB/AUX button.
When a compatible audio unit is
connected to the auxiliary input jack,
press the USB/AUX button to select When you disconnect the iPod while
it is playing, the display shows No
Data.
If you reconnect the same iPod, the
system may begin playing where it
lef t of f , depending on what mode the
iPod is in when it is reconnected.If you see an error message in the
display, see page .
:
294
iPod
Error Messages
T o Stop Playing Your iPod
Disconnect ing an iPod
Playing an iPod
(Models without navigation system)
Features
293
10/07/17 10:13:38 31TK8600_298
select it.
2011 Odyssey
Page 311 of 722

To take the system out of the
Audio mode, press one of
the other source buttons than the
USB/AUX button. When a
compatible audio unit is connected to
the auxiliary input jack, press the
USB/AUX button to select it.
Switching to another mode pauses
the music playing f rom your phone.
If you receive a call when the
Audio is playing, press the
PICK-UPbuttononthesteering
wheel. The display switches to the
HFLmode(seepage ).
Af ter ending the call, press the
HANG-UP button to go back to theAudio mode. 496
Bluetooth
As required by the FCC:
This device complies with Part 15 of theFCC rules. Operation is subject to thef ollowing two conditions: (1) This devicemay not cause harmf ul interf erence, and(2) this device must accept anyinterf erence received, includinginterf erence that may cause undesiredoperation.
Changes or modif ications not expresslyapproved by the party responsible f orcompliance could void the user’sauthority to operate the equipment.
This device complies with IndustryCanada Standard RSS-210.Operation is subject to the f ollowing twoconditions: (1) this device may not causeinterf erence, and (2) this device mustaccept any interf erence that may causeundesired operation of the device.
Bluetooth
Bluetooth
T o swit ch t o HFL mode
T o t urn of f t he Bluet oot h
Audio
mode
Bluetooth
Audio System (Models without navigation system)
308
10/07/17 10:15:18 31TK8600_313
2011 Odyssey
Page 348 of 722

The scan f unction samples all tracks
on the disc in the order they are
recordedonthedisc.
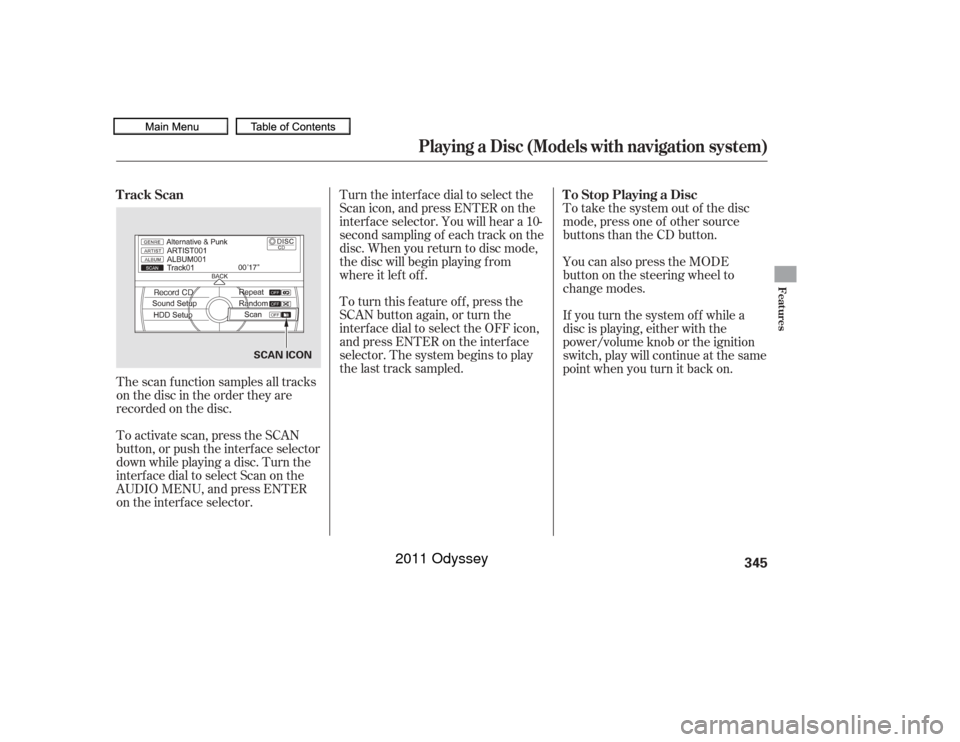
To activate scan, press the SCAN
button, or push the interf ace selector
down while playing a disc. Turn the
interf ace dial to select Scan on the
AUDIO MENU, and press ENTER
on the interf ace selector.Turn the interface dial to select the
Scan icon, and press ENTER on the
interf ace selector. You will hear a 10-
second sampling of each track on the
disc. When you return to disc mode,
the disc will begin playing f rom
where it lef t of f .
To turn this feature off, press the
SCAN button again, or turn the
interf ace dial to select the OFF icon,
andpressENTERontheinterface
selector. The system begins to play
the last track sampled.
To take the system out of the disc
mode, press one of other source
buttons than the CD button.
You can also press the MODE
buttononthesteeringwheelto
change modes.
If you turn the system of f while a
disc is playing, either with the
power/volume knob or the ignition
switch, play will continue at the same
point when you turn it back on.
Track Scan
To Stop Playing a Disc
Playing a Disc (Models with navigation system)
Features
345
SCAN ICON
10/07/17 10:20:03 31TK8600_350
2011 Odyssey