Page 94 of 449

10. For the headlamp bulb, remove
the bulb by turning it
counterclockwise and pulling it
straight out.
11. For the park or turn lamp bulb,
remove the bulb by turning it
counterclockwise and pulling it
straight out.
WARNING: Handle a halogen headlamp bulb carefully and keep
out of children’s reach. Grasp the bulb only by its plastic base
and do not touch the glass. The oil from your hand could cause the
bulb to break the next time the headlamps are operated.
Install the new bulb(s) in reverse order.
Replacing brake/tail/turn/back-up lamp bulbs (pick-ups only)
1. Make sure the headlamps are off,
then open the tailgate to expose the
lamp assemblies.
2. Remove the two bolts from the
tail lamp assembly and carefully pull
the lamp assembly from the tailgate
pillar by releasing the two retaining
tabs.
3. Rotate the bulb socket counterclockwise and remove from lamp
assembly.
4. Pull the bulb straight out of the socket.Lights
94
2011 F-250/350/450/550 (f23)
Owners Guide, 4th Printing
USA (fus)
Page 95 of 449
Install the new bulb(s) in reverse order.
Replacing brake/tail/turn/back-up lamp bulbs (chassis cabs only)
(if equipped)
1. Make sure the headlamps are off.
2. Remove the four screws and the
lamp lens from lamp assembly.
3. Carefully pull the bulb straight
out of the socket and push in the
new bulb.
Replacing cargo lamp and high-mount brakelamp bulbs
1. Make sure the headlamps are off.
2. Remove the screws and lamp
assembly from the vehicle as wiring
permits.
3. Remove the bulb socket by
rotating it counterclockwise.
4. Pull the bulb straight out of the
socket. Lights
95
2011 F-250/350/450/550 (f23)
Owners Guide, 4th Printing
USA (fus)
Page 108 of 449

Mirror-mounted side turn signal indicator (if equipped)
When the vehicle turn signals are
activated, the outer portion of the
mirror housing will blink amber.
The turn signal feature can be seen
by other drivers who may approach
from the rear of the vehicle.
Clearance lamps (if equipped)
Illuminates when the headlamps or
parking lamps are switched on.
This provides additional visibility of
your vehicle to other drivers on the
road.
POWER ADJUSTABLE FOOT PEDALS (IF EQUIPPED)
The accelerator and brake pedal
should only be adjusted when the
vehicle is stopped and the gearshift
lever is in the P (Park) position.
The control is located on the left
side of the steering column. Press
and hold the rear of the control to
move the pedals toward you. Press
and hold the front of the control to
move the pedals away from you.
WARNING: Never adjust the accelerator and brake pedal with
feet on the pedals while the vehicle is moving.Driver Controls
108
2011 F-250/350/450/550 (f23)
Owners Guide, 4th Printing
USA (fus)
Page 109 of 449

The accelerator and brake pedal positions are saved when doing a
memory set function and can be recalled along with the vehicle
personality features when a memory position is selected. Refer to
Memory seats/power mirrors/adjustable pedals in the Seating and
Safety Restraints chapter.
SPEED CONTROL (IF EQUIPPED)
With speed control set, you can maintain a set speed without keeping
your foot on the accelerator pedal.
WARNING: Do not use the speed control in heavy traffic or on
roads that are winding, slippery or unpaved.
Using speed control
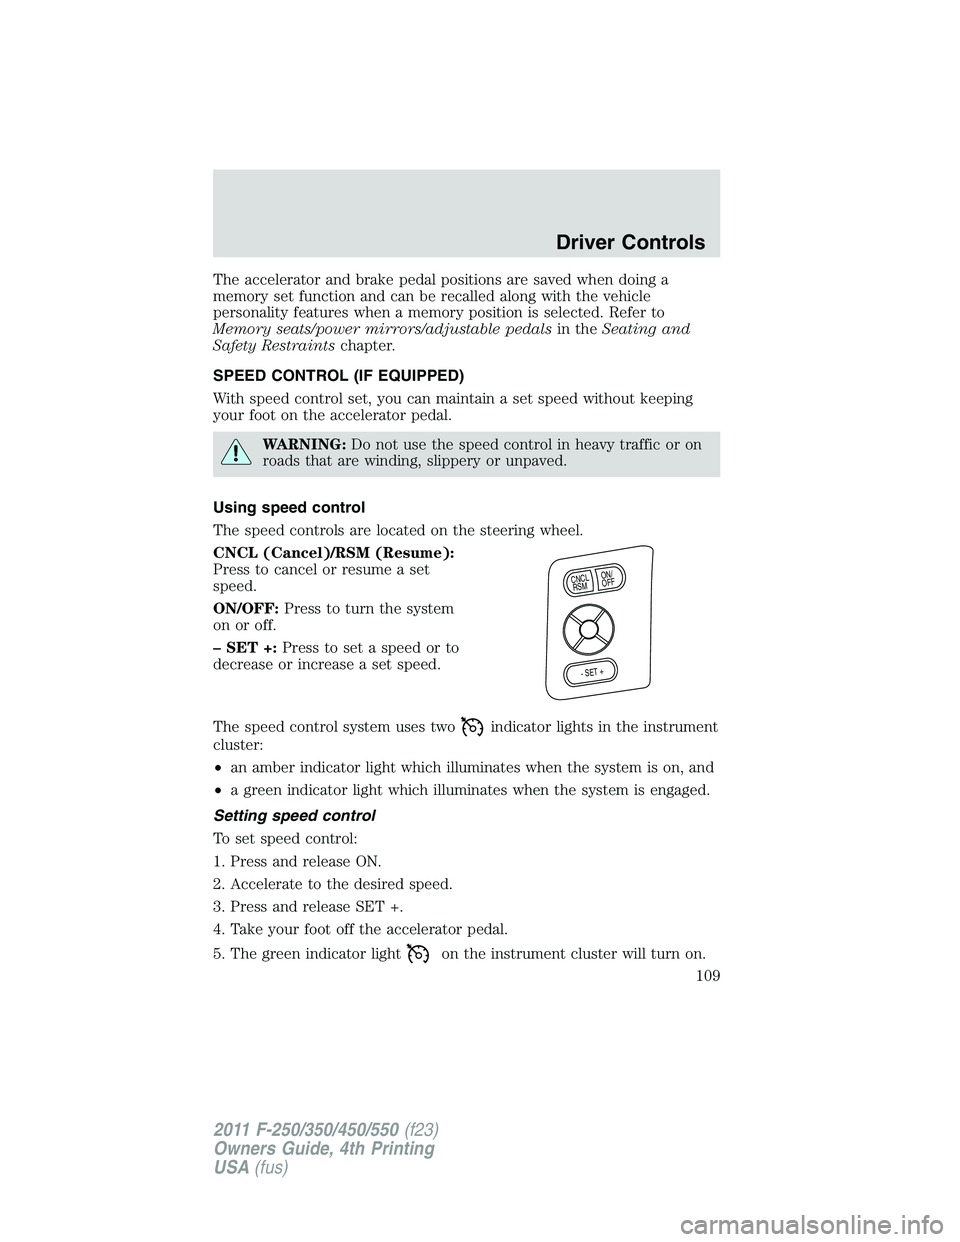
The speed controls are located on the steering wheel.
CNCL (Cancel)/RSM (Resume):
Press to cancel or resume a set
speed.
ON/OFF: Press to turn the system
on or off.
– SET +: Press to set a speed or to
decrease or increase a set speed.
The speed control system uses two indicator lights in the instrument
cluster:
• an amber indicator light which illuminates when the system is on, and
• a green indicator light which illuminates when the system is engaged.
Setting speed control
To set speed control:
1. Press and release ON.
2. Accelerate to the desired speed.
3. Press and release SET +.
4. Take your foot off the accelerator pedal.
5. The green indicator light on the instrument cluster will turn on. O N /
O F FC N C L
R S M
- S E T +
Driver Controls
109
2011 F-250/350/450/550 (f23)
Owners Guide, 4th Printing
USA (fus)
Page 110 of 449

Note:
• Vehicle speed may vary momentarily when driving up and down a
steep hill.
• If the vehicle speed increases above the set speed on a downhill, you
may want to apply the brakes to reduce the speed.
• If the vehicle speed decreases more than 10 mph (16 km/h) below
your set speed on an uphill, your speed control will disengage.
Disengaging a set speed
To disengage speed control, tap the brake pedal or press and release
CNCL.
Disengaging the speed control will not erase the previous set speed.
Resuming a set speed
Press and release RSM. This will automatically return the vehicle to the
previously set speed.
Increasing speed while using speed control
To increase the set speed:
• Press and hold SET + until you get to the desired speed, then release.
You can also use SET + to operate the tap-up function. Press and
release SET + to increase the vehicle set speed in 1 mph (1.6 km/h)
increments.
• Use the accelerator pedal to get to the desired speed then press and
release SET +.
Reducing speed while using speed control
To reduce a set speed:
• Press and hold SET – until you get to the desired speed, then release.
You can also use SET – to operate the tap-down function. Press and
release SET – to decrease the vehicle set speed in 1 mph (1.6 km/h)
increments.
• Press the brake pedal until the desired vehicle speed is reached then
press and release SET +.
Turning off speed control
To turn off the speed control, press OFF or turn off the ignition.
Note: When you turn off the speed control or the ignition, your speed
control set speed memory is erased.Driver Controls
110
2011 F-250/350/450/550 (f23)
Owners Guide, 4th Printing
USA (fus)
Page 121 of 449

POSITIVE RETENTION FLOOR MAT (IF EQUIPPED)
WARNING: Do not install additional floor mats on top of the
factory installed floor mats as they may interfere with the
accelerator or the brake pedals.
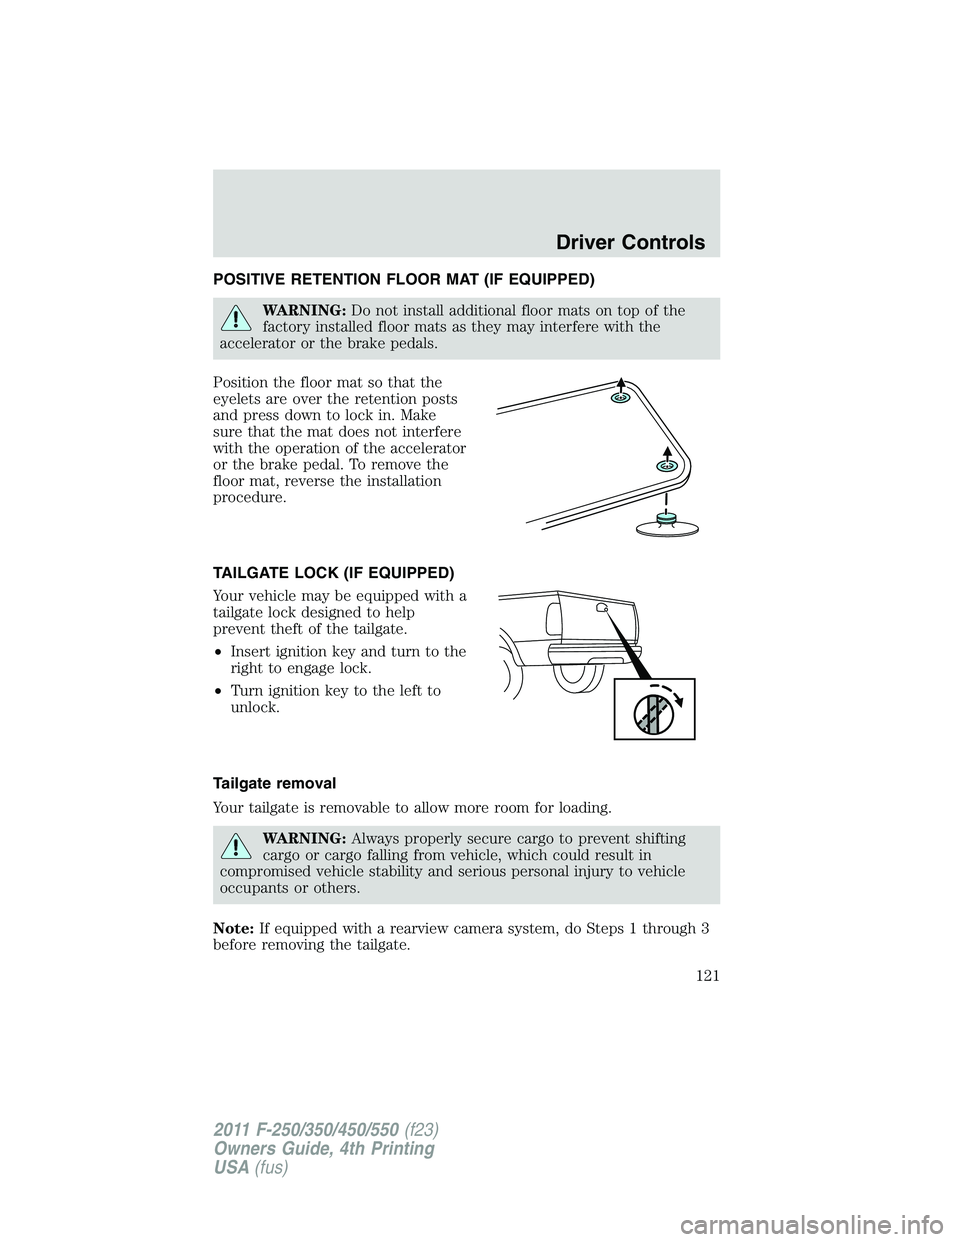
Position the floor mat so that the
eyelets are over the retention posts
and press down to lock in. Make
sure that the mat does not interfere
with the operation of the accelerator
or the brake pedal. To remove the
floor mat, reverse the installation
procedure.
TAILGATE LOCK (IF EQUIPPED)
Your vehicle may be equipped with a
tailgate lock designed to help
prevent theft of the tailgate.
• Insert ignition key and turn to the
right to engage lock.
• Turn ignition key to the left to
unlock.
Tailgate removal
Your tailgate is removable to allow more room for loading.
WARNING: Always properly secure cargo to prevent shifting
cargo or cargo falling from vehicle, which could result in
compromised vehicle stability and serious personal injury to vehicle
occupants or others.
Note: If equipped with a rearview camera system, do Steps 1 through 3
before removing the tailgate. Driver Controls
121
2011 F-250/350/450/550 (f23)
Owners Guide, 4th Printing
USA (fus)
Page 169 of 449

3. Insert the belt tongue into the proper buckle for your seating position
until you hear a snap and feel it latch.
4. Make sure the tongue is securely fastened to the buckle by pulling on
the tongue.
WARNING: The lap belt should fit snugly and as low as possible
around the hips, not across the waist.
WARNING: Front and rear seat occupants, including pregnant
women, should wear safety belts for optimum protection in an
accident.
WARNING: Each seating position in your vehicle has a specific
safety belt assembly which is made up of one buckle and one
tongue that are designed to be used as a pair. 1) Use the shoulder belt
on the outside shoulder only. Never wear the shoulder belt under the
arm. 2) Never swing the safety belt around your neck over the inside
shoulder. 3) Never use a single belt for more than one person.
While you are fastened in the safety belt, the combination lap/shoulder
belt with a cinch tongue adjusts to your movement. However, if you
brake hard, turn hard, or if your vehicle receives an impact of 5 mph
(8 km/h) or more, the safety belt will become locked and help reduce
your forward movement.
Restraint of pregnant women
WARNING: Always ride and drive with your seatback upright
and the safety belt properly fastened. The lap portion of the
safety belt should fit snug and be positioned low across the hips. The
shoulder portion of the safety belt should be positioned across the
chest. Pregnant women should also follow this practice. See figure
below. Seating and Safety Restraints
169
2011 F-250/350/450/550 (f23)
Owners Guide, 4th Printing
USA (fus)
Page 170 of 449

Pregnant women should always
wear their safety belt. The lap belt
portion of a combination lap and
shoulder belt should be positioned
low across the hips below the belly
and worn as tight as comfort will
allow. The shoulder belt should be
positioned to cross the middle of
the shoulder and the center of the
chest.
Vehicle sensitive mode
Combination lap and shoulder belts in normal retractor mode allow free
shoulder belt length adjustment to your movements and locking in
response to vehicle movement. For example, if the driver brakes
suddenly or turns a corner sharply, or the vehicle receives an impact of
approximately 5 mph (8 km/h) or more, the combination safety belts will
lock to help reduce forward movement of the driver and passengers.
Belt sensitive mode
Combination lap and shoulder belts can also be made to lock manually by
quickly pulling on the shoulder belt.
Automatic locking mode
When to use the automatic locking mode
In this mode, the shoulder belt is automatically pre-locked. The belt will
still retract to remove any slack in the shoulder belt. The automatic
locking mode is not available on the driver safety belt.
This mode should be used any time a child safety seat (except a
booster) is installed in a passenger front or outboard rear seating
position (if equipped). Children 12 years old and under should be
properly restrained in the rear seat whenever possible. Refer to Safety
restraints for children or Safety seats for children later in this chapter.Seating and Safety Restraints
170
2011 F-250/350/450/550 (f23)
Owners Guide, 4th Printing
USA (fus)