2011 FORD EXPLORER stop start
[x] Cancel search: stop startPage 276 of 449

brake pedal may suddenly travel a little farther as soon as ABS braking is
done and normal brake operation resumes. These are normal
characteristics of the ABS and should be no reason for concern.
Using ABS
When hard braking is required, apply continuous force on the brake
pedal. Do not pump the brake pedal since this will reduce the
effectiveness of the ABS and will increase your vehicle’s stopping
distance. The ABS will be activated immediately, allowing you to retain
steering control during hard braking and on slippery surfaces. However,
the ABS does not decrease stopping distance.
Brake assist
The brake assist system provides full braking force during panic braking
situations. It detects a rapid application of the brake pedal and uses the
ABS system to achieve maximum braking pressure. Once a panic brake
application is detected, the system will remain activated as long as the
brake pedal is pressed or ABS is engaged. The system is deactivated by
either releasing the brake pedal or coming to a complete stop. When the
system activates, noise from the ABS pump motor and brake pedal
pulsation may be observed; this is normal.
ABS warning lamp
The ABS lamp in the instrument
cluster momentarily illuminates
when the ignition is turned on. If
the light does not illuminate during
start up, remains on or flashes, the
ABS may be disabled and may need to be serviced.
Even when the ABS is disabled,
normal braking is still effective. If
your BRAKE warning lamp
illuminates with the parking brake
released, have your brake system
serviced immediately.
Brake override
This vehicle is equipped with a brake override feature. In the event the
accelerator pedal becomes stuck or entrapped, applying steady and firm
pressure to the brake pedal will both slow the vehicle and reduce engine
power. If you experience this condition, apply the brakes and bring your
vehicle to a safe stop. Turn the engine off, shift to P (Park) and apply
ABS
P!
BRAKE
Driving
275
2011 Explorer(exp)
Owners Guide, 1st Printing
USA(fus)
Page 277 of 449

the parking brake, and then inspect the accelerator pedal for any
interferences. If none are found and the condition persists, have your
vehicle towed to the nearest dealer.
Parking brake
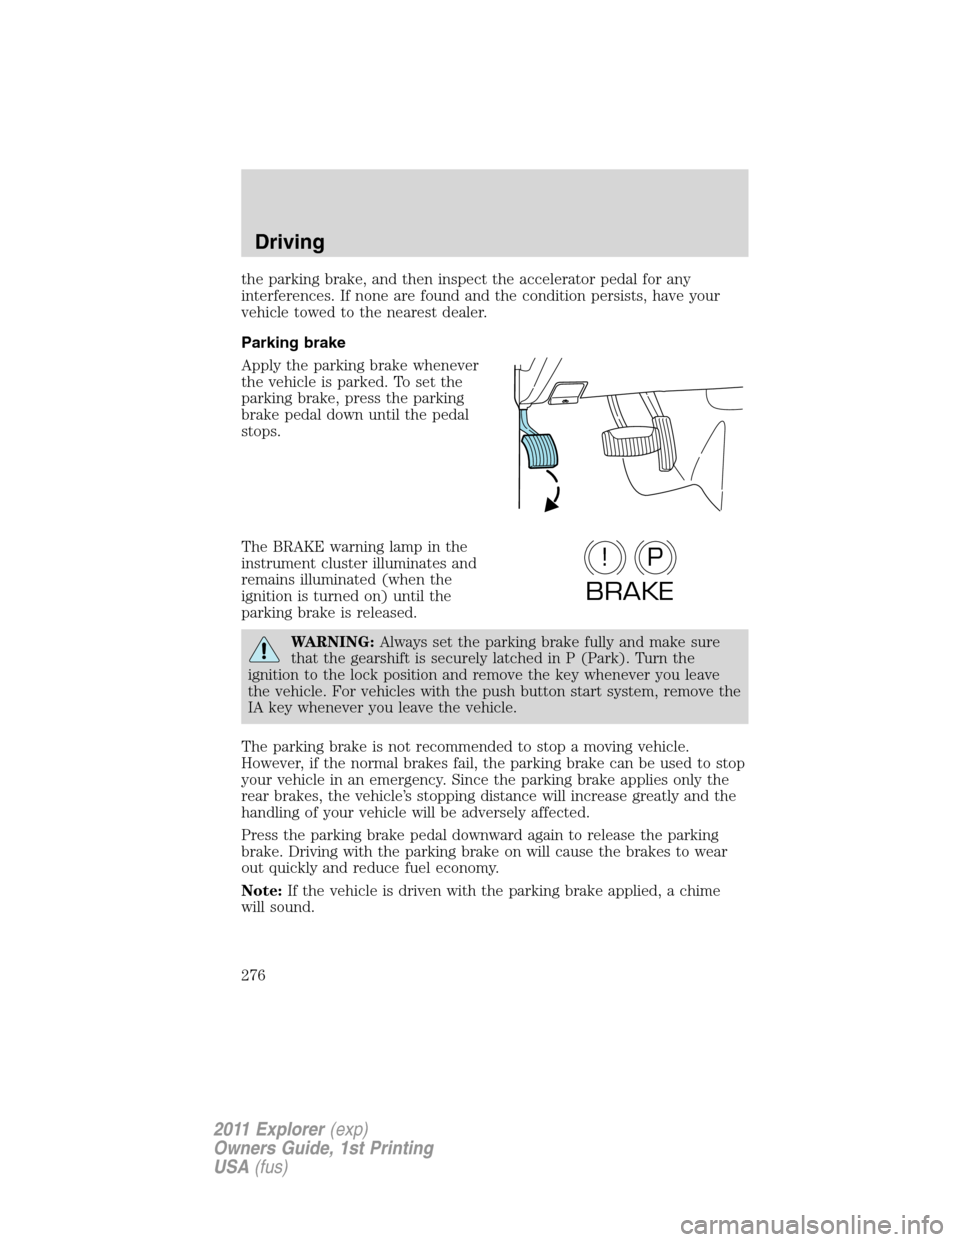
Apply the parking brake whenever
the vehicle is parked. To set the
parking brake, press the parking
brake pedal down until the pedal
stops.
The BRAKE warning lamp in the
instrument cluster illuminates and
remains illuminated (when the
ignition is turned on) until the
parking brake is released.
WARNING:Always set the parking brake fully and make sure
that the gearshift is securely latched in P (Park). Turn the
ignition to the lock position and remove the key whenever you leave
the vehicle. For vehicles with the push button start system, remove the
IA key whenever you leave the vehicle.
The parking brake is not recommended to stop a moving vehicle.
However, if the normal brakes fail, the parking brake can be used to stop
your vehicle in an emergency. Since the parking brake applies only the
rear brakes, the vehicle’s stopping distance will increase greatly and the
handling of your vehicle will be adversely affected.
Press the parking brake pedal downward again to release the parking
brake. Driving with the parking brake on will cause the brakes to wear
out quickly and reduce fuel economy.
Note:If the vehicle is driven with the parking brake applied, a chime
will sound.
P!
BRAKE
Driving
276
2011 Explorer(exp)
Owners Guide, 1st Printing
USA(fus)
Page 286 of 449

WARNING:The EPS system has diagnostics checks that
continuously monitor the EPS system to ensure proper operation
of the electronic system. When an electronic error is detected, the
message POWER STEERING ASSIST FAULT will be displayed in the
message center. If this happens, stop the vehicle in a safe place, and
turn off the engine. After at least 10 seconds, reset the system by
restarting the engine, and watch the message center for POWER
STEERING ASSIST FAULT. If the message returns, or returns while
driving, take the vehicle to your dealer to have it checked. With the
message displayed, the steering assist is turned off, making the vehicle
harder to steer.
WARNING:If the message SERVICE POWER STEERING is
displayed in the message center, the EPS system has detected a
problem with the system function. On the next ignition cycle, the
message SERVICE POWER STEERING NOW will be displayed and
steering assist will be removed until the steering system is serviced.
Have your vehicle taken to the nearest dealer as soon as possible.
If the steering wanders or pulls, check for:
•an improperly inflated tire.
•uneven tire wear.
•loose or worn suspension components.
•loose or worn steering components.
•improper steering alignment.
A high crown in the road or high crosswinds may also make the steering
seem to wander/pull.
Driving
285
2011 Explorer(exp)
Owners Guide, 1st Printing
USA(fus)
Page 290 of 449

P (Park)
This position locks the transmission
and prevents the front wheels from
turning.
To put your vehicle in gear:
•Press the brake pedal
•Move the gearshift lever into the
desired gear
To put your vehicle in P (Park):
•Come to a complete stop
•Move the gearshift lever and securely latch it in P (Park)
WARNING:Always set the parking brake fully and make sure
the gearshift is latched in P (Park). Turn the ignition to the off
position and remove the key whenever you leave your vehicle.
R (Reverse)
With the gearshift lever in R (Reverse), the vehicle will move backward.
Always come to a complete stop before shifting into and out of R
(Reverse).
N (Neutral)
With the gearshift lever in N (Neutral), the vehicle can be started and is
free to roll. Hold the brake pedal down while in this position.
D (Drive) with Overdrive
The normal driving position for the best fuel economy. Transmission
operates in gears one through six.
The automatic transmission shift strategy has the ability to detect hilly
terrain or mountainous areas and will provide a limited amount of grade
assist features automatically. Refer to D (Drive) with Grade assist or
SelectShift for more information.
D (Drive) with Tow on
The tow feature improves transmission operation when towing a trailer
or a heavy load. All transmission gear ranges are available when using
tow.
Tow can be activated by pressing theTOWswitch located on the
instrument panel by the headlamp control. TheTOW/HAULmessage
will illuminate in the instrument cluster.
PRNDL
Driving
289
2011 Explorer(exp)
Owners Guide, 1st Printing
USA(fus)
Page 294 of 449

Using hill start assist
The hill start assist feature is activated automatically when the vehicle is
stopped on a slope greater than five degrees. The hill start assist feature
operates with the vehicle facing downhill if reverse gear is selected. The
hill start assist feature will not operate if the parking brake is activated.
WARNING:You must remain in the vehicle once you have
activated the hill start assist feature.
Activating hill start assist
1. Press the brake pedal to bring the vehicle to a complete standstill.
Keep the brake pedal pressed.
2. If the sensors detect that the vehicle is on a slope, the hill start assist
feature will be activated automatically.
3. When you remove your foot from the brake pedal, the vehicle will
remain on the slope without rolling away for approximately up to two
seconds. This hold time will automatically be extended if you are in the
process of driving off.
4. Drive off in the normal manner. The brakes will be released
automatically.
WARNING:If the engine is revved excessively, or if a
malfunction is detected when the hill start assist feature is
active, the hill start assist feature will be deactivated.
If your vehicle gets stuck in mud or snow
If your vehicle gets stuck in mud or snow, it may be rocked out by
shifting between forward and reverse gears, stopping between shifts in a
steady pattern. Press lightly on the accelerator in each gear.
Do not rock the vehicle if the engine is not at normal operating
temperature or damage to the transmission may occur.
Do not rock the vehicle for more than a minute or damage to the
transmission and tires may occur, or the engine may overheat.
Driving
293
2011 Explorer(exp)
Owners Guide, 1st Printing
USA(fus)
Page 305 of 449

Automatic search for parking space
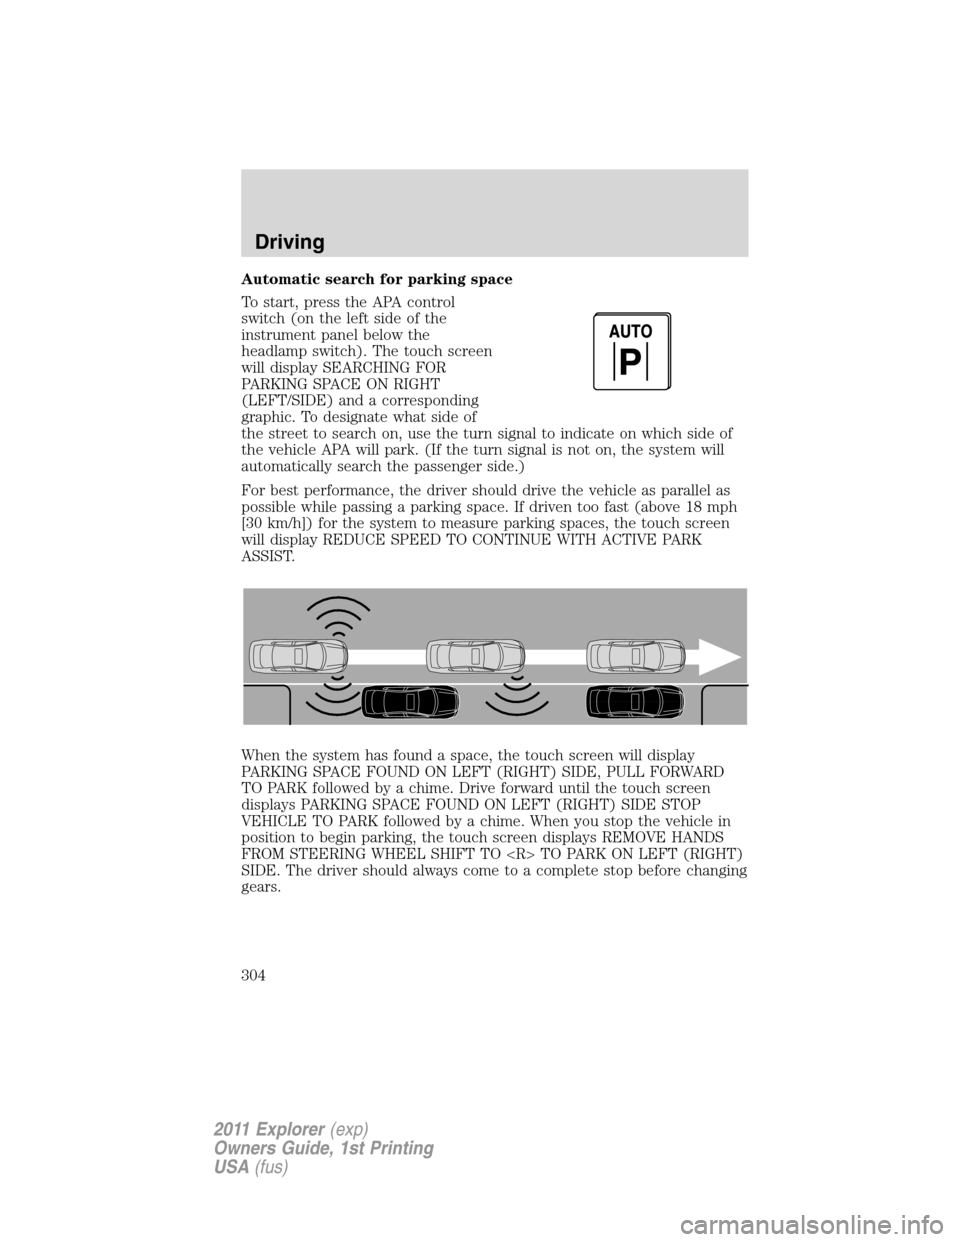
To start, press the APA control
switch(ontheleftsideofthe
instrument panel below the
headlamp switch). The touch screen
will display SEARCHING FOR
PARKING SPACE ON RIGHT
(LEFT/SIDE) and a corresponding
graphic. To designate what side of
the street to search on, use the turn signal to indicate on which side of
the vehicle APA will park. (If the turn signal is not on, the system will
automatically search the passenger side.)
For best performance, the driver should drive the vehicle as parallel as
possible while passing a parking space. If driven too fast (above 18 mph
[30 km/h]) for the system to measure parking spaces, the touch screen
will display REDUCE SPEED TO CONTINUE WITH ACTIVE PARK
ASSIST.
When the system has found a space, the touch screen will display
PARKING SPACE FOUND ON LEFT (RIGHT) SIDE, PULL FORWARD
TO PARK followed by a chime. Drive forward until the touch screen
displays PARKING SPACE FOUND ON LEFT (RIGHT) SIDE STOP
VEHICLE TO PARK followed by a chime. When you stop the vehicle in
position to begin parking, the touch screen displays REMOVE HANDS
FROM STEERING WHEEL SHIFT TO
SIDE. The driver should always come to a complete stop before changing
gears.
Driving
304
2011 Explorer(exp)
Owners Guide, 1st Printing
USA(fus)
Page 322 of 449

Descend a hill in the same gear you
would use to climb up the hill to
avoid excessive brake application
and brake overheating. Do not
descend in neutral; instead,
disengage overdrive or manually
shift to a lower gear. When
descending a steep hill, avoid
sudden hard braking as you could
lose control. When you brake hard,
the front wheels cannot turn and if
they are not turning, you will not be
able to steer. The front wheels have to be turning in order to steer the
vehicle.
Since your vehicle has anti-lock brakes, apply the brakes steadily. Do not
“pump” the brakes.
Driving on snow and ice
4WD vehicles have advantages over 2WD vehicles in snow and ice but
can skid like any other vehicle.
Should you start to slide while driving on snowy or icy roads, turn the
steering wheel in the direction of the slide until you regain control.
Avoid sudden applications of power and quick changes of direction on
snow and ice. Apply the accelerator slowly and steadily when starting
from a full stop.
Avoid sudden braking as well. Although a 4WD vehicle may accelerate
better than a two-wheel drive vehicle in snow and ice, it won’t stop any
faster, because as in other vehicles, braking occurs at all four wheels. Do
not become overconfident as to road conditions.
Make sure you allow sufficient distance between you and other vehicles
for stopping. Drive slower than usual and consider using one of the lower
gears. In emergency stopping situations, avoid locking of the wheels. Use
a “squeeze” technique, push on the brake pedal with a steadily increasing
force which allows the wheels to brake yet continue to roll so that you
may steer in the direction you want to travel. If you lock the wheels,
release the brake pedal and repeat the squeeze technique. Since your
vehicle is equipped with a Four Wheel Anti-Lock Brake System (ABS),
apply the brake steadily. Do not “pump” the brakes. Refer to theBrakes
section of this chapter for additional information on the operation of the
anti-lock brake system.
Driving
321
2011 Explorer(exp)
Owners Guide, 1st Printing
USA(fus)
Page 328 of 449

FUEL PUMP SHUT-OFF
In the event of a moderate to severe collision, this vehicle is equipped
with a fuel pump shut-off feature that stops the flow of fuel to the
engine. Not every impact will cause a shut-off.
Should your vehicle shut off after a collision due to this feature, you may
restart your vehicle by doing the following:
1. Turn the ignition switch to the off position.
2. Turn the ignition switch to the on position.
In some instances the vehicle may not restart the first time you try to
restart and may take one additional attempt.
WARNING:Failure to inspect and if necessary repair fuel leaks
after a collision may increase the risk of fire and serious injury.
Ford Motor Company recommends that the fuel system be inspected
by an authorized dealer after any collision.
FUSES AND RELAYS
Fuses
If electrical components in the
vehicle are not working, a fuse may
have blown. Blown fuses are
identified by a broken wire within
the fuse. Check the appropriate
fuses before replacing any electrical
components.
Note:Always replace a fuse with one that has the specified amperage
rating. Using a fuse with a higher amperage rating can cause severe wire
damage and could start a fire.
15
Roadside Emergencies
327
2011 Explorer(exp)
Owners Guide, 1st Printing
USA(fus)