Page 22 of 195

20
FRONT SEAT BELT HEIGHT
ADJUSTMENT
Always adjust the height of the seat
belt to the body of the passenger.
This precaution may considerably
reduce the risk of injury in the event
of a collision.
Correct adjustment is obtained
when the belt passes approximately
half way between the shoulder and
the neck.
According to the version, there may
be as many as 5 height adjustment
positions fig. 22:
To raise: lift the ring B to the
desired position.
The height of the seat
belts must be adjusted
with the vehicle stationary.
WARNING
SEAT BELTS
HOW TO USE THE
SEAT BELTS fig. 21
To fasten the seat belts, hold the
tongue A and insert it into the
buckle B, until it clicks into place.
Pull the belt lightly. If the seat belt
jams, let it rewind for a short
stretch, then pull it out again
without jerking.
fig. 21
F0X0022m
To unfasten the seat belt, press
button C. Guide the seat belt while
it is rewinding, to prevent it from
twisting. Through the reel, the belt
automatically adapts to the body of
the passenger wearing it, allowing
freedom of movement.
The reel may lock when the vehicle
is parked on a steep slope: this is
normal.
Furthermore, the reel mechanism
locks the belt if it is pulled sharply or
in the event of sudden braking,
collisions and high-speed bends.
For maximum
protection, keep the
backrest upright, lean back
into it and make sure that the
seat belt fits closely across the
chest and pelvis.
WARNING
Page 29 of 195
27
FUEL LEVEL GAUGE
fig. 35-36
The needle shows the amount of
fuel which should be left in the tank. The reserve warning light A switches
on constantly to indicate that
approximately 5.5–7.5 litres of fuel
are left in the tank. On some
versions, the same indication is
provided by warning light B, which
flashes on the display.
Do not travel with the fuel tank
almost empty: any gaps in fuel
delivery could damage the catalytic
converter.
E - tank empty.
F - tank full.
fig. 34
F0X0300m
fig. 36
F0X0039m
ON BOARD
INSTRUMENTS
SPEEDOMETER fig. 33-34
Depending on the version, the
speedometer may have different full
scale values.
fig. 35
F0X0037m
fig. 33
F0X0018m
Page 30 of 195

28
IMPORTANT If the needle moves to
the beginning of the scale
(low temperature) with the
overheating warning light A on, this
indicates a fault in the system. If this
is the case, contact a Fiat Dealership
to have the system checked.
The needle may also approach the
red section when travelling too
slowly in a very hot climate. In this
case, it is best to stop for a while
and stop the engine.
Then restart and accelerate lightly.
fig. 38
F0X0302m
ENGINE COOLANT
TEMPERATURE GAUGE
fig. 37-38
If warning light A switches on in the
instrument panel, this indicates
overheating of the engine coolant.
In normal operating conditions, the
needle may move to various
positions within the scale according
to the vehicle usage conditions and
the management of the engine
cooling system performed
automatically by the system itself.
However, it should not move to the
red danger zone.
fig. 37
F0X0301m
IMPORTANT If the indicator shows
that the tank is empty and the
reserve warning light A-fig. 35-36
flashes, this indicates a fault in the
system. On some versions, the same
fault indication is provided by scale
C, which flashes on the display. If
this is the case, contact a Fiat
Dealership to have the system
checked.
Page 33 of 195

31
Recalibrating the instruments
(compass and roll and pitch
meters)
The red LEDs will start to flash if
there is a fault with one of these
instruments.
In this case, the instruments must be
recalibrated. Proceed as follows:
– park the vehicle in an area which
is flat and with plenty of space
(suitable for driving through a
compete circle);
– make sure that the vehicle is
completely stationary;
– start the engine;
– use the stalk to switch on the side
lights 3 times in the space of 15
seconds;
– the roll and pitch meter LEDs
flash to indicate that the
recalibration process has started,
after which the compass LEDs
also flash;– at this point, drive the vehicle
through 2 complete circles,
finishing at the same starting point;
– the compass LEDs will stop
flashing; you must now switch the
side lights off 3 times in the space
of 15 seconds;
– the compass LEDs will switch on
for a moment, after which the
instrument panel display will show
a dedicated message regarding the
result of the calibration process.IMPORTANT Do not carry out the
recalibration procedure near strong
magnetic fields or energy sources.
To achieve correct recalibration,
carry out the procedure with vehicle
in running order and without
additional loads.
Page 36 of 195

34
To change the speed limit, rotate the
MY CAR ring nut: the value flashes.
The value can vary on a scale from
OFF to 220 km/h.
When the desired value is reached,
confirm by pressing MODE/TRIP.
If the ring nut remains turned for
more than 2 seconds, the value
increases / decreases rapidly.
When the function is selected, the
Üicon will appear on the display.
Dimmer
This function allows the brightness
level of some dashboard instruments
to be set: instrument panel, on-
board instruments, car radio display
etc. Doors open warning
This warning appears on the display
automatically when the vehicle speed
is greater than 4 km/h and one of
the doors is not shut correctly. On
some versions the
´warning light
switches on at the same time.
Set speed limit exceeded
This function allows the vehicle
speed limit to be set (km/h). When
this is exceeded, the driver is
notified through an acoustic signal
and the message SPEED LIMIT on
the display.
To navigate through the menu,
rotate the MY CAR ring nut. To
make adjustment and store them,
use the MODE/TRIP.
F0X1004m
F0X1005m
▼
F0X1012m
MODE
TRIP
F0X1005m
▼
MODE
TRIP
F0X1007m
F0X1008m
▼
MODE
TRIP
F0X1009m
▼
MODE
TRIP
F0X1010m
F0X1011m
▼
MODE
TRIP MODE
TRIP
Page 40 of 195

38
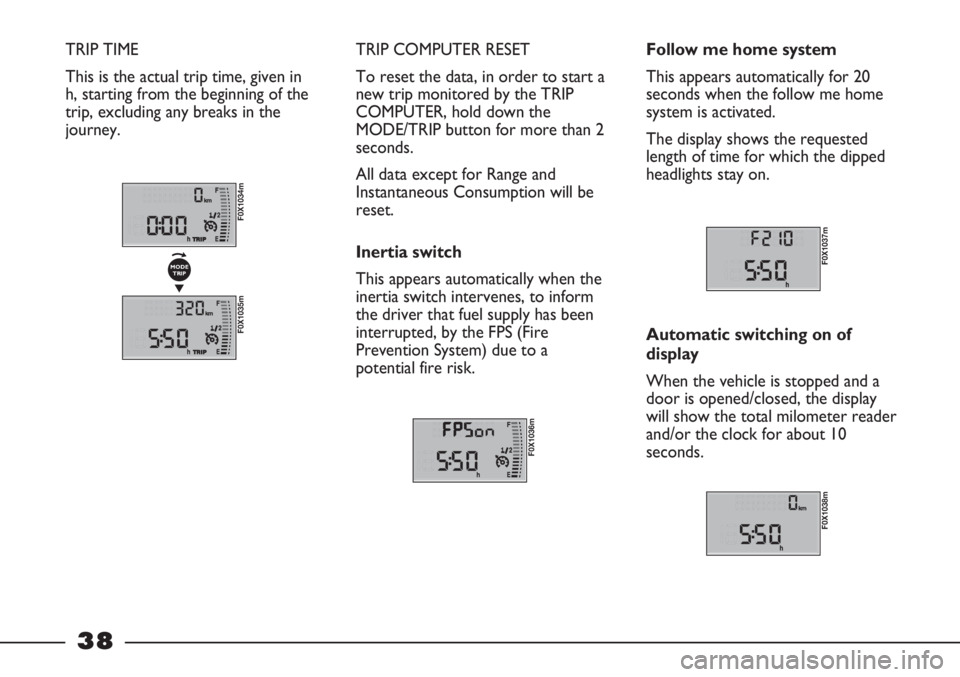
TRIP TIME
This is the actual trip time, given in
h, starting from the beginning of the
trip, excluding any breaks in the
journey. TRIP COMPUTER RESET
To reset the data, in order to start a
new trip monitored by the TRIP
COMPUTER, hold down the
MODE/TRIP button for more than 2
seconds.
All data except for Range and
Instantaneous Consumption will be
reset.
Inertia switch
This appears automatically when the
inertia switch intervenes, to inform
the driver that fuel supply has been
interrupted, by the FPS (Fire
Prevention System) due to a
potential fire risk.
F0X1036m
Follow me home system
This appears automatically for 20
seconds when the follow me home
system is activated.
The display shows the requested
length of time for which the dipped
headlights stay on.
F0X1037m
Automatic switching on of
display
When the vehicle is stopped and a
door is opened/closed, the display
will show the total milometer reader
and/or the clock for about 10
seconds.
F0X1038m
F0X1034m
F0X1035m
▼
MODE
TRIP
Page 47 of 195

45
Initial checks
When the key is turned to MAR-
ON, the display begins a process of
diagnosis for the vehicle’s on-board
systems. This may last for a few
seconds. If, with the engine running,
the system does not detect any
faults, the system displays OK.
If the display indicates a fault, see
WARNING LIGHTS AND
MESSAGES in this section.
Speed limit exceeded
(Spd. Lim.)
This function allows the vehicle
speed limit to be set (km/h). When
this is exceeded, the driver is
notified through a dedicated
indication on the display, an acoustic
signal and a warning light (triangle
logo).
This indications are interrupted
immediately when the MODE
button is pressed. The indication on
the displayTo set the speed limit, proceed as
follows:
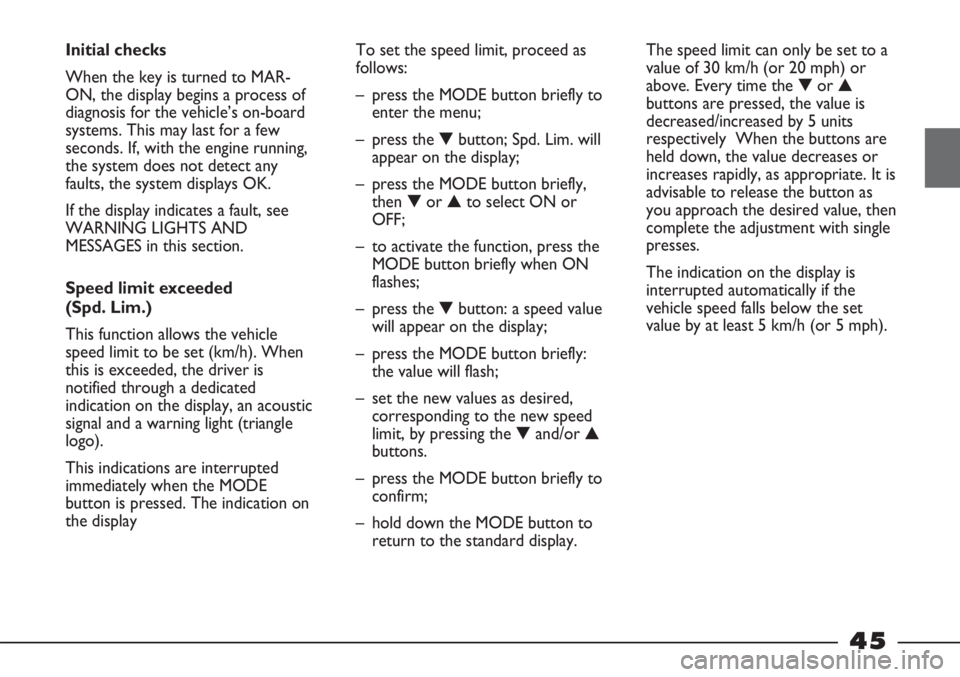
– press the MODE button briefly to
enter the menu;
– press the ▼button; Spd. Lim. will
appear on the display;
– press the MODE button briefly,
then ▼or ▲to select ON or
OFF;
– to activate the function, press the
MODE button briefly when ON
flashes;
– press the ▼button: a speed value
will appear on the display;
– press the MODE button briefly:
the value will flash;
– set the new values as desired,
corresponding to the new speed
limit, by pressing the ▼and/or ▲
buttons.
– press the MODE button briefly to
confirm;
– hold down the MODE button to
return to the standard display.The speed limit can only be set to a
value of 30 km/h (or 20 mph) or
above. Every time the ▼or ▲
buttons are pressed, the value is
decreased/increased by 5 units
respectively When the buttons are
held down, the value decreases or
increases rapidly, as appropriate. It is
advisable to release the button as
you approach the desired value, then
complete the adjustment with single
presses.
The indication on the display is
interrupted automatically if the
vehicle speed falls below the set
value by at least 5 km/h (or 5 mph).
Page 48 of 195

46
Dusk sensor sensitivity
(auto lamp)
This function, only available for
certain versions/markets, allows
dusk sensor sensitivity to be
adjusted to 3 levels:
level 1 – minimum sensitivity
level 2 – medium sensitivity
level 3 – maximum sensitivity
The greater the sensitivity, the lesser
the light intensity required to
automatically switch on the dipped
headlights, side lights and number
plate light.
To adjust, proceed as follows:
– press the MODE button briefly:
the display will show the level set
previously;
– press the ▼or ▲button to make
the desired adjustment;
– press the MODE button briefly to
confirm;
– hold down the MODE button to
return to the standard display.Trip B
This function, present only on some
versions/markets where provided,
allows the display of Trip B (partial
trip) to be activated (ON) or
deactivated (OFF). For further
information, see TRIP COMPUTER
in this section.
To activate or deactivate the
function, proceed as follows:
– press the MODE button briefly:
ON or OFF (depending on the
previous setting) flashes on the
display;
– press the ▼or ▲button to
select;
– press the MODE button briefly to
confirm;
– hold down the MODE button to
return to the standard display.Set Clock
(time adjustment)
To adjust the time, proceed as
follows:
– press the MODE button briefly:
the hours flash on the display;
– press the ▼or ▲button to
adjust;
– press the MODE button briefly:
the minutes flash on the display;
– press the ▼or ▲button to
adjust;
– press the MODE button briefly to
confirm;
– hold down the MODE button to
return to the standard display.
Every time the ▼or ▲buttons are
pressed, the value is
decreased/increased by 1 unit
respectively When the buttons are
held down, the value decreases or
increases rapidly, as appropriate. It is
advisable to release the button as
you approach the desired value, then
complete the adjustment with single
presses.