Page 321 of 566
transmitter. To change the Illuminated Approach status,
touch the + or - soft-key to select your desired time
interval. Touch the back arrow soft-key to return to the
previous menu.
•Headlights With Wipers — If Equipped
When this feature is selected, and the headlight switch is
in the AUTO position, the headlights will turn on ap-
proximately 10 seconds after the wipers are turned on.
The headlights will also turn off when the wipers are
turned off if they were turned on by this feature. To make
your selection, touch the Headlights With Wipers soft-
key, until a check-mark appears next to setting, showing
that setting has been selected. Touch the back arrow
soft-key to return to the previous menu.
•Auto Dim High Beams — If Equipped
When this feature is selected, the high beam headlights
will deactivate automatically under certain conditions. To make your selection, touch the Auto High Beams soft-
key, until a check-mark appears next to setting, showing
that setting has been selected. Touch the back arrow
soft-key to return to the previous menu. Refer to “Lights/
SmartBeam™ — If Equipped” in “Understanding The
Features Of Your Vehicle” for further information.
•Daytime Running Lights
When this feature is selected, the headlights will turn on
whenever the engine is running. To make your selection,
touch the Daytime Running Lights soft-key, until a
check-mark appears next to setting, showing that setting
has been selected. Touch the back arrow soft-key to
return to the previous menu.
•Steering Directed Lights
When this feature is selected, the headlights turn relative
to a change in direction of the steering wheel. To make
4
UNDERSTANDING YOUR INSTRUMENT PANEL 319
Page 322 of 566
your selection, touch the Steering Directed Lights soft-
key, until a check-mark appears next to setting, showing
that setting has been selected. Touch the back arrow
soft-key to return to the previous menu.
•Flash Headlights With Lock
When this feature is selected, the headlights will flash
when the doors are locked or unlocked with the Remote
Keyless Entry (RKE) transmitter. This feature may be
selected with or without the sound horn on lock feature
selected. To make your selection, touch the Flash Head-
lights with Lock soft-key, until a check-mark appears
next to setting, showing that setting has been selected.
Touch the back arrow soft-key to return to the previous
menu.
Doors & Locks
After pressing the Doors & Locks soft-key the following
settings will be available.
•Auto Unlock On Exit
When this feature is selected, all doors will unlock when
the vehicle is stopped and the transmission is in the
PARK or NEUTRAL position and the driver’s door is
opened. To make your selection, touch the Auto Unlock
On Exit soft-key, until a check-mark appears next to
setting, showing that setting has been selected. Touch the
back arrow soft-key to return to the previous menu.
•Flash Headlight With Lock
When this feature is selected, the headlights will flash
whe n the doors are locked or unlocked with the Remote
Keyless Entry (RKE) transmitter. To make your selection,
touch the Flash Lights With Lock soft-key, until a check-
mark appears next to setting, showing that setting has
been selected. Touch the back arrow soft-key to return to
the previous menu.
320 UNDERSTANDING YOUR INSTRUMENT PANEL
Page 325 of 566
temperatures are below 40° F (4.4° C). When tempera-
tures are above 80° F (26.7° C) the driver vented seat will
turn on. To make your selection, touch the Auto Heated
Seats soft-key, until a check-mark appears next to setting,
showing that setting has been selected. Touch the back
arrow soft-key to return to the previous menu.
Engine Off Options
After pressing the Engine Off Options soft-key the fol-
lowing settings will be available.
•Easy Exit Seat
This feature provides automatic driver seat positioning to
enhance driver mobility when entering and exiting the
vehicle. To make your selection, touch the Easy Exit Seats
soft-key, until a check-mark appears next to setting,
showing that setting has been selected. Touch the back
arrow soft-key to return to the previous menu.
•Engine Off Power Delay
When this feature is selected, the power window
switches, radio, Uconnect™ phone system (if equipped),
DVD video system (if equipped), power sunroof (if
equipped), and power outlets will remain active for up to
10 minutes after the ignition is cycled to OFF. Opening
either front door will cancel this feature. To change the
Engine Off Power Delay status touch the 0 seconds,
45 seconds, 5 minutes or 10 minutes soft-key. Then touch
the arrow back soft-key.
•Headlight Off Delay
When this feature is selected, the driver can choose to
have the headlights remain on for 0, 30, 60, or 90 seconds
when exiting the vehicle. To change the Headlight Off
Delay status touch the + or - soft-key to select your
desired time interval. Touch the back arrow soft-key to
return to the previous menu.
4
UNDERSTANDING YOUR INSTRUMENT PANEL 323
Page 331 of 566
CD/DVD DISC MAINTENANCE
To keep a CD/DVD in good condition, take the following
precautions:
1. Handle the disc by its edge; avoid touching the
surface.
2. If the disc is stained, clean the surface with a soft cloth,
wiping from center to edge.
3. Do not apply paper or tape to the disc; avoid scratch-
ing the disc.
4. Do not use solvents such as benzene, thinner, cleaners,
or anti-static sprays.
5. Store the disc in its case after playing.
6. Do not expose the disc to direct sunlight.
7. Do not store the disc where temperatures may become
too high.NOTE:
If you experience difficulty in playing a particu-
lar disc, it may be damaged (i.e., scratched, reflective
coating removed, a hair, moisture or dew on the disc)
oversized, or have protection encoding. Try a known
good disc before considering disc player service.
RADIO OPERATION AND MOBILE PHONES
Under certain conditions, the mobile phone being on in
your vehicle can cause erratic or noisy performance from
your radio. This condition may be lessened or eliminated
by relocating the mobile phone antenna. This condition is
not harmful to the radio. If your radio performance does
not satisfactorily “clear” by the repositioning of the
antenna, it is recommended that the radio volume be
turned down or off during mobile phone operation when
not using Uconnect™ (if equipped).4
UNDERSTANDING YOUR INSTRUMENT PANEL 329
Page 337 of 566
NOTE:In Sync mode, this button will also automati-
cally adjust the passenger temperature setting at the
same time.
11. Driver Temperature Control Up Button
Provides the driver with independent temperature con-
trol. Push the button for warmer temperature settings.
NOTE: In Sync mode, this button will also automati-
cally adjust the passenger temperature setting at the
same time.
12. Modes
The airflow distribution mode can be adjusted so air
comes from the instrument panel outlets, floor outlets,
demist outlets and defrost outlets. The Mode settings are
as follows:
•Panel Mode Air comes from the outlets in the instrument panel.
Each of these outlets can be individually adjusted to direct the flow of air. The air vanes of the center outlets
and outboard outlets can be moved up and down or side
to side to regulate airflow direction. There is a shut off
wheel located below the air vanes to shut off or adjust the
amount of airflow from these outlets.
•Bi-Level Mode
Air comes from the instrument panel outlets and
floor outlets. A slight amount of air is directed
through the defrost and side window demister outlets.
NOTE: BI-LEVEL mode is designed under comfort
conditions to provide cooler air out of the panel outlets
and warmer air from the floor outlets.
•Floor Mode Air comes from the floor outlets. A slight amount of
air is directed through the defrost and side window
demister outlets.
4
UNDERSTANDING YOUR INSTRUMENT PANEL 335
Page 346 of 566
�Driving On Slippery Surfaces ............. 361
▫ Acceleration ........................ 361
▫ Traction ........................... 362
� Driving Through Water ................. 362
▫ Flowing/Rising Water ................. 363
▫ Shallow Standing Water ............... 363
� Power Steering ....................... 365
� Multi-Displacement System (MDS)
(If Equipped) — 5.7L Engine Only .......... 366
� Parking Brake ........................ 366
� Anti-Lock Brake System ................. 369
� Electronic Brake Control System ........... 371
▫ Anti-Lock Brake System (ABS) ........... 371▫
Traction Control System (TCS) ........... 371
▫ Brake Assist System (BAS) .............. 372
▫ Electronic Stability Control (ESC) ......... 372
▫ Hill Start Assist (HSA) ................ 375
▫ Ready Alert Braking .................. 376
▫ Rain Brake Support ................... 377
▫ ESC Activation/Malfunction Indicator Light
And ESC Off Indicator Light ............ 377
▫ Synchronizing ESC ................... 378
� Tire Safety Information ................. 379
▫ Tire Markings ....................... 379
▫ Tire Identification Number (TIN) ......... 382
▫ Tire Terminology And Definitions ......... 383
344 STARTING AND OPERATING
Page 357 of 566
Over-Temperature Mode
The transmission electronics constantly monitor the
transmission oil temperature. If the transmission exceeds
normal operating temperature, the transmission will
change the way it shifts to help control the condition.
This may result in a slightly different feeling or response
during normal operation in the DRIVE position. After the
transmission cools down, it will return to normal
operation.
Brake/Transmission Shift Interlock System
This vehicle is equipped with a Brake Transmission Shift
Interlock System (BTSI) that holds the shift lever in the
PARK position when the ignition light is in the OFF
position. To move the shift lever out of the PARK
position, the ignition switch must be turned to the RUN
position by pressing the ENGINE START/STOP button
once or twice (engine running or not) and the brake pedal
must be pressed.
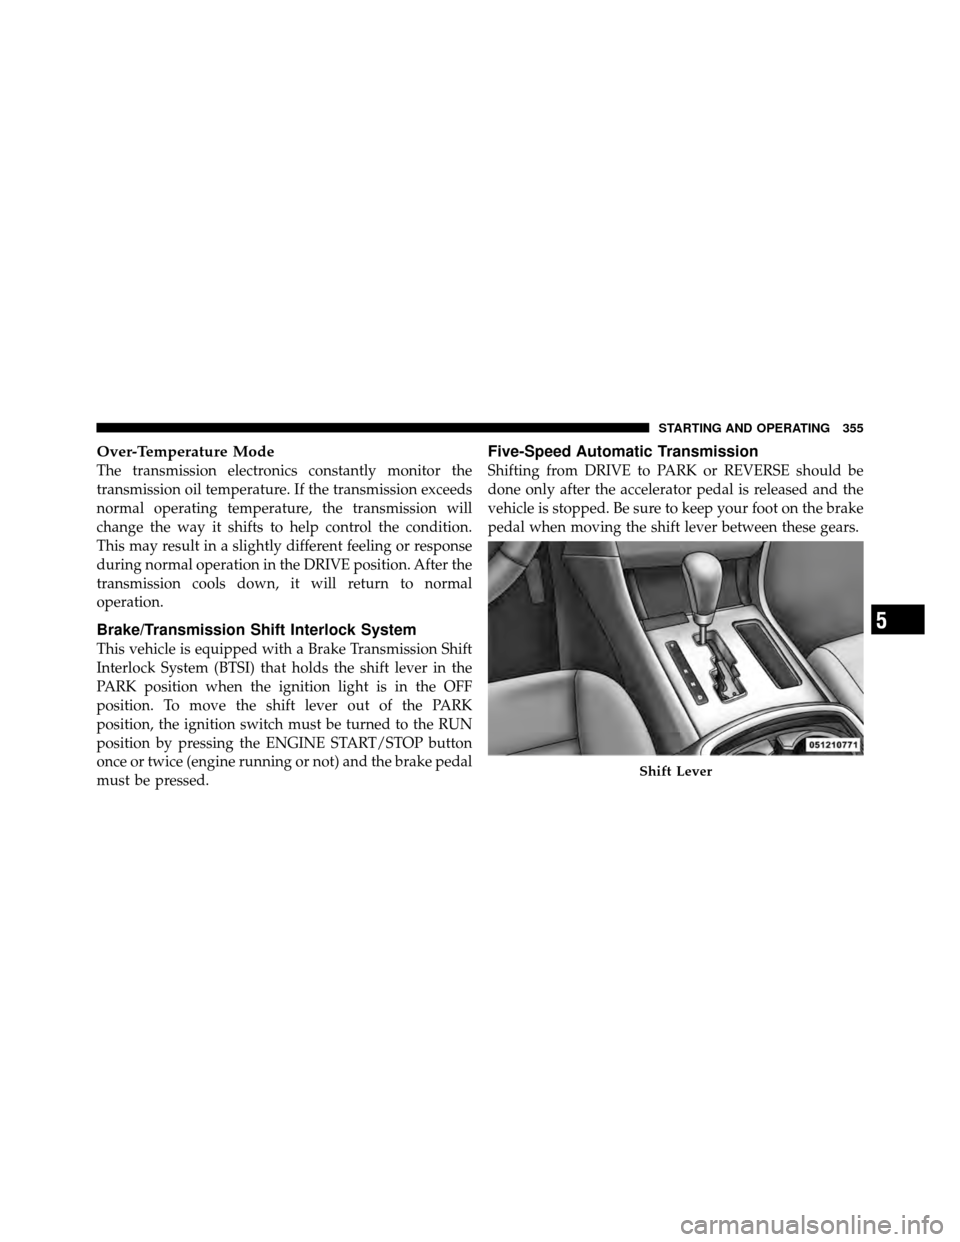
Five-Speed Automatic Transmission
Shifting from DRIVE to PARK or REVERSE should be
done only after the accelerator pedal is released and the
vehicle is stopped. Be sure to keep your foot on the brake
pedal when moving the shift lever between these gears.
Shift Lever
5
STARTING AND OPERATING 355
Page 359 of 566
CAUTION!
Damage to the shifter could result if the shift lever is
moved out of PARK before the ignition light is
turned from the OFF to the RUN position.
REVERSE
This range is used for moving the vehicle rearward.
Always stop before moving the shift lever to REVERSE.
NEUTRAL
This range is used when the vehicle is standing for
prolonged periods with the engine running. The engine
may be started in this range. Set the parking brake and
shift the transmission into PARK if you must leave the
vehicle.
CAUTION!
Coasting the vehicle or driving for any other reason
with shift lever in NEUTRAL can result in transmis-
sion damage.
WARNING!
Do not coast in NEUTRAL and never turn off the
ignition to coast down a hill. These are unsafe
practices that limit your response to changing traffic
or road conditions. You might lose control of the
vehicle and have a collision.
DRIVE
This range should be used for most city and highway
driving. It provides the smoothest upshifts and down-
shifts and the best fuel economy.
5
STARTING AND OPERATING 357