Page 31 of 573
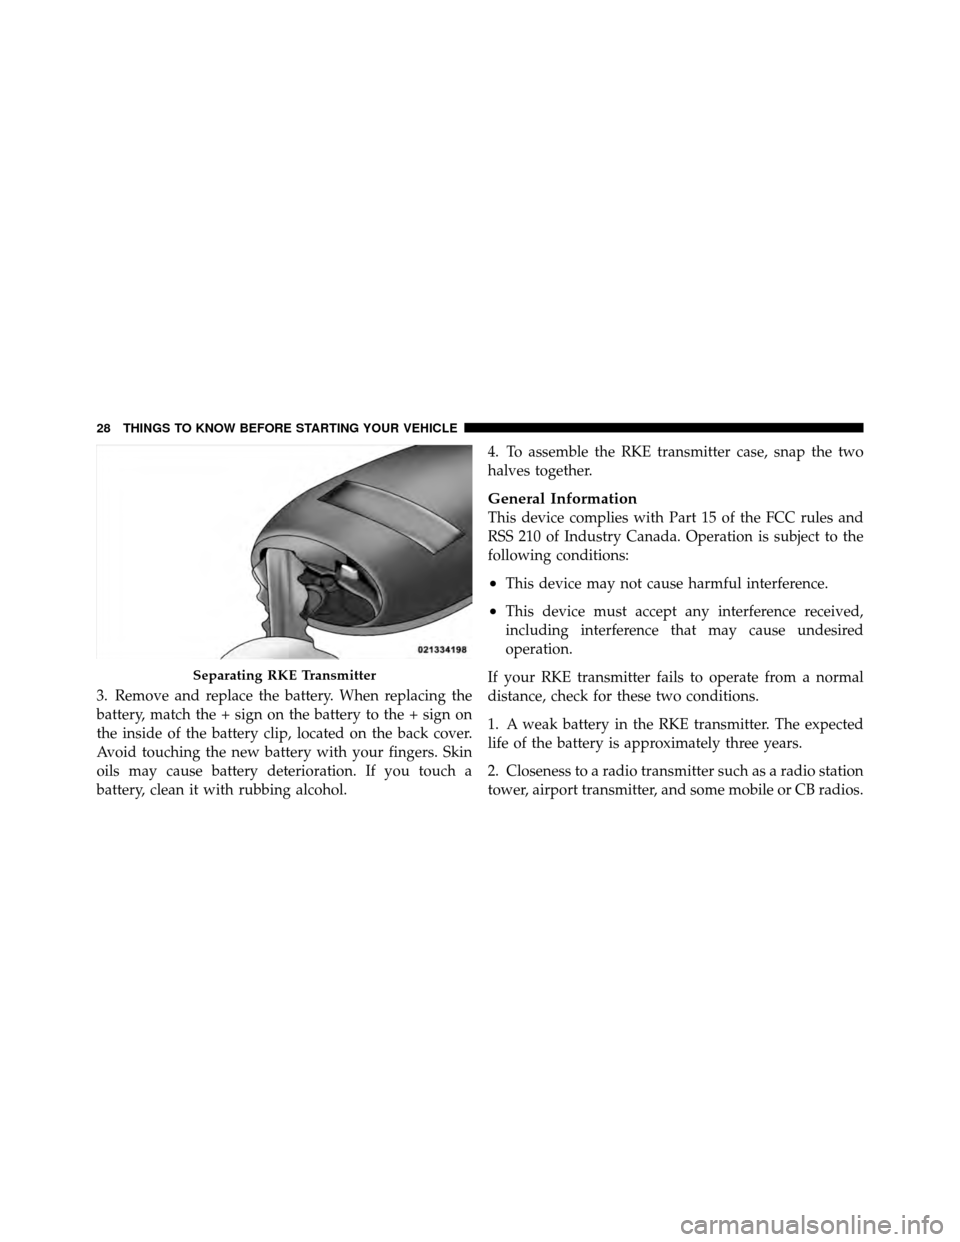
3. Remove and replace the battery. When replacing the
battery, match the + sign on the battery to the + sign on
the inside of the battery clip, located on the back cover.
Avoid touching the new battery with your fingers. Skin
oils may cause battery deterioration. If you touch a
battery, clean it with rubbing alcohol.4. To assemble the RKE transmitter case, snap the two
halves together.
General Information
This device complies with Part 15 of the FCC rules and
RSS 210 of Industry Canada. Operation is subject to the
following conditions:
•This device may not cause harmful interference.
•This device must accept any interference received,
including interference that may cause undesired
operation.
If your RKE transmitter fails to operate from a normal
distance, check for these two conditions.
1. A weak battery in the RKE transmitter. The expected
life of the battery is approximately three years.
2. Closeness to a radio transmitter such as a radio station
tower, airport transmitter, and some mobile or CB radios.
Separating RKE Transmitter
28 THINGS TO KNOW BEFORE STARTING YOUR VEHICLE
Page 55 of 573
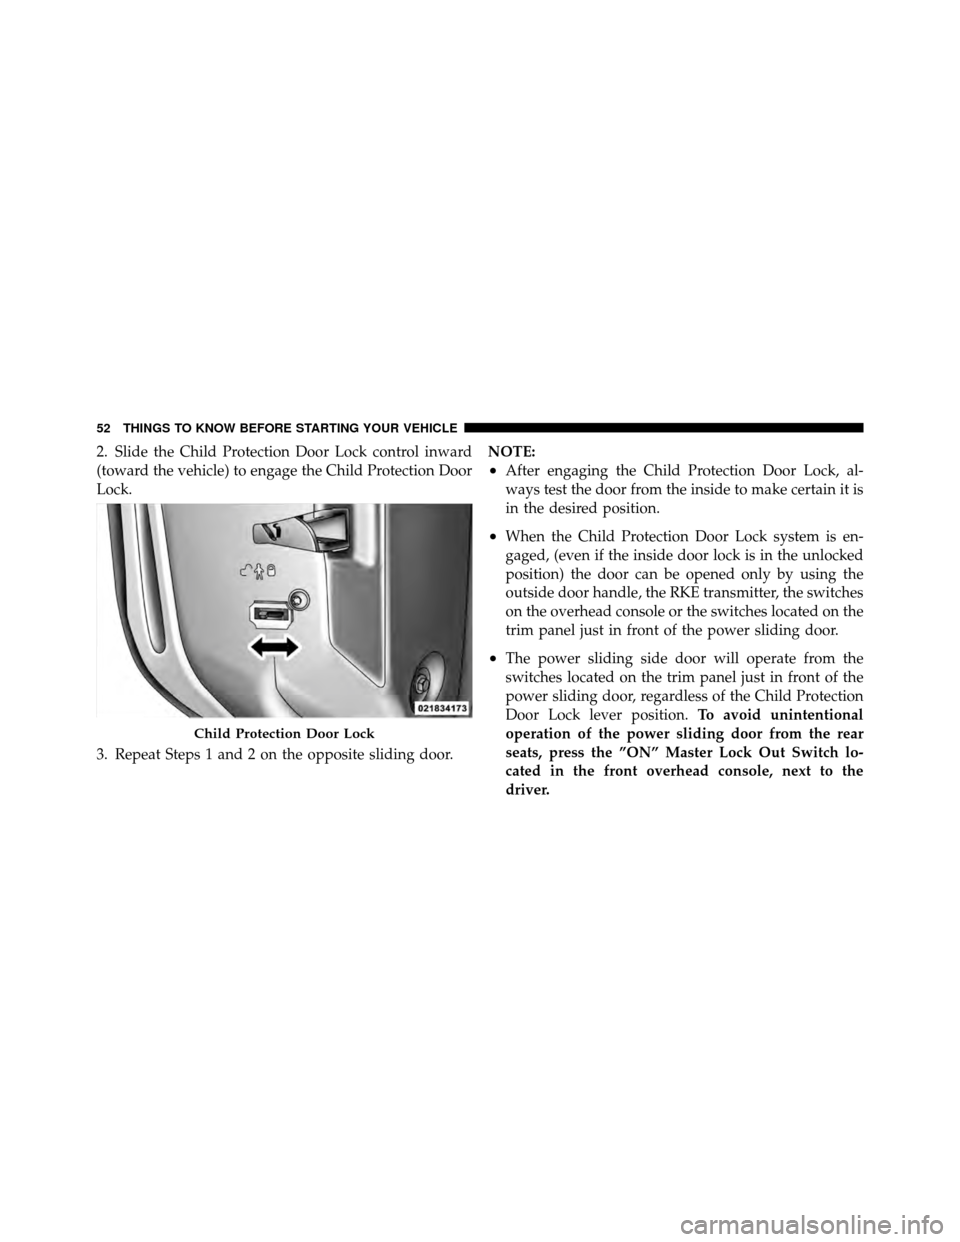
2. Slide the Child Protection Door Lock control inward
(toward the vehicle) to engage the Child Protection Door
Lock.
3. Repeat Steps 1 and 2 on the opposite sliding door.NOTE:
•After engaging the Child Protection Door Lock, al-
ways test the door from the inside to make certain it is
in the desired position.
•When the Child Protection Door Lock system is en-
gaged, (even if the inside door lock is in the unlocked
position) the door can be opened only by using the
outside door handle, the RKE transmitter, the switches
on the overhead console or the switches located on the
trim panel just in front of the power sliding door.
•The power sliding side door will operate from the
switches located on the trim panel just in front of the
power sliding door, regardless of the Child Protection
Door Lock lever position.
To avoid unintentional
operation of the power sliding door from the rear
seats, press the ”ON” Master Lock Out Switch lo-
cated in the front overhead console, next to the
driver.
Child Protection Door Lock
52 THINGS TO KNOW BEFORE STARTING YOUR VEHICLE
Page 69 of 573
6. To release the belt, push the red button on the buckle.
The belt will automatically retract to its stowed position.
If necessary, slide the latch plate down the webbing to
allow the belt to retract fully.
WARNING!
A frayed or torn belt could rip apart in an accident
and leave you with no protection. Inspect the belt
system periodically, checking for cuts, frays, or loose
parts. Damaged parts must be replaced immediately.
Do not disassemble or modify the system. Seat belt
assemblies must be replaced after an accident if they
have been damaged (bent retractor, torn webbing,
etc.).
Third Row Center Shoulder Belt Instructions
The shoulder belt for the third row center seat is located
in the headliner slightly behind the third row seat.Pull the strap down and secure the small latch plate of
the lap belt into the small buckle until you hear a “click”.
Position the shoulder belt on your chest so that it is
comfortable and not resting on your neck. When the belt
is long enough to fit, insert the large latch plate into the
buckle until you hear a “click.” The retractor should
withdraw any slack in the belt.
To release the small latch plate, position the end of the
large latch plate against the red button on the small latch
plate and push upward. Reinstall the latch plates into the
headliner.
Adjustable Upper Shoulder Belt Anchorage
In the front seats and the second row outboard seats, the
shoulder belt anchorage can be adjusted upward or
downward to help position the belt away from your
neck. The upper anchorage can be adjusted upward by
66 THINGS TO KNOW BEFORE STARTING YOUR VEHICLE
Page 75 of 573
1. Grasp the deployed AHR from the rear seat.
2. Position the hands on the top of the deployed AHR at
a comfortable position.3. Pull
downthenrearward towards the rear of the
vehicle then downto engage the locking mechanism.
Hand Positioning Points On AHR
1 — Downward Movement
2 — Rearward Movement
72 THINGS TO KNOW BEFORE STARTING YOUR VEHICLE
Page 77 of 573

Enhanced Seat Belt Use Reminder System
(BeltAlert�)
BeltAlert�is a feature intended to remind the driver and
front passenger (if equipped with front passenger
BeltAlert�) to fasten their seat belts. If the driver or front
seat passenger is unbelted, the Seat Belt Reminder Light
will turn on and remain on until both front seat belts are
fastened.
The BeltAlert� warning sequence begins within 60 sec-
onds of the vehicle speed over 5 mph (8 km/h), by
blinking the Seat Belt Reminder Light and sounding an
intermittent chime. Once the sequence starts, it will
continue for 96 seconds or until the respective seat belts
are fastened. After the sequence completes, the Seat Belt
Reminder Light remains illuminated until the respective
seat belts are fastened. The driver should instruct all
other occupants to fasten their seat belts. If a front seat
belt is unbuckled while traveling at speeds greater than 5 mph (8 km/h), BeltAlert�
will chime once and illumi-
nate the Seat Belt Reminder Light, then will proceed to
the 96 second warning sequence.
The front passenger seat BeltAlert� is not active when the
front passenger seat is unoccupied. BeltAlert� may be
triggered when an animal or heavy object is on the front
passenger seat or when the seat is folded flat (if
equipped). It is recommended that pets be restrained in
the rear seat in pet harnesses or pet carriers that are
secured by seat belts, and cargo is properly stowed.
BeltAlert� can be enabled or disabled by your authorized
dealer or by following these steps:
NOTE: The following steps must occur within the first
60 seconds of the ignition switch being cycled to the
ON/RUN position. Chrysler Group LLC does not recom-
mend deactivating BeltAlert�.
74 THINGS TO KNOW BEFORE STARTING YOUR VEHICLE
Page 98 of 573
Not all child restraint systems will be installed as we
have described here. Again, carefully follow the instruc-
tions that come with the child restraint system.
WARNING!
Improper installation of a child restraint to the
LATCH anchorages can lead to failure of an infant or
child restraint. The child could be badly injured or
killed. Follow the manufacturer’s directions exactly
when installing an infant or child restraint.
Installing The LATCH-Compatible Child Restraint
System
Each vehicle, except commercial cargo vehicles,
is equipped with the child restraint anchorage
system called LATCH, which stands for Lower
Anchors and Tether for CHildren. Two LATCH child
restraint anchorage systems are installed on all second-
row seats and in the center position on all third row fold-in-floor seats. Second-row seats also feature tether
strap anchorages, located in the rear surface of the
seatback. In addition, all third row fold-in-floor seats are
equipped with a child restraint tether anchor at the center
seating position.
NOTE:
•When using the LATCH attaching system to install a
child restraint, please ensure that all seat belts not
being used for occupant restraints are stowed and out
of reach of children. It is recommended that before
installing the child restraint, buckle the seat belt so the
seat belt is tucked behind the child restraint and out of
reach. If the buckled seat belt interferes with the child
restraint installation, instead of tucking the seat belt
behind the child restraint, route the seat belt through
the child restraint belt path and then buckle it. This
should stow the seat belt out of the reach of an
inquisitive child. Remind all children in the vehicle
2
THINGS TO KNOW BEFORE STARTING YOUR VEHICLE 95
Page 115 of 573
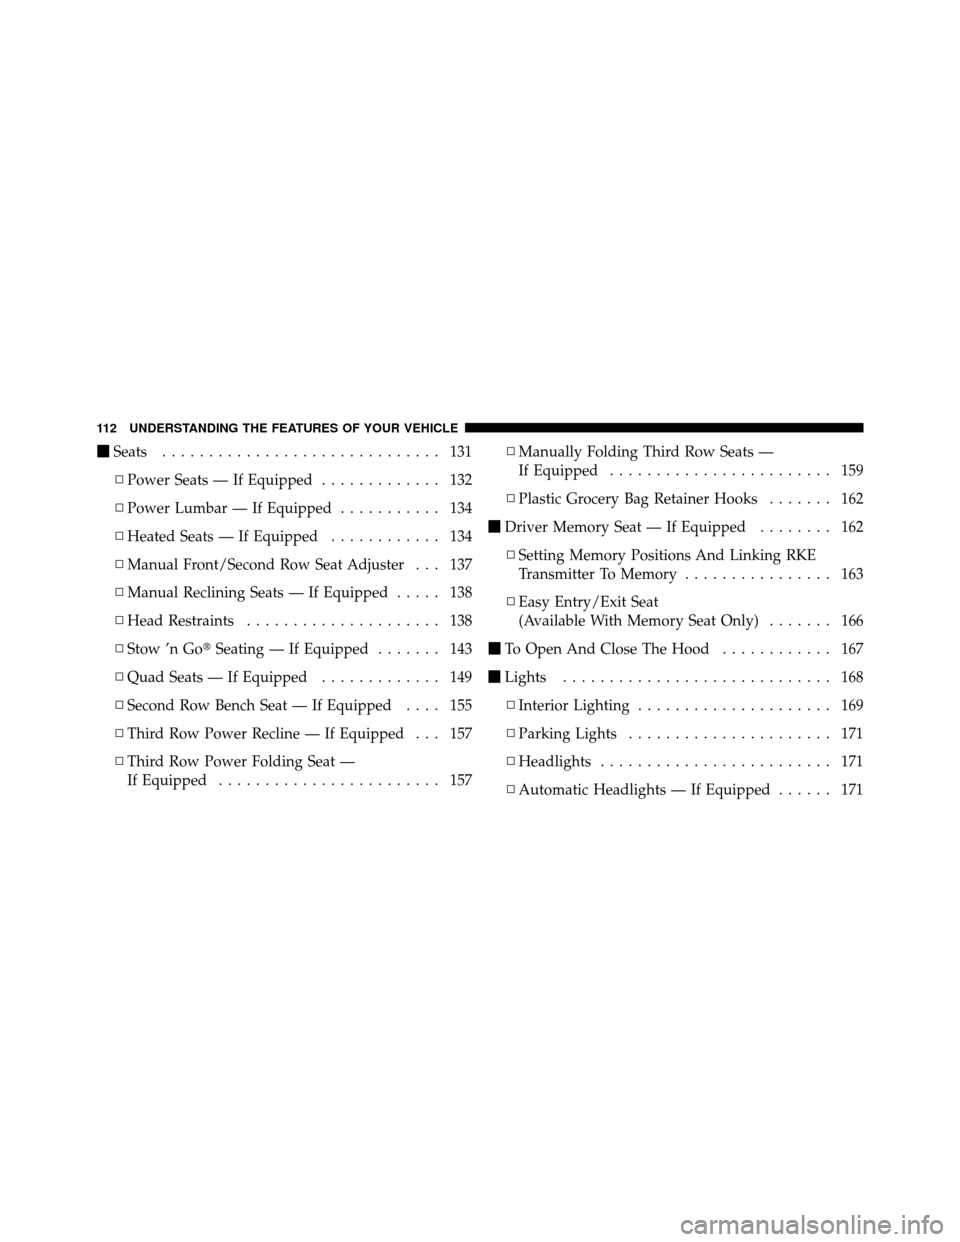
�Seats .............................. 131
▫ Power Seats — If Equipped ............. 132
▫ Power Lumbar — If Equipped ........... 134
▫ Heated Seats — If Equipped ............ 134
▫ Manual Front/Second Row Seat Adjuster . . . 137
▫ Manual Reclining Seats — If Equipped ..... 138
▫ Head Restraints ..................... 138
▫ Stow ’n Go� Seating — If Equipped ....... 143
▫ Quad Seats — If Equipped ............. 149
▫ Second Row Bench Seat — If Equipped .... 155
▫ Third Row Power Recline — If Equipped . . . 157
▫ Third Row Power Folding Seat —
If Equipped ........................ 157 ▫
Manually Folding Third Row Seats —
If Equipped ........................ 159
▫ Plastic Grocery Bag Retainer Hooks ....... 162
� Driver Memory Seat — If Equipped ........ 162
▫ Setting Memory Positions And Linking RKE
Transmitter To Memory ................ 163
▫ Easy Entry/Exit Seat
(Available With Memory Seat Only) ....... 166
� To Open And Close The Hood ............ 167
� Lights ............................. 168
▫ Interior Lighting ..................... 169
▫ Parking Lights ...................... 171
▫ Headlights ......................... 171
▫ Automatic Headlights — If Equipped ...... 171
112 UNDERSTANDING THE FEATURES OF YOUR VEHICLE
Page 120 of 573
MIRRORS
Inside Day/Night Mirror — If Equipped
A two-point pivot system allows for horizontal and
vertical adjustment of the mirror. Adjust the mirror to
center on the view through the rear window.
Headlight glare can be reduced by moving the small
control under the mirror to the night position (toward the
rear of the vehicle). The mirror should be adjusted while
set in the day position (toward the windshield).
Manual Rearview Mirror
3
UNDERSTANDING THE FEATURES OF YOUR VEHICLE 117