Page 120 of 573
MIRRORS
Inside Day/Night Mirror — If Equipped
A two-point pivot system allows for horizontal and
vertical adjustment of the mirror. Adjust the mirror to
center on the view through the rear window.
Headlight glare can be reduced by moving the small
control under the mirror to the night position (toward the
rear of the vehicle). The mirror should be adjusted while
set in the day position (toward the windshield).
Manual Rearview Mirror
3
UNDERSTANDING THE FEATURES OF YOUR VEHICLE 117
Page 123 of 573
Using the mirror control switch, press on any of the four
arrows for the direction that you want the mirror to
move.
Driver’s side power mirror preselected positions can be
controlled by the optional Driver Memory Seat Feature.
Refer to “Driver Memory Seat” in “Understanding The
Features Of Your Vehicle” for further information.
Heated Mirrors — If Equipped
These mirrors are heated to melt frost or ice. This
feature is activated whenever you turn on the rear
window defroster. Refer to “Rear Window Features” in
“Understanding The Features Of Your Vehicle” for fur-
ther information.
Tilt Mirrors In Reverse (Available With Memory
Seat Only) — If Equipped
Tilt Mirrors in Reverse provides automatic outside mirror
positioning which will aid the drivers view of the ground
rearward of the front doors. The driver’s outside mirror
will move slightly downward from the present position
when the vehicle is shifted into REVERSE. The driver’s
outside mirror will then return to the original position
when the vehicle is shifted out of REVERSE position.
Each stored memory setting will have an associated Tilt
Mirrors in Reverse position.
NOTE: The Tilt Mirrors in Reverse feature is not en-
abled when delivered from the factory. The Tilt Mirrors in
Reverse feature can be enabled or disabled in the Elec-
tronic Vehicle Information Center (EVIC). Refer to “Elec-
tronic Vehicle Information Center (EVIC)/Customer-
Programmable Features” in “Understanding Your
Instrument Panel” for further information.
120 UNDERSTANDING THE FEATURES OF YOUR VEHICLE
Page 125 of 573
BLIND SPOT MONITORING — IF EQUIPPED
The Blind Spot Monitoring (BSM) system uses two radar-
based sensors, located inside the rear bumper fascia, to
detect highway licensable vehicles (automobiles, trucks,
motorcycles, etc.) that enter the blind spot zones from the
rear/front/side of the vehicle.When the vehicle is started, the BSM warning light will
momentarily illuminate in both outside rear view mirrors
to let the driver know that the system is operational. The
BSM system sensors operate when the vehicle is in any
forward gear or REVERSE and enters stand-by mode
when the vehicle is in PARK.
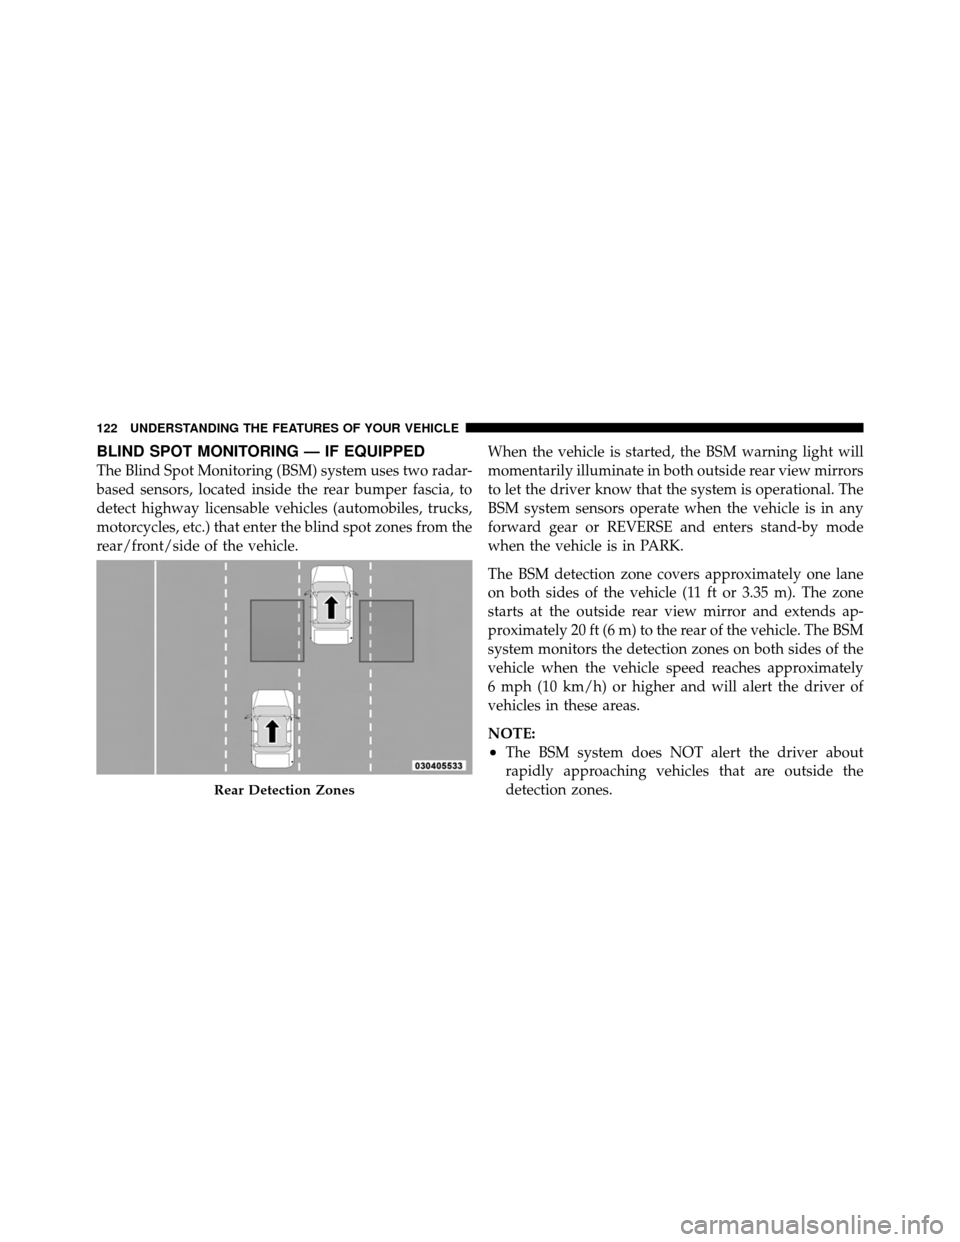
The BSM detection zone covers approximately one lane
on both sides of the vehicle (11 ft or 3.35 m). The zone
starts at the outside rear view mirror and extends ap-
proximately 20 ft (6 m) to the rear of the vehicle. The BSM
system monitors the detection zones on both sides of the
vehicle when the vehicle speed reaches approximately
6 mph (10 km/h) or higher and will alert the driver of
vehicles in these areas.
NOTE:
•The BSM system does NOT alert the driver about
rapidly approaching vehicles that are outside the
detection zones.
Rear Detection Zones
122 UNDERSTANDING THE FEATURES OF YOUR VEHICLE
Page 178 of 573
SmartBeam™ — If Equipped
The SmartBeam™ system provides increased forward
lighting at night by automating high beam control
through the use of a digital camera mounted on the
inside rearview mirror. This camera detects vehicle spe-
cific light and automatically switches from high beams to
low beams until the approaching vehicle is out of view.
To Activate
1. Select “Automatic High Beams — ON” through the
EVIC. Refer to “Electronic Vehicle Information Center
(EVIC)/Customer-Programmable Features” in “Under-
standing Your Instrument Panel” for further information.
2. Rotate the headlight switch counterclockwise to the
AUTO (A) position.
3. Push the multifunction lever away from you to switch
the headlights to the high beam position. Refer to “Mul-
tifunction Lever” in this section for further information.NOTE:
This system will not activate until the vehicle is
at, or above, 25 mph (40 km/h).
To Deactivate
Perform either of the following steps to deactivate the
SmartBeam™ system.
1. Select “Automatic High Beams — OFF” through the
EVIC. Refer to “Electronic Vehicle Information Center
(EVIC)/Customer-Programmable Features” in “Under-
standing Your Instrument Panel” for further information.
2. Pull the multifunction lever toward you to switch the
headlights from the high beam to the low beam position.
3. Rotate the headlight switch clockwise from the AUTO
(A) to the on position.
NOTE: Broken, muddy or obstructed headlights and
taillights of vehicles in the field of view will cause
headlights to remain on longer (closer to the vehicle).
3
UNDERSTANDING THE FEATURES OF YOUR VEHICLE 175
Page 201 of 573
4. Enable or disable the rear camera feature by selecting
“enable rear camera in reverse” soft key and pressing the
“save” soft-key.
Turning ParkView�On Or Off —
Without Navigation/Multimedia Radio
1. Press the “menu” hard-key.
2. Select “system setup” soft-key.
3. Enable or disable the rear camera feature by selecting
“enable rear camera in reverse” soft-key.
OVERHEAD CONSOLES
Front Overhead Console
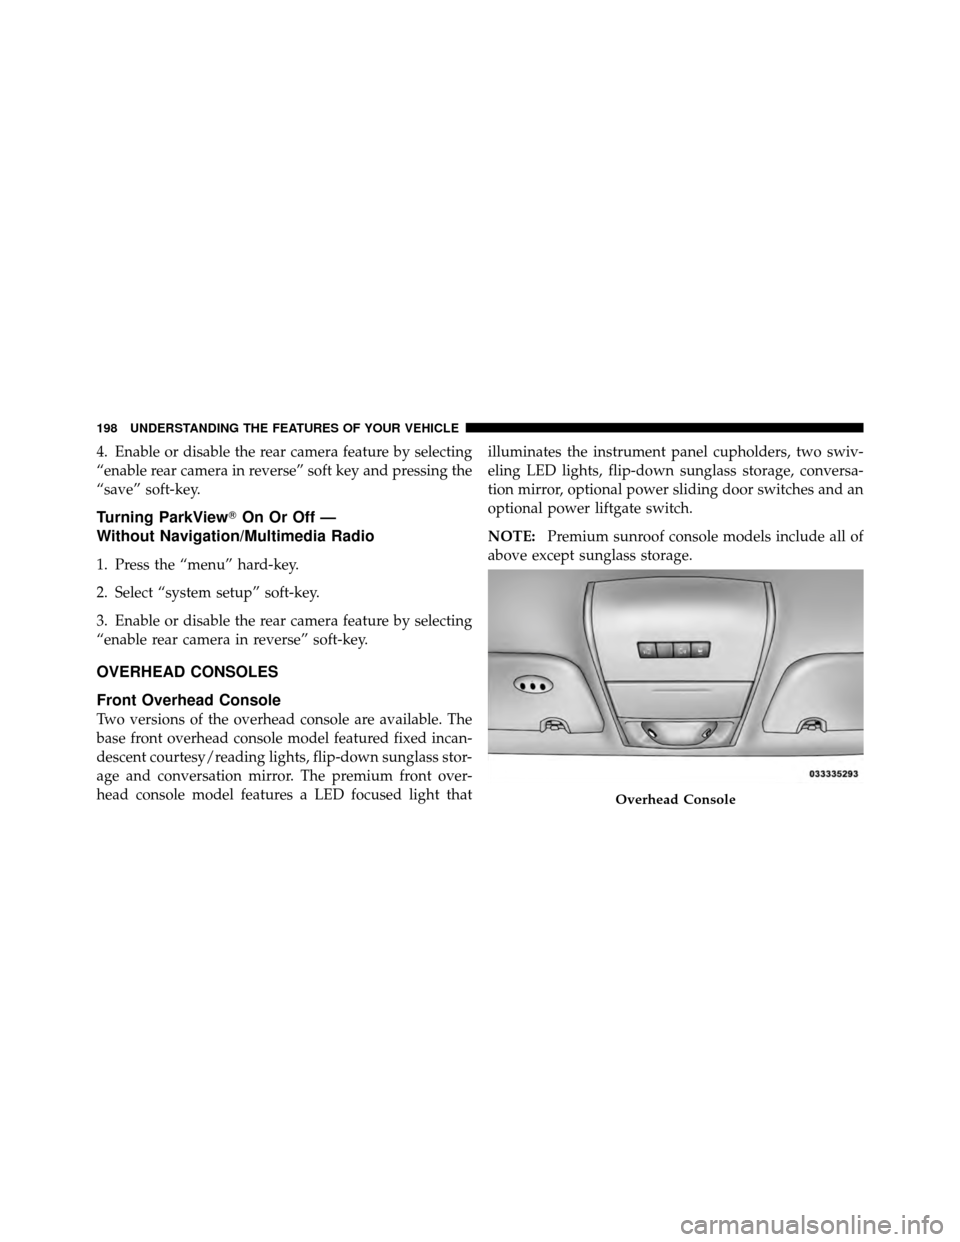
Two versions of the overhead console are available. The
base front overhead console model featured fixed incan-
descent courtesy/reading lights, flip-down sunglass stor-
age and conversation mirror. The premium front over-
head console model features a LED focused light that illuminates the instrument panel cupholders, two swiv-
eling LED lights, flip-down sunglass storage, conversa-
tion mirror, optional power sliding door switches and an
optional power liftgate switch.
NOTE:
Premium sunroof console models include all of
above except sunglass storage.
Overhead Console
198 UNDERSTANDING THE FEATURES OF YOUR VEHICLE
Page 278 of 573
•Service Park Assist System
•Personal Settings Not Available — Vehicle Not in Park
•Blind Spot System Off — This message is displayed
when the ignition is turned to ON to indicate the Blind
Spot System has been turned off.
•Blind Spot System Not Available — This message is
displayed to indicate the Blind Spot Monitor (BSM)
system is temporarily unavailable due to sensor block-
age, electronic interference, or other�temporary�con-
ditions. When this message is displayed both outside
rear view icons will be illuminated. If electronic inter-
ference is present, the BSM system will illuminate the
icon only on the side of interference as long as
interference is present.
•Service Blind Spot System — This message is dis-
played to indicate the Blind Spot Monitor (BSM)
system is permanently unavailable. The driver will receive an EVIC message and the BSM display warn-
ing in both mirrors will be permanently illuminated. If
this message is present see an authorized dealer.
EVIC White Telltale Lights
This area will show reconfigurable white caution tell-
tales. These telltales include:
•Electronic Range Select (ERS) Status
The shift lever status “5,4,3,2,1” are displayed indicating
the shift lever position. Telltales “5,4,3,2,1” indicate the
Electronic Range Select (ERS) feature has been engaged
and the gear selected is displayed. For further informa-
tion on ERS, refer to “Starting And Operating”
•Electronic Speed Control Ready This light will turn on when the electronic
speed control is ready. For further information,
refer to “Electronic Speed Control” in “Under-
standing The Features Of Your Vehicle.”
4
UNDERSTANDING YOUR INSTRUMENT PANEL 275
Page 508 of 573
solvents, detergents, or ammonia-based cleaners to clean
your leather upholstery. Application of a leather condi-
tioner is not required to maintain the original condition.
WARNING!
Do not use volatile solvents for cleaning purposes.
Many are potentially flammable, and if used in
closed areas they may cause respiratory harm.
Cleaning Headlights
Your vehicle has plastic headlights that are lightweight
and less susceptible to stone breakage than glass head-
lights.
Plastic is not as scratch resistant as glass and therefore
different lens cleaning procedures must be followed.To minimize the possibility of scratching the lenses and
reducing light output, avoid wiping with a dry cloth. To
remove road dirt, wash with a mild soap solution fol-
lowed by rinsing.
Do not use abrasive cleaning components, solvents, steel
wool or other aggressive material to clean the lenses.
Glass Surfaces
All glass surfaces should be cleaned on a regular basis
with MOPAR�
Glass Cleaner or equivalent or any com-
mercial household-type glass cleaner. Never use an abra-
sive type cleaner. Use caution when cleaning the inside
rear window equipped with electric defrosters or the
right rear quarter window equipped with the radio
antenna. Do not use scrapers or other sharp instruments
that may scratch the elements.
When cleaning the rearview mirror, spray cleaner on the
towel or rag that you are using. Do not spray cleaner
directly on the mirror.
7
MAINTAINING YOUR VEHICLE 505
Page 514 of 573
CavityCartridge
Fuse Mini-
Fuse Description
M13 — 20 Amp YellowIgnition Off Draw—
Instrument Cluster,
SIREN, Clock Mod-
ule, Multi-Function
Control Switch/ITM
M14 — 20 Amp YellowSpare Fuse
M15 — 20 Amp YellowRear View Mirror,
Instrument Cluster,
Multi-Function Con-
trol Switch, Tire Pres-
sure Monitor, Glow
Plug Module – Export
Diesel Only, Assy-
Shifter (Hall Effect),
Acoustic Noise Can-
cellationCavity
Cartridge
Fuse Mini-
Fuse Description
M16 — 10 Amp RedAirbag Module/
Occupant Classifica-
tion Module
M17 — 15 Amp BlueLeft Tail/License/
Park Lamp, Running
Lamps
M18 — 15 Amp BlueRight Tail/Park/Run
Lamp
M19 — 25 Amp NaturalAutomatic Shutdown
#1 and #2
M20 — 15 Amp BlueInstrument Cluster
Interior Light, Switch
Bank, Steering Col-
umn Module, Switch
Steering Wheel
M21 — 20 Amp YellowAutomatic Shutdown
#3
7
MAINTAINING YOUR VEHICLE 511