Page 60 of 573

•If the power liftgate encounters multiple obstructions
within the same cycle, the system will automatically
stop and must be opened or closed manually.
WARNING!
•Driving with the liftgate open can allow poison-
ous exhaust gases into your vehicle. You and your
passengers could be injured by these fumes. Keep
the liftgate closed when you are operating the
vehicle.
•If you are required to drive with the liftgate open,
make sure that all windows are closed, and the
climate control blower switch is set at high speed.
Do not use the recirculation mode.
Gas props support the liftgate in the open position.
However, because the gas pressure drops with tempera-
ture, it may be necessary to assist the props when
opening the liftgate in cold weather.
OCCUPANT RESTRAINTS
Some of the most important safety features in your
vehicle are the restraint systems:
•Three-point lap and shoulder belts for all seating
positions
•Advanced Front Air Bags for driver and front passen-
ger
•Supplemental Active Head Restraints (AHR) located
on top of the front seats (integrated into the head
restraint) — if equipped
•Supplemental Driver Side Knee Air Bag
•Supplemental Side Air Bag Inflatable Curtains
(SABIC) that span the front, second, and third row
seating for the driver and passengers seated next to a
window
•Supplemental Seat-Mounted Side Air Bags (SAB)
2
THINGS TO KNOW BEFORE STARTING YOUR VEHICLE 57
Page 109 of 573

Exhaust Gas
WARNING!
Exhaust gases can injure or kill. They contain carbon
monoxide (CO), which is colorless and odorless.
Breathing it can make you unconscious and can
eventually poison you. To avoid breathing (CO),
follow these safety tips:
Do not run the engine in a closed garage or in confined
areas any longer than needed to move your vehicle in or
out of the area.
If it is necessary to sit in a parked vehicle with the engine
running, adjust your heating or cooling controls to force
outside air into the vehicle. Set the blower at high speed. If you are required to drive with the liftgate open, make
sure that all windows are closed and the climate control
BLOWER switch is set at high speed. DO NOT use the
recirculation mode.
The best protection against carbon monoxide entry into
the vehicle body is a properly maintained engine exhaust
system.
Whenever a change is noticed in the sound of the exhaust
system, when exhaust fumes can be detected inside the
vehicle, or when the underside or rear of the vehicle is
damaged, have a competent mechanic inspect the com-
plete exhaust system and adjacent body areas for broken,
damaged, deteriorated, or mispositioned parts. Open
seams or loose connections could permit exhaust fumes
to seep into the passenger compartment. In addition,
inspect the exhaust system each time the vehicle is raised
for lubrication or oil change. Replace as required.
106 THINGS TO KNOW BEFORE STARTING YOUR VEHICLE
Page 138 of 573

Vehicles Equipped With Remote Start
On models that are equipped with remote start, the
driver ’s heated seat and Heated Steering Wheel can be
programmed to come on during a remote start. Refer to
“Remote Starting System — If Equipped” in “Things To
Know Before Starting Your Vehicle” for further
information.
Front Heated Seats
There are two heated seat switches that allow the driver
and passenger to operate the seats independently. The
controls for each heater are located on the switch bank
below the climate controls.
You can choose from HIGH, LOW or OFF heat settings.
Amber indicator lights in each switch indicate the level of
heat in use. Two indicator lights will illuminate for
HIGH, one for LOW and none for OFF.Press the switch once to select HIGH-level
heating. Press the switch a second time to select
LOW-level heating. Press the switch a third
time to shut the heating elements OFF.
NOTE: Once a heat setting is selected, heat will be felt
within two to five minutes.
When the HIGH-level setting is selected, the heater will
provide a boosted heat level during the initial stages of
operation. Then, the heat output will drop to the normal
HIGH-level. If the HIGH-level setting is selected, the
system will automatically switch to LOW-level after
approximately 30 minutes of continuous operation. At
that time, the number of illuminated LEDs changes from
two to one, indicating the change. The LOW-level setting
will turn OFF automatically after approximately
45 minutes.
3
UNDERSTANDING THE FEATURES OF YOUR VEHICLE 135
Page 184 of 573

HEATED STEERING WHEEL — IF EQUIPPED
The steering wheel contains a heating element that helps
warm your hands in cold weather. The heated steering
wheel has only one temperature setting. Once the heated
steering wheel has been turned on it will operate for
approximately 58 to 70 minutes before automatically
shutting off. The heated steering wheel can shut off early
or may not turn on when the steering wheel is already
warm.
The heated steering wheel switch is located on the switch
bank below the climate controls.Press the switch to turn on the heated
steering wheel. The light on the switch
will illuminate to indicate the steering
wheel heater is on. Pressing the switch
a second time will turn off the heated
steering wheel and light indicator. NOTE:
The engine must be running for the heated
steering wheel to operate.
Vehicles Equipped With Remote Start
On models that are equipped with remote start, the
heated steering wheel can be programmed to come on
during a remote start. Refer to “Remote Starting System
— If Equipped” in “Things to Know Before Starting Your
Vehicle” for further information.
WARNING!
•Persons who are unable to feel pain to the skin
because of advanced age, chronic illness, diabetes,
spinal cord injury, medication, alcohol use, ex-
haustion, or other physical conditions must exer-
cise care when using the steering wheel heater. It
may cause burns even at low temperatures, espe-
cially if used for long periods.
(Continued)
3
UNDERSTANDING THE FEATURES OF YOUR VEHICLE 181
Page 220 of 573

POWER INVERTER — IF EQUIPPED
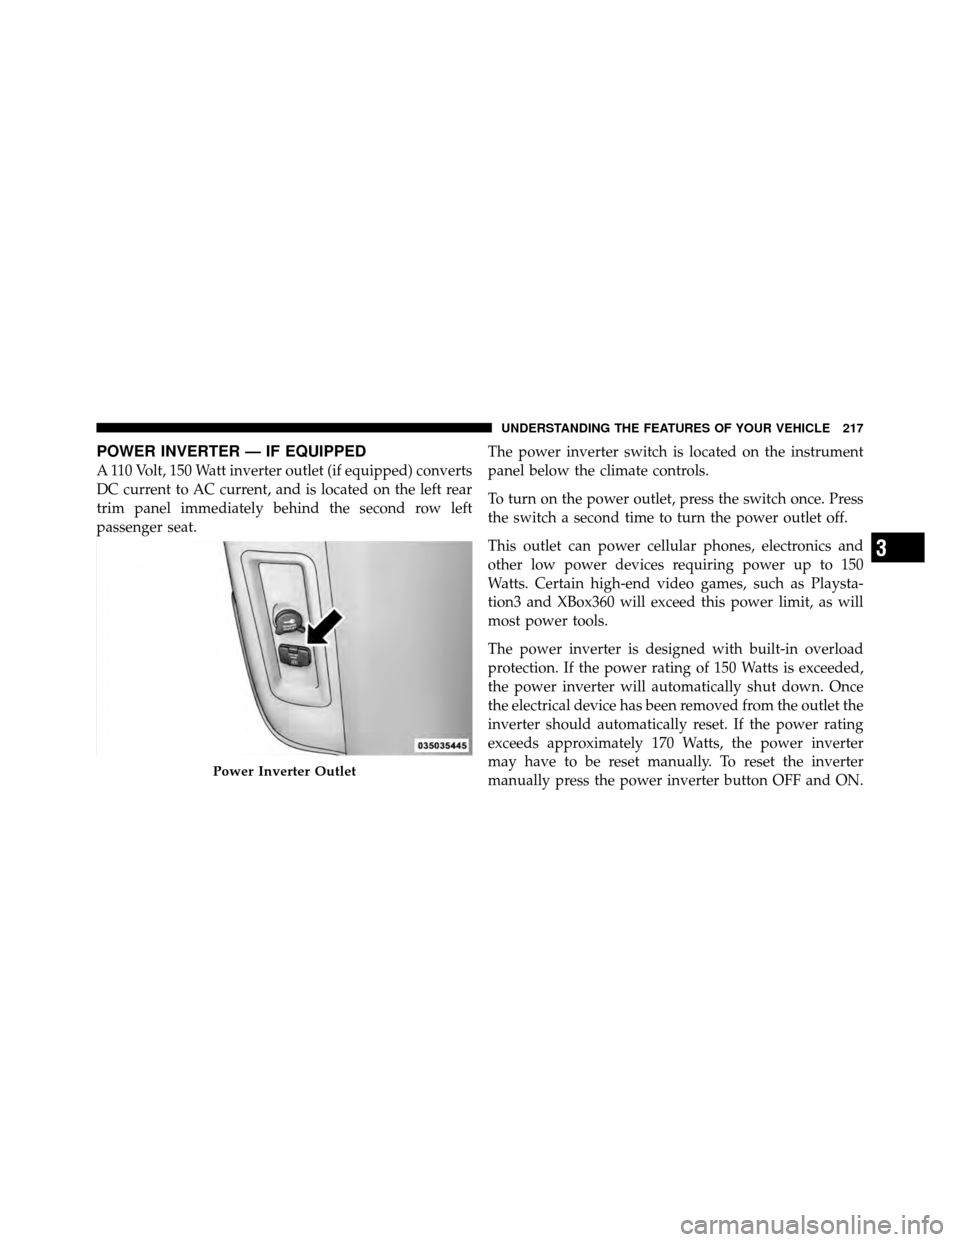
A 110 Volt, 150 Watt inverter outlet (if equipped) converts
DC current to AC current, and is located on the left rear
trim panel immediately behind the second row left
passenger seat.The power inverter switch is located on the instrument
panel below the climate controls.
To turn on the power outlet, press the switch once. Press
the switch a second time to turn the power outlet off.
This outlet can power cellular phones, electronics and
other low power devices requiring power up to 150
Watts. Certain high-end video games, such as Playsta-
tion3 and XBox360 will exceed this power limit, as will
most power tools.
The power inverter is designed with built-in overload
protection. If the power rating of 150 Watts is exceeded,
the power inverter will automatically shut down. Once
the electrical device has been removed from the outlet the
inverter should automatically reset. If the power rating
exceeds approximately 170 Watts, the power inverter
may have to be reset manually. To reset the inverter
manually press the power inverter button OFF and ON.
Power Inverter Outlet
3
UNDERSTANDING THE FEATURES OF YOUR VEHICLE 217
Page 240 of 573

REAR WINDOW FEATURES
Rear Window Defroster
The rear window defroster button is located on the
climate control (Mode) knob. Press this button to
turn on the rear window defroster and the heated outside
mirrors (if equipped). An indicator in the button will
illuminate when the rear window defroster is on. The
rear window defroster automatically turns off after ap-
proximately 10 minutes. For an additional five minutes of
operation, press the button a second time.
NOTE:
•You can turn off the heated mirror feature at anytime
by pressing the rear window defroster switch a second
time.
•To prevent excessive battery drain, use the rear win-
dow defroster only when the engine is operating.
CAUTION!
Failure to follow these cautions can cause damage to
the heating elements:
•Use care when washing the inside of the rear
window. Do not use abrasive window cleaners on
the interior surface of the window. Use a soft cloth
and a mild washing solution, wiping parallel to
the heating elements. Labels can be peeled off
after soaking with warm water.
•Do not use scrapers, sharp instruments, or abra-
sive window cleaners on the interior surface of the
window.
•Keep all objects a safe distance from the window.
REAR LOAD-LEVELING SYSTEM — IF EQUIPPED
The automatic load-leveling system will provide a level
riding vehicle under most passenger and cargo loading
conditions.
3
UNDERSTANDING THE FEATURES OF YOUR VEHICLE 237
Page 252 of 573

▫Operating Instructions
(Uconnect™ Phone) — If Equipped ....... 317
� iPod�/USB/MP3 Control — If Equipped ..... 317
▫ Connecting The iPod� Or External USB
Device ............................ 318
▫ Using This Feature ................... 318
▫ Controlling The iPod� Or External USB
Device Using Radio Buttons ............. 319
▫ Play Mode ......................... 319
▫ List Or Browse Mode ................. 321
▫ Bluetooth Streaming Audio (BTSA) ........ 323
� Video Entertainment System (VES)™ —
If Equipped .......................... 324 �
Steering Wheel Audio Controls —
If Equipped .......................... 326
▫ Radio Operation ..................... 327
▫ CD Player ......................... 327
� CD/DVD Disc Maintenance .............. 327
� Radio Operation And Mobile Phones ....... 328
� Climate Controls ...................... 328
▫ Manual Heating And Air Conditioning
System — If Equipped ................. 328
▫ Three-Zone Temperature Control —
If Equipped ........................ 333
▫ Rear Manual Climate Control —
If Equipped ........................ 337
▫ Automatic Temperature Control
(ATC) — If Equipped ................. 340
4
UNDERSTANDING YOUR INSTRUMENT PANEL 249
Page 254 of 573
INSTRUMENT PANEL FEATURES
1 — Air Vents5 — Analog Clock 9 — DVD – If Equipped 13 — Ignition Switch
2 — Instrument Cluster 6 — Upper Glove Compartment 10 — Storage Bin 14 — Hood Release
3 — Shift Lever 7 — Lower Glove Compartment 11 — Cup Holders 15 — Dimmer Switch
4 — Radio 8 — Climate Controls 12 — Switch Bank16 — Headlight Switch
4
UNDERSTANDING YOUR INSTRUMENT PANEL 251