Page 20 of 573
provides both audible and visible signals, for the first
three minutes, the headlights, park lamps and/or turn
signals will flash and Vehicle Security Light will flash
repeatedly and the horn will sound. For an additional
15 minutes, only the headlights, park lamps and/or turn
signals and Vehicle Security Light will flash.
Rearming Of The System
The Vehicle Security Alarm will rearm itself after the 15
additional minutes of headlights and Vehicle Security
Light flashing, if the Vehicle Security Alarm has not been
disabled. If the condition which initiated the alarm is still
present, the Vehicle Security Alarm will ignore that
condition and monitor the remaining doors and ignition.
To Arm The System
Follow these steps to arm the theft alarm:
1. Remove the key from the ignition system (refer to
�Starting Procedures�in�Starting And Operating� for
further information). •
For vehicles equipped with Keyless Enter-N-Go, make
sure the vehicle ignition system is �OFF�.
• For vehicles not equipped with Keyless Enter-N-Go,
make sure the vehicle ignition system is �OFF�and the
key is physically removed from the ignition.
2. Perform one of the following methods to lock the
vehicle:
• Press LOCK on the interior power door lock switch
with the driver and/or passenger door open.
•
Press the LOCK button on the exterior Passive Entry Door
Handle with a valid Key Fob available in the same exterior
zone (refer to �Keyless Enter-N-Go� in�Things To Know
Before Starting Your Vehicle� for further information).
•Press the LOCK button on the Remote Keyless Entry
(RKE) transmitter.
3. If any doors are open, close them.
2
THINGS TO KNOW BEFORE STARTING YOUR VEHICLE 17
Page 27 of 573
Using The Panic Alarm
To turn the Panic Alarm feature on or off, press and hold
the PANIC button on the RKE transmitter for at least one
second and release. When the Panic Alarm is on, the
headlights and park lights will flash, the horn will pulse
on and off, and the interior lights will turn on.
The Panic Alarm will stay on for three minutes unless
you turn it off by pressing the PANIC button a second
time or if the vehicle is driven above 5 mph (8 km/h).
NOTE:
•When you turn off the Panic Alarm by pressing the
PANIC button a second time, you may have to move
closer to the vehicle due to the Radio Frequency (RF)
noises of the system.
•The Panic Alarm cannot be activated if the engine is
running.
Power Open/Close Power Liftgate — If Equipped
Press the LIFTGATE button twice on the RKE transmitter
within five seconds to Open/Close the Power Liftgate. If
the button is pushed while the liftgate is being power
closed, the liftgate will reverse to the full open position.
The power liftgate may also be opened and closed by
pressing the LIFTGATE button located on the overhead
console.
If equipped with a rear interior switch on the left rear
pillar, pushing this switch once will close the liftgate only.
The liftgate cannot be opened from this switch.
If the vehicle is locked and Vehicle Security Alarm is
armed, using RKE transmitter to open the power liftgate
does not unlock the vehicle or disarm the Vehicle Security
Alarm.
24 THINGS TO KNOW BEFORE STARTING YOUR VEHICLE
Page 89 of 573
are not belted and seated properly, or if items are
positioned in the area where the side curtain air bag
inflates. This especially applies to children. The side
curtain air bag is only about 3-1/2 in (9 cm) thick when
it is inflated.
Because air bag sensors estimate deceleration over time,
vehicle speed and damage are not good indicators of
whether or not an air bag should have deployed.
NOTE:In a rollover the pretensioners and/or SAB and
SABIC air bags may deploy on both sides of the vehicle.
Front And Side Impact Sensors
In front and side impacts, impact sensors can aid the
ORC in determining appropriate response to impact
events.
Enhanced Accident Response System
In the event of an impact causing air bag deployment, if
the communication network remains intact, and the
power remains intact, depending on the nature of the
event the ORC will determine whether to have the
Enhanced Accident Response System perform the follow-
ing functions:
•Cut off fuel to the engine.
•Flash hazard lights as long as the battery has power or
until the ignition key is turned off.
•Turn on the interior lights, which remain on as long as
the battery has power or until the ignition key is
removed.
•Unlock the doors automatically.
If A Deployment Occurs
The Advanced Front Air Bags are designed to deflate
immediately after deployment.
86 THINGS TO KNOW BEFORE STARTING YOUR VEHICLE
Page 115 of 573
�Seats .............................. 131
▫ Power Seats — If Equipped ............. 132
▫ Power Lumbar — If Equipped ........... 134
▫ Heated Seats — If Equipped ............ 134
▫ Manual Front/Second Row Seat Adjuster . . . 137
▫ Manual Reclining Seats — If Equipped ..... 138
▫ Head Restraints ..................... 138
▫ Stow ’n Go� Seating — If Equipped ....... 143
▫ Quad Seats — If Equipped ............. 149
▫ Second Row Bench Seat — If Equipped .... 155
▫ Third Row Power Recline — If Equipped . . . 157
▫ Third Row Power Folding Seat —
If Equipped ........................ 157 ▫
Manually Folding Third Row Seats —
If Equipped ........................ 159
▫ Plastic Grocery Bag Retainer Hooks ....... 162
� Driver Memory Seat — If Equipped ........ 162
▫ Setting Memory Positions And Linking RKE
Transmitter To Memory ................ 163
▫ Easy Entry/Exit Seat
(Available With Memory Seat Only) ....... 166
� To Open And Close The Hood ............ 167
� Lights ............................. 168
▫ Interior Lighting ..................... 169
▫ Parking Lights ...................... 171
▫ Headlights ......................... 171
▫ Automatic Headlights — If Equipped ...... 171
112 UNDERSTANDING THE FEATURES OF YOUR VEHICLE
Page 117 of 573
�Parksense� Rear Park Assist — If Equipped . . . 186
▫ Parksense� Sensors................... 187
▫ Parksense� Warning Display ............ 187
▫ Parksense� Display................... 188
▫ Enabling/Disabling Parksense� .......... 191
▫ Service The Parksense� Rear Park Assist
System ............................ 192
▫ Cleaning The Parksense� System......... 192
▫ Parksense� System Usage Precautions ...... 192
� Parkview� Rear Back Up Camera —
If Equipped .......................... 195
▫ Turning Parkview� On Or Off —
With Navigation/Multimedia Radio ....... 197▫
Turning Parkview� On Or Off — Without
Navigation/Multimedia Radio ........... 198
� Overhead Consoles .................... 198
▫ Front Overhead Console ............... 198
▫ Courtesy/Interior Lighting ............. 199
▫ Sunglass Storage (Non-Sunroof Only) ...... 199
▫ Rear Courtesy/Reading Lights — If
Equipped .......................... 201
▫ Rear Overhead Consoles — If Equipped .... 201
� Garage Door Opener — If Equipped ........ 202
▫ Programming HomeLink� .............. 204
▫ Gate Operator/Canadian Programming .... 206
▫ Using HomeLink� ................... 207
114 UNDERSTANDING THE FEATURES OF YOUR VEHICLE
Page 172 of 573
Interior Lighting
Interior lights are turned on when a door or liftgate is
opened, the Remote Keyless Entry (RKE) transmitter is
activated, or when the dimmer control is moved to the
extreme top.
The interior lights will automatically turn off in approxi-
mately 10 minutes for the first activation and 90 seconds
every activation thereafter until the engine is started, if
one of the following occur:
•A door, sliding door or the liftgate is left open
•Any overhead reading light is left on
NOTE: The key must be out of the ignition switch or the
ignition switch must be in the OFF position for this
feature to operate.
Dimmer Switch
The dimmer switch is located to the right of the headlight
switch.
Interior Lighting Off
Rotate the dimmer control to the off position (extreme
bottom). The interior lights will remain off when the
doors or liftgate are open.
Dimmer Switch
3
UNDERSTANDING THE FEATURES OF YOUR VEHICLE 169
Page 173 of 573
Dimmer Control
With the parking lights or headlights on, rotating the
dimmer control for the interior lights on the instrument
panel upward will increase the brightness of the instru-
ment panel lights.
Parade Mode (Daytime Brightness Feature)
Rotate the dimmer control to the first detent. This feature
brightens the odometer, radio and overhead displays
when the parking lights or headlights are on.
Interior Lights On
Rotate the dimmer control completely upward to the
second detent (extreme top position) to turn on the
interior lights. The interior lights will remain on when the
dimmer control is in this position.
Halo Lights — If Equipped
Halo lights are strategically placed soft lighting that help
to illuminate specific areas to aid the occupants in
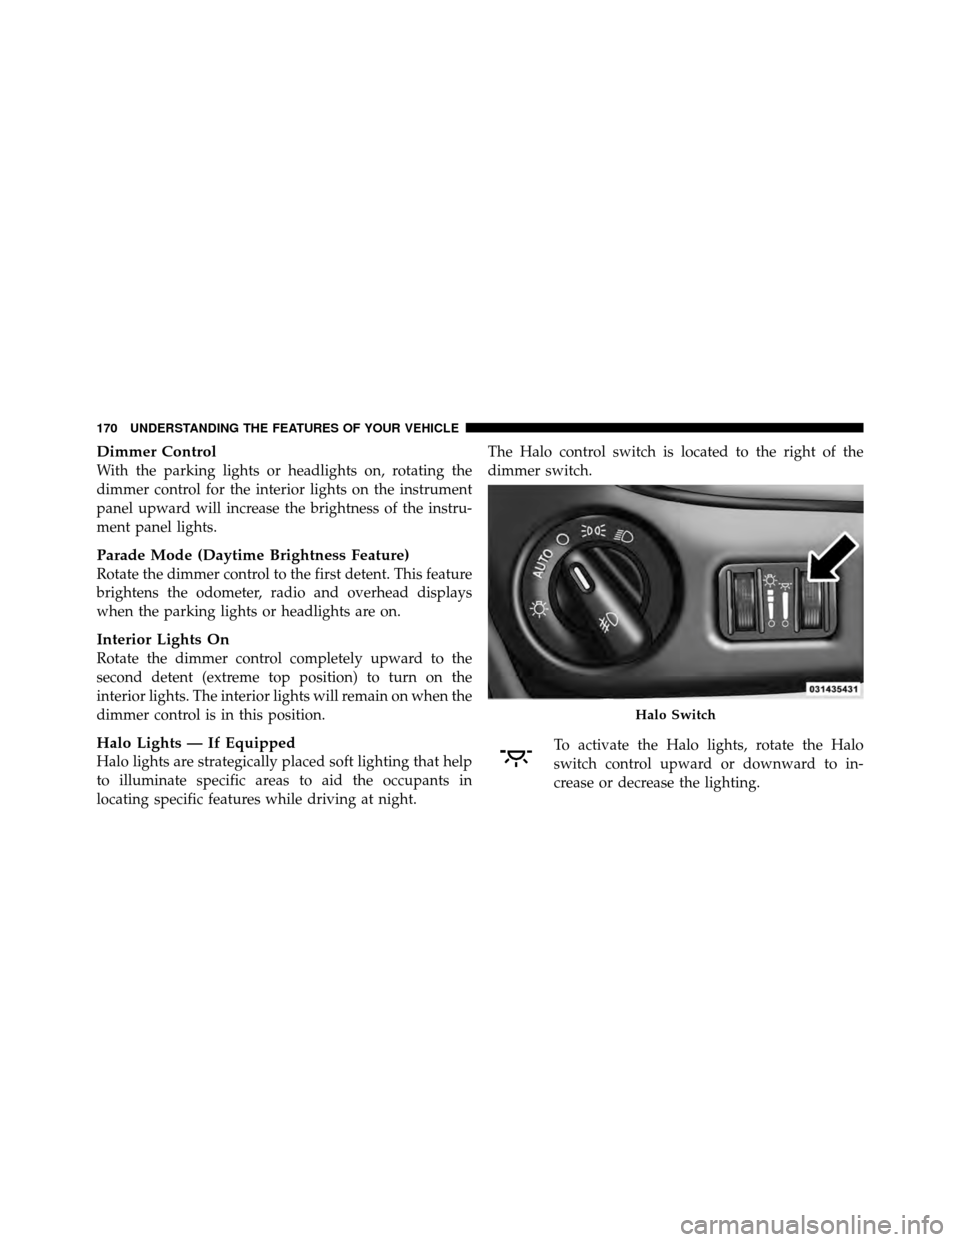
locating specific features while driving at night.The Halo control switch is located to the right of the
dimmer switch.
To activate the Halo lights, rotate the Halo
switch control upward or downward to in-
crease or decrease the lighting.
Halo Switch
170 UNDERSTANDING THE FEATURES OF YOUR VEHICLE
Page 202 of 573
Courtesy/Interior Lighting
At the forward end of the console are two courtesy lights
(standard dome light has two buttons). The lights turn on
when a front door, a sliding door or the liftgate is opened.
If your vehicle is equipped with Remote Keyless Entry
(RKE) the lights will also turn on when the UNLOCK
button on the RKE transmitter is pressed.
The courtesy lights also function as reading lights. Press
in on each lens to turn these lights on while inside the
vehicle. Press a second time to turn each light off. You
may adjust the direction of these lights by pressing the
outside ring, which is identified with four directional
arrows (LED lamps only).
The area around the instrument panel cupholders is also
illuminated from a light in the overhead console (pre-
mium console only). This light is turned on when the
headlight switch is on, and will adjust in brightness when
the dimmer control is rotated up or down.
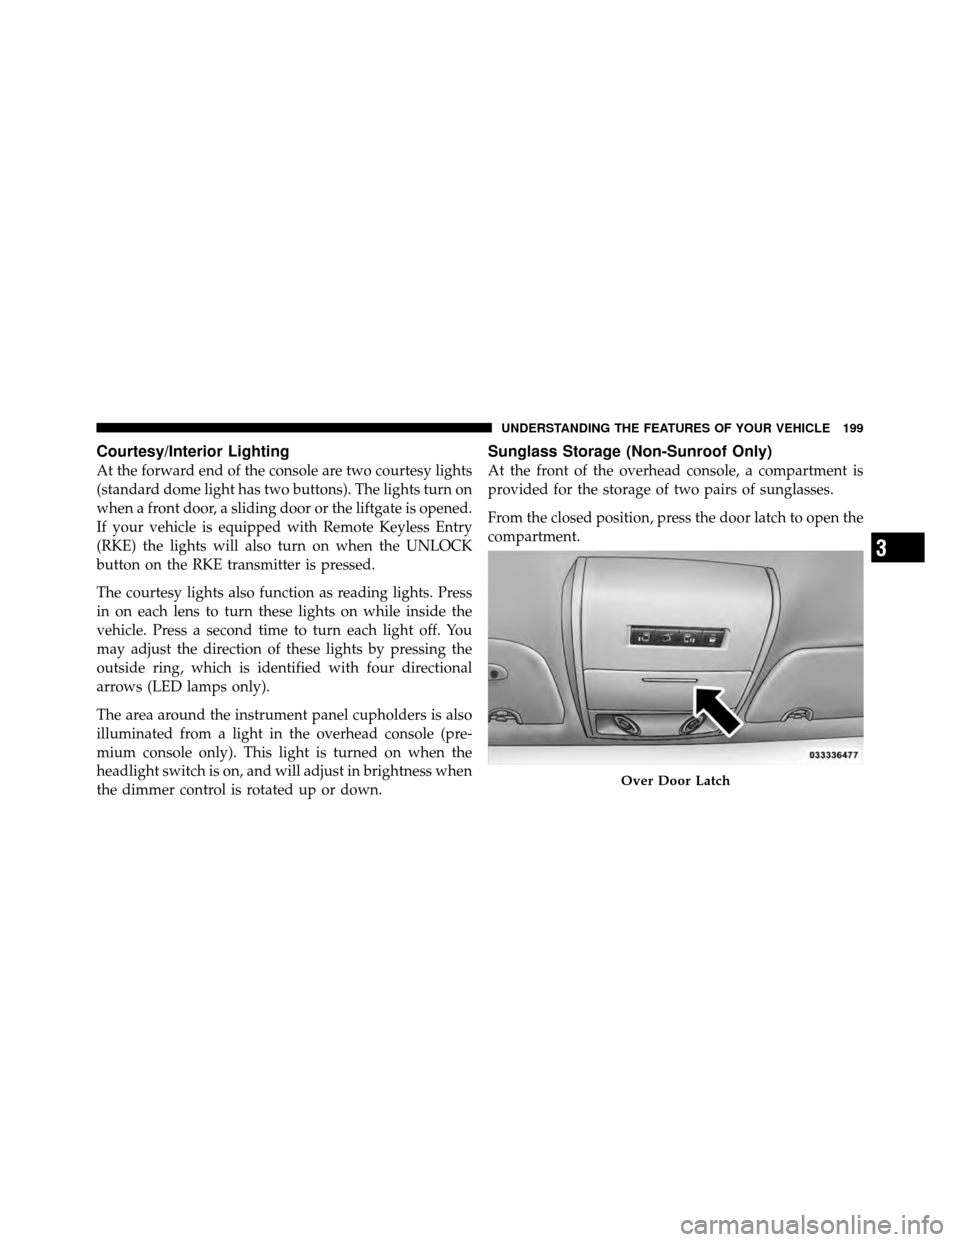
Sunglass Storage (Non-Sunroof Only)
At the front of the overhead console, a compartment is
provided for the storage of two pairs of sunglasses.
From the closed position, press the door latch to open the
compartment.
Over Door Latch
3
UNDERSTANDING THE FEATURES OF YOUR VEHICLE 199