Page 325 of 573
•Pressing a PRESET button will display the current
list on the top line and the first item in that list on
the second line.
•To exit List mode without selecting a track, press the
samePRESET button again to go back to Play
mode.
•LIST button: The LISTbutton will display the top
level menu of the iPod� or external USB device. Turn
the TUNE control knob to list the top-menu item to be
selected and press the TUNEcontrol knob. This will
display the next sub-menu list item on the audio
device, then follow the same steps to go to the desired
track in that list. Not all iPod� or external USB device
sub-menu levels are available on this system.
•MUSIC TYPE button: TheMUSIC TYPE button is
another shortcut button to the genre listing on your
audio device.
CAUTION!
•Leaving the iPod� or external USB device (or any
supported device) anywhere in the vehicle in
extreme heat or cold can alter the operation or
damage the device. Follow the device manufactur-
er ’s guidelines.
•Placing items on the iPod� or external USB device,
or connections to the iPod� or external USB device
in the vehicle, can cause damage to the device
and/or to the connectors.
WARNING!
Do not plug in or remove the iPod� or external USB
device while driving. Failure to follow this warning
could result in an accident.
322 UNDERSTANDING YOUR INSTRUMENT PANEL
Page 326 of 573

Bluetooth Streaming Audio (BTSA)
Music can be streamed from your cellular phone to the
Uconnect™ phone system.
Controlling BTSA Using Radio Buttons
To get into the BTSA mode, press either “AUX” button on
the radio or press the VR button and say “Bluetooth
Streaming Audio”.
Play Mode
When switched to BTSA mode, some audio devices can
start playing music over the vehicle’s audio system, but
some devices require the music to be initiated on the
device first, then it will get streamed to the Uconnect™
phone system. Seven devices can be paired to the
Uconnect™ phone system, but just one can be selected
and played.
Selecting Different Audio Device
1. Press PHONE button to begin.2. After the
�Ready�prompt and the following beep, say
�Setup�, then �Select Audio Devices�.
3. Say the name of the audio device or ask the
Uconnect™ phone system to list audio devices.
Next Track
Use the SEEK UP button, or press the VR button on the
radio and say “Next Track” to jump to the next track
music on your cellular phone.
Previous Track
Use the SEEK DOWN button, or press the VR button on
the radio and say “Previous Track” to jump to the
previous track music on your cellular phone.
Browse
Browsing is not available on a BTSA device. Only the
current song that is playing will display info.
4
UNDERSTANDING YOUR INSTRUMENT PANEL 323
Page 344 of 573
1. Air Conditioning (A/C) Button
Press and release to change the current Air Conditioning
(A/C) setting, the indicator illuminates when A/C is ON.
Performing this function will cause the ATC to switch
into manual mode.
2. Front Auto Indicator
This indicates when the system is in Front Auto mode.
3. Left Front Seat Occupant Temperature Display
This display shows the temperature setting for the left
front seat occupant.
4. Mode Display
This display shows the current Mode selection (Panel,
Bi-Level, Floor, Mix).
5. Blower Control Display
This display shows the current Blower speed selection.6. Right Front Seat Occupant Temperature Display
This display shows the temperature setting for the right
front seat occupant.
7. Rear Auto Indicator
This indicates when the system is in Rear Auto mode.
8. Front Defrost Button
Press and release to change the current setting, the
indicator illuminates when ON. Performing this function
will cause the ATC to switch into manual mode. The
blower will engage immediately if the Defrost mode is
selected.
9. Passenger Temperature Control Up/Down Button
Provides the passenger with independent temperature
control. Push the top button for warmer temperatures or
the lower button for cooler temperature settings.
4
UNDERSTANDING YOUR INSTRUMENT PANEL 341
Page 346 of 573
18. SYNC Button
Press and release to control the temperature setting for
both zones from the driver temperature control.
19. Driver Temperature Control Up/Down Button
Provides the driver with independent temperature con-
trol. Push the top button for warmer temperatures or the
lower button for cooler temperature settings.
Automatic Operation
1. Press the AUTO button on the front ATC Panel and the
words Front Auto will illuminate in the front ATC
display, along with two temperatures for the driver and
front passenger. The system will then automatically
regulate the amount of airflow.
2. Next, adjust the temperature you would like the
system to maintain, by adjusting the driver, front passen-
ger, and rear seat rotary temperature knobs. Once thedesired temperature is displayed, the system will achieve
and automatically maintain that comfort level.
3. When the system is set up for your comfort level, it is
not necessary to change the settings. You will experience
the greatest efficiency by simply allowing the system to
function automatically.
NOTE:
•It is not necessary to move the temperature settings for
cold or hot vehicles. The system automatically adjusts
the temperature, mode and fan speed to provide
comfort as quickly as possible.
•The temperature can be displayed in English or Metric
units by selecting the “Display Units of Measure in”
customer-programmable feature. Refer to the “Elec-
tronic Vehicle Information Center (EVIC) — Customer-
Programmable Features” in this Section.
4
UNDERSTANDING YOUR INSTRUMENT PANEL 343
Page 347 of 573
To provide you with maximum comfort in the automatic
mode, during cold start-ups, the blower fan will remain
on low until the engine warms up. The fan will engage
immediately if the DEFROST mode is selected, or by
changing the front blower knob setting
Manual Operation
This system offers a full complement of manual override
features. The AUTO symbol in the front ATC display will
be turned off when the system is being used in the
manual mode.
NOTE:Each of these features operate independently
from each other. If any one feature is controlled manually,
the temperature doors will continue to operate automati-
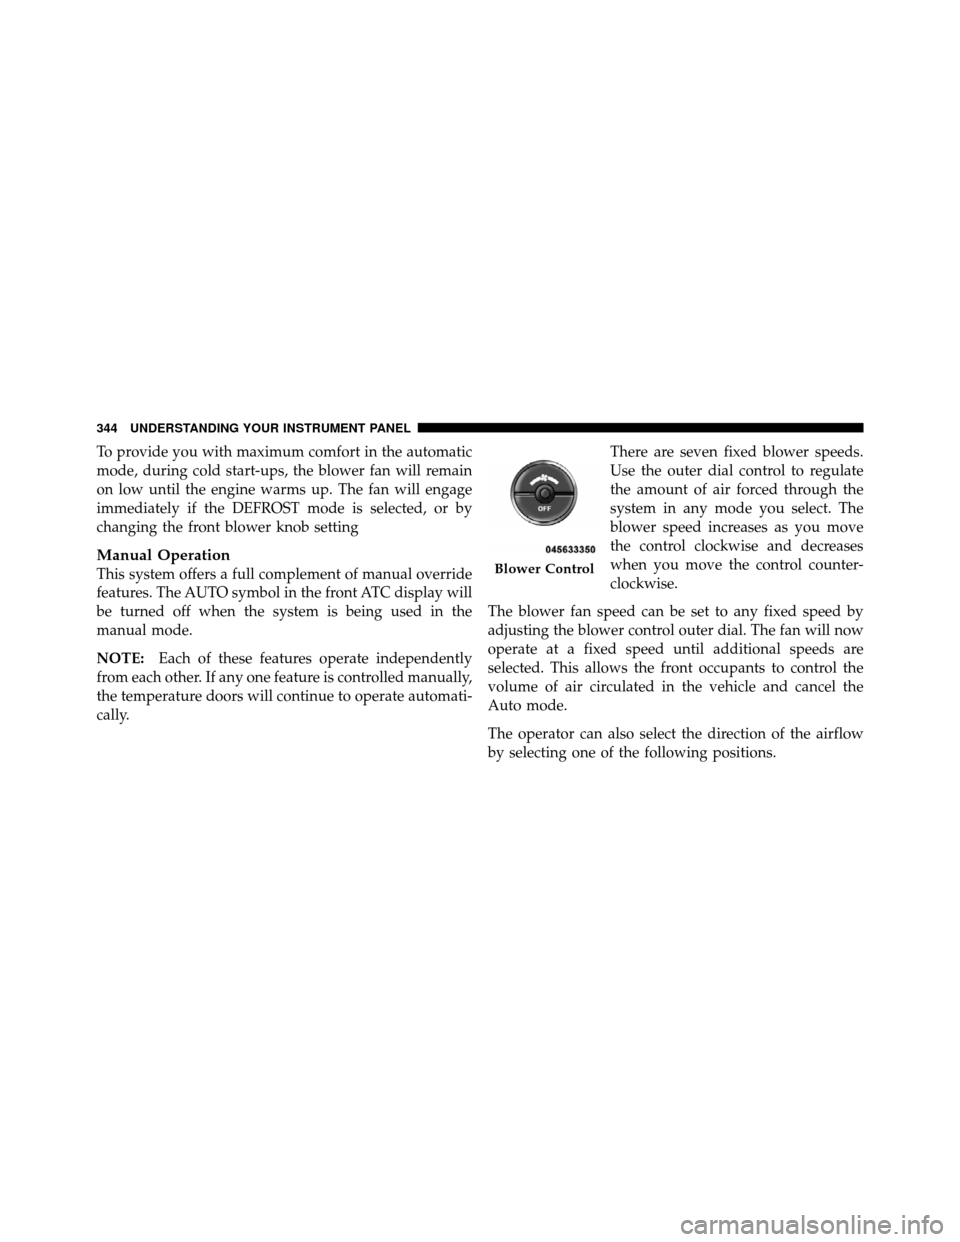
cally. There are seven fixed blower speeds.
Use the outer dial control to regulate
the amount of air forced through the
system in any mode you select. The
blower speed increases as you move
the control clockwise and decreases
when you move the control counter-
clockwise.
The blower fan speed can be set to any fixed speed by
adjusting the blower control outer dial. The fan will now
operate at a fixed speed until additional speeds are
selected. This allows the front occupants to control the
volume of air circulated in the vehicle and cancel the
Auto mode.
The operator can also select the direction of the airflow
by selecting one of the following positions.Blower Control
344 UNDERSTANDING YOUR INSTRUMENT PANEL
Page 349 of 573
Air Conditioning (A/C)
The Air Conditioning (A/C) button allows the operator
to manually activate or deactivate the air conditioning
system. When in A/C mode and the ATC is set to a cool
temperature, dehumidified air flows through the air
outlets. If Economy mode is desired, press the A/C
button to turn off the A/C mode in the ATC display and
deactivate the A/C system.
NOTE:
•If the system is in Mix, Floor or Defrost Mode, the A/C
can be turned off, but the A/C system shall remain
active to prevent fogging of the windows.
•If fog or mist appears on the windshield or side glass,
select Defrost mode and increase blower speed.
Recirculation Control
When outside air contains smoke, odors, or
high humidity, or if rapid cooling is desired,
you may wish to recirculate interior air by
pressing the RECIRCULATION control button.
RECIRCULATION mode should only be used temporar-
ily. A LED will illuminate on the RECIRCULATION
control button when RECIRCULATION mode is selected.
Push the button a second time to turn off the RECIRCU-
LATION mode LED and allow outside air into the
vehicle.
NOTE: In cold weather, use of the RECIRCULATION
mode may lead to excessive window fogging. The RE-
CIRCULATION mode is not allowed in the FLOOR, MIX
and DEFROST modes to improve window clearing op-
eration. Recirculation will be disabled automatically if
these modes are selected.
346 UNDERSTANDING YOUR INSTRUMENT PANEL
Page 350 of 573
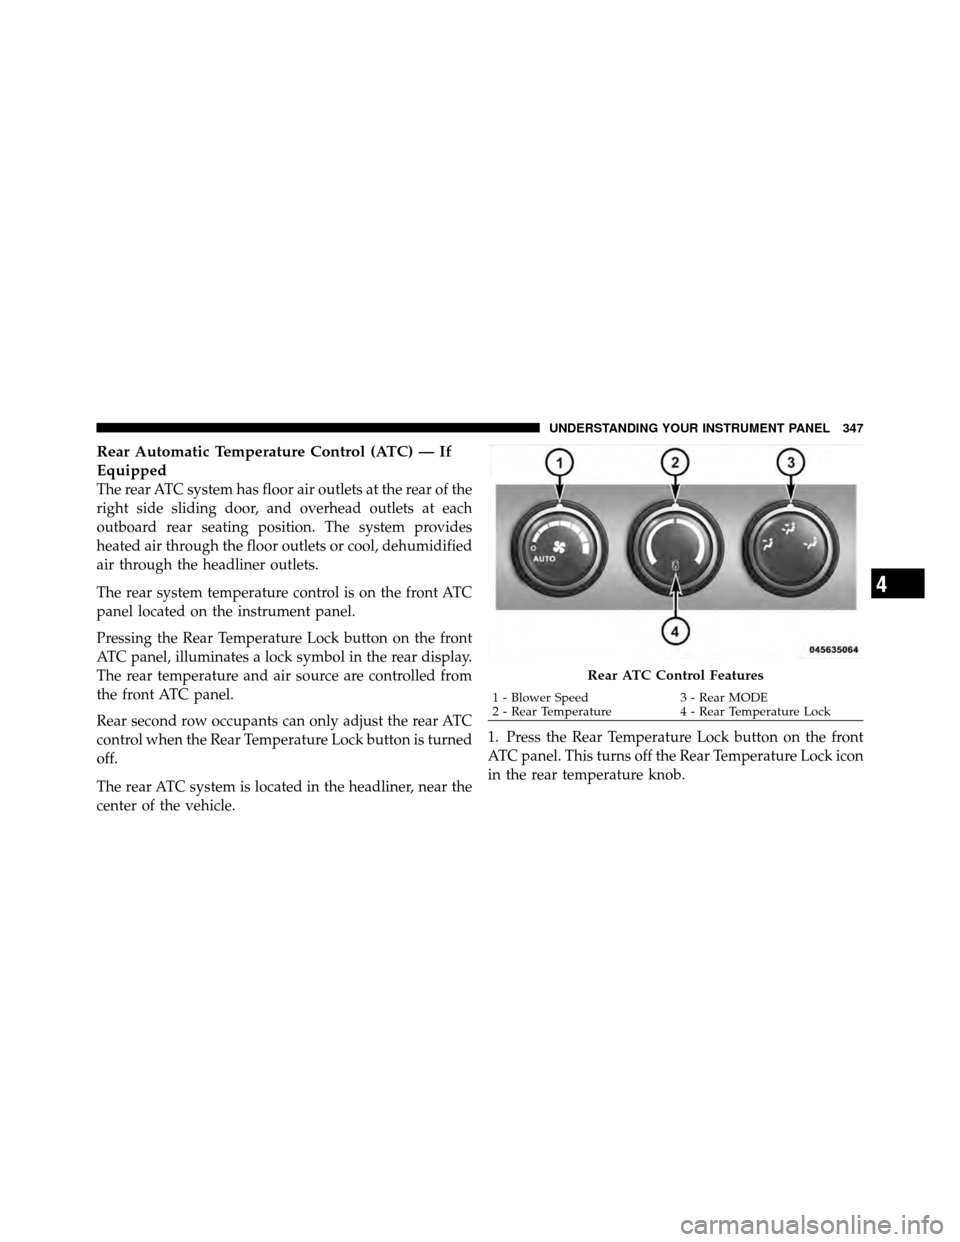
Rear Automatic Temperature Control (ATC) — If
Equipped
The rear ATC system has floor air outlets at the rear of the
right side sliding door, and overhead outlets at each
outboard rear seating position. The system provides
heated air through the floor outlets or cool, dehumidified
air through the headliner outlets.
The rear system temperature control is on the front ATC
panel located on the instrument panel.
Pressing the Rear Temperature Lock button on the front
ATC panel, illuminates a lock symbol in the rear display.
The rear temperature and air source are controlled from
the front ATC panel.
Rear second row occupants can only adjust the rear ATC
control when the Rear Temperature Lock button is turned
off.
The rear ATC system is located in the headliner, near the
center of the vehicle.1. Press the Rear Temperature Lock button on the front
ATC panel. This turns off the Rear Temperature Lock icon
in the rear temperature knob.
Rear ATC Control Features
1 - Blower Speed
3 - Rear MODE
2 - Rear Temperature 4 - Rear Temperature Lock
4
UNDERSTANDING YOUR INSTRUMENT PANEL 347
Page 351 of 573
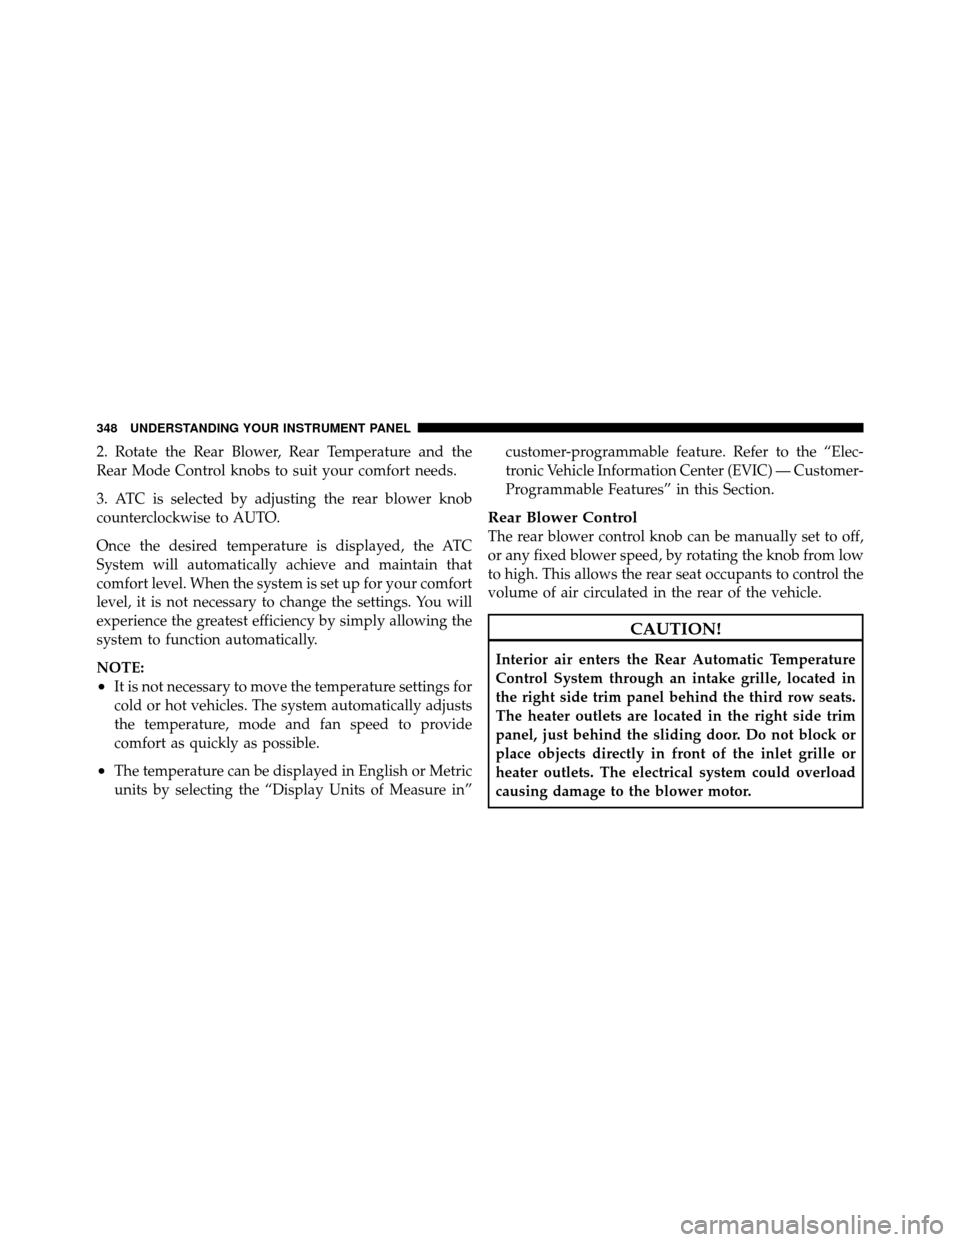
2. Rotate the Rear Blower, Rear Temperature and the
Rear Mode Control knobs to suit your comfort needs.
3. ATC is selected by adjusting the rear blower knob
counterclockwise to AUTO.
Once the desired temperature is displayed, the ATC
System will automatically achieve and maintain that
comfort level. When the system is set up for your comfort
level, it is not necessary to change the settings. You will
experience the greatest efficiency by simply allowing the
system to function automatically.
NOTE:
•It is not necessary to move the temperature settings for
cold or hot vehicles. The system automatically adjusts
the temperature, mode and fan speed to provide
comfort as quickly as possible.
•The temperature can be displayed in English or Metric
units by selecting the “Display Units of Measure in”customer-programmable feature. Refer to the “Elec-
tronic Vehicle Information Center (EVIC) — Customer-
Programmable Features” in this Section.
Rear Blower Control
The rear blower control knob can be manually set to off,
or any fixed blower speed, by rotating the knob from low
to high. This allows the rear seat occupants to control the
volume of air circulated in the rear of the vehicle.
CAUTION!
Interior air enters the Rear Automatic Temperature
Control System through an intake grille, located in
the right side trim panel behind the third row seats.
The heater outlets are located in the right side trim
panel, just behind the sliding door. Do not block or
place objects directly in front of the inlet grille or
heater outlets. The electrical system could overload
causing damage to the blower motor.
348 UNDERSTANDING YOUR INSTRUMENT PANEL