Page 352 of 573

Rear Temperature Control
To change the temperature in the rear of the vehicle,
rotate the temperature knob counterclockwise to lower
the temperature, and clockwise to increase the tempera-
ture. The rear temperature settings are displayed in the
front ATC panel.
When rear controls are locked by the front system, the
Rear Temperature Lock symbol on the temperature knob
is illuminated and any rear overhead adjustments are
ignored.
Rear Mode Control
Auto Mode
The rear system automatically maintains the correct
mode and comfort level desired by the rear seat occu-
pants.Headliner Mode
Air comes from the outlets in the headliner. Each of
these outlets can be individually adjusted to direct
the flow of air. Moving the air vanes of the outlets to one
side will shut off the airflow.
Bi-Level Mode Air comes from both the headliner outlets and the
floor outlets.
NOTE: In many temperature positions, the BI-LEVEL
mode is designed to provide cooler air out of the head-
liner outlets and warmer air from the floor outlets.
Floor Mode Air comes from the floor outlets.
Summer Operation
The engine cooling system in air conditioned vehicles
must be protected with a high-quality antifreeze coolant
4
UNDERSTANDING YOUR INSTRUMENT PANEL 349
Page 362 of 573

NOTE:The ENGINE START/STOP button should only
be removed or inserted with the ignition in the LOCK
position (OFF position for Keyless Enter-N-Go).
Normal Starting
Using The ENGINE START/STOP Button
NOTE: Normal starting of either a cold or a warm
engine is obtained without pumping or pressing the
accelerator pedal.
To start the engine, the transmission must be in PARK or
NEUTRAL. Press and hold the brake pedal while press-
ing the ENGINE START/STOP button once. The system
takes over and attempts to start the vehicle. If the vehicle
fails to start, the starter will disengage automatically after
10 seconds. If you wish to stop the cranking of the engine
prior to the engine starting, press the button again.
To Turn Off The Engine Using ENGINE
START/STOP Button
1. Place the shift lever in PARK, then press and release
the ENGINE START/STOP button.
2. The ignition switch will return to the OFF position.
3. If the shift lever is not in PARK, the ENGINE START/
STOP button must be held for two seconds and vehicle
speed must be above 5 mph (8 km/h) before the engine
will shut off. The ignition switch position will remain in
the ACC position until the shift lever is in PARK and the
button is pressed twice to the OFF position. If the shift
lever is not in PARK and the ENGINE START/STOP
button is pressed once, the EVIC (if equipped) will
display a “Vehicle Not In Park” message and the engine
will remain running. Never leave a vehicle out of the
PARK position, or it could roll.
5
STARTING AND OPERATING 359
Page 363 of 573
NOTE:If the ignition switch is left in the ACC or RUN
(engine not running) position and the transmission is in
PARK, the system will automatically time out after
30 minutes of inactivity and the ignition will switch to the
OFF position.
Keyless Enter-N-Go Functions – With Driver ’s Foot
OFF The Brake Pedal (In PARK Or NEUTRAL
Position)
The Keyless Enter-N-Go feature operates similar to an
ignition switch. It has four positions, OFF, ACC, RUN
and START. To change the ignition switch positions
without starting the vehicle and use the accessories
follow these steps.
•Starting with the ignition switch in the OFF position:
•Press the ENGINE START/STOP button once to
change the ignition switch to the ACC position (EVIC
displays “IGNITION MODE ACCESSORY”),
•Press the ENGINE START/STOP button a second time
to change the ignition switch to the RUN position
(EVIC displays “IGNITION MODE RUN”),
•Press the ENGINE START/STOP button a third time
to return the ignition switch to the OFF position (EVIC
displays “IGNITION MODE OFF”).
Extreme Cold Weather (Below –20°F or �29°C)
To ensure reliable starting at these temperatures, use of
an externally powered electric engine block heater (avail-
able from your authorized dealer) is recommended.
360 STARTING AND OPERATING
Page 369 of 573
The electronically-controlled transmission provides a
precise shift schedule. The transmission electronics are
self-calibrating; therefore, the first few shifts on a new
vehicle may be somewhat abrupt. This is a normal
condition, and precision shifts will develop within a few
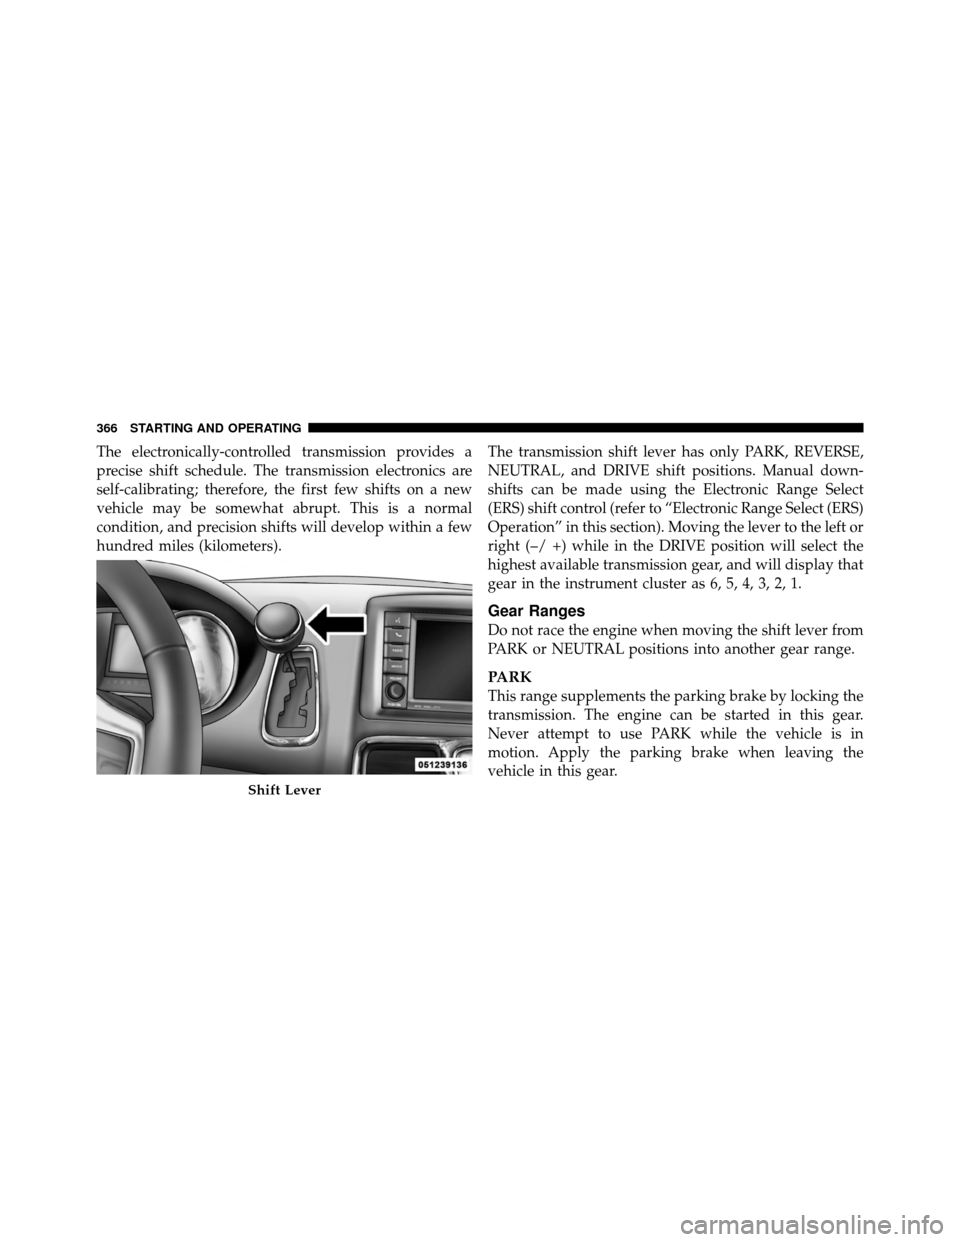
hundred miles (kilometers).The transmission shift lever has only PARK, REVERSE,
NEUTRAL, and DRIVE shift positions. Manual down-
shifts can be made using the Electronic Range Select
(ERS) shift control (refer to “Electronic Range Select (ERS)
Operation” in this section). Moving the lever to the left or
right (–/ +) while in the DRIVE position will select the
highest available transmission gear, and will display that
gear in the instrument cluster as 6, 5, 4, 3, 2, 1.
Gear Ranges
Do not race the engine when moving the shift lever from
PARK or NEUTRAL positions into another gear range.
PARK
This range supplements the parking brake by locking the
transmission. The engine can be started in this gear.
Never attempt to use PARK while the vehicle is in
motion. Apply the parking brake when leaving the
vehicle in this gear.
Shift Lever
366 STARTING AND OPERATING
Page 372 of 573
WARNING!
Do not coast in NEUTRAL and never turn off the
ignition to coast down a hill. These are unsafe
practices that limit your response to changing traffic
or road conditions. You might lose control of the
vehicle and have a collision.
DRIVE
This range should be used for most city and highway
driving. It provides the smoothest upshifts, downshifts,
and best fuel economy. However, when frequent trans-
mission shifting occurs, such as when operating the
vehicle under heavy loading conditions, (i.e., in hilly
terrain, traveling into strong head winds or while towing
heavy trailers), use the Electronic Range Select (ERS)
mode to select the “5” range. Under these conditions,
using the “5” range will improve performance and
extend transmission life by reducing excessive shifting
and heat buildup.
Electronic Range Select (ERS) Operation
The Electronic Range Select (ERS) shift control allows
you to move the shift lever to the left (-) or right (+) when
the shift lever is in the DRIVE position, this allows the
selection of the desired top gear. For example, if you shift
the transmission into third gear, the transmission will
never shift above third gear, but can shift down into
second or first gear automatically, when needed.
Switching from ERS to DRIVE can be done at any vehicle
speed. To shift from DRIVE mode to ERS mode, move the
shift lever to the left (-) once. The current gear will be
maintained as the top gear. To disable ERS, simply press
and hold the shift lever to the right (+) until “D” is
displayed in the instrument cluster odometer.
5
STARTING AND OPERATING 369
Page 373 of 573
WARNING!
Do not downshift for additional engine braking on a
slippery surface. The drive wheels could lose their
grip and the vehicle could skid, causing a collision or
personal injury.
Odometer
Screen Display123456D
Actual Gear(s)
Allowed 1 1-2 1-3 1-4 1-5 1-6 1-6
NOTE: To select the proper gear position for maximum
deceleration (engine braking), simply press and hold the
shift lever to the left (-). The transmission will shift to the
range from which the vehicle can best be slowed down.
Reset Mode – Electronic Transmission
The transmission is monitored electronically for abnor-
mal conditions. If a condition is detected that could cause
damage, the transmission automatically shifts into third gear. The transmission remains in third gear despite the
forward gear selected. PARK, REVERSE, and NEUTRAL
will continue to operate. This Reset feature allows the
vehicle to be driven to an authorized dealer for service
without damaging the transmission.
In the event of a momentary problem, the transmission
can be reset to regain all forward gears by performing the
following steps:
1. Stop the vehicle.
2. Shift into PARK.
3. Turn the ignition switch to the LOCK position.
4. Restart the engine.
5. Shift into the desired gear range and resume driving.
NOTE:
Even if the transmission can be reset, it is
recommended that you visit an authorized dealer at your
earliest possible convenience.
370 STARTING AND OPERATING
Page 413 of 573
•Seasonal temperature changes will affect tire pressure,
and the TPMS will monitor the actual tire pressure in
the tire.
Base System
The TPMS uses wireless technology with wheel rim
mounted electronic sensors to monitor tire pressure lev-
els. Sensors, mounted to each wheel as part of the valve
stem, transmit tire pressure readings to the Receiver
Module.
NOTE:It is particularly important for you to check the
tire pressure in all of your tires regularly and to maintain
the proper pressure.
The Basic TPMS consists of the following components:
•Receiver Module
•Four Tire Pressure Monitoring Sensors
•TPMS Telltale Warning Light
Tire Pressure Monitoring Low Tire Pressure
Warnings
The “Tire Pressure Monitoring Telltale Light”
will illuminate in the instrument cluster, a
�TIRE LOW PRESSURE� message will display
in the instrument cluster, and an audible chime
will be activated when one or more of the four active
road tire pressures are low. Should this occur, you should
stop as soon as possible, check the inflation pressure of
each tire on your vehicle, and inflate each tire to the
vehicle’s recommended cold tire pressure value (located
on the placard on the driver’s-side B-Pillar). The system
will automatically update and the “Tire Pressure Moni-
toring Telltale Light” will extinguish once the updated
tire pressures have been received.
NOTE: The vehicle may need to be driven for up to
20 minutes above 15 mph (24 km/h) to receive this
information.
410 STARTING AND OPERATING
Page 415 of 573
5. Once you repair or replace the original road tire and
reinstall it on the vehicle in place of the compact spare
tire, the TPMS will automatically update, and the “Tire
Pressure Monitoring Telltale Light” will turn off as long
as no tire pressure is below the low-pressure warning
limit in any of the four active road tires. The vehicle may
need to be driven for up to 20 minutes above 15 mph
(24 km/h) for the TPMS to receive this information.
Premium System – If Equipped
The TPMS uses wireless technology with wheel rim-
mounted electronic sensors to monitor tire pressure lev-
els. Sensors mounted to each wheel as part of the valve
stem transmit tire pressure readings to the Receiver
Module.
NOTE:It is particularly important to regularly check
and maintain proper tire pressure in all the tires. The Premium TPMS consists of the following compo-
nents:
•Receiver Module
•Four TPMS Sensors
•Various TPMS messages, which display in the Elec-
tronic Vehicle Information Center (EVIC), and graph-
ics displaying tire pressures
•TPMS Telltale Warning Light
TPMS Low Pressure Warnings
The “Tire Pressure Monitoring Telltale Light” will illumi-
nate in the instrument cluster, and an audible chime will
be activated when one or more of the four active road tire
pressures are low. In addition, the EVIC will display a
“LOW TIRE PRESSURE” message for a minimum of five
seconds and a graphic display of the pressure value(s)
with the low tire(s) flashing.
412 STARTING AND OPERATING