2011 CHRYSLER TOWN AND COUNTRY change time
[x] Cancel search: change timePage 26 of 573
Sound Horn With Remote Lock
This feature will cause the horn to chirp when the doors
are locked with the RKE transmitter. This feature can be
turned on or turned off. To change the current setting,
proceed as follows:
•For vehicles equipped with the EVIC, refer to “Elec-
tronic Vehicle Information Center (EVIC)/Personal
Settings (Customer-Programmable Features)” in “Un-
derstanding Your Instrument Panel” for further infor-
mation.
•For vehicles not equipped with the EVIC, perform the
following steps:
1. Perform this operation while standing outside the
vehicle. 2. Press the LOCK button on a programmed RKE trans-
mitter for at least 4 seconds, but no longer than 10 sec-
onds. Then, press the PANIC button while still holding
the LOCK button.
3. Release both buttons at the same time.
4. Test the feature while outside of the vehicle by press-
ing the LOCK button on the RKE transmitter with the
ignition switch in the OFF position and the Key Fob
removed.
5. Repeat these steps if you want to return this feature to
its previous setting.
NOTE:
Pressing the LOCK button on the RKE transmit-
ter while you are in the vehicle will activate the Vehicle
Security Alarm. Opening a door with the Vehicle Security
Alarm activated will cause the alarm to sound. Press the
UNLOCK button to deactivate the Vehicle Security
Alarm.
2
THINGS TO KNOW BEFORE STARTING YOUR VEHICLE 23
Page 40 of 573
4. Within 15-seconds, cycle the ignition Key Fob from the
OFF position to the ON/RUN position a minimum of
five times ending in the ON/RUN position(do not start
the engine).
5. Within 30 seconds, press the driver’s door lock switch
in the UNLOCK direction.
6. A single chime will sound to indicate the feature has
been changed.
7. To reactivate this feature, repeat the above steps.
8. If a chime is not heard, the program mode was
canceled before the feature could be changed. If neces-
sary, repeat the previous procedure.
The Unlock Doors Automatically On Exit feature can be
reactivated by repeating the above mentioned procedure
or by performing the procedure in the EVIC, Customer-
Programmable Features on vehicles so equipped. NOTE:
Use the Lock Doors Automatically at 15 mph
(24 km/h) and Unlock Doors Automatically On Exit
features in accordance with local laws.
KEYLESS ENTER-N-GO
The Passive Entry system is an enhancement to the
vehicle’s Remote Keyless Entry (RKE) system and a
feature of Keyless Enter-N-Go. This feature allows you to
lock and unlock the vehicle’s door(s) without having to
press the RKE transmitter lock or unlock buttons.
NOTE:
•Passive Entry may be programmed ON/OFF; refer to
“Electronic Vehicle Information Center (EVIC)/
Personal Settings (Customer-Programmable Fea-
tures)” in “Understanding Your Instrument Panel” for
further information.
2
THINGS TO KNOW BEFORE STARTING YOUR VEHICLE 37
Page 109 of 573
Exhaust Gas
WARNING!
Exhaust gases can injure or kill. They contain carbon
monoxide (CO), which is colorless and odorless.
Breathing it can make you unconscious and can
eventually poison you. To avoid breathing (CO),
follow these safety tips:
Do not run the engine in a closed garage or in confined
areas any longer than needed to move your vehicle in or
out of the area.
If it is necessary to sit in a parked vehicle with the engine
running, adjust your heating or cooling controls to force
outside air into the vehicle. Set the blower at high speed. If you are required to drive with the liftgate open, make
sure that all windows are closed and the climate control
BLOWER switch is set at high speed. DO NOT use the
recirculation mode.
The best protection against carbon monoxide entry into
the vehicle body is a properly maintained engine exhaust
system.
Whenever a change is noticed in the sound of the exhaust
system, when exhaust fumes can be detected inside the
vehicle, or when the underside or rear of the vehicle is
damaged, have a competent mechanic inspect the com-
plete exhaust system and adjacent body areas for broken,
damaged, deteriorated, or mispositioned parts. Open
seams or loose connections could permit exhaust fumes
to seep into the passenger compartment. In addition,
inspect the exhaust system each time the vehicle is raised
for lubrication or oil change. Replace as required.
106 THINGS TO KNOW BEFORE STARTING YOUR VEHICLE
Page 126 of 573
•The BSM system detection zone DOES NOT change if
your vehicle is towing a trailer. Therefore, visually
verify the adjacent lane is clear for both your vehicle
and trailer before making a lane change. If the trailer
or other object (i.e., bicycle, sports equipment) extends
beyond the side of your vehicle, this may result in the
BSM warning light remaining illuminated the entire
time the vehicle is in a forward gear.
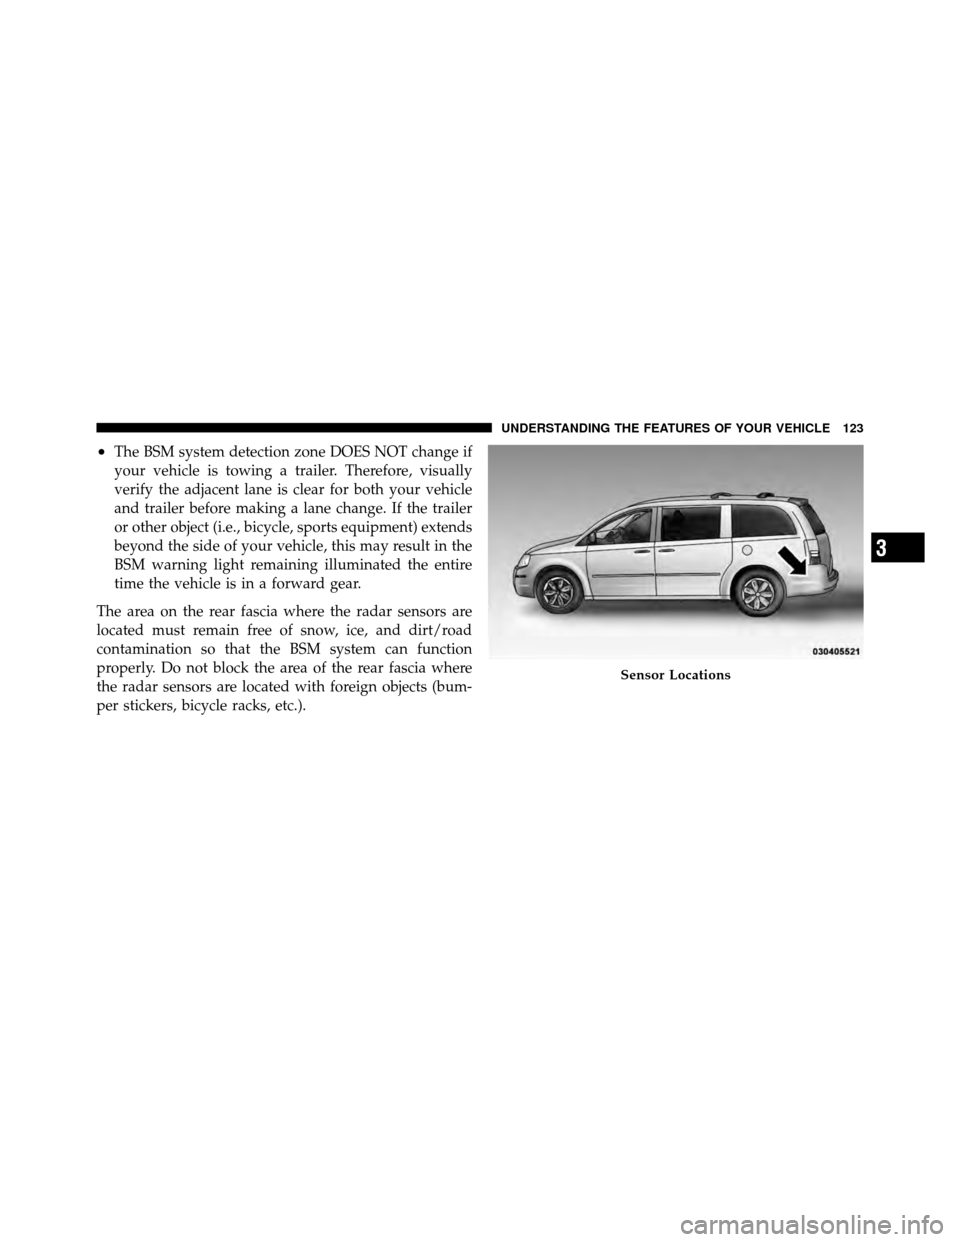
The area on the rear fascia where the radar sensors are
located must remain free of snow, ice, and dirt/road
contamination so that the BSM system can function
properly. Do not block the area of the rear fascia where
the radar sensors are located with foreign objects (bum-
per stickers, bicycle racks, etc.).
Sensor Locations
3
UNDERSTANDING THE FEATURES OF YOUR VEHICLE 123
Page 138 of 573
Vehicles Equipped With Remote Start
On models that are equipped with remote start, the
driver ’s heated seat and Heated Steering Wheel can be
programmed to come on during a remote start. Refer to
“Remote Starting System — If Equipped” in “Things To
Know Before Starting Your Vehicle” for further
information.
Front Heated Seats
There are two heated seat switches that allow the driver
and passenger to operate the seats independently. The
controls for each heater are located on the switch bank
below the climate controls.
You can choose from HIGH, LOW or OFF heat settings.
Amber indicator lights in each switch indicate the level of
heat in use. Two indicator lights will illuminate for
HIGH, one for LOW and none for OFF.Press the switch once to select HIGH-level
heating. Press the switch a second time to select
LOW-level heating. Press the switch a third
time to shut the heating elements OFF.
NOTE: Once a heat setting is selected, heat will be felt
within two to five minutes.
When the HIGH-level setting is selected, the heater will
provide a boosted heat level during the initial stages of
operation. Then, the heat output will drop to the normal
HIGH-level. If the HIGH-level setting is selected, the
system will automatically switch to LOW-level after
approximately 30 minutes of continuous operation. At
that time, the number of illuminated LEDs changes from
two to one, indicating the change. The LOW-level setting
will turn OFF automatically after approximately
45 minutes.
3
UNDERSTANDING THE FEATURES OF YOUR VEHICLE 135
Page 139 of 573
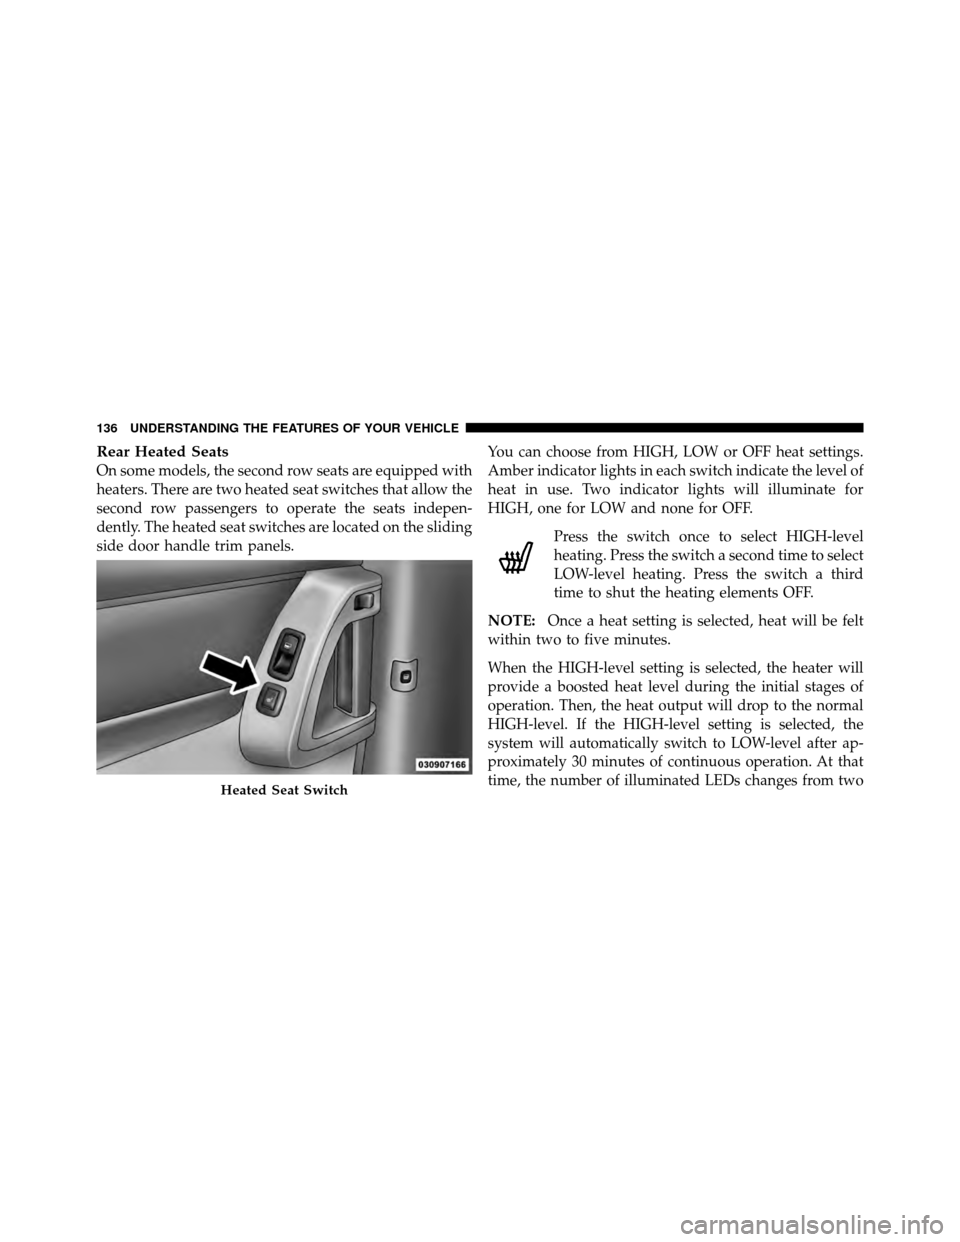
Rear Heated Seats
On some models, the second row seats are equipped with
heaters. There are two heated seat switches that allow the
second row passengers to operate the seats indepen-
dently. The heated seat switches are located on the sliding
side door handle trim panels.You can choose from HIGH, LOW or OFF heat settings.
Amber indicator lights in each switch indicate the level of
heat in use. Two indicator lights will illuminate for
HIGH, one for LOW and none for OFF.
Press the switch once to select HIGH-level
heating. Press the switch a second time to select
LOW-level heating. Press the switch a third
time to shut the heating elements OFF.
NOTE: Once a heat setting is selected, heat will be felt
within two to five minutes.
When the HIGH-level setting is selected, the heater will
provide a boosted heat level during the initial stages of
operation. Then, the heat output will drop to the normal
HIGH-level. If the HIGH-level setting is selected, the
system will automatically switch to LOW-level after ap-
proximately 30 minutes of continuous operation. At that
time, the number of illuminated LEDs changes from two
Heated Seat Switch
136 UNDERSTANDING THE FEATURES OF YOUR VEHICLE
Page 174 of 573
Parking Lights
Turn the headlight switch knob to the first detent
to turn the parking lights on. This also turns on all
instrument panel lighting.
Headlights
Turn the headlight switch knob to the second
detent to turn the headlights and parking lights
on. This also turns on all instrument panel
lighting.
To change the brightness of the instrument panel lights,
rotate the dimmer control up or down.
Automatic Headlights — If Equipped
This system automatically turns your headlights on or off
based on ambient light levels. To turn the system on, turn
the headlight switch to the extreme counterclockwise
position aligning the indicator with AUTO on the head-
light switch. When the system is on, the Headlight Time
Delay feature is also on. This means your headlights will stay on for up to 90 seconds after you turn the ignition
switch OFF. To turn the Automatic System off, turn the
headlight switch clockwise to the O (Off) position.
NOTE:
The engine must be running before the head-
lights will come on in the Automatic mode.
Headlights On With Wipers — If Equipped
When your headlights are in the Automatic mode and the
engine is running, the headlights will automatically turn
on when the wiper system is also turned on. Headlights
on when windshield wipers are on may be found on
vehicles equipped with an automatic headlight system.
Refer to “Electronic Vehicle Information Center (EVIC)/
Customer-Programmable Features” in “Understanding
Your Instrument Panel” for further information.
Headlight Delay — If Equipped
This feature provides the safety of headlight illumination
for up to 90 seconds after exiting your vehicle.
3
UNDERSTANDING THE FEATURES OF YOUR VEHICLE 171
Page 175 of 573

To activate the delay feature, turn OFF the ignition switch
while the headlights are still on. Then turn off the
headlights within 45 seconds. The 90 second delay inter-
val begins when headlight switch is turned off. If the
headlights or parking lights are turned back on or the
ignition switch is turned ON, the delay will be cancelled.
When exiting the vehicle the driver can choose to have
the headlights remain on for 30, 60, or 90 seconds or not
remain on. To change the timer setting, see your autho-
rized dealer.
The headlight delay time is programmable on vehicles
equipped with an EVIC. Refer to “Electronic Vehicle
Information Center (EVIC)/Customer-Programmable
Features” in “Understanding Your Instrument Panel” for
further information.
If the headlights are turned off before the ignition, they
will turn off in the normal manner.NOTE:
The headlights must be turned off within 45 sec-
onds of turning the ignition OFF to activate this feature.
Lights-On Reminder
If the headlights or the parking lights are left on, or if the
dimmer control is in the extreme top position after the
ignition switch is turned OFF, a chime will sound when
the driver’s door is opened.
Daytime Running Lights — If Equipped
The headlights on your vehicle will illuminate when the
engine is started and the transmission is in any gear
except PARK. This provides a constant lights on condi-
tion until the ignition is turned OFF. The lights illuminate
at less than 50% of normal intensity. If the parking brake
is applied, the Daytime Running Lights (DRL) will turn
off. Also, if a turn signal is activated, the DRL lamp on the
same side of the vehicle will turn off for the duration of
the turn signal activation. Once the turn signal is no
longer active, the DRL lamp will illuminate.
172 UNDERSTANDING THE FEATURES OF YOUR VEHICLE