2011 CHEVROLET MALIBU clock
[x] Cancel search: clockPage 159 of 382
Black plate (5,1)Chevrolet Malibu Owner Manual - 2011
Infotainment System 7-5
EQ (Equalization):Press this
button to choose bass and treble
equalization settings designed for
different types of music. Selecting
MANUAL or changing bass or
treble, returns the EQ to the manual
bass and treble settings.
Unique EQ settings can be saved
for each source.
If the radio has a Bose
®audio
system, the EQ settings are either
MANUAL or TALK.
Adjusting the Speakers
(Balance/Fade) Radio with CD
To adjust the balance or fade:
1. Press the
`or press the
fknob until the speaker
control label displays. 2. To adjust the setting, do one of
the following:
.Turn thefknob.
.Press either¨SEEK, or
©SEEK button.
.Press either\FWD,
or
sREV button.
Adjusting the Speakers
(Balance/Fade) Radio with CD
(MP3) and USB Port, Radio
with CD (MP3)
BAL/FADE (Balance/Fade):
To adjust the balance or fade:
1. Press the
fknob until
the speaker control
tabs display. 2. Highlight the desired speaker
control tab by doing one of the
following:
.Pressing thefknob.
.Press the softkey under the
desired tab.
3. Adjust the setting by doing one of the following:
.Turn thefknob clockwise
or counterclockwise.
.Press the¨SEEK, or
©SEEK button.
.Press the\FWD,
or
sREV button.
To quickly adjust all speaker and
tone controls to the middle position,
press the
fknob for more than
2 seconds.
If the Rear Seat Audio (RSA) is
turned on, the radio disables FADE
and mutes the rear speakers.
Page 186 of 382
Black plate (2,1)Chevrolet Malibu Owner Manual - 2011
8-2 Climate Controls
Operation
Temperature Control:Turn
clockwise or counterclockwise
to increase or decrease the
temperature inside the vehicle.
When it is cold outside −18°C (0°F)
or lower, use the engine coolant
heater, if vehicle has one, to provide
warmer air faster to the vehicle. An
engine coolant heater warms the
coolant the engine uses that
provides heat to warm the inside of
the vehicle. For more information,
see Engine Heater on page 9‑21.
9(Fan Control): Turn clockwise
or counterclockwise to increase
or decrease the fan speed. The
fan must be on to run the
air-conditioning compressor.
Air Delivery Mode Control: Turn
clockwise or counterclockwise to
change the current airflow mode. Select from the following:
H(Vent):
Air is directed to
the instrument panel outlets.
)(Bi-Level): Air is divided
between the instrument panel and
floor outlets. Some air will be
directed toward the side windows.
6(Floor): Air is directed to the
floor outlets with some air directed
to the windshield and side window
outlets.
-(Defog): This mode clears the
windows of fog or moisture. Air is
directed to the windshield and floor
outlets, with some air directed to the
side windows. When this mode is
selected, the system automatically
turns off recirculation and runs the
air-conditioning compressor unless
the outside temperature is at or
below freezing. The air-conditioning
compressor operates although the
indicator light is not on. The
air-conditioning indicator light turns
off when defog is selected. If the air-conditioning button is pressed
while in defog mode, the indicator
light will turn on. If the button is
pressed again, the light will turn off.
The recirculation mode cannot be
selected while in the defog mode.
Do not drive the vehicle until all the
windows are clear.
1(Defrost):
This mode quickly
clears the windshield of fog or frost.
Air is directed to the windshield with
some air directed to the floor vents.
In this mode, outside air is pulled
into the vehicle. The air-conditioning
compressor will not run unless the
outside temperature is at or below
freezing. The air-conditioning
compressor operates although the
indicator light is not on. The
air-conditioning indicator light turns
off when defrost is selected. If the
air-conditioning button is pressed
while in defrost mode, the indicator
light turns on. If the button is
pressed again, the light turns off.
Recirculation cannot be selected
while in the defrost mode.
Page 190 of 382
Black plate (6,1)Chevrolet Malibu Owner Manual - 2011
8-6 Climate Controls
2. Set the temperature.An initial setting of 73°F (23°C)
is recommended. Allow about
20 minutes for the system to
regulate. Press
worxto
adjust the temperature setting as
necessary. If the temperature is
set at 60°F (15°C) the system
remains at the maximum cooling
setting. If the temperature is set
at 90°F (32°C) the system
remains at the maximum heat
setting. Choosing either
maximum setting does not
cause the vehicle to heat or
cool any faster.
Do not to cover the sensor
located on the top of the
instrument panel near the
windshield. This sensor
regulates air temperature based
on the intensity of the sun.
Also do not cover the sensor
grille on the lower right side of
the climate control faceplate, as
this regulates the inside
temperature. To avoid blowing cold air at
engine start-up in cold weather,
the system delays turning on the
fan until warm air is available.
The length of delay depends on
the engine coolant temperature.
Turning the fan knob overrides
this delay and changes the fan
to the selected speed.
Manual Operation
9(Off):
Select this position on the
fan knob to turn off the entire
climate control system. Outside air
still enters the vehicle. The airflow
direction and temperature can be
adjusted.
x/wTemperature Control:
Press the arrows to increase or
decrease the temperature inside the
vehicle.
9(Fan Control): Turn clockwise
or counterclockwise to increase or
decrease the fan speed. Air Delivery Mode Control:
Turn
clockwise or counterclockwise to
change the direction of the airflow
in the vehicle.
Select from the following:
H(Vent): Air is directed to the
instrument panel outlets.
)(Bi-Level): Air is divided
between the instrument panel
outlets and the floor outlets.
6(Floor): Air is directed to the
floor outlets with some air directed
to the side window outlets.
-(Defog): This mode clears the
windows of fog or moisture. Air is
directed to the floor and windshield
outlets.
0(Defrost): This mode clears the
windows of fog or frost more quickly.
The system automatically controls
the fan speed if defrost is selected
from the AUTO mode. If the outside
temperature is 4°C (40°F) or
warmer, the air conditioning
compressor automatically runs to
help dehumidify the air and dry the
Page 199 of 382
Black plate (5,1)Chevrolet Malibu Owner Manual - 2011
Driving and Operating 9-5
Steering in Emergencies
There are times when steering can
be more effective than braking. For
example, you come over a hill and
find a truck stopped in your lane,
or a car suddenly pulls out from
nowhere, or a child darts out from
between parked cars and stops right
in front of you. These problems can
be avoided by braking—if you can
stop in time. But sometimes you
cannot stop in time because there is
no room. That is the time for
evasive action —steering around
the problem.
The vehicle can perform very well in
emergencies like these. First apply
the brakes. See Braking
on
page 9‑3. It is better to remove as
much speed as possible from a
collision. Then steer around the
problem, to the left or right
depending on the space available.
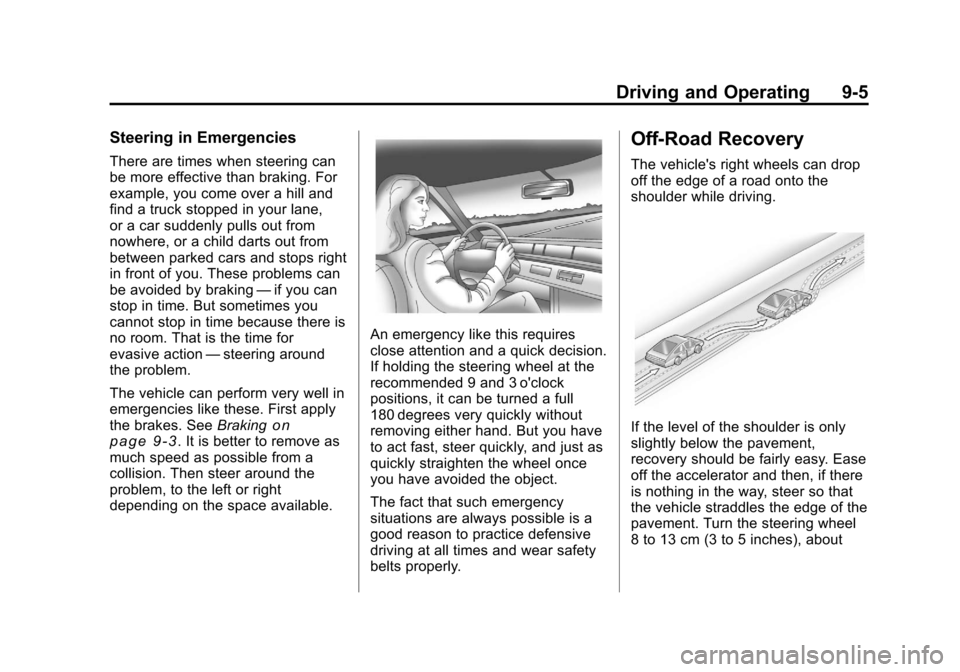
An emergency like this requires
close attention and a quick decision.
If holding the steering wheel at the
recommended 9 and 3 o'clock
positions, it can be turned a full
180 degrees very quickly without
removing either hand. But you have
to act fast, steer quickly, and just as
quickly straighten the wheel once
you have avoided the object.
The fact that such emergency
situations are always possible is a
good reason to practice defensive
driving at all times and wear safety
belts properly.
Off-Road Recovery
The vehicle's right wheels can drop
off the edge of a road onto the
shoulder while driving.
If the level of the shoulder is only
slightly below the pavement,
recovery should be fairly easy. Ease
off the accelerator and then, if there
is nothing in the way, steer so that
the vehicle straddles the edge of the
pavement. Turn the steering wheel
8 to 13 cm (3 to 5 inches), about
Page 235 of 382
Black plate (41,1)Chevrolet Malibu Owner Manual - 2011
Driving and Operating 9-41
and rubber parts. That damage
would not be covered under the
vehicle warranty.
Filling the Tank
{WARNING
Fuel vapor burns violently and a
fuel fire can cause bad injuries.
To help avoid injuries to you and
others, read and follow all the
instructions on the fuel pump
island. Turn off the engine when
refueling. Do not smoke near fuel
or when refueling the vehicle. Do
not use cellular phones. Keep
sparks, flames, and smoking
materials away from fuel. Do not
leave the fuel pump unattended
when refueling the vehicle. This is
against the law in some places.
Do not re-enter the vehicle while
pumping fuel. Keep children away
from the fuel pump; never let
children pump fuel.
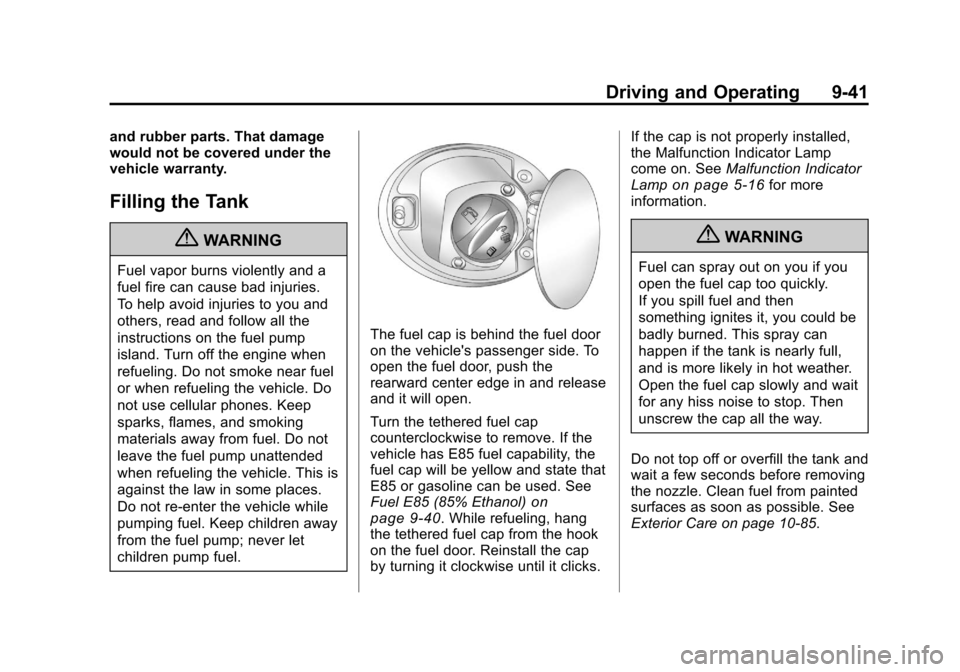
The fuel cap is behind the fuel door
on the vehicle's passenger side. To
open the fuel door, push the
rearward center edge in and release
and it will open.
Turn the tethered fuel cap
counterclockwise to remove. If the
vehicle has E85 fuel capability, the
fuel cap will be yellow and state that
E85 or gasoline can be used. See
Fuel E85 (85% Ethanol)
on
page 9‑40. While refueling, hang
the tethered fuel cap from the hook
on the fuel door. Reinstall the cap
by turning it clockwise until it clicks. If the cap is not properly installed,
the Malfunction Indicator Lamp
come on. See
Malfunction Indicator
Lamp
on page 5‑16for more
information.
{WARNING
Fuel can spray out on you if you
open the fuel cap too quickly.
If you spill fuel and then
something ignites it, you could be
badly burned. This spray can
happen if the tank is nearly full,
and is more likely in hot weather.
Open the fuel cap slowly and wait
for any hiss noise to stop. Then
unscrew the cap all the way.
Do not top off or overfill the tank and
wait a few seconds before removing
the nozzle. Clean fuel from painted
surfaces as soon as possible. See
Exterior Care on page 10‑85.
Page 260 of 382
Black plate (18,1)Chevrolet Malibu Owner Manual - 2011
10-18 Vehicle Care
How to Add Coolant to the
Radiator
{WARNING
An electric engine cooling fan
under the hood can start up even
when the engine is not running
and can cause injury. Keep
hands, clothing, and tools away
from any underhood electric fan.
{WARNING
Steam and scalding liquids from a
hot cooling system can blow out
and burn you badly. They are
under pressure, and if you turn
the surge tank pressure
cap—even a little —they can
come out at high speed. Never
turn the cap when the cooling
system, including the surge tank
(Continued)
WARNING (Continued)
pressure cap, is hot. Wait for the
cooling system and surge tank
pressure cap to cool if you ever
have to turn the pressure cap.
If coolant is needed, add the proper
mixture directly to the radiator, but
be sure the cooling system is cool
before this is done.
1. Remove the coolant surge tank pressure cap when the cooling
system, including the coolant
surge tank pressure cap and
upper radiator hose, is no longer
hot. Turn the pressure cap
slowly counterclockwise about
two or two and one-half turns.
If a hiss is heard, wait for that to
stop. This will allow any
pressure still left to be vented
out the discharge hose.
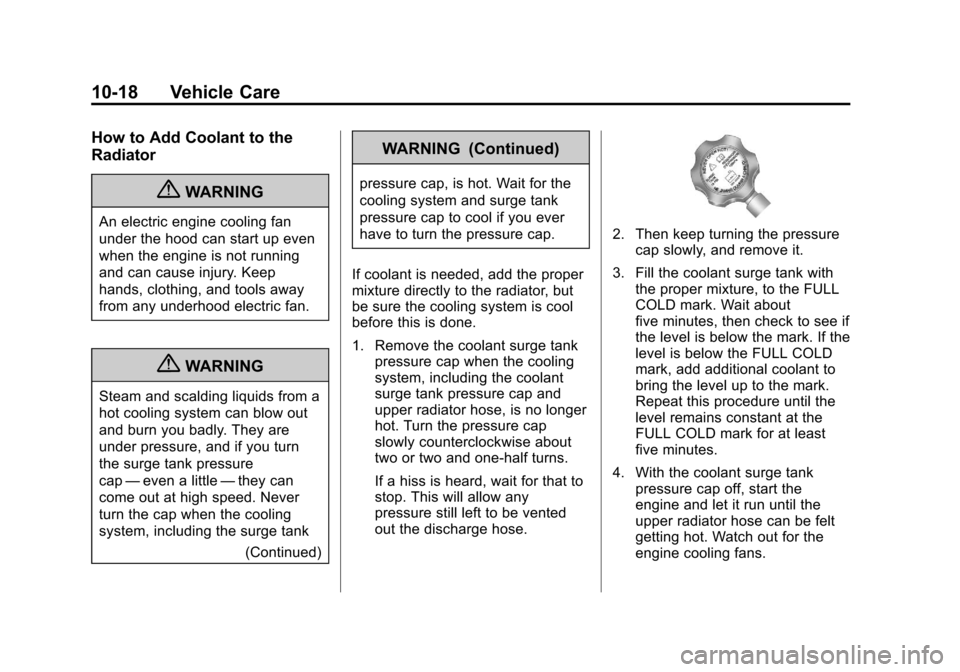
2. Then keep turning the pressurecap slowly, and remove it.
3. Fill the coolant surge tank with the proper mixture, to the FULL
COLD mark. Wait about
five minutes, then check to see if
the level is below the mark. If the
level is below the FULL COLD
mark, add additional coolant to
bring the level up to the mark.
Repeat this procedure until the
level remains constant at the
FULL COLD mark for at least
five minutes.
4. With the coolant surge tank pressure cap off, start the
engine and let it run until the
upper radiator hose can be felt
getting hot. Watch out for the
engine cooling fans.
Page 270 of 382
Black plate (28,1)Chevrolet Malibu Owner Manual - 2011
10-28 Vehicle Care
Bulb Replacement
For the proper type of replacement
bulbs, seeReplacement Bulbson
page 10‑29.
For any bulb changing procedure
not listed in this section, contact
your dealer.
Halogen Bulbs
{WARNING
Halogen bulbs have pressurized
gas inside and can burst if you
drop or scratch the bulb. You or
others could be injured. Be sure
to read and follow the instructions
on the bulb package.
Taillamps, Turn Signal,
and Stoplamps
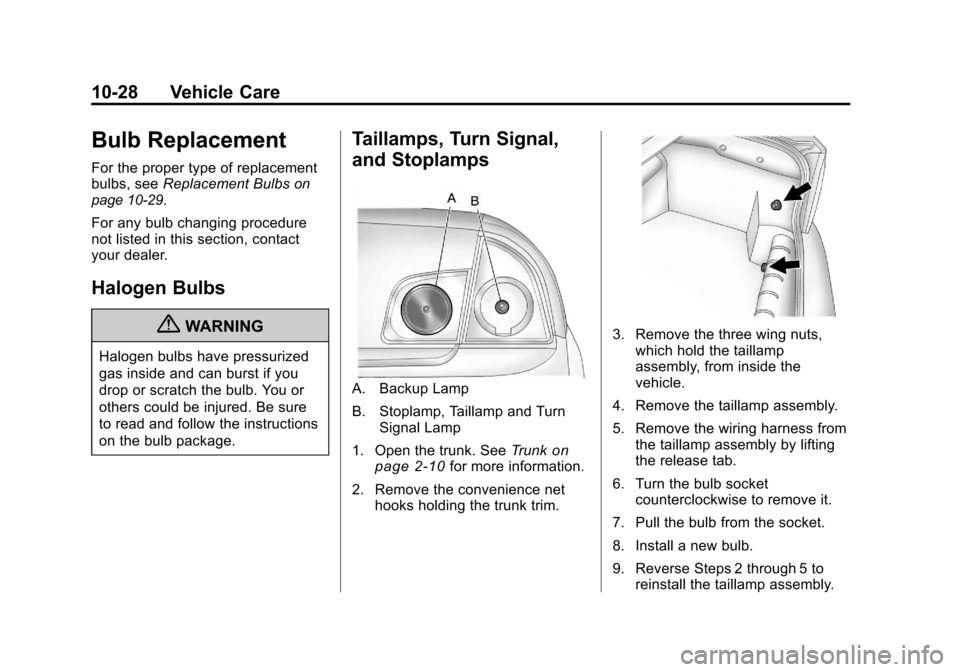
A. Backup Lamp
B. Stoplamp, Taillamp and Turn Signal Lamp
1. Open the trunk. See Trunk
on
page 2‑10for more information.
2. Remove the convenience net hooks holding the trunk trim.
3. Remove the three wing nuts,which hold the taillamp
assembly, from inside the
vehicle.
4. Remove the taillamp assembly.
5. Remove the wiring harness from the taillamp assembly by lifting
the release tab.
6. Turn the bulb socket counterclockwise to remove it.
7. Pull the bulb from the socket.
8. Install a new bulb.
9. Reverse Steps 2 through 5 to reinstall the taillamp assembly.
Page 271 of 382
Black plate (29,1)Chevrolet Malibu Owner Manual - 2011
Vehicle Care 10-29
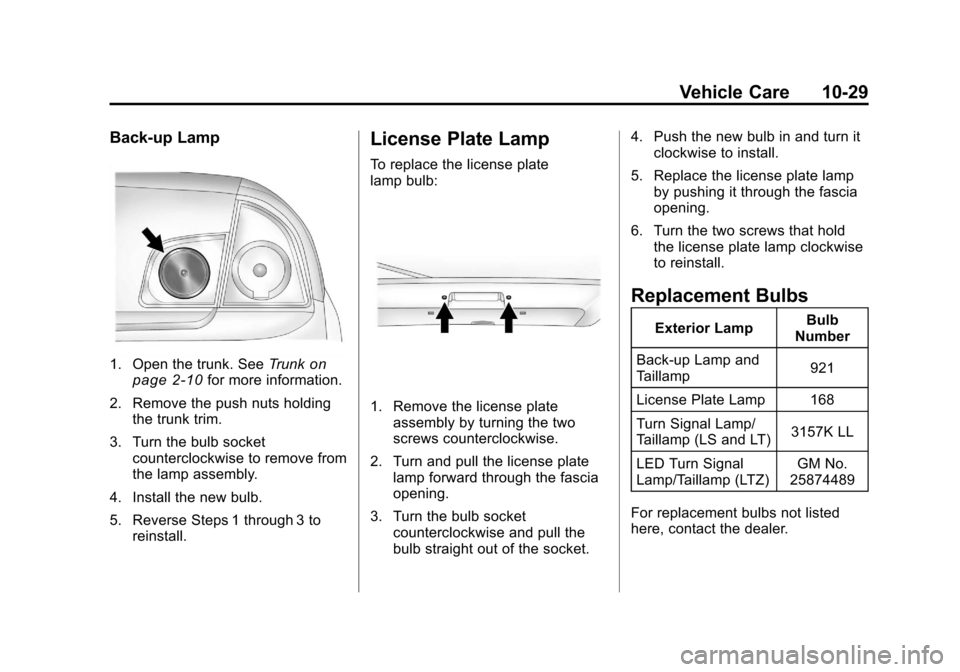
Back-up Lamp
1. Open the trunk. SeeTrunkon
page 2‑10for more information.
2. Remove the push nuts holding the trunk trim.
3. Turn the bulb socket counterclockwise to remove from
the lamp assembly.
4. Install the new bulb.
5. Reverse Steps 1 through 3 to reinstall.
License Plate Lamp
To replace the license plate
lamp bulb:
1. Remove the license plateassembly by turning the two
screws counterclockwise.
2. Turn and pull the license plate lamp forward through the fascia
opening.
3. Turn the bulb socket counterclockwise and pull the
bulb straight out of the socket. 4. Push the new bulb in and turn it
clockwise to install.
5. Replace the license plate lamp by pushing it through the fascia
opening.
6. Turn the two screws that hold the license plate lamp clockwise
to reinstall.
Replacement Bulbs
Exterior Lamp Bulb
Number
Back-up Lamp and
Taillamp 921
License Plate Lamp 168
Turn Signal Lamp/
Taillamp (LS and LT) 3157K LL
LED Turn Signal
Lamp/Taillamp (LTZ) GM No.
25874489
For replacement bulbs not listed
here, contact the dealer.