2011 CHEVROLET HHR instrument cluster
[x] Cancel search: instrument clusterPage 9 of 430

Black plate (3,1)Chevrolet HHR Owner Manual - 2011
A.Outlet Adjustment on page 4‑20.
B. Cruise Control
on page 4‑8(If Equipped).
C. Turn Signal/Multifunction Lever on page 4‑4.
D. Instrument Panel Cluster on page 4‑23.
E. Windshield Wipers on page 4‑5.
Windshield Washer on page 4‑6.
F. Instrument Panel Storage on page 3‑42.
G. Traction Control System (TCS)
on page 5‑8(If Equipped).
Electronic Stability Control (ESC). See Electronic
Stability Control (ESC) on page 5‑6.
H. Passenger Airbag Status Indicator on page 4‑27.
I. Rear Side Cargo Door Buttons (If Equipped). See Rear Side Cargo Door on page 3‑11.
J. Hood Release on page 6‑13.
K. Driver Information Center (DIC) Buttons. See Driver Information Center (DIC) on page 4‑38.
L. Data Link Connector (DLC). See Malfunction
Indicator Lamp on page 4‑33. M.
Horn on page 4‑3.
N. Audio Steering Wheel Controls
on page 4‑79(If Equipped).
O. Instrument Panel Brightness on page 4‑14.
P. Audio System(s) on page 4‑50.
Q. Climate Control System on page 4‑18.
R. Rear Window Wiper/Washer on page 4‑7.
S. Shift Lever (Manual Shown). See Manual
Transmission Operation
on page 3‑29and
Automatic Transmission Operation on page 3‑26.
T. Accessory Power Outlet(s)
on page 4‑15(If Equipped).
Cigarette Lighter (If Equipped). See Ashtray(s)
and Cigarette Lighter on page 4‑17.
U. Fog Lamps
on page 4‑13(If Equipped).
V. Hazard Warning Flashers on page 4‑3.
W. Glove Box on page 3‑42.
1-3
Page 23 of 430
Black plate (17,1)Chevrolet HHR Owner Manual - 2011
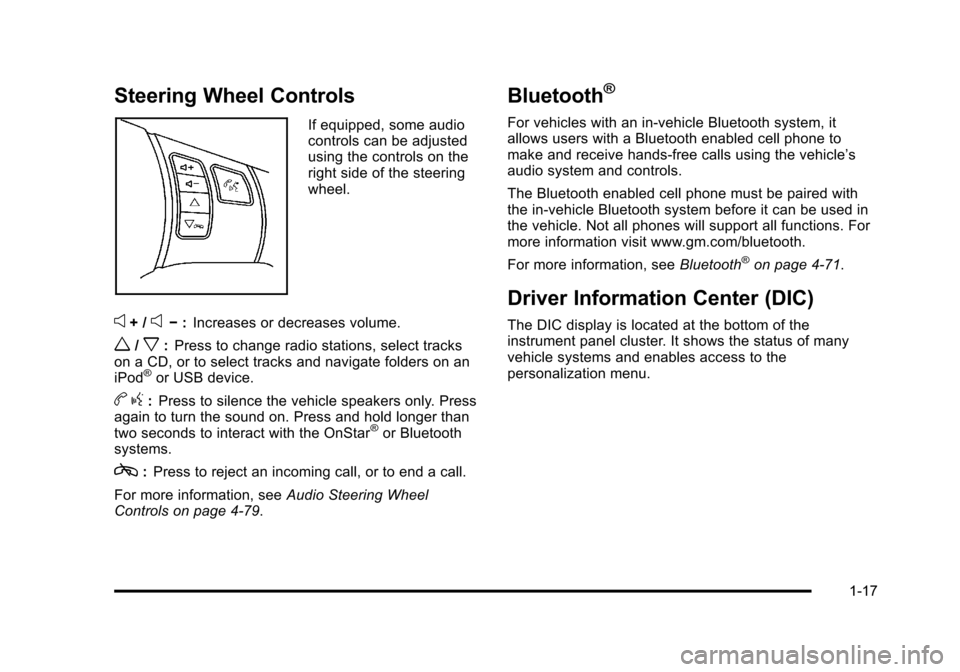
Steering Wheel Controls
If equipped, some audio
controls can be adjusted
using the controls on the
right side of the steering
wheel.
e+ /e−:Increases or decreases volume.
w/x:Press to change radio stations, select tracks
on a CD, or to select tracks and navigate folders on an
iPod
®or USB device.
b g:Press to silence the vehicle speakers only. Press
again to turn the sound on. Press and hold longer than
two seconds to interact with the OnStar
®or Bluetooth
systems.
c: Press to reject an incoming call, or to end a call.
For more information, see Audio Steering Wheel
Controls on page 4‑79.
Bluetooth®
For vehicles with an in-vehicle Bluetooth system, it
allows users with a Bluetooth enabled cell phone to
make and receive hands-free calls using the vehicle’s
audio system and controls.
The Bluetooth enabled cell phone must be paired with
the in-vehicle Bluetooth system before it can be used in
the vehicle. Not all phones will support all functions. For
more information visit www.gm.com/bluetooth.
For more information, see Bluetooth
®on page 4‑71.
Driver Information Center (DIC)
The DIC display is located at the bottom of the
instrument panel cluster. It shows the status of many
vehicle systems and enables access to the
personalization menu.
1-17
Page 92 of 430
Black plate (60,1)Chevrolet HHR Owner Manual - 2011
{WARNING:
Airbags inflate with great force, faster than the
blink of an eye. Anyone who is up against, or very
close to, any airbag when it inflates can be
seriously injured or killed. Do not sit unnecessarily
close to the airbag, as you would be if you were
sitting on the edge of your seat or leaning forward.
Safety belts help keep you in position before and
during a crash. Always wear your safety belt,
even with airbags. The driver should sit as far
back as possible while still maintaining control of
the vehicle.
Occupants should not lean on or sleep against the
door or side windows in seating positions with
roof-rail airbags.
{WARNING:
Children who are up against, or very close to, any
airbag when it inflates can be seriously injured or
killed. Airbags plus lap-shoulder belts offer(Continued)
WARNING: (Continued)
protection for adults and older children, but not for
young children and infants. Neither the vehicle's
safety belt system nor its airbag system is
designed for them. Young children and infants
need the protection that a child restraint system
can provide. Always secure children properly in
your vehicle. To read how, seeOlder Children
on
page 2‑34
or Infants and Young Childrenon
page 2‑36
.
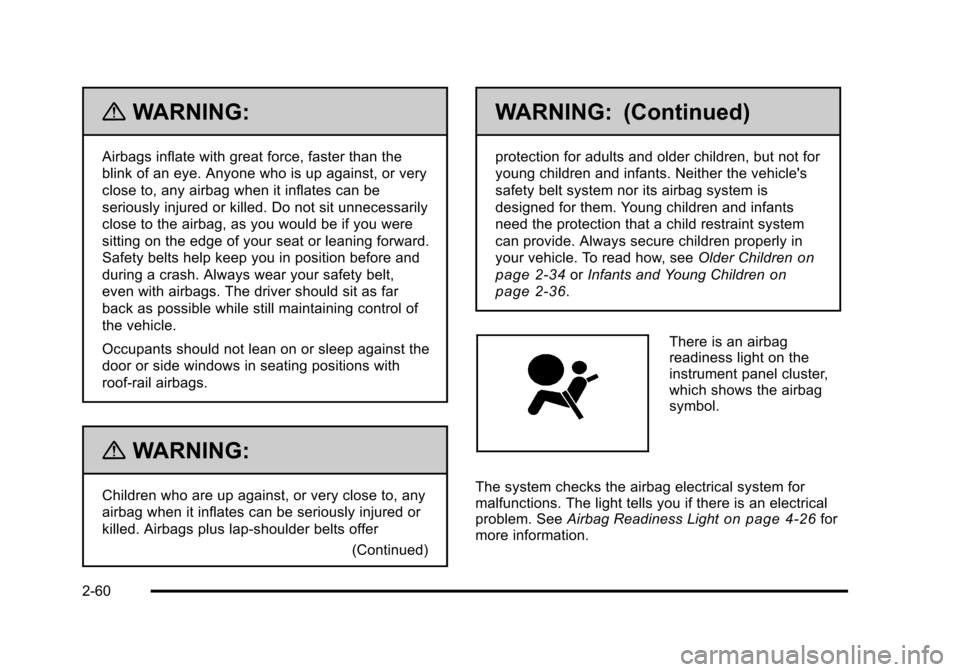
There is an airbag
readiness light on the
instrument panel cluster,
which shows the airbag
symbol.
The system checks the airbag electrical system for
malfunctions. The light tells you if there is an electrical
problem. See Airbag Readiness Light
on page 4‑26for
more information.
2-60
Page 128 of 430
Black plate (22,1)Chevrolet HHR Owner Manual - 2011
3. Come to a complete stop, shift to P (Park), andturn the ignition to LOCK/OFF. On vehicles with an
automatic transmission, the shift lever must be in
P (Park) to turn the ignition switch to the LOCK/
OFF position.
4. Set the parking brake. See Parking Brake
on
page 3‑30.
The steering can bind with the wheel turned off center.
If this happens, move it from right to left while turning
the key to ACC/ACCESSORY. If this does not work,
then the vehicle needs service.
{WARNING:
If you have a manual transmission removing the
key from the ignition switch will lock the steering
column and result in a loss of ability to steer the
vehicle. This could cause a collision. If you need
to turn the engine off while the vehicle is moving,
turn the key to ACC/ACCESSORY. ACC (ACC/ACCESSORY):
This position operates
some of the electrical accessories. It unlocks the
steering wheel and ignition.
R (ON/RUN): This is the position in which you can
operate the electrical accessories and to display some
instrument panel cluster warning and indicator lights.
The switch stays in this position when the engine is
running.
If you leave the key in the ACC/ACCESSORY or ON/
RUN position with the engine off, the battery could be
drained. You may not be able to start the vehicle if the
battery is allowed to drain for an extended period
of time.
/ (START): This position starts the engine. When the
engine starts, release the key. The ignition switch will
return to ON/RUN for driving.
A warning tone will sound when the driver door is
opened, the ignition is in LOCK/OFF or ACC/
ACCESSORY and the key is in the ignition.
3-22
Page 157 of 430
Black plate (1,1)Chevrolet HHR Owner Manual - 2011
Section 4 Instrument Panel
Instrument Panel Overview. . . . . . . . . . . . . . . . . . . . . . . .4-3
Hazard Warning Flashers . . . . . . . . . . . . . . . . . . . . . . . 4-3
Horn . . . . . . . . . . . . . . . . . . . . . . . . . . . . . . . . . . . . . . . . . . . . 4-3
Tilt Wheel . . . . . . . . . . . . . . . . . . . . . . . . . . . . . . . . . . . . . . . 4-3
Turn Signal/Multifunction Lever . . . . . . . . . . . . . . . . . . 4-4
Turn and Lane-Change Signals . . . . . . . . . . . . . . . . . 4-4
Headlamp High/Low-Beam Changer . . . . . . . . . . . . 4-5
Flash-to-Pass . . . . . . . . . . . . . . . . . . . . . . . . . . . . . . . . . . . 4-5
Windshield Wipers . . . . . . . . . . . . . . . . . . . . . . . . . . . . . . 4-5
Windshield Washer . . . . . . . . . . . . . . . . . . . . . . . . . . . . . 4-6
Rear Window Wiper/Washer . . . . . . . . . . . . . . . . . . . . 4-7
Cruise Control . . . . . . . . . . . . . . . . . . . . . . . . . . . . . . . . . . 4-8
Headlamps . . . . . . . . . . . . . . . . . . . . . . . . . . . . . . . . . . . . 4-11
Wiper Activated Headlamps . . . . . . . . . . . . . . . . . . . 4-12
Headlamps on Reminder . . . . . . . . . . . . . . . . . . . . . . 4-12
Daytime Running Lamps (DRL) . . . . . . . . . . . . . . . . 4-12
Automatic Headlamp System . . . . . . . . . . . . . . . . . . 4-13
Fog Lamps . . . . . . . . . . . . . . . . . . . . . . . . . . . . . . . . . . . . 4-13
Instrument Panel Brightness . . . . . . . . . . . . . . . . . . . 4-14
Dome Lamp . . . . . . . . . . . . . . . . . . . . . . . . . . . . . . . . . . . 4-14
Entry/Exit Lighting . . . . . . . . . . . . . . . . . . . . . . . . . . . . . 4-14
Reading Lamps . . . . . . . . . . . . . . . . . . . . . . . . . . . . . . . . 4-14
Electric Power Management . . . . . . . . . . . . . . . . . . . 4-15
Battery Run-Down Protection . . . . . . . . . . . . . . . . . . 4-15
Accessory Power Outlet(s) . . . . . . . . . . . . . . . . . . . . . 4-15
Ashtray(s) and Cigarette Lighter . . . . . . . . . . . . . . . 4-17 Climate Controls
. . . . . . . . . . . . . . . . . . . . . . . . . . . . . . . . . . 4-18
Climate Control System . . . . . . . . . . . . . . . . . . . . . . . . 4-18
Outlet Adjustment . . . . . . . . . . . . . . . . . . . . . . . . . . . . . . 4-20
Passenger Compartment Air Filter . . . . . . . . . . . . . 4-21
Warning Lights, Gauges, and Indicators . . . . . . . .4-22
Instrument Panel Cluster . . . . . . . . . . . . . . . . . . . . . . . 4-23
Speedometer and Odometer . . . . . . . . . . . . . . . . . . . 4-24
Tachometer . . . . . . . . . . . . . . . . . . . . . . . . . . . . . . . . . . . . 4-24
Safety Belt Reminders . . . . . . . . . . . . . . . . . . . . . . . . . 4-25
Airbag Readiness Light . . . . . . . . . . . . . . . . . . . . . . . . 4-26
Passenger Airbag Status Indicator . . . . . . . . . . . . . 4-27
Charging System Light . . . . . . . . . . . . . . . . . . . . . . . . 4-28
Up-Shift Light . . . . . . . . . . . . . . . . . . . . . . . . . . . . . . . . . . 4-28
Brake System Warning Light . . . . . . . . . . . . . . . . . . . 4-29
Antilock Brake System (ABS) Warning Light . . . 4-30
Enhanced Traction System (ETS) Indicator/ Warning Light . . . . . . . . . . . . . . . . . . . . . . . . . . . . . . . . 4-30
Electronic Stability Control (ESC)/Traction Control System (TCS) Indicator/Warning
Light . . . . . . . . . . . . . . . . . . . . . . . . . . . . . . . . . . . . . . . . . 4-31
Engine Coolant Temperature Warning Light . . . . 4-32
Engine Coolant Temperature Gauge . . . . . . . . . . . 4-32
Tire Pressure Light . . . . . . . . . . . . . . . . . . . . . . . . . . . . 4-33
Malfunction Indicator Lamp . . . . . . . . . . . . . . . . . . . . 4-33
Oil Pressure Light . . . . . . . . . . . . . . . . . . . . . . . . . . . . . 4-36
Security Light . . . . . . . . . . . . . . . . . . . . . . . . . . . . . . . . . . 4-36
4-1
Page 160 of 430
Black plate (4,1)Chevrolet HHR Owner Manual - 2011
Turn Signal/Multifunction Lever
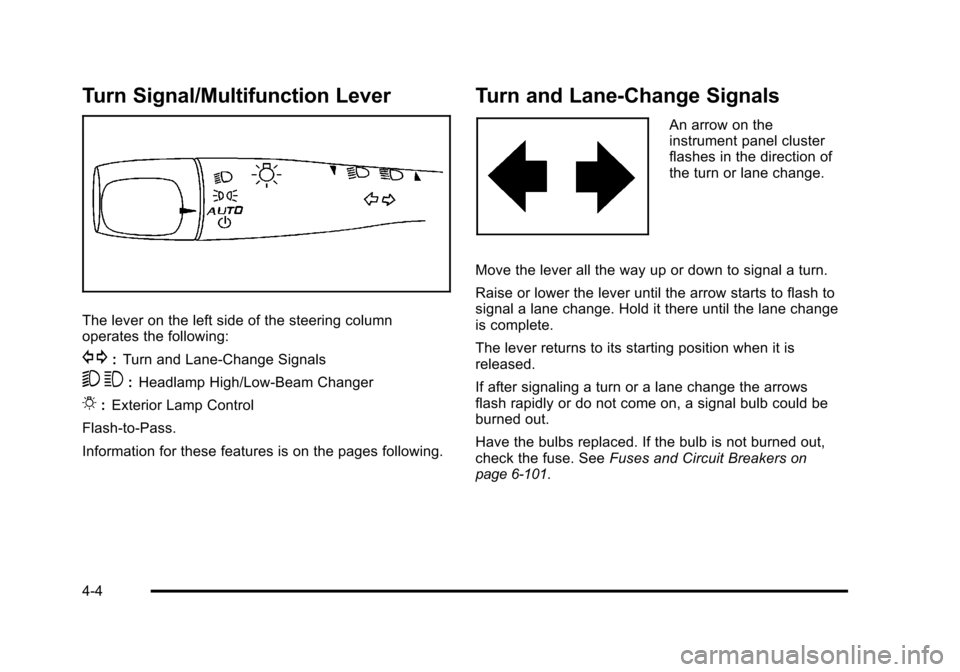
The lever on the left side of the steering column
operates the following:
G:Turn and Lane-Change Signals
5 3:Headlamp High/Low-Beam Changer
O:Exterior Lamp Control
Flash-to-Pass.
Information for these features is on the pages following.
Turn and Lane-Change Signals
An arrow on the
instrument panel cluster
flashes in the direction of
the turn or lane change.
Move the lever all the way up or down to signal a turn.
Raise or lower the lever until the arrow starts to flash to
signal a lane change. Hold it there until the lane change
is complete.
The lever returns to its starting position when it is
released.
If after signaling a turn or a lane change the arrows
flash rapidly or do not come on, a signal bulb could be
burned out.
Have the bulbs replaced. If the bulb is not burned out,
check the fuse. See Fuses and Circuit Breakers
on
page 6‑101.
4-4
Page 161 of 430
Black plate (5,1)Chevrolet HHR Owner Manual - 2011
Headlamp High/Low-Beam Changer
To change the headlamps from low beam to high beam,
push the turn signal lever away from you.
This indicator light
appears on the instrument
panel cluster when the
high beams are on.
To change the headlamps from high beam to low beam,
pull the turn signal lever toward you.
Flash-to-Pass
To signal to a driver in front of you that you want to
pass, pull the turn signal/multifunction lever until the
high-beam headlamps come on. Then release the lever
to turn them off.
Windshield Wipers
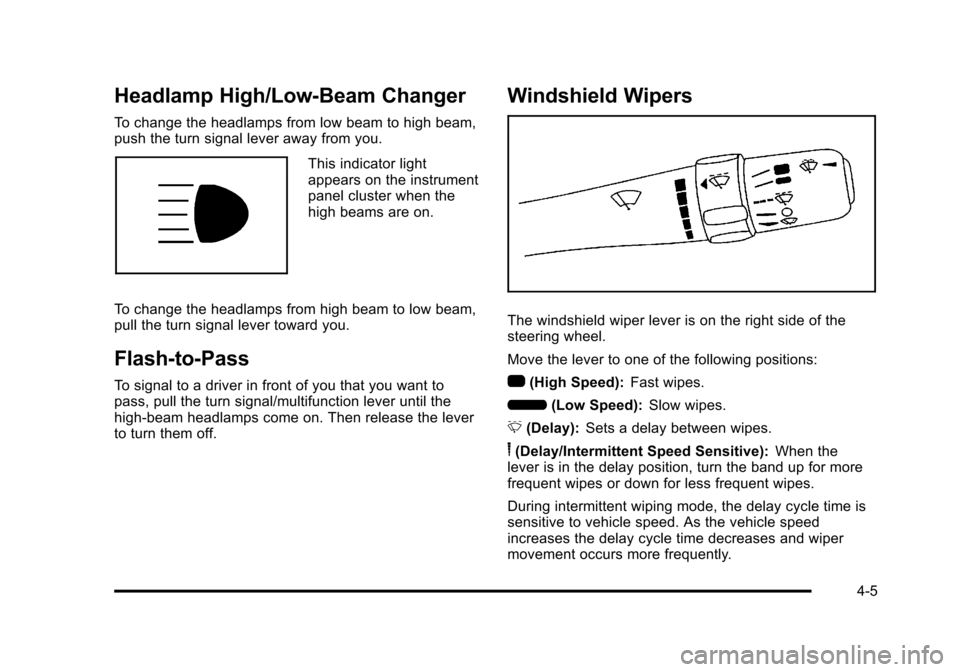
The windshield wiper lever is on the right side of the
steering wheel.
Move the lever to one of the following positions:
1 (High Speed): Fast wipes.
6 (Low Speed): Slow wipes.
& (Delay): Sets a delay between wipes.
6(Delay/Intermittent Speed Sensitive): When the
lever is in the delay position, turn the band up for more
frequent wipes or down for less frequent wipes.
During intermittent wiping mode, the delay cycle time is
sensitive to vehicle speed. As the vehicle speed
increases the delay cycle time decreases and wiper
movement occurs more frequently.
4-5
Page 169 of 430
Black plate (13,1)Chevrolet HHR Owner Manual - 2011
Automatic Headlamp System
When it is dark enough outside, the automatic system
turns on the headlamps at the normal brightness along
with other lamps such as the taillamps, sidemarker,
parking lamps, instrument panel lights, and interior
switch backlighting.
Do not cover the light sensor, located on top of the
instrument panel. If the sensor is covered the
headlamps may remain on when they are not needed.
If the vehicle is driven through a parking garage,
overcast weather or a tunnel, the automatic headlamp
system may turn on.
There is a delay in the transition between the daytime
and nighttime operation of the automatic lamp control
system so that driving under bridges or bright overhead
street lights does not affect the system. The automatic
lamp control system will only be affected when the light
sensor sees a change in lighting lasting longer than this
delay.
If the vehicle is started in a dark garage, the automatic
lamp system turns on immediately. Once the vehicle
exits the garage, it will take about 20 seconds for the
automatic lamp system to change to DRL if it is light
outside. During that delay, the instrument panel cluster
may not be as bright as usual. Make sure theinstrument panel brightness control is in the full bright
position. See
Instrument Panel Brightnesson
page 4‑14.
To idle the vehicle with the system off, turn the ignition
on and turn the exterior light switch to the off/on
position. For vehicles first sold in Canada, the
transmission must stay in P (Park) for this function or
the parking brake must be set for vehicles with manual
transmissions.
Turn on the regular headlamps when they are needed.
Fog Lamps
For vehicles with fog lamps, the button is located on the
instrument panel, to the right of the steering wheel.
The ignition must be on to use the fog lamps.
#: Press to turn the fog lamps on and off. An indicator
light on the button comes on when the fog lamps
are on.
The parking lamps automatically turn on and off when
the fog lamps are turned on and off.
The fog lamps will turn off while the high-beam
headlamps are turned on.
Some localities have laws that require the headlamps to
be on along with the fog lamps.
4-13