2011 CHEVROLET HHR window
[x] Cancel search: windowPage 123 of 430
Black plate (17,1)Chevrolet HHR Owner Manual - 2011
Express-Down Window
The driver's window switch has an express-down
feature that allows the window to be lowered without
holding the switch. Press the switch part way, and the
driver's window will open a small amount. Press the
switch down all the way, release it, and the window will
go down automatically.
To stop the window while it is lowering, press and
release the top of, or pull up on the switch.
Window Lockout
o(Window Lockout): Your vehicle has a lockout
feature to prevent rear seat passengers from operating
the windows. Press the lockout button, located with the
power window switches, to turn the feature on and off.
When the red band on the button is showing, the
lockout feature is off.
Sun Visors
To block out glare, swing down the visor(s). The sun
visors can also be detached from the center mount and
swung out to cover the side windows. They can also be
slid along the rod to cover different areas of the front
window.
Visor Vanity Mirrors
Your vehicle has visor vanity mirrors. Swing down the
sun visor and lift the cover to expose the mirror.
Theft-Deterrent Systems
This vehicle has theft-deterrent features, however, they
do not make it impossible to steal.
Content Theft-Deterrent
Your vehicle may have a
content theft-deterrent
alarm system.
Arming the System
To arm the system:
1. Turn the ignition off.
2. Press lock on the RKE transmitter.
3-17
Page 130 of 430
Black plate (24,1)Chevrolet HHR Owner Manual - 2011
Retained Accessory Power (RAP)
These vehicle accessories may be used for up to
10 minutes after the engine is turned off.
.Audio System
.Power Windows, if equipped
.Sunroof, if equipped
The power windows and sunroof will continue to work
for up to 10 minutes or until any door is opened. The
radio will work when the key is in ON/RUN or ACC/
ACCESSORY. Once the key is turned from ON/RUN to
OFF/LOCK, the radio will continue to work for
10 minutes or until the driver's door is opened.
Starting the Engine
Place the transmission in the proper gear.
Automatic Transmission
Move the shift lever to P (Park) or N (Neutral). The
engine will not start in any other position. To restart the
vehicle when it is already moving, use N (Neutral) only.
Notice: Do not try to shift to P (Park) if the vehicle is
moving. If you do, you could damage the
transmission. Shift to P (Park) only when the vehicle
is stopped.
Manual Transmission
The shift lever should be in N (Neutral) and the parking
brake engaged. Hold the clutch pedal down to the floor
and start the engine. The vehicle will not start if the
clutch pedal is not all the way down.
Starting Procedure
1. With your foot off the accelerator pedal, turn the ignition key to START. When the engine starts, let
go of the key. The idle speed will go down as the
engine warms. Do not race the engine immediately
after starting it. Operate the engine and
transmission gently to allow the oil to warm up and
lubricate all moving parts.
The vehicle has a Computer-Controlled Cranking
System. This feature assists in starting the engine
and protects components. If the ignition key is
turned to the START position, and then released
when the engine begins cranking, the engine will
continue cranking for a few seconds or until the
vehicle starts. If the engine does not start and the
key is held in START for many seconds, cranking
will be stopped after 15 seconds to prevent
cranking motor damage. To prevent gear damage,
this system also prevents cranking if the engine is
already running. Engine cranking can be stopped
by turning the ignition switch to ACC/ACCESSORY
or LOCK/OFF.
3-24
Page 140 of 430
Black plate (34,1)Chevrolet HHR Owner Manual - 2011
Parking Over Things That Burn
{WARNING:
Things that can burn could touch hot exhaust
parts under the vehicle and ignite. Do not park
over papers, leaves, dry grass, or other things that
can burn.
Engine Exhaust
{WARNING:
Engine exhaust contains Carbon Monoxide (CO)
which cannot be seen or smelled. Exposure to CO
can cause unconsciousness and even death.
Exhaust may enter the vehicle if:
.The vehicle idles in areas with poor ventilation
(parking garages, tunnels, deep snow that
may block underbody airflow or tail pipes).
.The exhaust smells or sounds strange or
different.(Continued)
WARNING: (Continued)
.The exhaust system leaks due to corrosion or
damage.
.The vehicle’s exhaust system has been
modified, damaged or improperly repaired.
.There are holes or openings in the vehicle
body from damage or after-market
modifications that are not completely sealed.
If unusual fumes are detected or if it is suspected
that exhaust is coming into the vehicle:
.Drive it only with the windows
completely down.
.Have the vehicle repaired immediately.
Never park the vehicle with the engine running in
an enclosed area such as a garage or a building
that has no fresh air ventilation.
3-34
Page 142 of 430
Black plate (36,1)Chevrolet HHR Owner Manual - 2011
Mirrors
Manual Rearview Mirror
Hold the inside rearview mirror in the center to move it
for a clearer view behind your vehicle. Adjust the mirror
to avoid glare from the headlamps behind you. Push the
tab forward for daytime use and pull it for nighttime use.
If the vehicle has map lamps, press the buttons located
at the bottom of the mirror to turn them on or off.
Automatic Dimming Rearview Mirror
The vehicle may have an automatic dimming inside
rearview mirror with a compass and map lights and/or
OnStar
®.
Vehicles with OnStar have three additional control
buttons located at the bottom of the mirror. See your
dealer for more information on the system and how to
subscribe to OnStar
®. See the OnStar®owners guide
for more information about the services OnStar
provides.
Press the buttons located at the bottom of the mirror to
turn the map lights on or off.
O(On/Off): Press to turn the dimming feature on or off.
Automatic Dimming Mirror Operation
Automatic dimming reduces the glare of lights from
behind the vehicle. The dimming feature comes on and
the indicator light illuminates each time the vehicle is
started.
Cleaning the Mirror
Do not spray glass cleaner directly on the mirror. Use a
soft towel dampened with water.
Compass
Compass Operation
Y
/O(On/Off): If the vehicle has one of these buttons,
press to turn the compass on or off.
With the compass feature on, each time the vehicle is
started, the compass displays the current compass
direction after a few seconds.
Compass Calibration
If after a few seconds the display does not show a
compass direction, (N for North for example), there may
be a strong magnetic field interfering with the compass.
Interference can be caused by a magnetic antenna
mount, note pad holder, or similar object. If CAL
appears in the compass window, the compass may
need to be reset or calibrated.
3-36
Page 143 of 430
Black plate (37,1)Chevrolet HHR Owner Manual - 2011
To calibrate the compass:1. Make sure CAL is displayed. If CAL is not displayed, press and hold the compass button until
CAL displays.
2. While CAL displays, drive the vehicle in circles at 5 mph (8 km/h) or less until the display reads a
direction.
Compass Variance
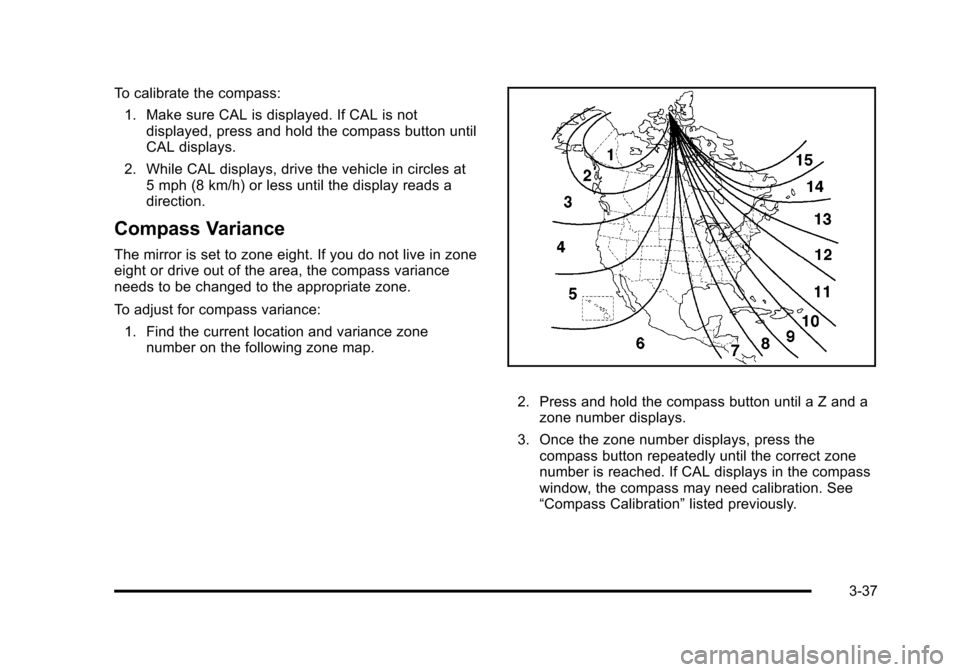
The mirror is set to zone eight. If you do not live in zone
eight or drive out of the area, the compass variance
needs to be changed to the appropriate zone.
To adjust for compass variance:
1. Find the current location and variance zone number on the following zone map.
2. Press and hold the compass button until a Z and a
zone number displays.
3. Once the zone number displays, press the compass button repeatedly until the correct zone
number is reached. If CAL displays in the compass
window, the compass may need calibration. See
“Compass Calibration” listed previously.
3-37
Page 157 of 430
Black plate (1,1)Chevrolet HHR Owner Manual - 2011
Section 4 Instrument Panel
Instrument Panel Overview. . . . . . . . . . . . . . . . . . . . . . . .4-3
Hazard Warning Flashers . . . . . . . . . . . . . . . . . . . . . . . 4-3
Horn . . . . . . . . . . . . . . . . . . . . . . . . . . . . . . . . . . . . . . . . . . . . 4-3
Tilt Wheel . . . . . . . . . . . . . . . . . . . . . . . . . . . . . . . . . . . . . . . 4-3
Turn Signal/Multifunction Lever . . . . . . . . . . . . . . . . . . 4-4
Turn and Lane-Change Signals . . . . . . . . . . . . . . . . . 4-4
Headlamp High/Low-Beam Changer . . . . . . . . . . . . 4-5
Flash-to-Pass . . . . . . . . . . . . . . . . . . . . . . . . . . . . . . . . . . . 4-5
Windshield Wipers . . . . . . . . . . . . . . . . . . . . . . . . . . . . . . 4-5
Windshield Washer . . . . . . . . . . . . . . . . . . . . . . . . . . . . . 4-6
Rear Window Wiper/Washer . . . . . . . . . . . . . . . . . . . . 4-7
Cruise Control . . . . . . . . . . . . . . . . . . . . . . . . . . . . . . . . . . 4-8
Headlamps . . . . . . . . . . . . . . . . . . . . . . . . . . . . . . . . . . . . 4-11
Wiper Activated Headlamps . . . . . . . . . . . . . . . . . . . 4-12
Headlamps on Reminder . . . . . . . . . . . . . . . . . . . . . . 4-12
Daytime Running Lamps (DRL) . . . . . . . . . . . . . . . . 4-12
Automatic Headlamp System . . . . . . . . . . . . . . . . . . 4-13
Fog Lamps . . . . . . . . . . . . . . . . . . . . . . . . . . . . . . . . . . . . 4-13
Instrument Panel Brightness . . . . . . . . . . . . . . . . . . . 4-14
Dome Lamp . . . . . . . . . . . . . . . . . . . . . . . . . . . . . . . . . . . 4-14
Entry/Exit Lighting . . . . . . . . . . . . . . . . . . . . . . . . . . . . . 4-14
Reading Lamps . . . . . . . . . . . . . . . . . . . . . . . . . . . . . . . . 4-14
Electric Power Management . . . . . . . . . . . . . . . . . . . 4-15
Battery Run-Down Protection . . . . . . . . . . . . . . . . . . 4-15
Accessory Power Outlet(s) . . . . . . . . . . . . . . . . . . . . . 4-15
Ashtray(s) and Cigarette Lighter . . . . . . . . . . . . . . . 4-17 Climate Controls
. . . . . . . . . . . . . . . . . . . . . . . . . . . . . . . . . . 4-18
Climate Control System . . . . . . . . . . . . . . . . . . . . . . . . 4-18
Outlet Adjustment . . . . . . . . . . . . . . . . . . . . . . . . . . . . . . 4-20
Passenger Compartment Air Filter . . . . . . . . . . . . . 4-21
Warning Lights, Gauges, and Indicators . . . . . . . .4-22
Instrument Panel Cluster . . . . . . . . . . . . . . . . . . . . . . . 4-23
Speedometer and Odometer . . . . . . . . . . . . . . . . . . . 4-24
Tachometer . . . . . . . . . . . . . . . . . . . . . . . . . . . . . . . . . . . . 4-24
Safety Belt Reminders . . . . . . . . . . . . . . . . . . . . . . . . . 4-25
Airbag Readiness Light . . . . . . . . . . . . . . . . . . . . . . . . 4-26
Passenger Airbag Status Indicator . . . . . . . . . . . . . 4-27
Charging System Light . . . . . . . . . . . . . . . . . . . . . . . . 4-28
Up-Shift Light . . . . . . . . . . . . . . . . . . . . . . . . . . . . . . . . . . 4-28
Brake System Warning Light . . . . . . . . . . . . . . . . . . . 4-29
Antilock Brake System (ABS) Warning Light . . . 4-30
Enhanced Traction System (ETS) Indicator/ Warning Light . . . . . . . . . . . . . . . . . . . . . . . . . . . . . . . . 4-30
Electronic Stability Control (ESC)/Traction Control System (TCS) Indicator/Warning
Light . . . . . . . . . . . . . . . . . . . . . . . . . . . . . . . . . . . . . . . . . 4-31
Engine Coolant Temperature Warning Light . . . . 4-32
Engine Coolant Temperature Gauge . . . . . . . . . . . 4-32
Tire Pressure Light . . . . . . . . . . . . . . . . . . . . . . . . . . . . 4-33
Malfunction Indicator Lamp . . . . . . . . . . . . . . . . . . . . 4-33
Oil Pressure Light . . . . . . . . . . . . . . . . . . . . . . . . . . . . . 4-36
Security Light . . . . . . . . . . . . . . . . . . . . . . . . . . . . . . . . . . 4-36
4-1
Page 163 of 430
Black plate (7,1)Chevrolet HHR Owner Manual - 2011
Rear Window Wiper/Washer
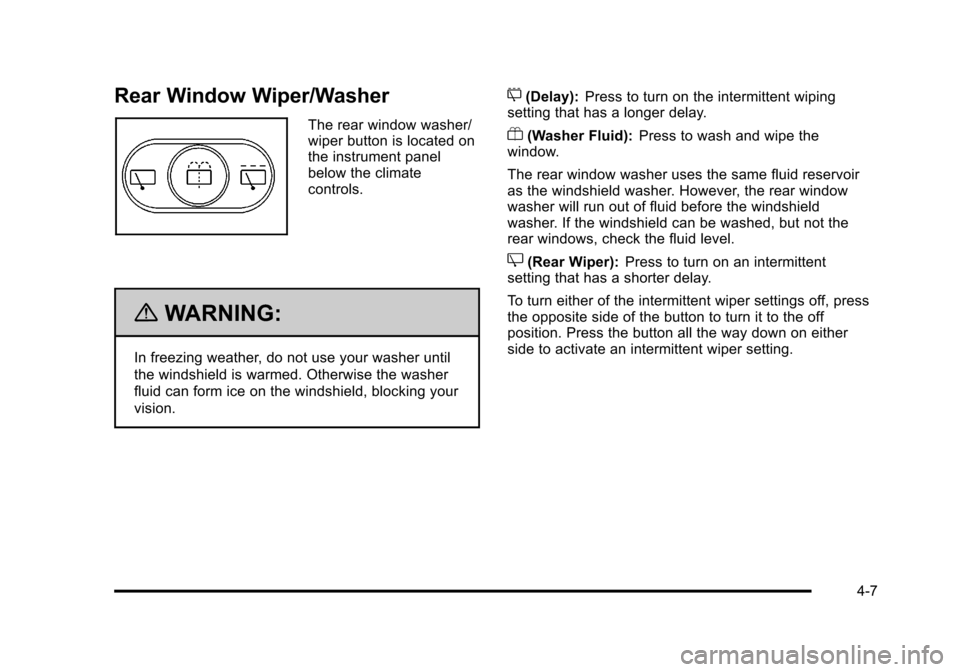
The rear window washer/
wiper button is located on
the instrument panel
below the climate
controls.
{WARNING:
In freezing weather, do not use your washer until
the windshield is warmed. Otherwise the washer
fluid can form ice on the windshield, blocking your
vision.
5(Delay):Press to turn on the intermittent wiping
setting that has a longer delay.
Y(Washer Fluid): Press to wash and wipe the
window.
The rear window washer uses the same fluid reservoir
as the windshield washer. However, the rear window
washer will run out of fluid before the windshield
washer. If the windshield can be washed, but not the
rear windows, check the fluid level.
Z(Rear Wiper): Press to turn on an intermittent
setting that has a shorter delay.
To turn either of the intermittent wiper settings off, press
the opposite side of the button to turn it to the off
position. Press the button all the way down on either
side to activate an intermittent wiper setting.
4-7
Page 171 of 430
Black plate (15,1)Chevrolet HHR Owner Manual - 2011
Electric Power Management
This vehicle has Electric Power Management (EPM), an
advanced control system. It estimates the battery's
temperature and state of charge and then adjusts the
voltage for best performance and extended life of the
battery.
When the battery's state of charge is low, the voltage is
raised slightly to quickly put the charge back in. When
the state of charge is high, the voltage is lowered
slightly to prevent overcharging. If the vehicle has a
voltmeter gauge or voltage display on the Driver
Information Center (DIC), you may see the voltage
move up or down. This is normal. If there is a problem,
an alert will be displayed.
The battery can be discharged at idle if the electrical
loads are very high. This is true for all vehicles. This is
because the generator (alternator) may not be spinning
fast enough at idle to produce all the power that is
needed for very high electrical loads.
A high electrical load occurs when several of the
following loads are on: headlamps, high beams, fog
lamps, rear window defogger, climate control fan at high
speed, heated seats, engine cooling fans, trailer loads,
and loads plugged into accessory power outlets.
EPM works to prevent excessive discharge of the
battery. It does this by balancing the generator's output
and the vehicle's electrical needs. It can increaseengine idle speed to generate more power, whenever
needed. It can temporarily reduce the power demands
of some accessories.
Normally, these actions occur in steps or levels, without
being noticeable. In rare cases at the highest levels of
corrective action, this action may be noticeable to the
driver.
Battery Run-Down Protection
The vehicle has a battery saver feature designed to
protect the vehicle's battery.
When any interior lamp is left on and the ignition is
turned off, the battery rundown protection system
automatically turns the lamp off after 20 minutes. This
prevents draining of the battery.
Accessory Power Outlet(s)
Accessory power outlets can be used to connect
electrical equipment, such as a cell phone or
MP3 player.
The accessory power outlets are located on the
instrument panel below the climate controls and at the
rear of the center console. There may be an outlet in
the rear cargo area on the passenger side.
Remove the cover to access and replace when not
in use.
4-15