2011 CHEVROLET HHR inflation pressure
[x] Cancel search: inflation pressurePage 329 of 430

Black plate (53,1)Chevrolet HHR Owner Manual - 2011
Occupant Distribution:Designated seating
positions.
Outward Facing Sidewall
:The side of an
asymmetrical tire that has a particular side that
faces outward when mounted on a vehicle. The
side of the tire that contains a whitewall, bears
white lettering, or bears manufacturer, brand, and/
or model name molding that is higher or deeper
than the same moldings on the other sidewall of
the tire.
Passenger (P-Metric) Tire
:A tire used on
passenger cars and some light duty trucks and
multipurpose vehicles.
Recommended Inflation Pressure
:Vehicle
manufacturer's recommended tire inflation
pressure as shown on the tire placard. See
Inflation - Tire Pressure
on page 6‑54and Loading
the Vehicle
on page 5‑22.
Radial Ply Tire
:A pneumatic tire in which the ply
cords that extend to the beads are laid at
90 degrees to the centerline of the tread.
Rim
:A metal support for a tire and upon which
the tire beads are seated.
Sidewall
:The portion of a tire between the tread
and the bead. Speed Rating
:An alphanumeric code assigned
to a tire indicating the maximum speed at which a
tire can operate.
Traction
:The friction between the tire and the
road surface. The amount of grip provided.
Tread
:The portion of a tire that comes into
contact with the road.
Treadwear Indicators
:Narrow bands, sometimes
called wear bars, that show across the tread of a
tire when only 1/16 inch (1.6 mm) of tread
remains. See When It Is Time for New Tires
on
page 6‑62
.
UTQGS (Uniform Tire Quality Grading
Standards)
:A tire information system that
provides consumers with ratings for a tire's
traction, temperature, and treadwear. Ratings are
determined by tire manufacturers using
government testing procedures. The ratings are
molded into the sidewall of the tire. See Uniform
Tire Quality Grading
on page 6‑65.
Vehicle Capacity Weight
:The number of
designated seating positions multiplied by 150 lbs
(68 kg) plus the rated cargo load. See Loading the
Vehicle
on page 5‑22.
6-53
Page 330 of 430
Black plate (54,1)Chevrolet HHR Owner Manual - 2011
Vehicle Maximum Load on the Tire:Load on an
individual tire due to curb weight, accessory
weight, occupant weight, and cargo weight.
Vehicle Placard
:A label permanently attached to
a vehicle showing the vehicle's capacity weight
and the original equipment tire size and
recommended inflation pressure. See “Tire and
Loading Information Label” underLoading the
Vehicle
on page 5‑22.
Inflation - Tire Pressure
Tires need the correct amount of air pressure to
operate effectively.
Notice:Do not let anyone tell you that under‐
inflation or over‐inflation is all right. It is not.
If your tires do not have enough air (under‐
inflation), you can get the following:
.Tire overloading and over-heating which
could lead to a blowout.
.Premature or irregular wear.
.Poor handling.
.Reduced fuel economy. If your tires have too much air (over‐inflation),
you can get the following:
.Unusual wear.
.Poor handling.
.Rough ride.
.Needless damage from road hazards.
A vehicle specific Tire and Loading Information
label is attached to your vehicle. This label shows
your vehicle's original equipment tires and the
correct inflation pressures for your tires when they
are cold. The recommended cold tire inflation
pressure, shown on the label, is the minimum
amount of air pressure needed to support your
vehicle's maximum load carrying capacity.
For additional information regarding how much
weight your vehicle can carry, and an example of
the Tire and Loading Information label, see
Loading the Vehicle
on page 5‑22. How you load
your vehicle affects vehicle handling and ride
comfort. Never load your vehicle with more weight
than it was designed to carry.
6-54
Page 331 of 430
Black plate (55,1)Chevrolet HHR Owner Manual - 2011
When to Check
Check your tires once a month or more. Do not
forget to check the compact spare tire, it should
be at 60 psi (420 kPa). For additional information
regarding the compact spare tire, seeCompact
Spare Tire
on page 6‑91.
How to Check
Use a good quality pocket-type gauge to check
tire pressure. You cannot tell if your tires are
properly inflated simply by looking at them.
Radial tires may look properly inflated even
when they are under‐inflated. Check the tire's
inflation pressure when the tires are cold.
Cold means your vehicle has been sitting for
at least three hours or driven no more than
1 mile (1.6 km).
Remove the valve cap from the tire valve stem.
Press the tire gauge firmly onto the valve to get a
pressure measurement. If the cold tire inflation
pressure matches the recommended pressure on
the Tire and Loading Information label, no further
adjustment is necessary. If the inflation pressure
is low, add air until you reach the recommended
amount. If you overfill the tire, release air by pushing on
the metal stem in the center of the tire valve.
Re‐check the tire pressure with the tire gauge.
Be sure to put the valve caps back on the valve
stems. They help prevent leaks by keeping out dirt
and moisture.
Tire Pressure Monitor System
The Tire Pressure Monitor System (TPMS) uses radio
and sensor technology to check tire pressure levels.
The TPMS sensors monitor the air pressure in your
vehicle's tires and transmit tire pressure readings to a
receiver located in the vehicle.
Each tire, including the spare (if provided), should be
checked monthly when cold and inflated to the inflation
pressure recommended by the vehicle manufacturer
on the vehicle placard or tire inflation pressure label.
(If your vehicle has tires of a different size than the size
indicated on the vehicle placard or tire inflation pressure
label, you should determine the proper tire inflation
pressure for those tires.)
As an added safety feature, your vehicle has been
equipped with a tire pressure monitoring system
(TPMS) that illuminates a low tire pressure telltale when
one or more of your tires is significantly under‐inflated.
6-55
Page 332 of 430
Black plate (56,1)Chevrolet HHR Owner Manual - 2011
Accordingly, when the low tire pressure telltale
illuminates, you should stop and check your tires as
soon as possible, and inflate them to the proper
pressure. Driving on a significantly under‐inflated tire
causes the tire to overheat and can lead to tire failure.
Under‐inflation also reduces fuel efficiency and tire
tread life, and may affect the vehicle's handling and
stopping ability.
Please note that the TPMS is not a substitute for proper
tire maintenance, and it is the driver's responsibility to
maintain correct tire pressure, even if under‐inflation
has not reached the level to trigger illumination of the
TPMS low tire pressure telltale.
Your vehicle has also been equipped with a TPMS
malfunction indicator to indicate when the system is not
operating properly. The TPMS malfunction indicator is
combined with the low tire pressure telltale. When the
system detects a malfunction, the telltale will flash for
approximately one minute and then remain continuously
illuminated. This sequence will continue upon
subsequent vehicle start‐ups as long as the malfunction
exists.When the malfunction indicator is illuminated, the
system may not be able to detect or signal low tire
pressure as intended. TPMS malfunctions may occur
for a variety of reasons, including the installation of
replacement or alternate tires or wheels on the vehicle
that prevent the TPMS from functioning properly.
Always check the TPMS malfunction telltale after
replacing one or more tires or wheels on your vehicle to
ensure that the replacement or alternate tires and
wheels allow the TPMS to continue to function properly.
See
Tire Pressure Monitor Operation
on page 6‑57for
additional information.
Federal Communications Commission
(FCC) and Industry Canada
See Radio Frequency Statementon page 8‑17for
information regarding Part 15 of the Federal
Communications Commission (FCC) rules and Industry
Canada Standards RSS-210/220/310.
6-56
Page 333 of 430
Black plate (57,1)Chevrolet HHR Owner Manual - 2011
Tire Pressure Monitor Operation
This vehicle may have a Tire Pressure Monitor System
(TPMS). The TPMS is designed to warn the driver when
a low tire pressure condition exists. If your vehicle has
this feature, TPMS sensors are mounted onto each tire
and wheel assembly, excluding the spare tire and wheel
assembly. The TPMS sensors monitor the air pressure
in the vehicle's tires and transmits the tire pressure
readings to a receiver located in the vehicle.
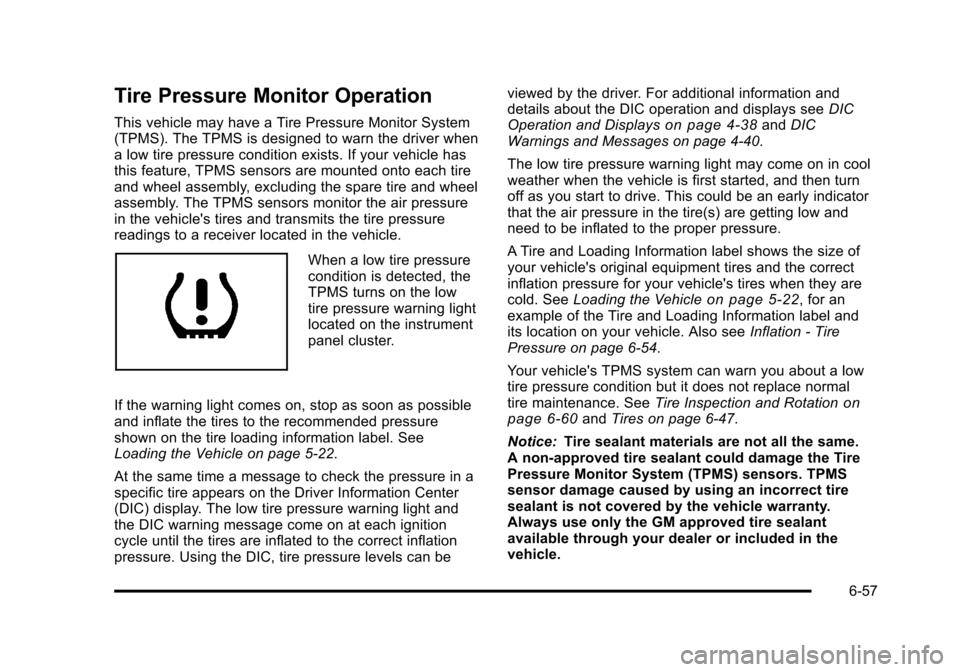
When a low tire pressure
condition is detected, the
TPMS turns on the low
tire pressure warning light
located on the instrument
panel cluster.
If the warning light comes on, stop as soon as possible
and inflate the tires to the recommended pressure
shown on the tire loading information label. See
Loading the Vehicle on page 5‑22.
At the same time a message to check the pressure in a
specific tire appears on the Driver Information Center
(DIC) display. The low tire pressure warning light and
the DIC warning message come on at each ignition
cycle until the tires are inflated to the correct inflation
pressure. Using the DIC, tire pressure levels can be viewed by the driver. For additional information and
details about the DIC operation and displays see
DIC
Operation and Displays
on page 4‑38and DIC
Warnings and Messages on page 4‑40.
The low tire pressure warning light may come on in cool
weather when the vehicle is first started, and then turn
off as you start to drive. This could be an early indicator
that the air pressure in the tire(s) are getting low and
need to be inflated to the proper pressure.
A Tire and Loading Information label shows the size of
your vehicle's original equipment tires and the correct
inflation pressure for your vehicle's tires when they are
cold. See Loading the Vehicle
on page 5‑22, for an
example of the Tire and Loading Information label and
its location on your vehicle. Also see Inflation - Tire
Pressure on page 6‑54.
Your vehicle's TPMS system can warn you about a low
tire pressure condition but it does not replace normal
tire maintenance. See Tire Inspection and Rotation
on
page 6‑60and Tires on page 6‑47.
Notice: Tire sealant materials are not all the same.
A non-approved tire sealant could damage the Tire
Pressure Monitor System (TPMS) sensors. TPMS
sensor damage caused by using an incorrect tire
sealant is not covered by the vehicle warranty.
Always use only the GM approved tire sealant
available through your dealer or included in the
vehicle.
6-57
Page 335 of 430
Black plate (59,1)Chevrolet HHR Owner Manual - 2011
TPMS Sensor Matching Process
Each TPMS sensor has a unique identification code.
Any time you replace one or more of the TPMS sensors
or rotate the vehicle's tires, the identification codes
need to be matched to the new tire/wheel location. The
sensors are matched, to the tire/wheel locations, in the
following order: driver side front tire, passenger side
front tire, passenger side rear tire, and driver side rear
tire using a TPMS diagnostic tool. See your dealer for
service.
The TPMS sensors can also be matched to each tire/
wheel position by increasing or decreasing the tire's air
pressure. When increasing the tire's pressure, do not
exceed the maximum inflation pressure indicated on the
tire's sidewall. To decrease the tire's air-pressure use
the pointed end of the valve cap, a pencil-style air
pressure gauge, or a key.
You have two minutes to match each tire and wheel
position. If it takes longer than two minutes to match
any tire and wheel position, the matching process stops
and you need to start over.
The TPMS matching process is outlined below:1. Set the parking brake.
2. Turn the ignition switch to ON/RUN with the engine off. 3. Press and hold the Remote Keyless Entry (RKE)
transmitter's LOCK and UNLOCK buttons, at the
same time, for about five seconds to start the
TPMS learn mode. The horn sounds twice
indicating the TPMS receiver is ready and in
learn mode.
4. Start with the driver side front tire. The driver side front turn signal also comes on to indicate that
corner's sensor is ready to be learned.
5. Remove the valve cap from the tire's valve stem. Activate the TPMS sensor by increasing or
decreasing the tire's air pressure for about
eight seconds. The horn chirp, can take up to
30 seconds to sound. It chirps one time and then
all the turn signals flash one time to confirm the
sensor identification code has been matched to the
tire/wheel position.
6. The passenger side front turn signal comes on to indicate that corner sensor is ready to be learned.
Proceed to the passenger side front tire and repeat
the procedure in Step 5.
7. The passenger side rear turn signal comes on to indicate that corner sensor is ready to be learned.
Proceed to the passenger side rear tire and repeat
the procedure in Step 5.
6-59
Page 337 of 430
Black plate (61,1)Chevrolet HHR Owner Manual - 2011
Any time you notice unusual wear, rotate the tires
as soon as possible and check wheel alignment.
Also check for damaged tires or wheels. See
When It Is Time for New Tires
on page 6‑62and
Wheel Replacement
on page 6‑67.
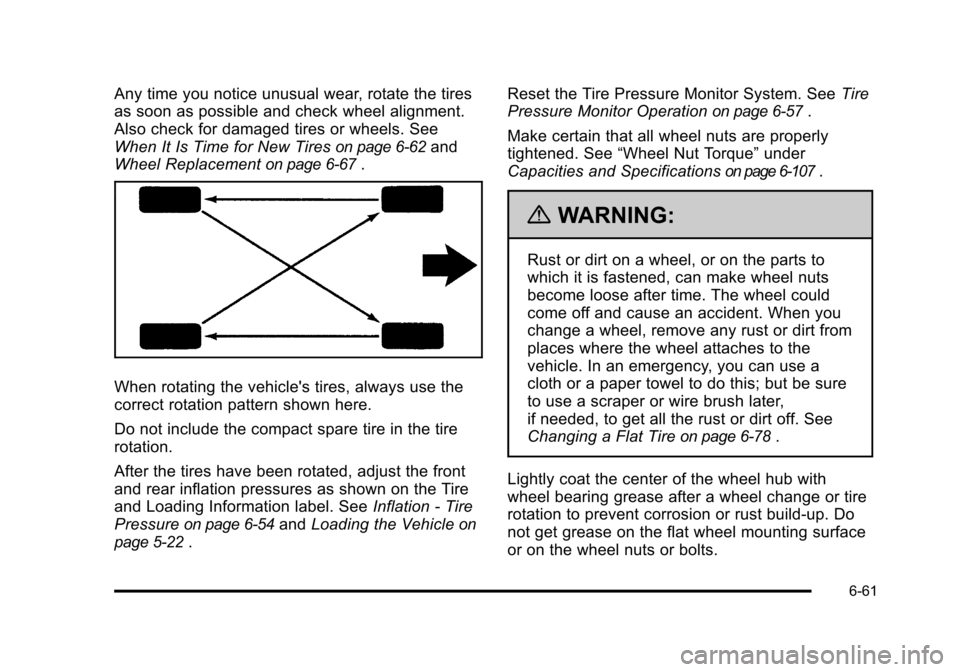
When rotating the vehicle's tires, always use the
correct rotation pattern shown here.
Do not include the compact spare tire in the tire
rotation.
After the tires have been rotated, adjust the front
and rear inflation pressures as shown on the Tire
and Loading Information label. See Inflation - Tire
Pressure
on page 6‑54and Loading the Vehicleon
page 5‑22
. Reset the Tire Pressure Monitor System. See
Tire
Pressure Monitor Operation
on page 6‑57.
Make certain that all wheel nuts are properly
tightened. See “Wheel Nut Torque” under
Capacities and Specifications
on page 6‑107.
{WARNING:
Rust or dirt on a wheel, or on the parts to
which it is fastened, can make wheel nuts
become loose after time. The wheel could
come off and cause an accident. When you
change a wheel, remove any rust or dirt from
places where the wheel attaches to the
vehicle. In an emergency, you can use a
cloth or a paper towel to do this; but be sure
to use a scraper or wire brush later,
if needed, to get all the rust or dirt off. See
Changing a Flat Tire
on page 6‑78.
Lightly coat the center of the wheel hub with
wheel bearing grease after a wheel change or tire
rotation to prevent corrosion or rust build-up. Do
not get grease on the flat wheel mounting surface
or on the wheel nuts or bolts.
6-61
Page 338 of 430
Black plate (62,1)Chevrolet HHR Owner Manual - 2011
When It Is Time for New Tires
Various factors, such as maintenance, temperatures,
driving speeds, vehicle loading, and road conditions
influence when you need new tires.
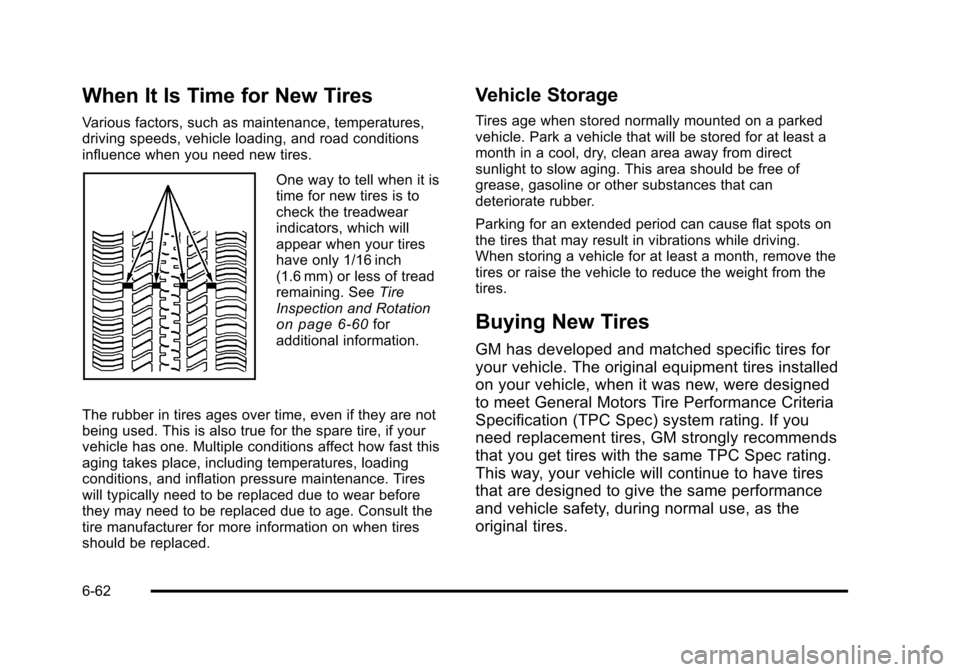
One way to tell when it is
time for new tires is to
check the treadwear
indicators, which will
appear when your tires
have only 1/16 inch
(1.6 mm) or less of tread
remaining. SeeTire
Inspection and Rotation
on page 6‑60for
additional information.
The rubber in tires ages over time, even if they are not
being used. This is also true for the spare tire, if your
vehicle has one. Multiple conditions affect how fast this
aging takes place, including temperatures, loading
conditions, and inflation pressure maintenance. Tires
will typically need to be replaced due to wear before
they may need to be replaced due to age. Consult the
tire manufacturer for more information on when tires
should be replaced.
Vehicle Storage
Tires age when stored normally mounted on a parked
vehicle. Park a vehicle that will be stored for at least a
month in a cool, dry, clean area away from direct
sunlight to slow aging. This area should be free of
grease, gasoline or other substances that can
deteriorate rubber.
Parking for an extended period can cause flat spots on
the tires that may result in vibrations while driving.
When storing a vehicle for at least a month, remove the
tires or raise the vehicle to reduce the weight from the
tires.
Buying New Tires
GM has developed and matched specific tires for
your vehicle. The original equipment tires installed
on your vehicle, when it was new, were designed
to meet General Motors Tire Performance Criteria
Specification (TPC Spec) system rating. If you
need replacement tires, GM strongly recommends
that you get tires with the same TPC Spec rating.
This way, your vehicle will continue to have tires
that are designed to give the same performance
and vehicle safety, during normal use, as the
original tires.
6-62