2011 CHEVROLET CORVETTE automatic transmission
[x] Cancel search: automatic transmissionPage 42 of 428
Black plate (10,1)Chevrolet Corvette Owner Manual - 2011
2-10 Keys, Doors and Windows
Automatic Door Locks
The vehicle is programmed so that,
when the doors are closed, the
ignition is on and the shift lever is
moved out of P (Park) for automatic
transmissions, or when vehicle
speed becomes faster than 13 km/h
(8 mph) for manual transmissions,
both doors will lock.
Use the power door unlock switch to
unlock the door when the vehicle is
not in P (Park). When the door is
closed again, the doors will lock
either when your foot is removed
from the brake or the vehicle
speed becomes faster than
13 km/h (8 mph).
Automatic Door Unlock
The vehicle is programmed so that
when the shift lever is moved into
P (Park) for automatic transmission
vehicles or when the ignition is
turned OFF or is in Retained
Accessory Power (RAP) for manual
transmission vehicles, both doors
will unlock.With the vehicle stopped and the
engine running, door unlocking
can be programmed through the
Driver Information Center (DIC).
This allows the driver to choose
various unlock settings.
For programming information,
see
Vehicle Personalization on
page 5‑55.
Lockout Protection
Your vehicle can be programmed
to sound the horn three times and
unlock the driver door when both
doors are closed and there is a
keyless access transmitter inside
the vehicle. When the driver door
is opened, a reminder chime will
sound continuously. The vehicle will
remain locked only when at least
one transmitter has been removed
from the vehicle and both doors are
closed. See Vehicle Personalization
on page 5‑55.
Doors
Hatch
{WARNING
Exhaust gases can enter the
vehicle if it is driven with the
liftgate, trunk/hatch open, or
with any objects that pass
through the seal between the
body and the trunk/hatch or
liftgate. Engine exhaust contains
Carbon Monoxide (CO) which
cannot be seen or smelled. It can
cause unconsciousness and even
death.
If the vehicle must be driven with
the liftgate, or trunk/hatch open:
.Close all of the windows.
.Fully open the air outlets
on or under the instrument
panel.
(Continued)
Page 43 of 428

Black plate (11,1)Chevrolet Corvette Owner Manual - 2011
Keys, Doors and Windows 2-11
WARNING (Continued)
.Adjust the Climate Control
system to a setting that
brings in only outside air
and set the fan speed to the
highest setting. See Climate
Control System in the Index.
.If the vehicle is equipped with
a power liftgate, disable the
power liftgate function.
For more information about
carbon monoxide, see Engine
Exhaust on page 9‑26.
Notice: Closing the hatch/trunk
lid forcefully or from the sides
can cause damage to the glass,
the defogger or the weather
stripping. Be sure objects will fit
in the hatch/trunk area before
closing the hatch/trunk lid. When
closing the hatch/trunk lid, gently
pull down from the center. Notice:
Do not store heavy or
sharp objects in the rear storage
compartments located in the
hatch/trunk area. The objects
could damage the underbody.
Hatch/Trunk Lid Release
There are several ways to release
the hatch/trunk lid. If your vehicle
has an automatic transmission,
the shift lever must be in P (Park).
For manual transmission vehicles,
the parking brake must be set
when the ignition is started for
the hatch/trunk release to operate.
The parking brake does not need
to be set when the ignition is off for
the hatch/trunk release to operate.
See Parking Brake on page 9‑35.
V(Hatch/Trunk) : Press this
button, located on the instrument
panel to the left of the steering
wheel. The theft-deterrent alarm
system must not be armed.
}(Hatch/Trunk) : Press this
button on the keyless access
transmitter. See Remote Keyless
Entry (RKE) System on page 2‑3.
Press the hatch/trunk release button
located on the rear of the hatch/
trunk lid above the license plate, as
long as you have your transmitter
with you.
If your vehicle has lost battery
power, open the hatch/trunk using
the vehicle key. See Keys on
page 2‑2 for more information.
The key lock cylinder is located on
the rear of the hatch/trunk lid above
the license plate. Turn the vehicle
key clockwise in the lock.
Page 51 of 428
Black plate (19,1)Chevrolet Corvette Owner Manual - 2011
Keys, Doors and Windows 2-19
Until you are sure you can remove
the panel alone, have someone
help you.
Notice:If you drop or rest a roof
panel on its edges, the roof panel,
paint and/or weatherstripping
may be damaged. Always place
the roof panel in the stowage
receivers after removing it from
the vehicle.
1. Park on a level surface and set the parking brake. Shift an
automatic transmission into
P (Park). Shift a manual
transmission into N (Neutral).
2. Make sure the ignition is off.
3. Lower both sun visors.
4. Open the rear hatch and remove any items that may interfere with
proper storage of the roof panel. 5. Lower the windows.
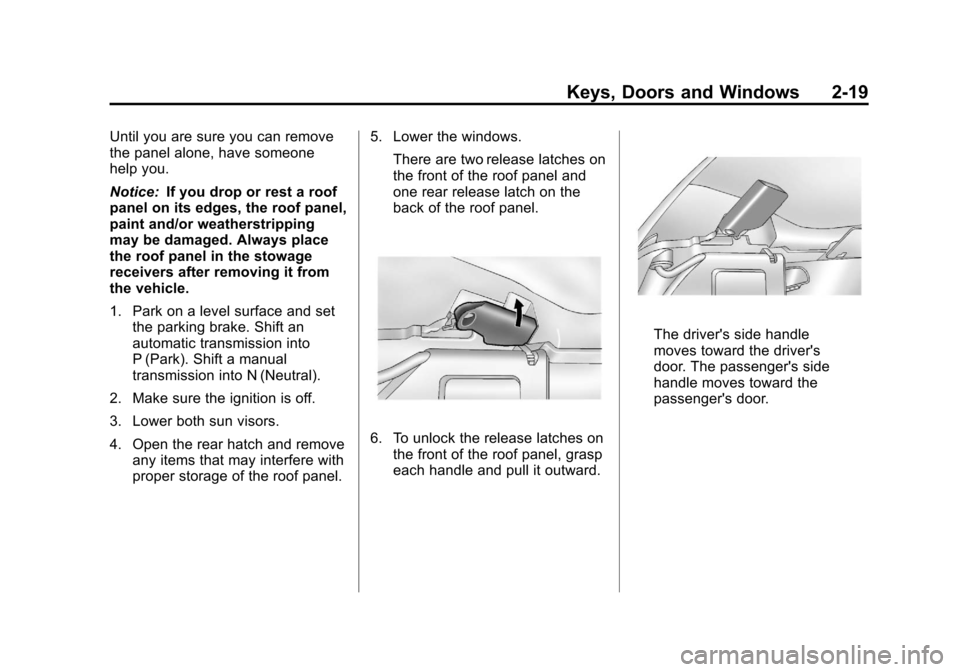
There are two release latches on
the front of the roof panel and
one rear release latch on the
back of the roof panel.
6. To unlock the release latches onthe front of the roof panel, grasp
each handle and pull it outward.
The driver's side handle
moves toward the driver's
door. The passenger's side
handle moves toward the
passenger's door.
Page 53 of 428
Black plate (21,1)Chevrolet Corvette Owner Manual - 2011
Keys, Doors and Windows 2-21
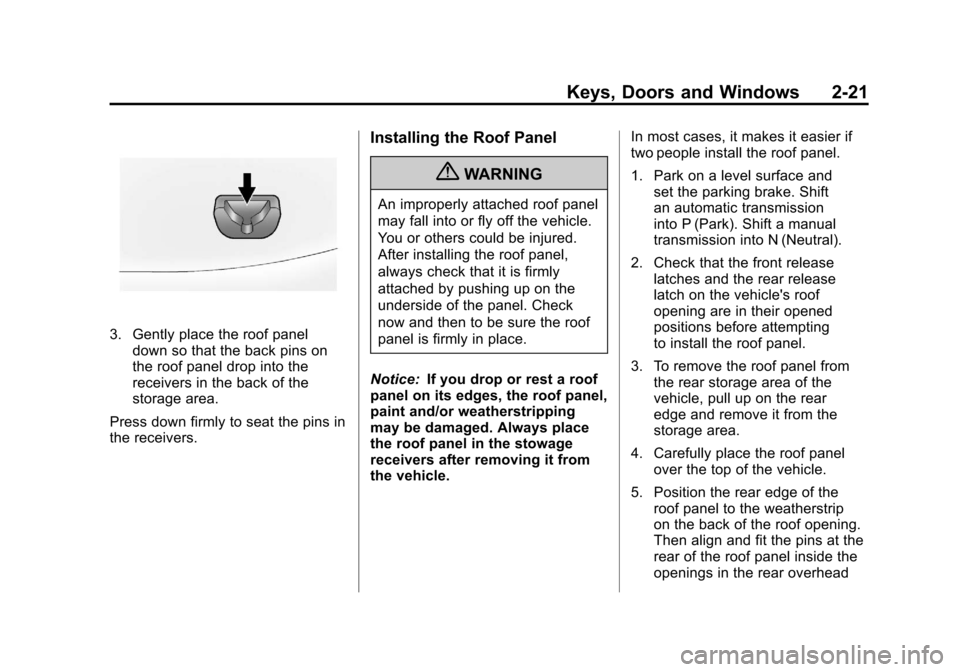
3. Gently place the roof paneldown so that the back pins on
the roof panel drop into the
receivers in the back of the
storage area.
Press down firmly to seat the pins in
the receivers.
Installing the Roof Panel
{WARNING
An improperly attached roof panel
may fall into or fly off the vehicle.
You or others could be injured.
After installing the roof panel,
always check that it is firmly
attached by pushing up on the
underside of the panel. Check
now and then to be sure the roof
panel is firmly in place.
Notice: If you drop or rest a roof
panel on its edges, the roof panel,
paint and/or weatherstripping
may be damaged. Always place
the roof panel in the stowage
receivers after removing it from
the vehicle. In most cases, it makes it easier if
two people install the roof panel.
1. Park on a level surface and
set the parking brake. Shift
an automatic transmission
into P (Park). Shift a manual
transmission into N (Neutral).
2. Check that the front release latches and the rear release
latch on the vehicle's roof
opening are in their opened
positions before attempting
to install the roof panel.
3. To remove the roof panel from the rear storage area of the
vehicle, pull up on the rear
edge and remove it from the
storage area.
4. Carefully place the roof panel over the top of the vehicle.
5. Position the rear edge of the roof panel to the weatherstrip
on the back of the roof opening.
Then align and fit the pins at the
rear of the roof panel inside the
openings in the rear overhead
Page 55 of 428
Black plate (23,1)Chevrolet Corvette Owner Manual - 2011
Keys, Doors and Windows 2-23
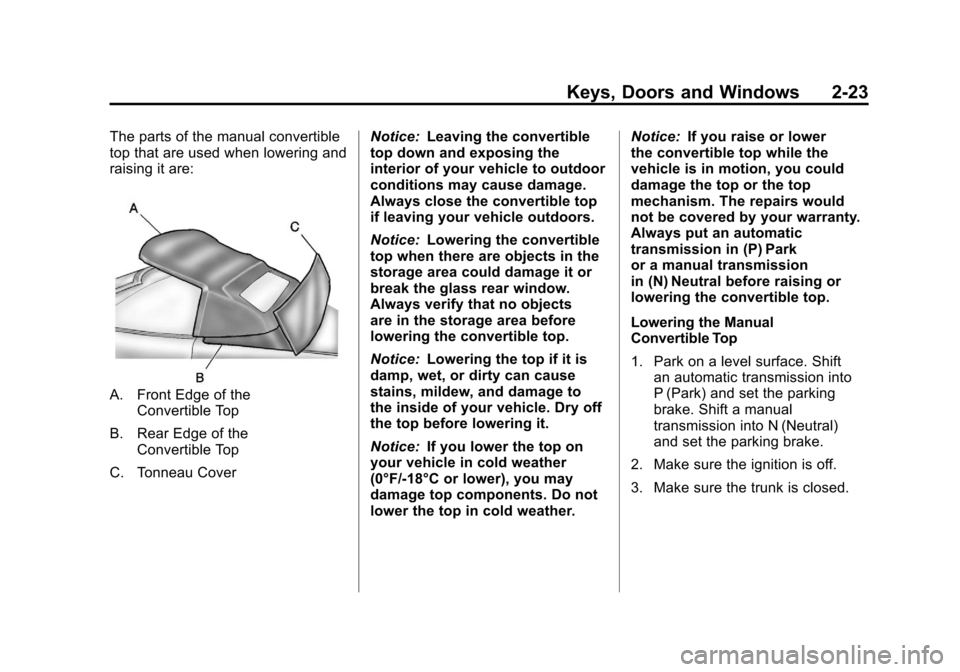
The parts of the manual convertible
top that are used when lowering and
raising it are:
A. Front Edge of theConvertible Top
B. Rear Edge of the Convertible Top
C. Tonneau Cover Notice:
Leaving the convertible
top down and exposing the
interior of your vehicle to outdoor
conditions may cause damage.
Always close the convertible top
if leaving your vehicle outdoors.
Notice: Lowering the convertible
top when there are objects in the
storage area could damage it or
break the glass rear window.
Always verify that no objects
are in the storage area before
lowering the convertible top.
Notice: Lowering the top if it is
damp, wet, or dirty can cause
stains, mildew, and damage to
the inside of your vehicle. Dry off
the top before lowering it.
Notice: If you lower the top on
your vehicle in cold weather
(0°F/-18°C or lower), you may
damage top components. Do not
lower the top in cold weather. Notice:
If you raise or lower
the convertible top while the
vehicle is in motion, you could
damage the top or the top
mechanism. The repairs would
not be covered by your warranty.
Always put an automatic
transmission in (P) Park
or a manual transmission
in (N) Neutral before raising or
lowering the convertible top.
Lowering the Manual
Convertible Top
1. Park on a level surface. Shift an automatic transmission into
P (Park) and set the parking
brake. Shift a manual
transmission into N (Neutral)
and set the parking brake.
2. Make sure the ignition is off.
3. Make sure the trunk is closed.
Page 58 of 428
Black plate (26,1)Chevrolet Corvette Owner Manual - 2011
2-26 Keys, Doors and Windows
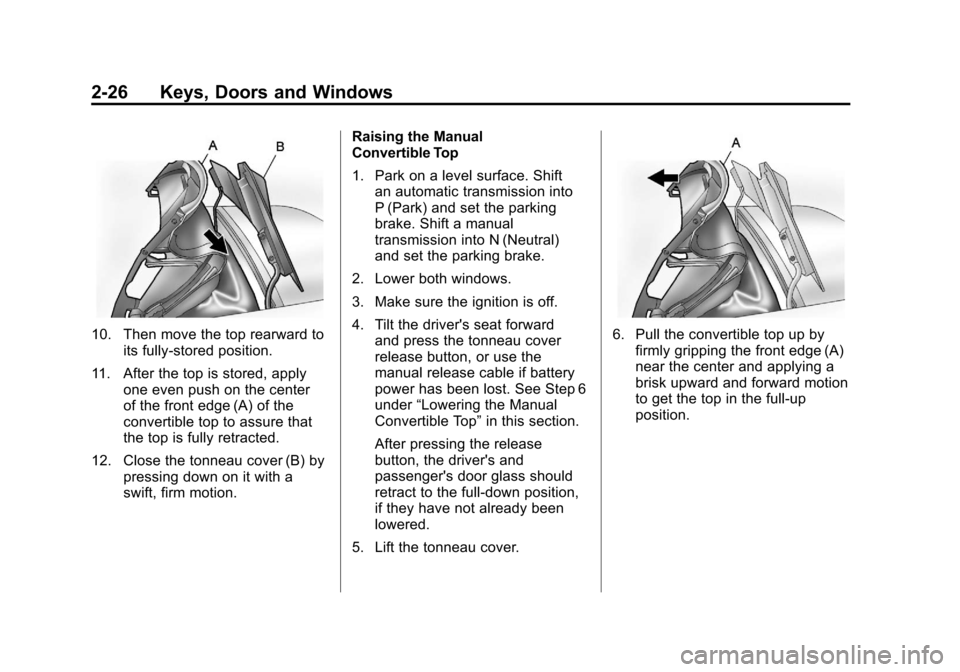
10. Then move the top rearward toits fully-stored position.
11. After the top is stored, apply one even push on the center
of the front edge (A) of the
convertible top to assure that
the top is fully retracted.
12. Close the tonneau cover (B) by pressing down on it with a
swift, firm motion. Raising the Manual
Convertible Top
1. Park on a level surface. Shift
an automatic transmission into
P (Park) and set the parking
brake. Shift a manual
transmission into N (Neutral)
and set the parking brake.
2. Lower both windows.
3. Make sure the ignition is off.
4. Tilt the driver's seat forward and press the tonneau cover
release button, or use the
manual release cable if battery
power has been lost. See Step 6
under “Lowering the Manual
Convertible Top” in this section.
After pressing the release
button, the driver's and
passenger's door glass should
retract to the full-down position,
if they have not already been
lowered.
5. Lift the tonneau cover.6. Pull the convertible top up by firmly gripping the front edge (A)
near the center and applying a
brisk upward and forward motion
to get the top in the full-up
position.
Page 60 of 428
Black plate (28,1)Chevrolet Corvette Owner Manual - 2011
2-28 Keys, Doors and Windows
Power Operation
For care and cleaning of the
convertible top see“Cleaning the
Convertible Top” in this section.
High pressure car washes may
cause water to enter the vehicle.
To operate the power convertible
top use the following steps.
Notice: Leaving the convertible
top down and exposing the
interior of your vehicle to outdoor
conditions may cause damage.
Always close the convertible top
if leaving your vehicle outdoors.
Notice: Lowering the convertible
top when there are objects in the
storage area could damage it or
break the glass rear window.
Always verify that no objects
are in the storage area before
lowering the convertible top.
Notice: Lowering the top if it is
damp, wet, or dirty can cause
stains, mildew, and damage to the
inside of your vehicle. Dry off the
top before lowering it. Notice:
If you lower the top on
your vehicle in cold weather
(0°F/-18°C or lower), you may
damage top components. Do not
lower the top in cold weather.
Notice: If you raise or lower the
convertible top while the vehicle
is in motion, you could damage
the top or the top mechanism.
The repairs would not be covered
by your warranty. Always put
an automatic transmission
in (P) Park or a manual
transmission in (N) Neutral
before raising or lowering the
convertible top.
Lowering the Power
Convertible Top
1. Park on a level surface. Start the engine. Shift an automatic
transmission into P (Park) and
set the parking brake. Shift
a manual transmission into
N (Neutral), and set the parking
brake. 2. Make sure the trunk is closed
and the rear trunk partition in
the rear storage area is in the
fastened upright position, and
that no objects are forward of
the divider. See “Rear Trunk
Partition” underRear Storage on
page 4‑1.
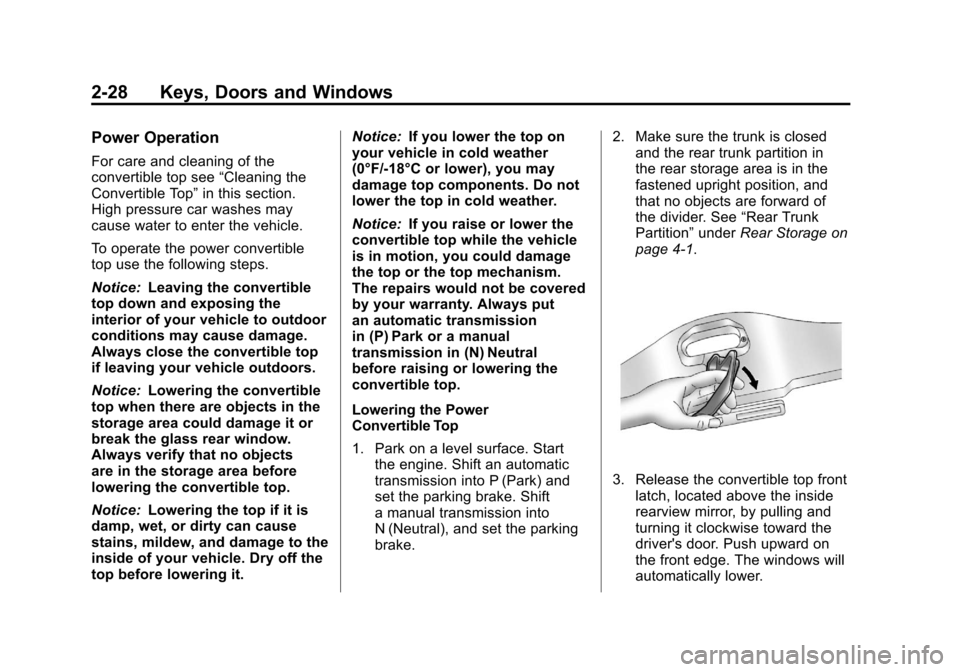
3. Release the convertible top front latch, located above the inside
rearview mirror, by pulling and
turning it clockwise toward the
driver's door. Push upward on
the front edge. The windows will
automatically lower.
Page 61 of 428

Black plate (29,1)Chevrolet Corvette Owner Manual - 2011
Keys, Doors and Windows 2-29
4. Return the convertible top frontlatch to the closed position.
5. Push and hold the bottom of thepower convertible top button,
located to the left of the steering
wheel, on the instrument panel. The convertible top will lower into
the rear of the vehicle. A chime will
sound when the convertible top has
lowered completely. If the radio is
on the sound may be muted for a
brief time due to a new audio
system equalization being loaded.
If the convertible top is operated
multiple times, the engine should
be running to prevent drain on the
vehicle's battery. Under certain
conditions, the Driver Information
Center (DIC) may display a
message regarding the power
convertible top. See
Convertible
Top Messages on page 5‑37 for
more information. Raising the Power Convertible Top
Notice:
If you raise or lower
the convertible top while the
vehicle is in motion, you could
damage the top or the top
mechanism. The repairs would
not be covered by your warranty.
Always put an automatic
transmission in (P) Park
or a manual transmission
in (N) Neutral before raising or
lowering the convertible top.
1. Park on a level surface. Start the engine. Shift an automatic
transmission into P (Park) and
set the parking brake. Shift
a manual transmission into
N (Neutral) and set the parking
brake.
2. Make sure the trunk lid is closed and the rear trunk partition in
the rear storage area is in the
fastened upright position, and
that no objects are forward of
the divider. See “Rear Trunk
Partition” underRear Storage on
page 4‑1.