2011 BMW 535I rear entertainment
[x] Cancel search: rear entertainmentPage 204 of 304

Vehicle information*
Computer content can be displayed. Operation
is only possible in the front.
Options menu
The split screen is not available and there is no
Integrated Owner's Manual.
Operation
is the same as for the front menu op‐
tions, refer to page 18.
Enabling
Enabling operation in the rear
Only possible via the iDrive in the front.
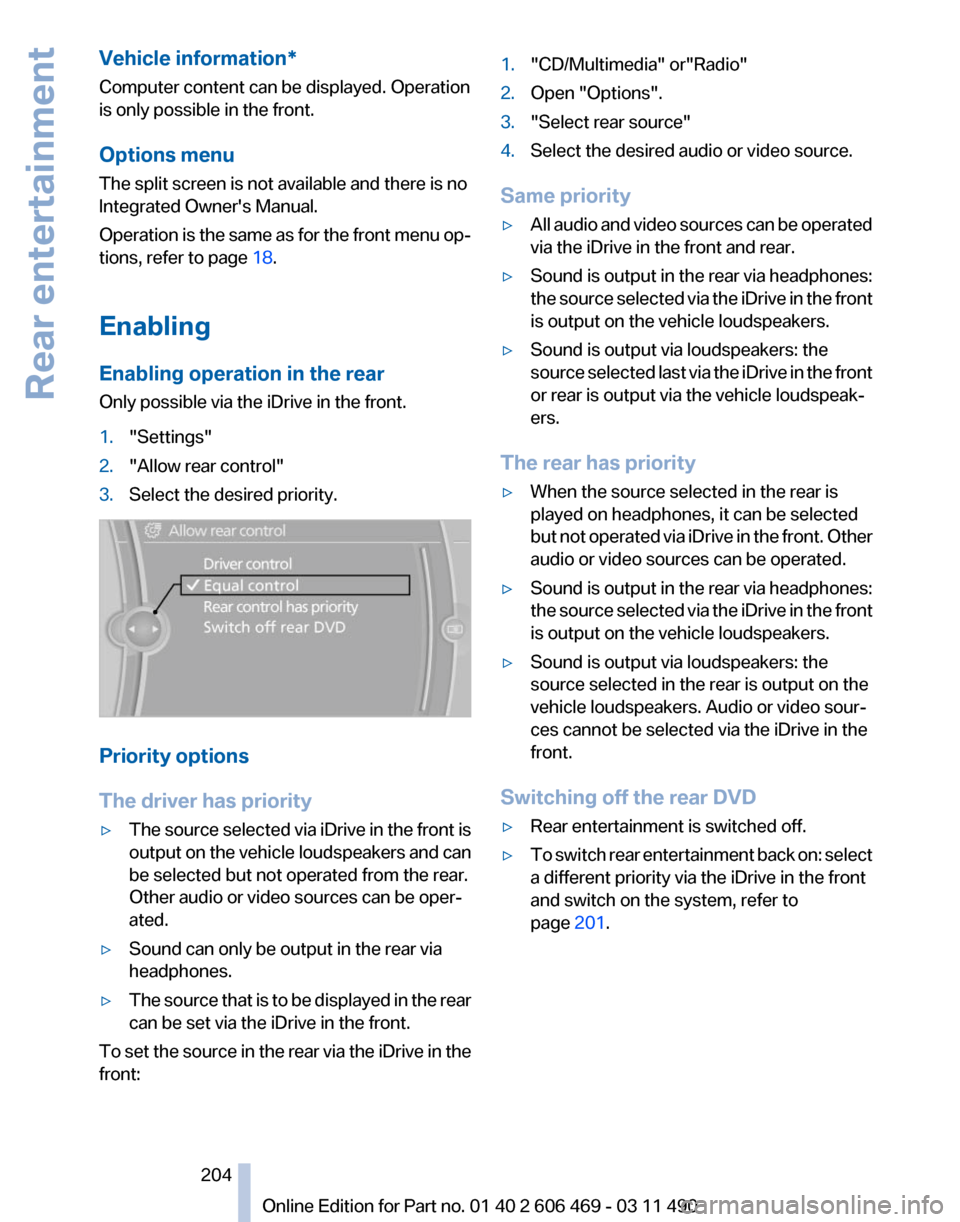
1. "Settings"
2. "Allow rear control"
3. Select the desired priority. Priority options
The driver has priority
▷
The source selected via iDrive in the front is
output
on the vehicle loudspeakers and can
be selected but not operated from the rear.
Other audio or video sources can be oper‐
ated.
▷ Sound can only be output in the rear via
headphones.
▷ The source that is to be displayed in the rear
can be set via the iDrive in the front.
To set the source in the rear via the iDrive in the
front: 1.
"CD/Multimedia" or"Radio"
2. Open "Options".
3. "Select rear source"
4. Select the desired audio or video source.
Same priority
▷ All audio and video sources can be operated
via the iDrive in the front and rear.
▷ Sound is output in the rear via headphones:
the
source selected via the iDrive in the front
is output on the vehicle loudspeakers.
▷ Sound is output via loudspeakers: the
source
selected last via the iDrive in the front
or rear is output via the vehicle loudspeak‐
ers.
The rear has priority
▷ When the source selected in the rear is
played on headphones, it can be selected
but
not operated via iDrive in the front. Other
audio or video sources can be operated.
▷ Sound is output in the rear via headphones:
the
source selected via the iDrive in the front
is output on the vehicle loudspeakers.
▷ Sound is output via loudspeakers: the
source selected in the rear is output on the
vehicle loudspeakers. Audio or video sour‐
ces cannot be selected via the iDrive in the
front.
Switching off the rear DVD
▷ Rear entertainment is switched off.
▷ To switch rear entertainment back on: select
a different priority via the iDrive in the front
and switch on the system, refer to
page 201.
Seite 204
204 Online Edition for Part no. 01 40 2 606 469 - 03 11 490
Rear entertainment
Page 205 of 304

Headphones, vehicle
loudspeakers
Connecting the headphones
Normal headphones
Connect via the jack 1/8"/3.5 mm, refer to
page
201, on the rear CD/DVD player.
Infrared headphones
Connection via the infrared interface on the
lower edge of the screen.
Fitting infrared headphones and information on
which headphones are supported can be ob‐
tained from your service center.
When using infrared headphones, ensure that
the connection between the headphones and
the infrared interface is not disrupted:
▷ Do not place an obstacle between the inter‐
face and headphones.
▷ Do not cover the interface.
▷ Do not scratch the interface.
Fold up display screens for interference-free re‐
ception.
Unfavorable light conditions such as bright am‐
bient light can impair reception.
Sound output on the headphones or
vehicle loudspeakers
Operation is only possible in the rear.
1. Open "Options".
2. "Headphones" or "Loudspeakers"
With the following setting, sound output in the
rear is not possible via the vehicle speakers:
"Driver control".
External devices
General information
External audio and video devices and digital
cameras
can be connected to cinch sockets, re‐
fer to page 201, on the CD/DVD player. Opera‐
tion takes place on the external device. Due to the large number of different audio and
video devices available on the market, it cannot
be ensured that every audio and video device
will be displayed correctly on the screen.
Connecting an external device
1.
Fold down the cover in front of the cinch
sockets on the CD/DVD player.
2. Connect the external device to the RCA
sockets.
▷Video: yellow socket.
▷ Audio: white and red socket.
Starting playback
1. "CD/Multimedia"
2. "External devices"
3. Select the or symbol.
Volume
The volume of the sound output is dependent
on the audio device. If this volume differs mark‐
edly
from the volume of the other audio sources,
it is advisable to adjust the volumes.
Adjusting the volume
The volume can only be adjusted if no external
video device is connected.
1. "CD/Multimedia"
2. "External devices"
3. Select the or symbol.
4. "Volume" 5.
Turn the controller until the desired volume
is set and press the controller.
Seite 205
205Online Edition for Part no. 01 40 2 606 469 - 03 11 490
Reference Mobility Communication
Entertainment Navigation Driving tips Controls At a glance
Page 206 of 304

What to do if...
Only a black screen is visible.
▷
Switch on the system.
There are no options available on the screen.
▷ Replace remote control batteries.
▷ With Professional rear seat entertainment
toggle between screens if necessary.
Radio stations or TV channels are grayed out
and cannot be selected.
▷ Function is limited due to the selected pri‐
ority. Change priority.
The DVD does not play.
▷ Playback does not begin automatically.
Start DVD manually, refer to page 183.
The volume of the rear vehicle speakers cannot
be adjusted.
▷ Sound in the rear is output via the head‐
phones. Change priority if necessary and
output sound via vehicle speakers.
Seite 206
206 Online Edition for Part no. 01 40 2 606 469 - 03 11 490Rear entertainment
Page 211 of 304

▷
The mobile phone is ready for operation.
▷ Bluetooth is activated in the vehicle and on
the mobile phone.
▷ Bluetooth presettings may need to be made
on the mobile phone, e.g., for a connection
without
confirmation or visibility, refer to the
mobile phone operating instructions.
▷ Deactivate Bluetooth audio if necessary.
▷ A number with at least four and a maximum
of 16 digits was defined as the Bluetooth
passkey. It is only required once for pairing.
▷ The ignition is switched on.
Activating/deactivating Bluetooth
Bluetooth
is not permitted everywhere. Comply
with all safety guidelines and regulations.
1. "Telephone"
2. Open "Options".
3. "Bluetooth®"
Additional functions
General information
Activate the functions before pairing to be able
to use them in the vehicle. Information on suit‐
able
mobile phones, refer to page 210, that sup‐
port these functions.
Additional telephone
A mobile phone can be used as an additional
telephone.
The additional telephone can be used to accept
incoming calls, refer to page 214. While a call is
active on the additional telephone, incoming
calls are displayed on the Control Display.
Audio source
A mobile phone can be used as an audio source.
Activating/deactivating the additional
functions
1. "Telephone"
2. "Bluetooth® (phone)" 3.
Open "Options".
4. Select the desired additional function.
▷"Additional telephone"
▷ "Office"
▷ "Bluetooth® audio"
Pairing and connecting a device Pairing a device
To
avoid becoming distracted and posing
an unnecessary hazard both to your own vehi‐
cle's occupants and to other road users, only
pair the device while the vehicle is stationary.◀
Pair the vehicle entirely on the front or rear Con‐
trol Display.
1. "Telephone"
2. "Bluetooth® (phone)"
3. "Add new phone"
The Bluetooth name of the vehicle is dis‐
played.
4. To perform additional steps on the mobile
phone, refer to the mobile phone operating
instructions:
for instance, search for or con‐
nect the Bluetooth device or a new device.
The Bluetooth name of the vehicle appears
on the mobile phone display.
5. Select the Bluetooth name of the vehicle on
the mobile phone display.
Prompt
via iDrive or the mobile phone to en‐
ter the same Bluetooth passkey.
6. Enter the passkey and confirm. 7.
Select the functions for which the mobile
phone is to be used.
8. "OK" Seite 211
211Online Edition for Part no. 01 40 2 606 469 - 03 11 490
Reference Mobility
Communication Entertainment Navigation Driving tips Controls At a glance
Page 253 of 304

The wheels are composed of special rims and
tires that are self-supporting, to a limited de‐
gree.
The
support of the sidewall allows the tire to re‐
main drivable to a restricted degree in the event
of a pressure loss.
Continued driving with a damaged tire., refer to
page 90
Changing run-flat tires
For your own safety, only use run-flat tires. No
spare tire is available in the case of a flat tire. Your
service center will be glad to advise you.
Snow chains
Fine-link snow chains
Only certain types of fine-link snow chains have
been tested by the manufacturer of your vehicle,
classified as road-safe and recommended.
Consult your service center for more informa‐
tion.
Use
Use only in pairs on the rear wheels, equipped
with the tires of the following size:
▷ 225/55 R 17.
▷ 245/45 R 18.
Follow the chain manufacturer's instructions.
Make
sure that the snow chains are always suf‐
ficiently tight. Retighten as needed according to
the chain manufacturer's instructions.
Do not initialize the Tire Pressure Monitor after
mounting snow chains, as doing so may result
in incorrect readings.
When driving with snow chains, briefly activate
Dynamic Traction Control if necessary.
Maximum speed with snow chains
Do not exceed a speed of 30 mph/50 km/h when
using snow chains. Snow chain detection*
The concept
When using snow chains, you should set
whether you are driving with or without snow
chains via the iDrive.
The
snow chain detection system supports you
by automatically showing the detected state on
the Control Display.
When snow chains are in use, the rear axle steer‐
ing of the Integral Active Steering* is deacti‐
vated automatically.
At speeds above the maximum allowable speed
with snow chains of 30 mph/50 km/h, the rear
axle steering is activated again automatically.
Activating the status
1. "Settings"
2. "Tire chains"
3. "Tire chains installed"
Automatic detection
If functioning properly:
▷ Snow chains are mounted. The setting is not
activated .
After you drive a short distance, a Check
Control message is shown and the state is
activated automatically.
Confirm the automatic activation.
▷ Snow chains are not mounted. The setting
is activated .
At speeds above 30 mph/50 km/h, a Check
Control message is displayed. Deactivate
the status manually.
If not functioning properly:
▷ Snow chains are mounted. The setting is not
activated .
A Check Control message is not displayed.
The
automatic detection system is malfunc‐
tioning. Activate the status manually.
Seite 253
253Online Edition for Part no. 01 40 2 606 469 - 03 11 490
Reference
Mobility Communication Entertainment Navigation Driving tips Controls At a glance
Page 265 of 304

1.
Fold open the cover in the engine compart‐
ment. 2.
Unscrew the cap and remove it. 3.
Unscrew the bulb holder counterclockwise. 4.
Remove the bulb and replace it.
5. Insert the new bulb and attach the cover in
the reverse order.
Front fog lamps
Follow the general instructions on lamps and
bulbs, refer to page 262.
35-watt bulb, H8 1.
Carefully pull out the grill toward the front. 2.
Remove the screws. 3.
Pull the lamp out toward the front.
4. Remove the bulb and replace it.
5. Insert the new bulb and attach the cover in
the reverse order.
Tail lamps, bulb replacement
At a glance 1
Turn signal
2 Backup lamp
3 Inside brake lamp*
4 Tail lamp
5 Outside brake lamp
6 Rear reflector*
Seite 265
265Online Edition for Part no. 01 40 2 606 469 - 03 11 490
Reference
Mobility Communication Entertainment Navigation Driving tips Controls At a glance
Page 273 of 304

▷
Maneuvering capability is limited during cor‐
nering.
▷ The tow bar will generate lateral forces if it
is secured with an offset.
Tow rope
When starting to tow the vehicle, make sure that
the tow rope is taut.
To avoid jerking and the associated stresses on
the vehicle components when towing, always
use nylon ropes or nylon straps.
Attaching the tow rope correctly
Only secure the tow rope on the tow fit‐
ting; otherwise, damage can occur when it is se‐
cured on other parts of the vehicle.◀
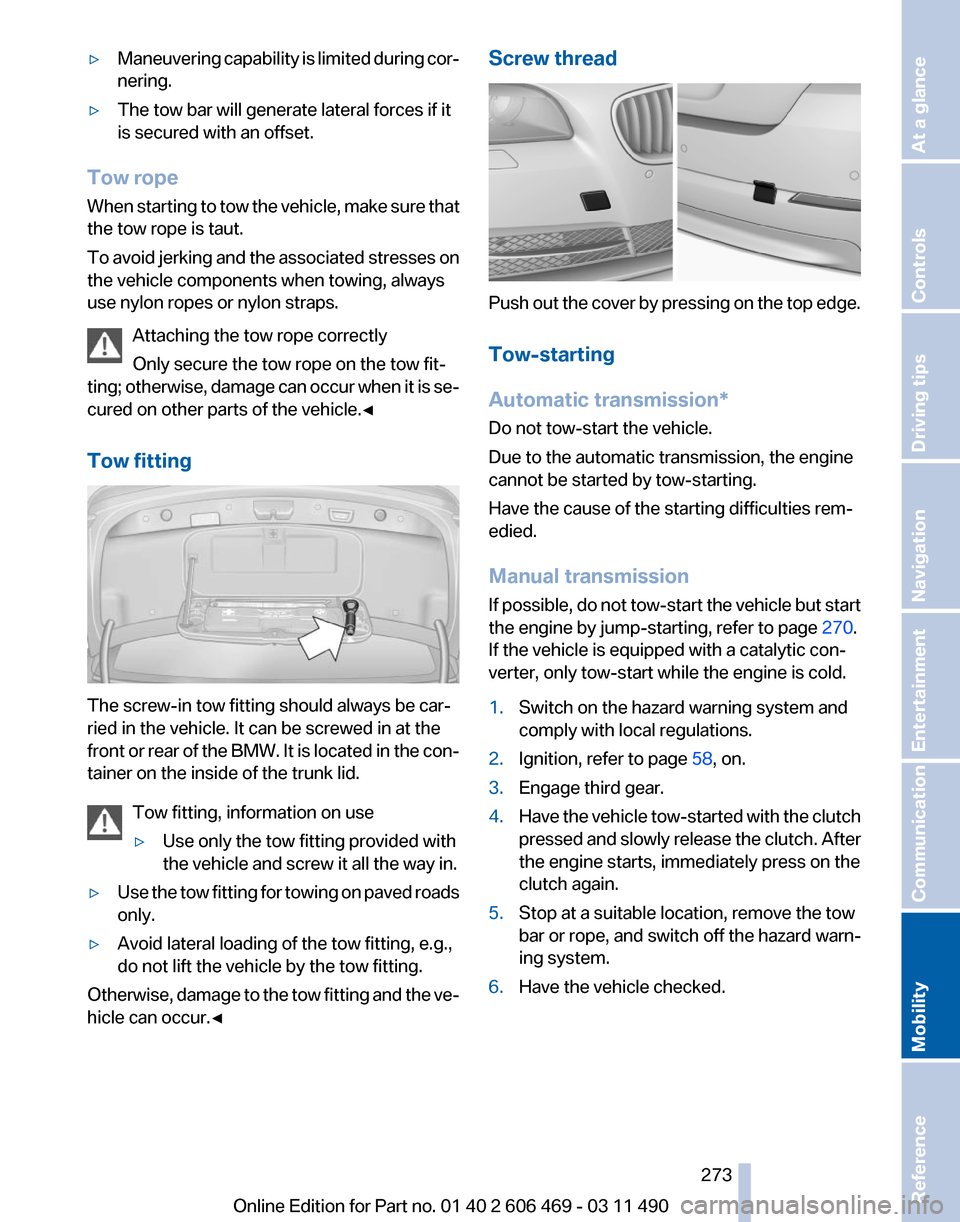
Tow fitting The screw-in tow fitting should always be car‐
ried in the vehicle. It can be screwed in at the
front
or rear of the BMW. It is located in the con‐
tainer on the inside of the trunk lid.
Tow fitting, information on use
▷Use only the tow fitting provided with
the vehicle and screw it all the way in.
▷ Use the tow fitting for towing on paved roads
only.
▷ Avoid lateral loading of the tow fitting, e.g.,
do not lift the vehicle by the tow fitting.
Otherwise, damage to the tow fitting and the ve‐
hicle can occur.◀ Screw thread
Push out the cover by pressing on the top edge.
Tow-starting
Automatic transmission
*
Do not tow-start the vehicle.
Due to the automatic transmission, the engine
cannot be started by tow-starting.
Have the cause of the starting difficulties rem‐
edied.
Manual transmission
If possible, do not tow-start the vehicle but start
the engine by jump-starting, refer to page 270.
If the vehicle is equipped with a catalytic con‐
verter, only tow-start while the engine is cold.
1. Switch on the hazard warning system and
comply with local regulations.
2. Ignition, refer to page 58, on.
3. Engage third gear.
4. Have the vehicle tow-started with the clutch
pressed
and slowly release the clutch. After
the engine starts, immediately press on the
clutch again.
5. Stop at a suitable location, remove the tow
bar or rope, and switch off the hazard warn‐
ing system.
6. Have the vehicle checked.
Seite 273
273Online Edition for Part no. 01 40 2 606 469 - 03 11 490
Reference
Mobility Communication Entertainment Navigation Driving tips Controls At a glance
Page 283 of 304

Weights
The values preceding the slash apply to vehicles
with manual transmission; the values following
the slash apply to vehicles with automatic trans‐
mission.
528i
Approved gross vehicle weight lbs/kg
4,982/2,260
Load lbs/kg1,058/480
Approved front axle load lbs/kg2,359/1,070
Approved rear axle load lbs/kg2,844/1,290
Approved roof load capacity lbs/kg220/100
Trunk capacity cu ft/l18.36/520
535i
Approved gross vehicle weight lbs
kg5,159/5,181
2,340/2,350
Load lbs/kg1,058/480
Approved front axle load lbs/kg2,491/1,130
Approved rear axle load lbs
kg2,866/2,888
1,300/1,310
Approved roof load capacity lbs/kg220/100
Cargo area capacity cu ft/l18.36/520
550i
Approved gross vehicle weight lbs
kg5,401/5,423
2,450/2,460
Load lbs/kg1,036/470
Approved front axle load lbs
kg2,712/2,734
1,230/1,240
Approved rear axle load lbs
kg2,932/2,943
1,330/1,335
Approved roof load capacity lbs/kg220/100
Cargo area capacity cu ft/l18.36/520 Seite 283
283Online Edition for Part no. 01 40 2 606 469 - 03 11 490
Reference Mobility Communication Entertainment Navigation Driving tips Controls At a glance