2011 BMW 335I CONVERTIBLE weight
[x] Cancel search: weightPage 45 of 278
Controls
43Reference
At a glance
Driving tips
Communications
Navigation
Entertainment
Mobility
Seats
Note before adjusting
Never attempt to adjust your seat while
the vehicle is moving. The seat could
respond with unexpected movement, and the
ensuing loss of vehicle control could lead to an
accident.
On the front passenger seat as well, do not
incline the backrest too far to the rear while the
vehicle is being driven; otherwise, there is a
danger in the event of an accident of sliding
under the safety belt, eliminating the protection
normally provided by the belt.<
Comply with the instructions on head restraint
height on page45, and on damaged safety
belts on page49.
Manual adjustment
Observe the adjustment instructions on
page43 to ensure the best possible per-
sonal protection.<
Longitudinal direction
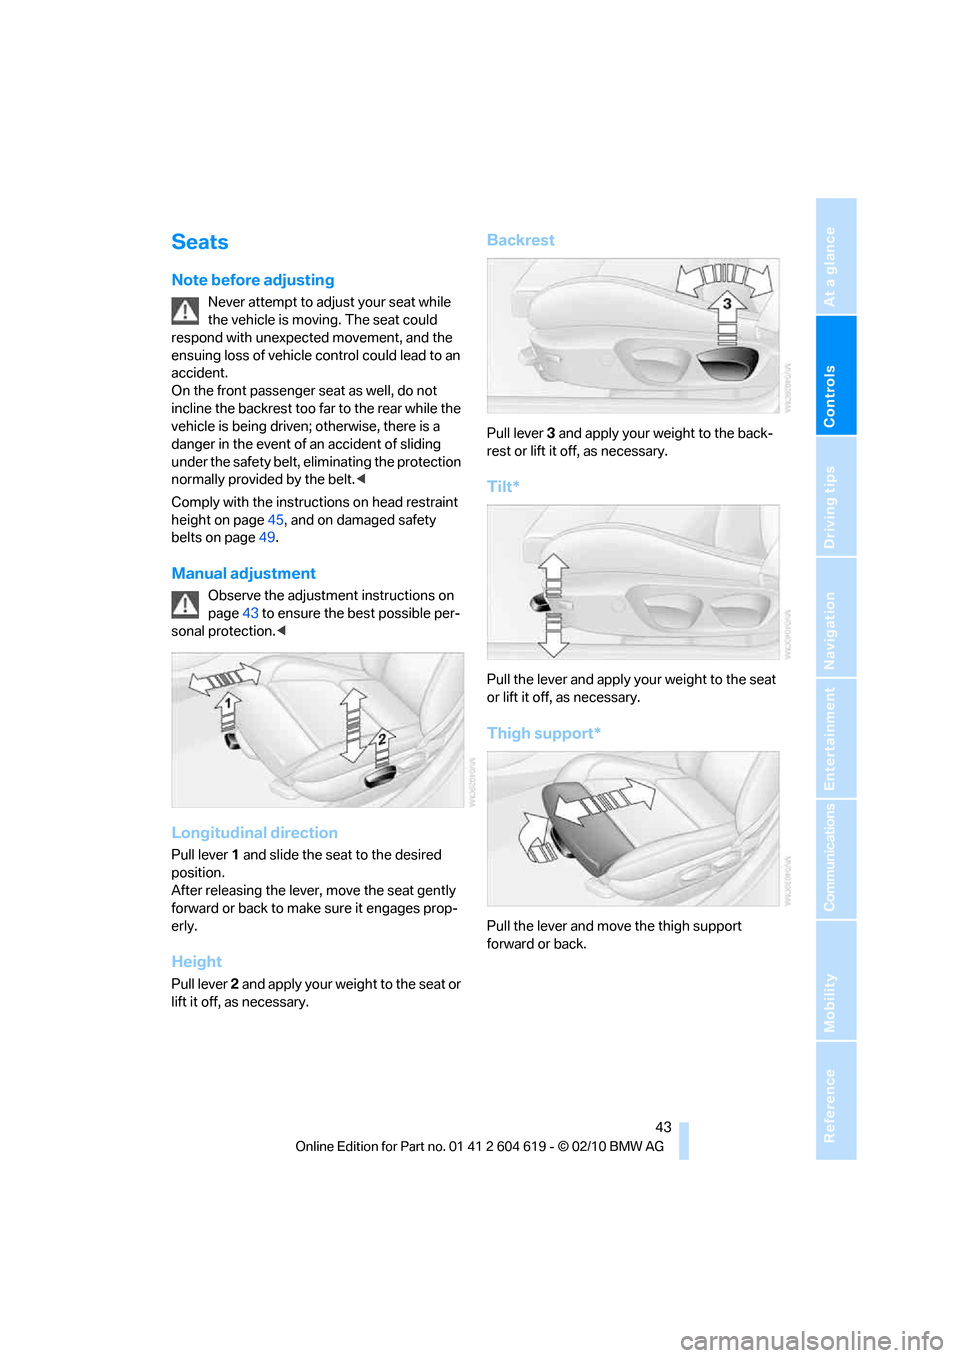
Pull lever 1 and slide the seat to the desired
position.
After releasing the lever, move the seat gently
forward or back to make sure it engages prop-
erly.
Height
Pull lever 2 and apply your weight to the seat or
lift it off, as necessary.
Backrest
Pull lever 3 and apply your weight to the back-
rest or lift it off, as necessary.
Tilt*
Pull the lever and apply your weight to the seat
or lift it off, as necessary.
Thigh support*
Pull the lever and move the thigh support
forward or back.
Page 54 of 278
Transporting children safely
52
Transporting children safely
The right place for children
Do not leave children unattended in the
vehicle; otherwise, they could endanger
themselves and/or other persons by opening
the doors, for example.<
Children always in the rear
Accident research has shown that the safest
place for children is on the rear seat.
Children under the age of 13 or smaller
than 5 ft/150 cm may be transported only
in the rear in suitable child restraint systems
appropriate for their age, weight and size. Oth-
erwise, there is an increased risk of injury in the
event of an accident.<
Children 13 years of age or older must be buck-
led in with a safety belt as soon as there no
longer is any child restraint system that is
appropriate for their age, size and weight.
Children in the front passenger seat
Should it be necessary to use a child
restraint system on the front passenger
seat, the front and side airbags for the front pas-
senger must be deactivated. Otherwise, a child
traveling on that seat will face a significant risk
of injury if the airbags are triggered off, even
with a child restraint system.<
For more information on automatic deactivation
of the front passenger airbags refer to page98.
Installing child restraint
systems
Observe the child restraint system manu-
facturer's instructions when selecting,
installing and using child restraint systems.
Otherwise, the protective effect may be dimin-
ished. <
Standard child restraint systems are designed
to be secured with a lap belt or with the lap-belt
section of a lap-and-shoulder belt. Incorrectly or improperly installed child restraint systems
can increase the risk of injury to children.
Always follow the installation instructions for
the system with the greatest care.
On the front passenger seat
After installing a child restraint system on
the front passenger seat, make sure that
the front and side airbags for the front passen-
ger are deactivated; otherwise, there is an
increased risk of injury if the airbags deploy.<
Seat position
Before installing a child restraint system, move
the front passenger seat as far back and up as
possible to obtain the best possible position for
the belt. Do not change the seat position after
this.
Backrest width*
The backrest width of the front passenger
seat must be at its widest possible set-
ting. Do not change the setting after installing
the child seat. Otherwise, the child seat's stabil-
ity on the front passenger seat is limited.<
1.Adjust the backrest width to its widest
setting, refer to page44.
2.Install the child seat.
Child seat security
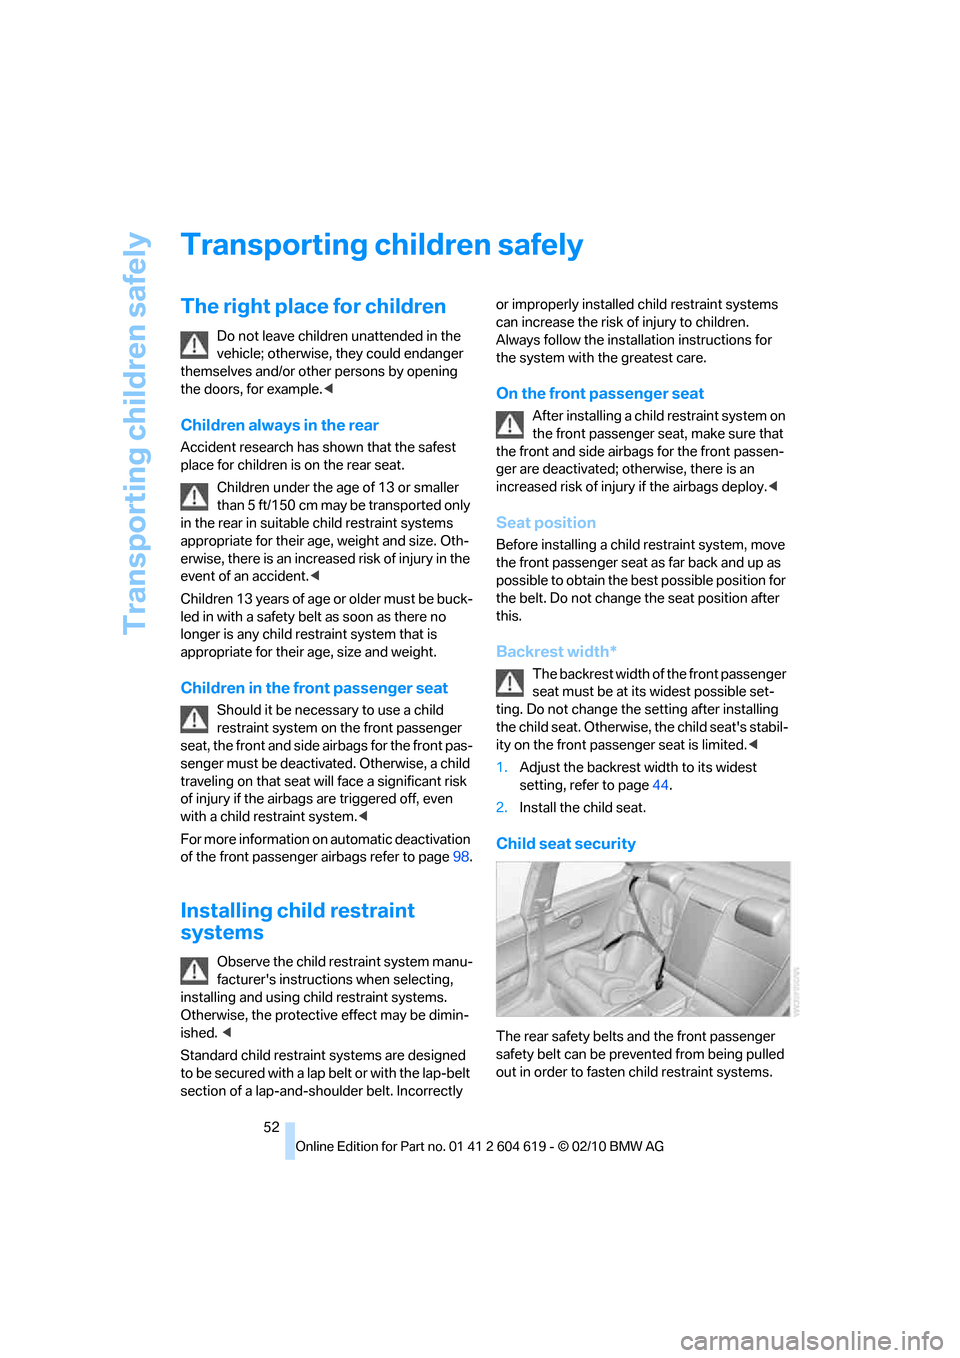
The rear safety belts and the front passenger
safety belt can be prevented from being pulled
out in order to fasten child restraint systems.
Page 118 of 278
Practical interior accessories
116
Storage compartments inside
the vehicle
Depending on your vehicle's equipment, you
will find compartments beside the steering col-
umn
*, in the front doors and in the center con-
sole
*.
There are nets
* on the front-seat backrests.
Storage compartments in the rear
console
Depending on your vehicle's equipment ver-
sion, the following storage compartments can
be found in the rear console:
>Storage tray
>Storage compartment with cover
>Cupholders
Coupe: clothes hooks
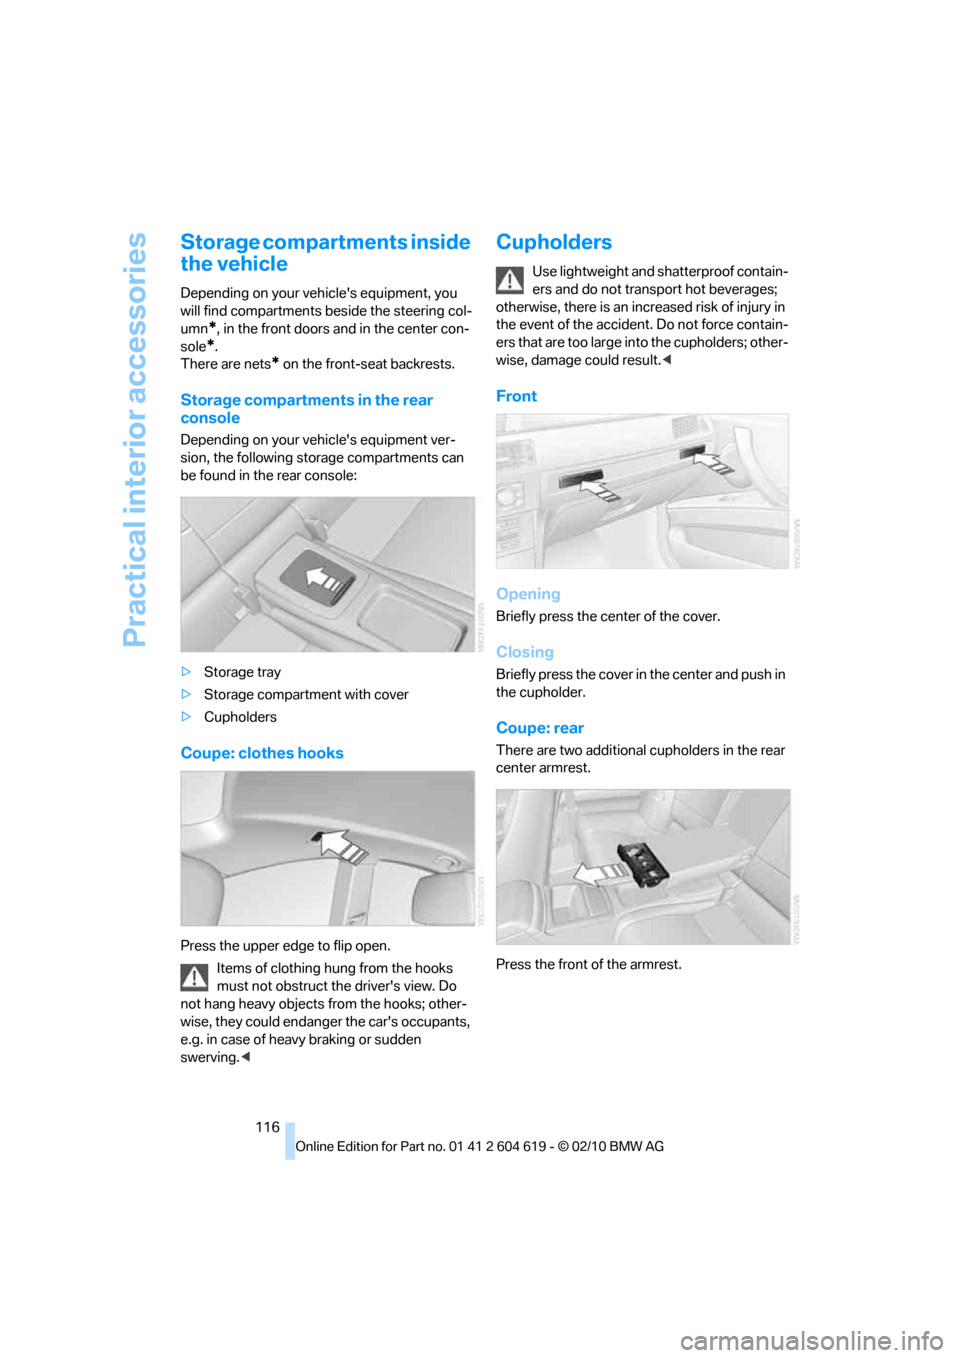
Press the upper edge to flip open.
Items of clothing hung from the hooks
must not obstruct the driver's view. Do
not hang heavy objects from the hooks; other-
wise, they could endanger the car's occupants,
e.g. in case of heavy braking or sudden
swerving.<
Cupholders
Use lightweight and shatterproof contain-
ers and do not transport hot beverages;
otherwise, there is an increased risk of injury in
the event of the accident. Do not force contain-
ers that are too large into the cupholders; other-
wise, damage could result.<
Front
Opening
Briefly press the center of the cover.
Closing
Briefly press the cover in the center and push in
the cupholder.
Coupe: rear
There are two additional cupholders in the rear
center armrest.
Press the front of the armrest.
Page 128 of 278

Things to remember when driving
126
Things to remember when driving
Break-in period
Moving parts need breaking-in time to adjust to
each other. Please follow the instructions below
in order to achieve the optimal service life and
economy of operation for your vehicle.
Engine and differential
Always obey all official speed limits.
Up to 1,200 miles/2,000 km
Drive at varying engine and road speeds, but do
not exceed an engine speed of 4,500 rpm or a
road speed of 100 mph/160 km/h.
Avoid full-throttle operation and use of the
transmission's kickdown mode.
After driving 1,200 miles/2,000 km
Engine and vehicle speeds can be gradually
increased.
Tires
Due to technical factors associated with their
manufacture, tires do not achieve their full trac-
tion potential until after an initial break-in
period. Therefore, drive cautiously during the
first 200 miles/300 km.
Brake system
Brakes require an initial break-in period of
approx. 300 miles/500 km to achieve optimized
contact and wear patterns between brake pads
and rotors. Drive cautiously during this break-in
period.
Clutch
The function of the clutch reaches its optimal
level only after a distance driven of approx.
300 miles/500 km. During this break-in period,
engage the clutch gently.
Following part replacement
The same break-in procedures should be
observed if any of the components mentioned
above have to be renewed in the course of the
vehicle's operating life.
Saving fuel
The fuel consumption of your vehicle depends
on several factors. You can lower fuel consump-
tion and the environmental impact by taking
certain measures, adjusting your driving style
and having the vehicle serviced regularly.
Remove any unneeded cargo
Additional weight increases fuel consumption.
Remove any mounted parts after you
have finished using them
Remove unneeded additional mirrors, the roof
rack and the rear luggage rack after use.
Mounted parts affect the vehicle's aerodynam-
ics and increase fuel consumption.
Close the windows and glass roof
An open glass roof or window causes higher air
resistance and thus increases fuel consump-
tion.
Check tire inflation pressure regularly
Check the tire inflation pressure at least twice a
month and before embarking on a long journey,
and correct it if necessary.
Low tire inflation pressure causes higher rolling
resistance and thus increases fuel consumption
and tire wear.
Set off immediately
Do not let the engine warm up while the car is
still standing, but set off immediately at moder-
ate engine speed. This is the fastest way for the
cold engine to reach its operating temperature.
Page 131 of 278
Driving tips
129Reference
At a glance
Controls
Communications
Navigation
Entertainment
Mobility
Cargo loading
To avoid loading the tires beyond their
approved carrying capacity, never over-
load the vehicle. Overloading can lead to over-
heating and increases the rate at which damage
develops inside the tires. In some situations,
this can result in sudden loss of tire pressure.<
Make sure that no liquids are spilled or
leak from their containers in the cargo
area, as this could result in damage to the vehi-
cle.<
Determining loading limit
1.Locate the following statement on your
vehicle's placard
*:
The combined weight of occupants
and cargo should never exceed
XXX kg or YYY lbs. Otherwise, overloading
can result in damage to the vehicle and
unstable driving conditions.<
2.Determine the combined weight of the
driver and passengers that will be riding in
your vehicle.
3.Subtract the combined weight of the driver
and passengers from XXX kilograms or YYY
pounds.
4.The resulting figure equals the available
amount of cargo and luggage load capacity.
For example, if the YYY amount equals
1,400 lbs. and there will be five 150-lb. pas-
sengers in your vehicle, the amount of avail-
able cargo and luggage load capacity is
650 lbs:
1,400 lbs. minus 750 lbs. = 650 lbs.
5.Determine the combined weight of luggage
and cargo being loaded on the vehicle. That weight may not safely exceed the available
cargo and luggage load capacity calculated
in step 4.
6.If your vehicle will be towing a trailer, part of
the load from your trailer will be transferred
to your vehicle. Consult the manual for
transporting a trailer to determine how this
may reduce the available cargo and luggage
load capacity of your vehicle.
Load
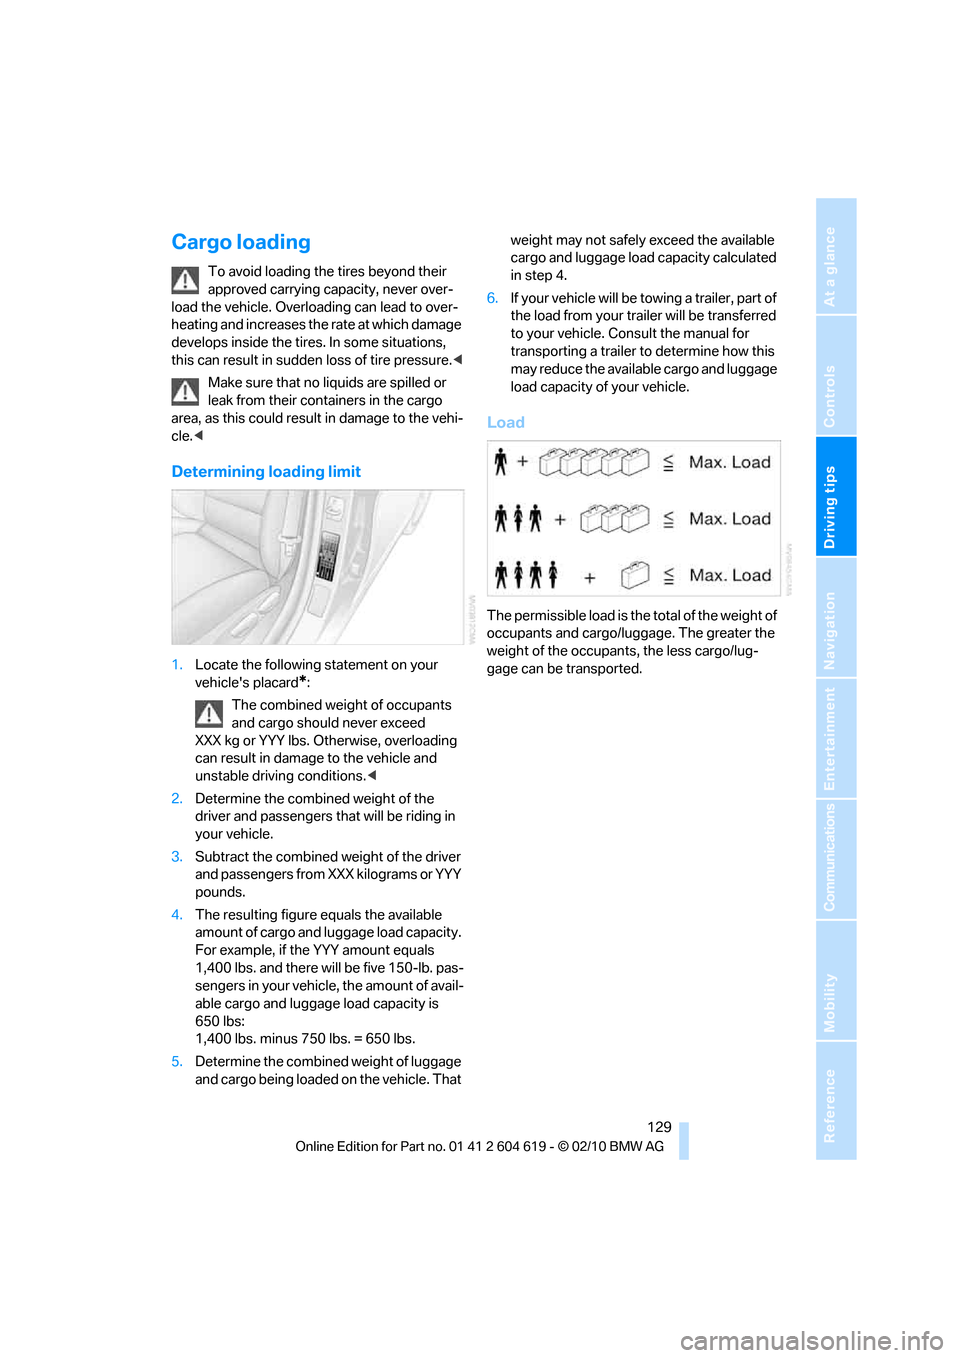
The permissible load is the total of the weight of
occupants and cargo/luggage. The greater the
weight of the occupants, the less cargo/lug-
gage can be transported.
Page 133 of 278
Driving tips
131Reference
At a glance
Controls
Communications
Navigation
Entertainment
Mobility
Always position and secure the cargo as
described above, so that it cannot endan-
ger the car's occupants, for example if sudden
braking or swerving is necessary.
Never exceed either the approved gross vehicle
weight or either of the approved axle loads, refer
to page249; otherwise, excessive loads can
pose a safety hazard, and may also place you in
violation of traffic safety laws.
Heavy or hard objects should not be carried
loose inside the car, since they could be thrown
around, for example as a result of heavy braking,
sudden swerves, etc., and endanger the occu-
pants.
Only attach the cargo straps using the lashing
eyes shown in the illustration. Do not secure
cargo with the anchors for tether straps, refer to
page53; otherwise, these could be damaged.
A special rack system is available as an option
for your BMW. Comply with the directions given
in the installation instructions.
Mounting points
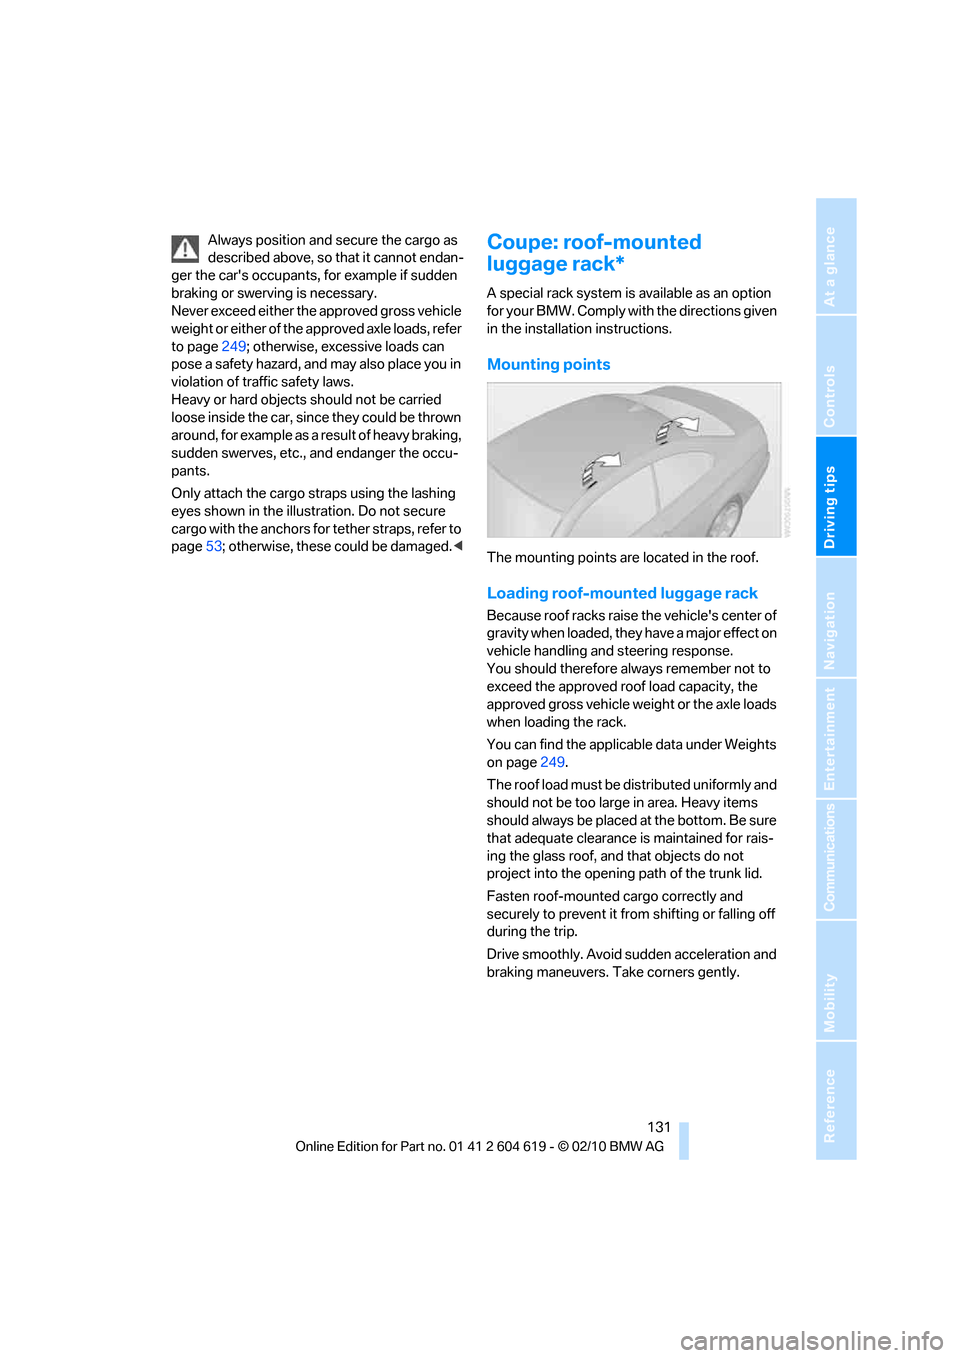
The mounting points are located in the roof.
Loading roof-mounted luggage rack
Because roof racks raise the vehicle's center of
gravity when loaded, they have a major effect on
vehicle handling and steering response.
You should therefore always remember not to
exceed the approved roof load capacity, the
approved gross vehicle weight or the axle loads
when loading the rack.
You can find the applicable data under Weights
on page249.
The roof load must be distributed uniformly and
should not be too large in area. Heavy items
should always be placed at the bottom. Be sure
that adequate clearance is maintained for rais-
ing the glass roof, and that objects do not
project into the opening path of the trunk lid.
Fasten roof-mounted cargo correctly and
securely to prevent it from shifting or falling off
during the trip.
Drive smoothly. Avoid sudden acceleration and
braking maneuvers. Take corners gently.
Page 209 of 278
Mobility
207Reference
At a glance
Controls
Driving tips
Communications
Navigation
Entertainment
Observe the following when refueling
When handling fuels, follow the safety
instructions provided at filling stations;
otherwise, there is a risk of personal injury or
property damage.<
When refueling, insert the filler nozzle com-
pletely into the filler pipe. Avoid lifting the filler
nozzle while filling the tank, as that would lead
to
>Premature pump shutoff
>Reduced efficiency of the fuel-vapor recov-
ery system.
The fuel tank is full when the filler nozzle clicks
off the first time.
Fuel tank capacity
Approx. 16.1 US gallons/61 liters, including the
reserve capacity of 2.1 US gallons/8 liters.
Refuel as soon as possible once your
cruising range falls below 30 miles/
50 km; otherwise, engine functions are not
ensured and damage can occur.<
Fuel specifications
Gasoline engine: required fuel
Do not refuel with leaded fuel; otherwise,
the catalytic converter will be damaged.
Do not fill the tank with E85, i.e. fuel containing
85Ξ ethanol, nor with FlexFuel. Otherwise, the
engine and fuel supply system will be dam-
aged.<
Super Premium Gasoline/AKI 91
This gasoline is highly recommended.
However, you may also use gasoline with less
AKI. The minimum AKI Rating is:
>328i/xDrive: 87
>335i, 335i/xDrive: 89.
If you use gasoline with this minimum AKI Rat-
ing, the engine may produce knocking sounds
when starting at high outside temperatures.
This has no effect on the engine life.Do not use any gasoline below the speci-
fied minimum fuel grade. Otherwise, the
engine could be damaged.<
Use high-quality brands
Field experience has indicated significant dif-
ferences in fuel quality: volatility, composition,
additives, etc., among gasolines offered for sale
in the United States and Canada. Fuels contain-
ing up to and including 10Ξ ethanol or other
oxygenates with up to 2.8Ξ oxygen by weight,
that is, 15Ξ MTBE or 3Ξ methanol plus an
equivalent amount of cosolvent, will not void the
applicable warranties with respect to defects in
materials or workmanship.
The use of poor-quality fuels may result in
drivability, starting and stalling problems
especially under certain environmental condi-
tions such as high ambient temperature and
high altitude.
Should you encounter drivability problems
which you suspect could be related to the fuel
y o u a r e u s i n g , w e r e c o m m e n d t h a t y o u r e s p o n d
by switching to a recognized high-quality brand
such as gasoline that is advertised as Top Tier
Detergent Gasoline.
Failure to comply with these recommendations
may also result in unscheduled maintenance.<
Page 211 of 278

Mobility
209Reference
At a glance
Controls
Driving tips
Communications
Navigation
Entertainment
Coupe: tire inflation pressures for the 328i
Tire size Pressure specifications in psi/kPa
Traveling speeds
up to a max. of
100 mph / 160 km/hTraveling speeds
including those
exceeding
100 mph / 160 km/h
All pressure specifications in the table are
indicated in psi/kilopascal with cold tires.
Cold = ambient temperature
Without Sport Package:
205/55 R 16 91 H M+S
225/50 R 16 92 H M+S
225/45 R 17 91 H M+S
225/45 R 17 91 V32/220 38/260 36/250 44/300
225/45 R 17 94 V M+S XL 32/220 39/270 36/250 44/300
Front: 225/45 R 17 91 V 32/220 - 36/250 -
Rear: 255/40 R 17 94 V - 35/240 - 39/270
Front: 225/40 R 18 88 W 32/220 - 36/250 -
Rear: 255/35 R 18 90 W - 39/270 - 42/290
Front: 225/35 R 19 88 Y XL 36/250 - 36/250 -
Rear: 255/30 R 19 91 Y XL - 44/300 - 44/300
With Sport Package:
205/55 R 16 91 H M+S
225/50 R 16 92 H M+S
225/45 R 17 91 H M+S32/220 38/260 36/250 44/300
225/45 R 17 91 V 32/220 38/260 42/290 49/340
225/45 R 17 94 V M+S XL 32/220 39/270 42/290 49/340
Front: 225/45 R 17 91 V 32/220 - 42/290 -
Rear: 255/40 R 17 94 V - 35/240 - 44/300
Front: 225/40 R 18 88 W 32/220 - 39/270 -
Rear: 255/35 R 18 90 W - 39/270 - 46/320
Front: 225/35 R 19 88 Y XL 36/250 - 39/270 -
Rear: 255/30 R 19 91 Y XL - 44/300 - 46/320
More details on the permissible load and weights can be found on page249.