Page 84 of 324

Gauges and Multi-Information Display
Multi-Information Display
83Instrument Panel
Setup Group Customizable Features Description Selectable settings
Door SetupAuto Door LockChanges the setting for the automatic locking
feature. Shift from
P (A / T only), With
VEH SPD
*1, OFF
Auto Door UnlockChanges the setting for when the doors unlock
automatically.Shift to P*2, IGN Off
*3, OFF
Driver Door
*1, All Doors
Door Lock ModeSets up either the driver's door or all doors to unlock
on the first push of the remote.Driver Door*1
All Doors
Keyless Lock
Acknowledgment�-�0�$�, ���6�/�-�0�$�,�������5�I�F���F�Y�U�F�S�J�P�S���M�J�H�I�U�T���n�B�T�I
LOCK (2nd push) - The beeper soundsON
*1, OFF
Security Relock TimerChanges the time it takes for the doors to relock and
the security system to set after you unlock the vehicle
without opening any door.90 sec, 60 sec, 30 sec
*1
Default AllSets/Cancels all the customized settings as
default.Set, Cancel
*1: Default Setting
*2: Default Setting for automatic transmission
*3: Default Setting for manual transmission
Continued
Page 85 of 324
Gauges and Multi-Information Display
Multi-Information Display
84Instrument Panel
Example for customization settings
The steps for changing the "TRIP A RESET with REFUEL" setting to ON are shown
below. The default setting for "TRIP A RESET with REFUEL" is OFF.
1. Press and hold
button until "CHG
SET TING" appears on the display.
2. Press the SEL /RESET button to go into the
"ME TER SE TUP" group.
3. Press the SEL /RESET button again.
"LANGUAGE SELECTION" appears first
in the display.
Page 86 of 324
Gauges and Multi-Information Display
Multi-Information Display
85Instrument Panel
4. Press the
button until "TRIP
A RESET with REFUEL" appears on the
display, then press the SEL /RESET button.
The display switches to the
"Customization setup" screen, where
you can select "ON," "OFF, or" "EXIT."
5. Press the
button and select
"ON," then press the SEL /RESET button.
The "ON" setup screen appears,
then the display returns to the
"Customization menu" screen.
6. Press the
button until "EXIT"
appears in the display, then press the SEL /
RESET button.
7. Repeat Step 6 until you return to the
normal screen.
Page 100 of 324

Security System
Security System Alarm
99Controls
Setting the security system alarm
The security system alarm automatically sets when the following conditions have
been met:
The ignition switch is in LOCK �t
0
, and the key has been removed from the
ignition switch.
The hood is closed. �t
All doors are locked. �t
When the security system alarm sets
The security system indicator in the instrument panel blinks. When the blinking
interval changes after about 15 seconds, the security system is set. To cancel the security system alarm
The security system is canceled when the vehicle is unlocked using the key or
remote transmitter. The security system indicator goes off at the same time.
Security System Alarm
Do not set the security system alarm when someone
is in the vehicle or a window is open. The system
can accidentally activate when:
Unlocking the door with the lock tab or the �tmaster door lock switch.
Opening the trunk with the release button on the �tdriver's door or the emergency trunk opener.
If the battery goes dead after you have set the
security system alarm, the security alarm may go off
once the battery is recharged or replaced.
If this occurs, deactivate the security system alarm
by unlocking a door using the key or remote
transmitter.
Do not attempt to alter this system or add another
device to it.
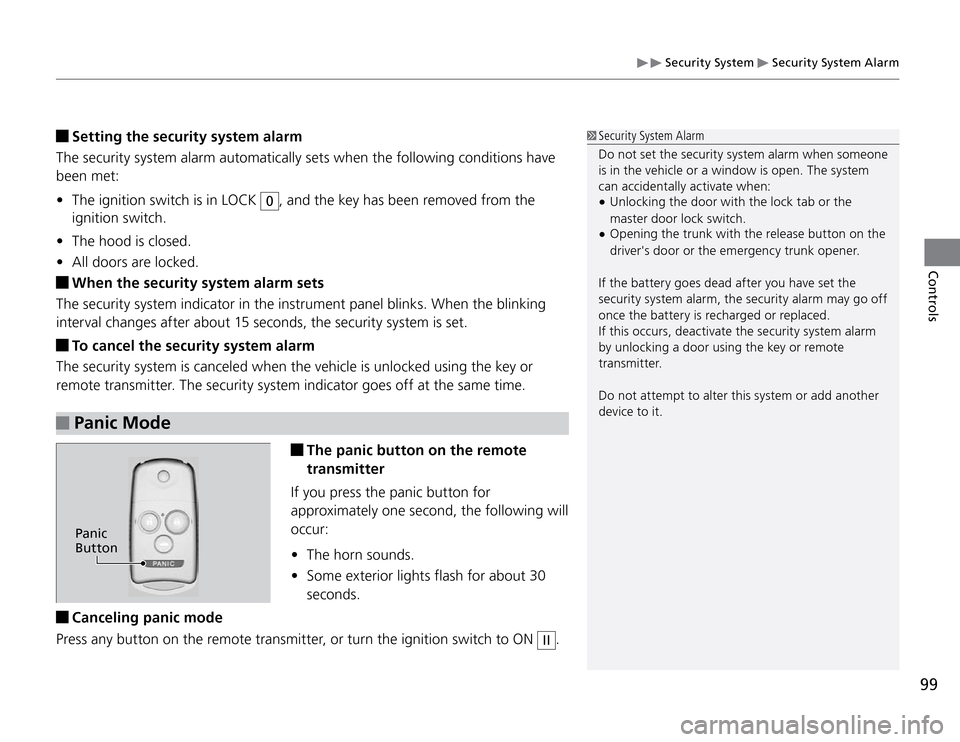
The panic button on the remote
transmitter
If you press the panic button for
approximately one second, the following will
occur:
The horn sounds. �t
Some exterior lights flash for about 30 �t
seconds.
Panic Mode Canceling panic mode
Press any button on the remote transmitter, or turn the ignition switch to ON
II
.
Panic
Button
Page 106 of 324

105
Continued
Controls
Operating the Switches Around the Steering Wheel
Turn Signals
Light Switches
Turn Signals
The turn signals can be used when the
ignition switch is in ON
II
.
Rotating the light switch turns the lights on
and off, regardless of the position of the
ignition switch.
High beams
Push the lever forward until you hear a click. Low beams
When in high beams, pull the lever back to
return to low beams. Flashing the high beams
Pull the lever back, and release it.
Manual Operation
Light Switches
If you remove the key from the ignition switch while
the light is on, a chime sounds when the driver’s
door is opened.
When the lights are on, the lights on indicator in
the instrument panel will be on.
Indicators
�
P. 6 4
Repeatedly turning the headlights on and off
reduces the life of the HID headlight bulbs.
If you sense that the level of the headlights is
abnormal, have the vehicle inspected by a dealer.
Do not leave the lights on when the engine is off
because it will cause the battery to discharge.
Light Switches
Right Turn
Left Turn
High Beams
Low BeamsFlashing the
high beams
Turns on side marker, tail and
license plate lights Turns on headlights, parking,
side marker, tail, and license
plate lights
Page 107 of 324

Operating the Switches Around the Steering Wheel
Light Switches
106Controls
Automatic Operation (automatic lighting control)
Automatic lighting control can be used when
the ignition switch is in ON
II
.
When you turn the light switch to
AUTO
,
the headlights and other exterior lights will
switch on and off automatically depending
on the ambient brightness.
Automatic Operation (automatic lighting control)
We recommend that you turn on the lights manually
when driving at night, in a dense fog, or in dark
areas such as long tunnels or parking facilities.
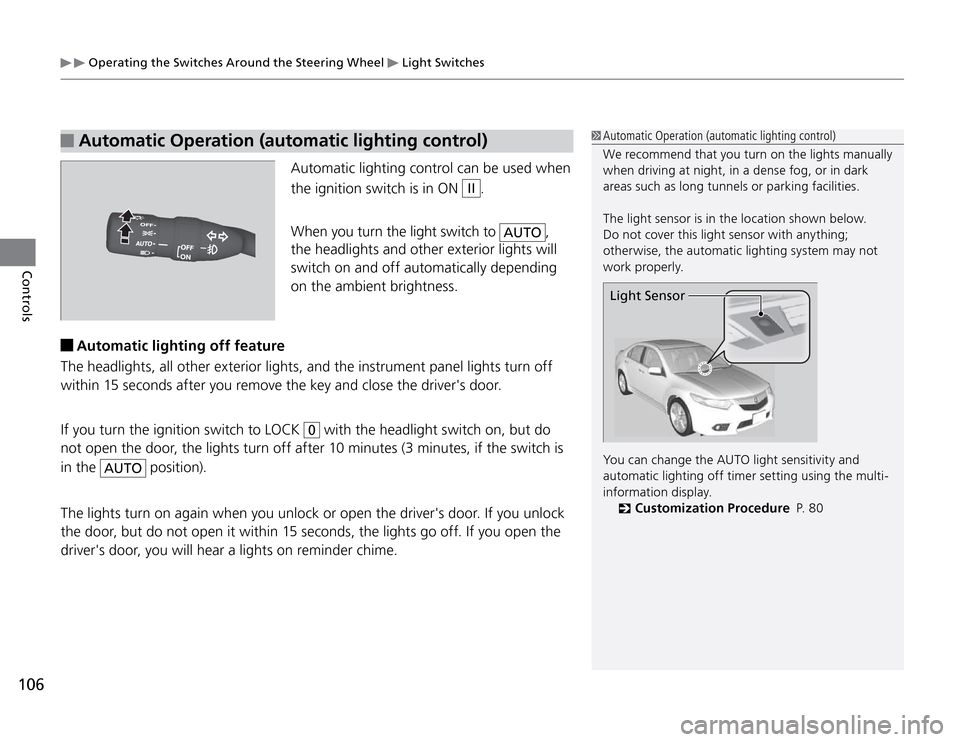
The light sensor is in the location shown below.
Do not cover this light sensor with anything;
otherwise, the automatic lighting system may not
work properly.Light SensorYou can change the AUTO light sensitivity and
automatic lighting off timer setting using the multi-
information display.
Customization Procedure
�
P. 8 0
Automatic lighting off feature
The headlights, all other exterior lights, and the instrument panel lights turn off
within 15 seconds after you remove the key and close the driver's door.
If you turn the ignition switch to LOCK
0 with the headlight switch on, but do
not open the door, the lights turn off after 10 minutes (3 minutes, if the switch is
in the
AUTO
position).
The lights turn on again when you unlock or open the driver's door. If you unlock
the door, but do not open it within 15 seconds, the lights go off. If you open the
driver's door, you will hear a lights on reminder chime.
Page 108 of 324
Operating the Switches Around the Steering Wheel
Fog Lights
107
Controls
Fog Lights
When the low beam headlights are on, turn
the fog light switch on to use the fog lights.
Fog Lights
When the fog lights are on, the indicator in the
instrument panel will be on.
They go off when the headlights turn off, or when
the daytime running lights are on.
Indicators
�
P. 6 4
Daytime Running LightsThe high beam headlights and indicator come on slightly dimmer than normal.
The ignition switch is in ON �t
II
.
The headlight switch is off, or in �t
.
The parking brake is released. �t
The lights remain on even if you set the parking brake. Turning off the ignition
switch will turn off the daytime running lights.
The high beam headlights return to the original brightness once the headlight
switch is turned on.
Fog Light Switch
Page 110 of 324

Operating the Switches Around the Steering Wheel
Brightness Control
109
Controls
Brightness Control
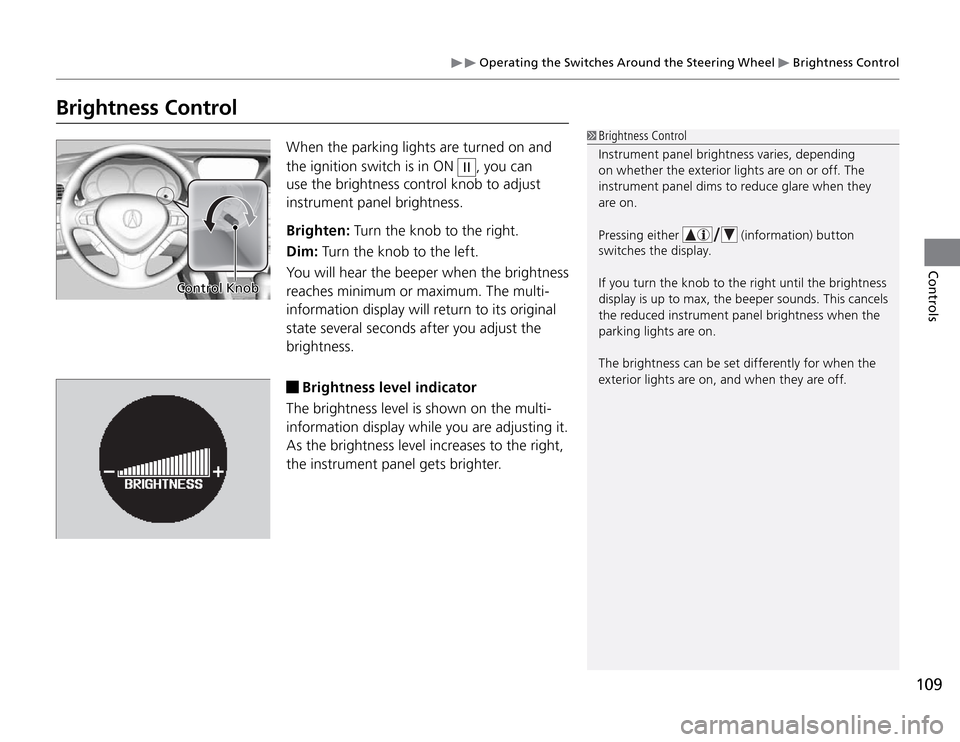
When the parking lights are turned on and
the ignition switch is in ON
II
, you can
use the brightness control knob to adjust
instrument panel brightness.
Brighten: Turn the knob to the right.
Dim: Turn the knob to the left.
You will hear the beeper when the brightness
reaches minimum or maximum. The multi-
information display will return to its original
state several seconds after you adjust the
brightness.
Brightness level indicator
The brightness level is shown on the multi-
information display while you are adjusting it.
As the brightness level increases to the right,
the instrument panel gets brighter.
Brightness Control
Instrument panel brightness varies, depending
on whether the exterior lights are on or off. The
instrument panel dims to reduce glare when they
are on.
Pressing either
(information) button
switches the display.
If you turn the knob to the right until the brightness
display is up to max, the beeper sounds. This cancels
the reduced instrument panel brightness when the
parking lights are on.
The brightness can be set differently for when the
exterior lights are on, and when they are off.
Control Knob