2010 VOLKSWAGEN TRANSPORTER window
[x] Cancel search: windowPage 88 of 486
are not a substitute for seat belts. Seat belts must always be worn, even when the front seats are equipped with front airbags.
Additional information and warnings:
• Driving tips 33
• Central locking system 39
• Correct sitting position 61
• Seat belts 79
• Child seats (accessories) 96
• Cleaning and caring for the interior 388
• Accessories, modifications, repairs and renewal of parts 394
• Consumer information 404
A WARNING
Never rely solely on the airbag system for your protection.
• Even if an alrbag is triggered, it only offers auxiliary protection.
• The airbag system offers the best level of protection, and reduces the risk of injury, when seat belts are properly worn 79, Seat belts.
• Before every trip, each vehicle occupant must adopt the correct sitting position, cor-rectly fasten the seat belt belonging to their seat and keep it fastened properly throughout the trip. This applies to ail vehicle occupants and also in urban traffic.
A WARNING
The risk of injury increases if there are any objects between the vehicle occupants and the deployment area of the airbag when it is triggered. This will alter the deployment zone of the airbag, or the objects will be flung against the body.
• Never hold any objects in your hand or on your lap while the vehicle is in motion.
• Never transport any objects on the front passenger seal The objects could enter the deployment zone of the airbag during sudden braking or driving manoeuvres and then be flung dangerously through the vehicle interi-or if the airbag is activated.
• Vehicle occupants sitting on the front seats and rear outer seats must never carry any people, pets or objects in the deployment zone between themselves and the airbags. Make sure that children and passengers also keep to this rule.
BB I Before the journey
A WARNING
External devices in the vehicle that are not properly secured can be flung though the in-terior and cause injuries, if there is a sudden driving or braking manoeuvre, or in the event of an accident.
• You should never position or attach an ex-ternal device on a door, on the windscreen or above or near to the areas marked "AIRBAG" on the steering wheel, the dash panel and the seat backrests, or between these areas and the vehicle occupants. External devices can cause serious Injury in an accident, especial-ly when the airbags deploy.
A WARNING
The alrbag system can only be triggered once. The system will have to be replaced if the airbags have been triggered.
• Alrbags that have deployed and any affec-ted system parts must be immediately re-placed with new parts that are approved by Volkswagen Commercial Vehicles for the re-spective vehicle.
• Repairs and modifications to your vehicle should only be carried out by a qualified workshop. Qualified workshops have the nec-essary tools, diagnostic equipment, repair in-formation and qualified personnel.
• Never use recycled alrbag components or components that have been taken from end-of-life vehicles in your vehicle.
• Never alter any components of the airbag system.
A WARNING
Fine dust particles or steam may be released when the alrbags trigger. This Is normal and does not mean that there is a fire in the vehi-cle.
• The fine dust can cause irritation to the skin and eye membranes and cause breath-ing difficulties, particularly for people suffer-ing from asthma or people who have {had) other respiratory problems. To help reduce breathing difficulties, get out of the vehicle or open the windows or doors for more fresh air.
• If you come into contact with the dust, you should wash your hands and face with a mild soap and water before eating.
• Do not let the dust get into your eyes or into open wounds.
Page 94 of 486
A WARNING
The front passenger front airbag should only be switched off in exceptional circumstances.
• To prevent damage to the airbag system, only switch the front passenger front airbag on and off when the ignition is switched off.
• lt is the driver's responsibility to ensure that the key-operated switch is set to the cor-rect position.
Combined curtain and side airbags
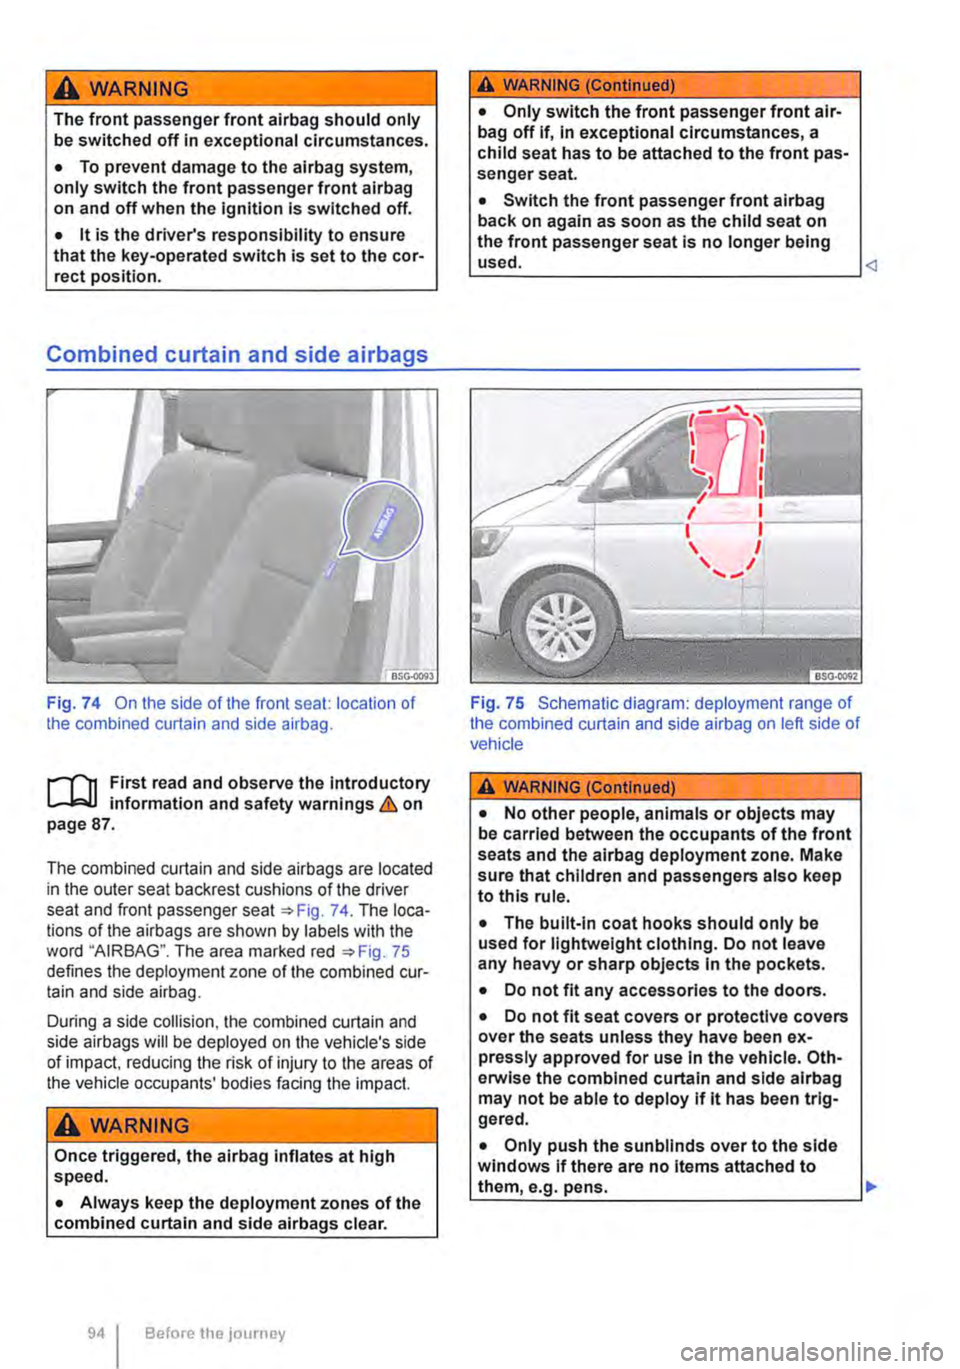
Fig. 74 On the side of the front seat: location of the combined curtain and side airbag.
l""'"'fl1 and observe the introductory L-.lr:J.J mformat1on and safety warnings & on page 87.
The combined curtain and side airbags are located in the outer seat backrest cushions of the driver seat and front passenger seat =:oFig. 74. The loca-tions of the airbags are shown by labels with the word "AIRBAG". The area marked red =:oFig. 75 defines the deployment zone of the combined cur-tain and side airbag.
During a side collision, the combined curtain and side airbags will be deployed on the vehicle's side of impact, reducing the risk of injury to the areas of the vehicle occupants' bodies facing the impact.
A WARNING
Once triggered, the airbag inflates at high speed.
• Always keep the deployment zones of the combined curtain and side airbags clear.
94 Before the journey
A WARNING (Continued)
• Only switch the front passenger front air-bag off if, In exceptional circumstances, a child seat has to be attached to the front pas-senger seat.
• Switch the front passenger front alrbag back on again as soon as the child seat on the front passenger seat is no longer being used.
Fig. 75 Schematic diagram: deployment range of the combined curtain and side airbag on left side of vehicle
A WARNING (Continued)
• No other people, animals or objects may be carried between the occupants of the front seats and the airbag deployment zone. Make sure that children and passengers also keep to this rule.
• The built-in coat hooks should only be used for lightweight clothing. Do not leave any heavy or sharp objects In the pockets.
• Do not fit any accessories to the doors.
• Do not fit seat covers or protective covers over the seats unless they have been ex-pressly approved for use In the vehicle. Oth-erwise the combined curtain and side alrbag may not be able to deploy If lt has been trig-gered.
• Only push the sunblinds over to the side windows if there are no Items attached to them, e.g. pens. .,..
Page 95 of 486
A wARNING
Incorrect use of the driver and front passen-ger seat could hinder the proper function of the combined curtain and side airbags and cause serious injury.
• Never remove the front seats from the ve-hicle or alter any components of these seats.
Curtain airbags
A WARNING (Continued)
• If too much pressure is applied to the back rest side bolster, the combined curtain and side airbags may not be triggered cor-rectly, may not trigger at all or may trigger unexpectedly.
• Any damage to the original seat uphols-tery or around the seams of the combined curtain and side airbag units must be re-paired immediately by a qualified workshop.
r-111 First read and observe the introductory l..-W information and safety warnings & on page 87.
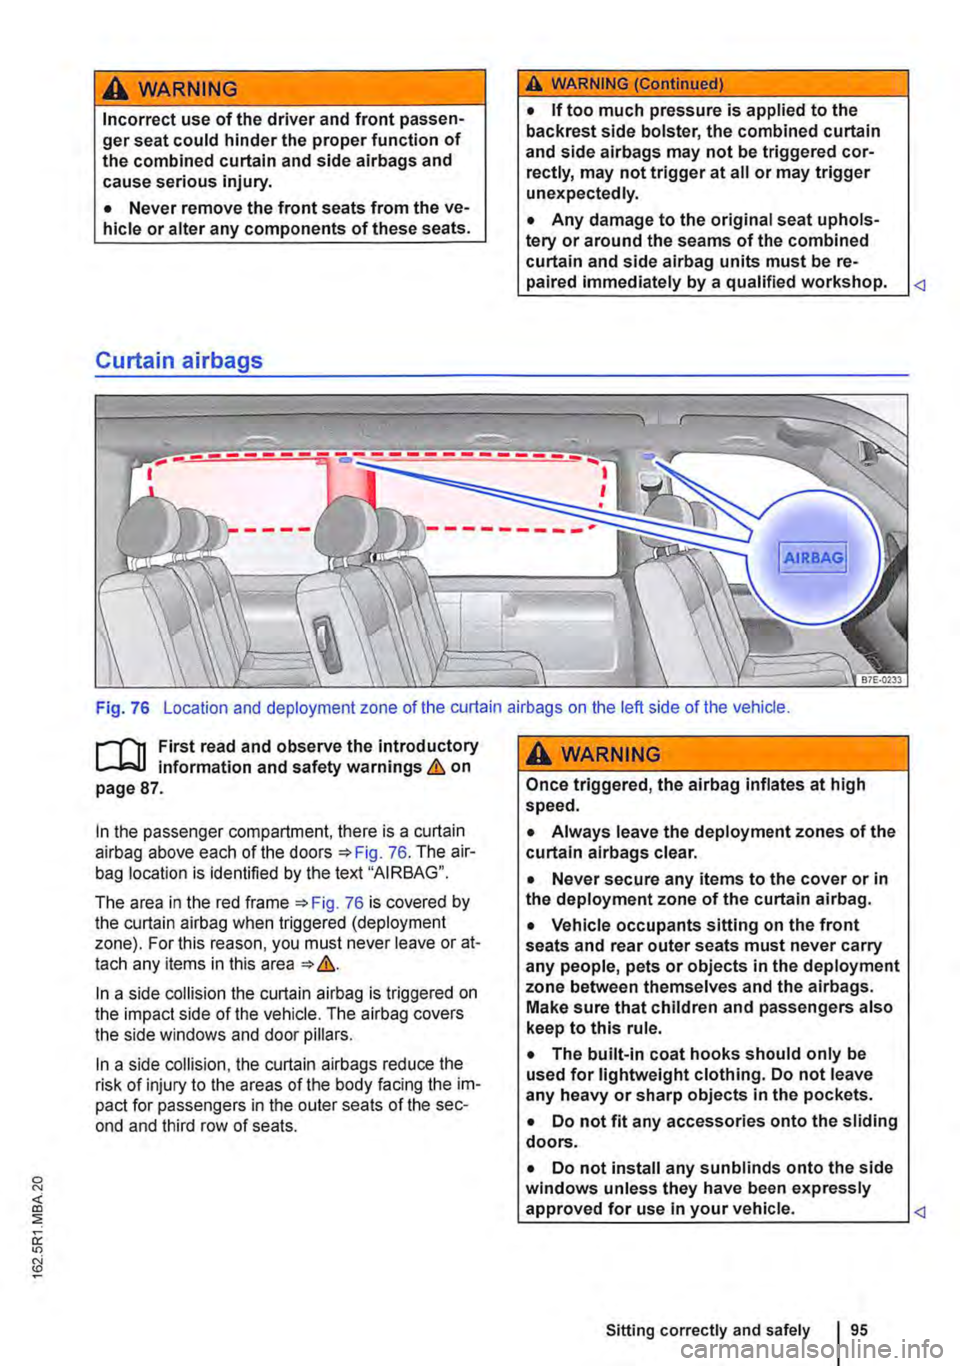
In the passenger compartment, there is a curtain airbag above each of the doors =>Fig. 76. The air-bag location is identified by the text "AIRBAG".
The area in the red frame =>Fig. 76 is covered by the curtain airbag when triggered (deployment zone). For this reason, you must never leave or at-tach any items in this area => &.
In a side collision the curtain airbag is triggered on the impact side of the vehicle. The airbag covers the side windows and door pillars.
In a side collision, the curtain airbags reduce the risk of injury to the areas of the body facing the im-pact for passengers in the outer seats of the sec-ond and third row of seats.
A WARNING
Once triggered, the airbag inflates at high speed.
• Always leave the deployment zones of the curtain alrbags clear.
• Never secure any items to the cover or in the deployment zone of the curtain airbag.
• Vehicle occupants sitting on the front seats and rear outer seats must never carry any people, pets or objects in the deployment zone between themselves and the airbags. Make sure that children and passengers also keep to this rule.
• The built-in coat hooks should only be used for lightweight clothing. Do not leave any heavy or sharp objects in the pockets.
• Do not fit any accessories onto the sliding doors.
• Do not install any sun blinds onto the side windows unless they have been expressly approved for use In your vehicle.
Page 115 of 486
Protection from the sun
a:n Introduction
This chapter contains information on the following subjects:
Sun visors . . . . . . . . . . . . . . . . . . . . . . . . . . . . . 115
Sun blind for the rear side windows 115
Windscreens made of heat-insulating glass . . 116
Sun visors
J
ltf·OOSl
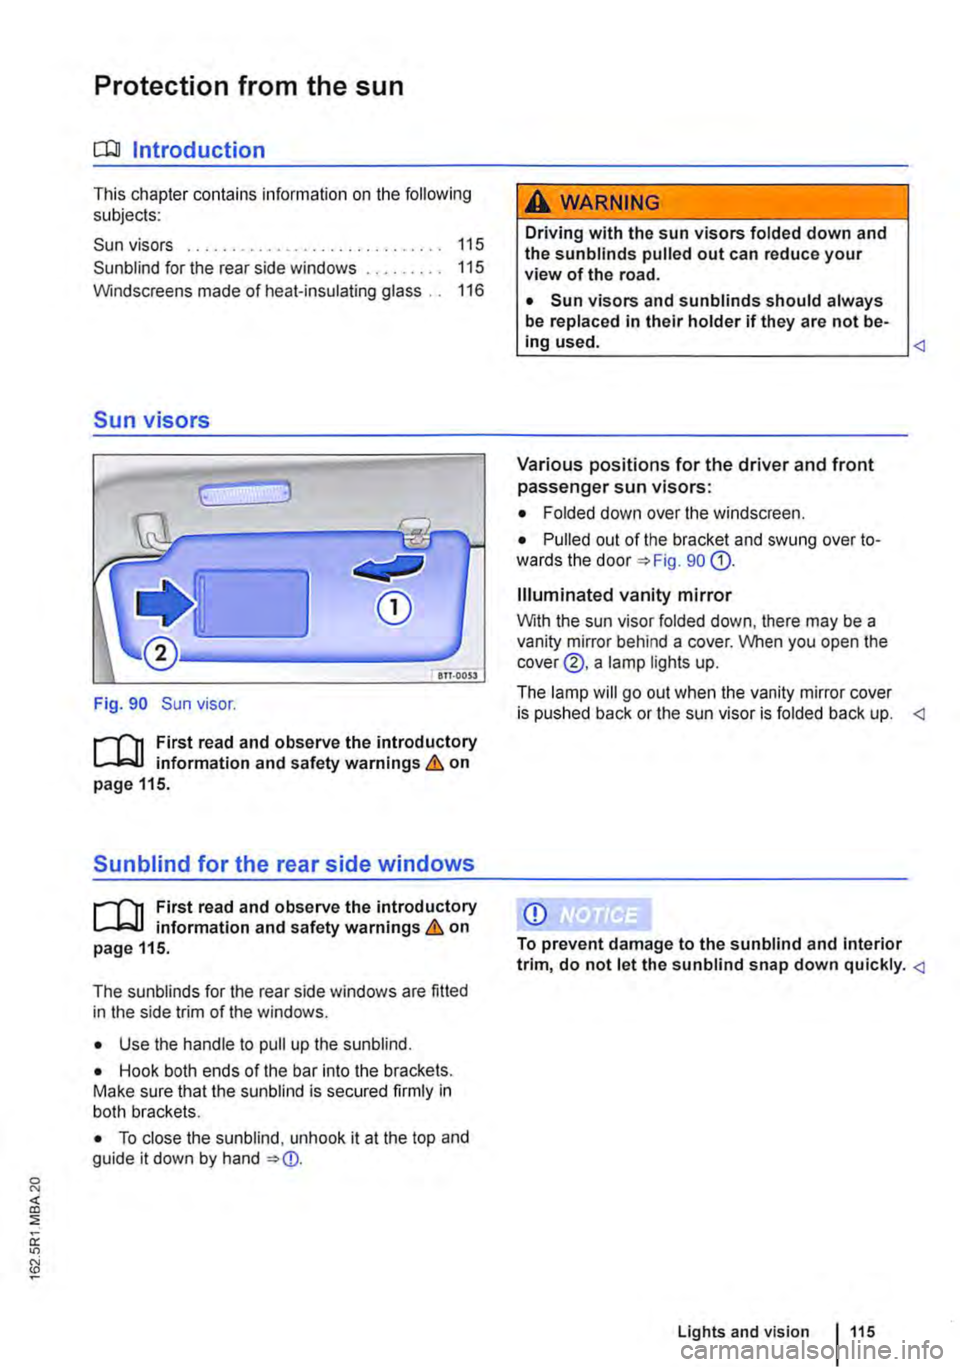
Fig. 90 Sun visor.
t"'l1 First read and observe the introductory L-bll information and safety warnings Lh on page 115.
Sunblind for the rear side windows
t"'l1 First read and observe the introductory L-blJ information and safety warnings Lh on page 115.
The sunblinds for the rear side windows are fitted in the side trim of the windows.
• Use the handle to pull up the sunblind.
• Hook both ends of the bar into the brackets. Make sure that the sun blind is secured firmly in both brackets.
• To close the sunblind, unhook it at the top and guide it down by hand => (]).
A WARNING
Driving with the sun visors folded down and the sun blinds pulled out can reduce your view of the road.
• Sun visors and sun blinds should always be replaced in their holder if they are not be-ing used.
Various positions for the driver and front passenger sun visors:
• Folded down over the windscreen.
• Pulled out of the bracket and swung over to-wards the door 90 Q).
Illuminated vanity mirror
With the sun visor folded down. there may be a vanity mirror behind a cover. When you open the cover@, a lamp lights up.
The lamp will go out when the vanity mirror cover is pushed back or the sun visor is folded back up.
CD
To prevent damage to the sun blind and interior trim, do not let the sunblind snap down quickly.
Lights and vision 115
Page 116 of 486
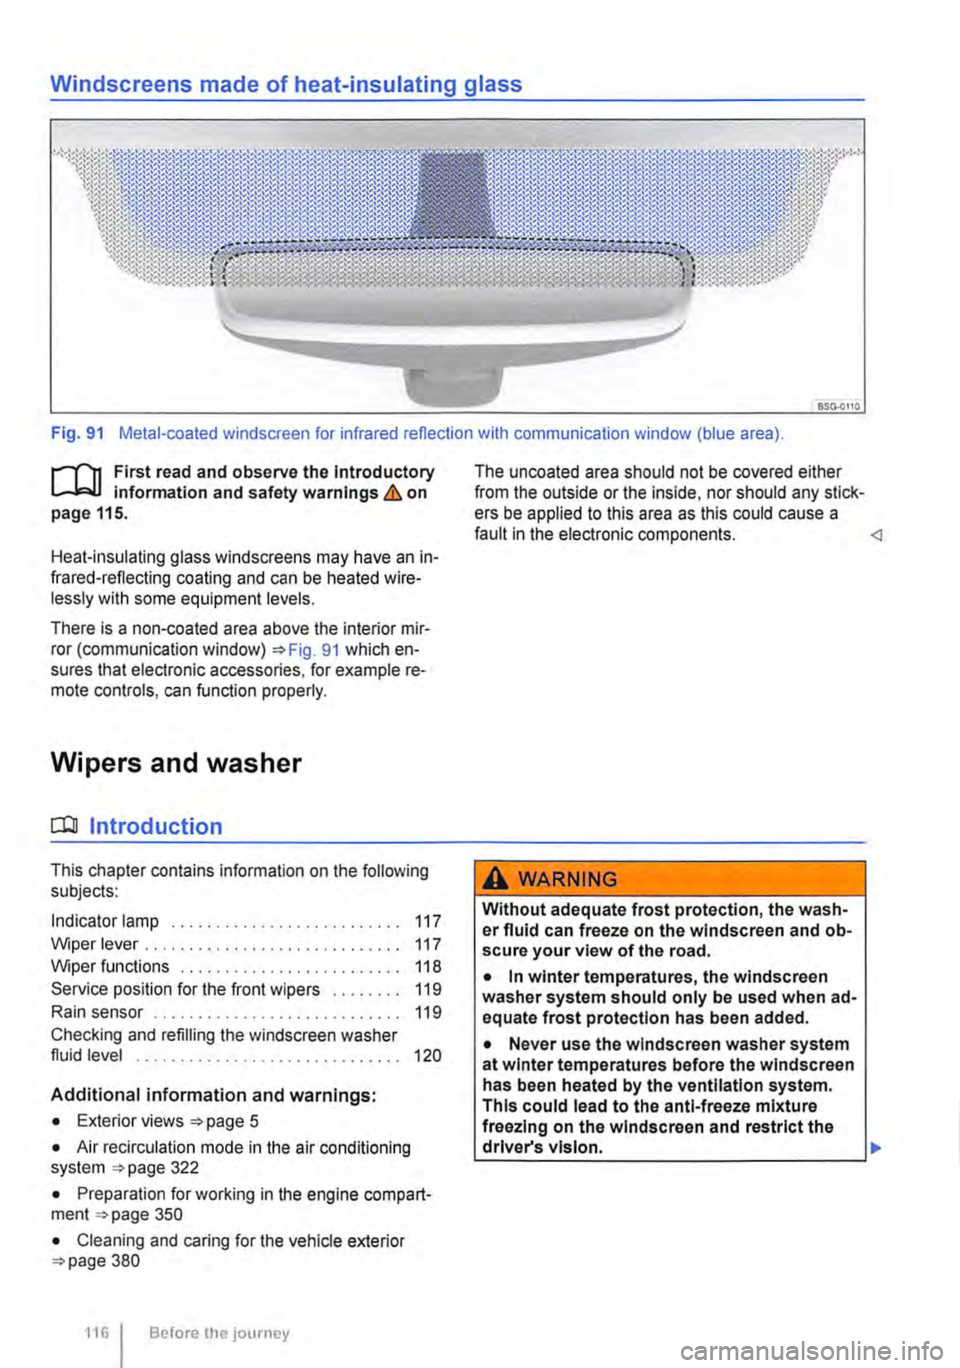
Windscreens made of heat-insulating glass
Fig. 91 Metal-coated windscreen for infrared reflection with communication window (blue area).
r-111 First read and observe the Introductory L-W.! Information and safety warnings & on page 115.
Heat-insulating glass windscreens may have an in-frared-reflecting coating and can be heated wire-lessly with some equipment levels.
There is a non-coated area above the interior mir-ror (communication window) 91 which en-sures that electronic accessories, for example re-mote controls, can function properly.
Wipers and washer
CQJ Introduction
This chapter contains information on the following subjects:
Indicator lamp . . . . . . . . . . . . . . . . . . . . . . . 117
Wiper lever . . . . . . . . . . . . . . . . . . . . . . . . . . . . . 117 Wiper functions . . . . . . . . . . 118 Service position for the front wipers . . . . . . . . 119
Rain sensor . . . . . . . . . . . . . . . . . . . . 119
Checking and refilling the windscreen washer fluid level . . . . . . . . . . . . . . . . . . . . . . . . . . . . . . 120
Additional information and warnings:
• Exterior views page 5
• Air recirculation mode in the air conditioning system 322
• Preparation for working in the engine compart-ment page 350
• Cleaning and caring for the vehicle exterior 380
116 I Before the journey
The uncoated area should not be covered either from the outside or the inside, nor should any stick-ers be applied to this area as this could cause a fault in the electronic components.
Without adequate frost protection, the wash-er fluid can freeze on the windscreen and ob-scure your view of the road.
• In winter temperatures, the windscreen washer system should only be used when ad-equate frost protection has been added.
• Never use the windscreen washer system at winter temperatures before the windscreen has been heated by the ventilation system. This could lead to the anti-freeze mixture freezing on the windscreen and restrict the driver's vision. .,.
Page 118 of 486
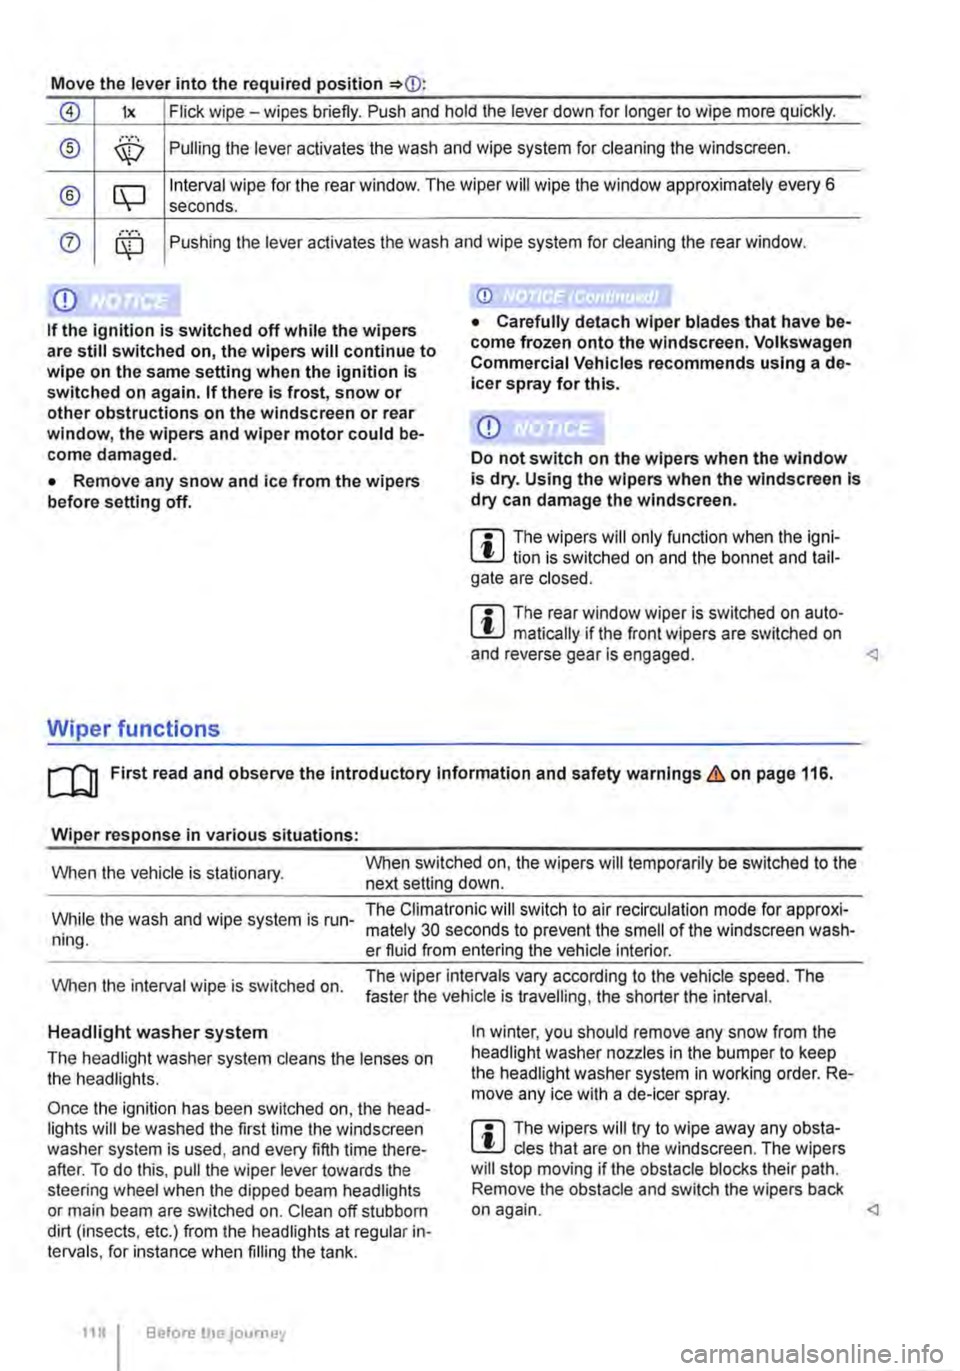
Move the lever into the required position
0 lx Flick wipe -wipes briefly. Push and hold the lever down for longer to wipe more quickly.
® ,··.··· \X:) Pulling the lever aclivates the wash and wipe system for cleaning the windscreen.
® CQ Interval wipe for the rear window. The wiper will wipe the window approximately every 6 seconds .
0 ........ Pushing the lever activates the wash and wipe system for cleaning the rear window.
Q)
If the ignition is switched off while the wipers are still switched on, the wipers will continue to wipe on the same setting when the ignition Is switched on again. If there Is frost, snow or other obstructions on the windscreen or rear window, the wipers and wiper motor could be-come damaged.
• Remove any snow and ice from the wipers before setting off.
Wiper functions
Q)
Do not switch on the wipers when the window is dry. Using the wipers when the windscreen Is dry can damage the windscreen.
m The wipers will only function when the igni-W lion is switched on and the bonnet and tail-gate are closed.
m The rear window wiper is switched on auto-W matically if the front wipers are switched on and reverse gear is engaged.
Wiper response in various situations:
When the vehicle is stationary. When switched on, the wipers will temporarily be switched to the next setting down.
While the wash and wipe system is run-ning.
The Climatronic will switch to air recirculation mode for approxi-mately 30 seconds to prevent the smell of the windscreen wash-er fluid from entering the vehicle interior.
When the interval wipe is switched on. The wiper intervals vary according to the vehicle speed. The faster the vehicle is travelling, the shorter the interval.
Headlight washer system
The headlight washer system cleans the lenses on the headlights.
Once the ignition has been switched on, the head-lights will be washed the first time the windscreen washer system is used, and every fifth time there-after. To do this, pull the wiper lever towards the steering wheel when the dipped beam headlights or main beam are switched on. Clean off stubborn dirt (insects, etc.) from the headlights at regular in-tervals, for instance when filling the tank.
118 Before the journey
In winter, you should remove any snow from the headlight washer nozzles in the bumper to keep the headlight washer system in working order. Re-move any ice with a de-icer spray.
m The wipers will try to wipe away any obsta-W cles that are on the windscreen. The wipers will stop moving if the obstacle blocks their path. Remove the obstacle and switch the wipers back on again.
Page 121 of 486

Recommended windscreen washer fluid
• For warm weather: summer windscreen wash G 052 184 A 1. Dilution 1:100 (1 part concen-trate, 100 parts water) in the washer fluid reservoir.
• All-year washer fluid G 052 164 A2. Dilution in winter to -18°C (0°F) approx. 1 :2 (1 part concen-trate, 2 parts water), otherwise dilute one part con-centrate to four parts water (1 :4) in the washer fluid reservoir.
Capacities
The capacity of the washer fluid reservoir is ap-proximately 3. 7 litres or approximately 5.0 litres in vehicles with a headlight washer system.
A WARNING
Never mix coolant additive or other unsuita-ble additives into the windscreen washer flu-id. An oily film may otherwise be left on the windscreen or rear window which will restrict the field of vision.
Mirrors
o:n Introduction
This chapter contains information on the following subjects:
Interior mirror .............. . 122
Exterior mirrors ............ . . .... 123
For safety reasons it is important that the driver po-sitions the exterior and interior mirrors correctly be-fore starting a journey '* &.
You can use the exterior mirrors and the interior mirror to observe traffic behind you and adjust driv-ing style accordingly. Looking in the exterior mir-rors and the interior mirror does not allow the driver to see the entre side and rear area of the vehicle. The area that cannot be seen is known as the blind spot. There may be objects and other road users in the blind spot.
Additional information and warnings:
• Exterior views '* page 5
• Changing gear '*page 260
• Braking, stopping and parking '*page 269
A WARNING (Continued)
• Use clean, clear water (not distilled water) with a washer fluid recommended by Volks-wagen Commercial Vehicles.
• A suitable anti-freeze agent should be added to the windscreen washer fluid If nec-essary.
CD
• Never mix other cleaning agents with the cleaning agents recommended by Volkswagen Commercial Vehicles. This can cause the ingre-dients to separate and block the windscreen washer jets.
• When refilling or changing service fluids, please ensure that the correct fluids are added through the correct openings. Incorrect service fluids can cause serious functional problems and engine damage.
Adjusting the exterior and interior mirrors while driving may cause the driver to become distracted. This can lead to accidents and se-rious Injuries.
• Exterior and interior mirrors should only be adjusted when the vehicle is stationary.
• When parking, changing lane, or perform-ing an overtaking or turning manoeuvre, al-ways pay careful attention to the area around the vehicle as objects and other road users may be located In the blind spot.
• Always ensure that the mirrors are posi-tioned correctly and that the rear view Is not restricted by ice, snow, condensation or any other objects.
A WARNING
Automatic anti-dazzle mirrors contain an electrolyte fluid which could leak If the mirror is broken.
• The leaking electrolyte fluid can cause lrri-tation to the skin, eyes and respiratory or-gans, especially In people who suffer from
Lights and vision 121
Page 122 of 486
A WARNING (Continued)
asthma or similar illnesses. Immediately en-sure that there is a sufficient supply of fresh air and get out of the vehicle. If this is not possible, open all of the windows and doors.
• If the electrolyte fluid gets into the eyes or onto the skin, immediately wash the area with plenty of water for at least 15 minutes and consult a doctor.
• If the electrolyte fluid gets onto shoes or clothing, wash immediately with plenty of wa-ter for at least 15 minutes. Clean shoes and clothes thoroughly before wearing them again.
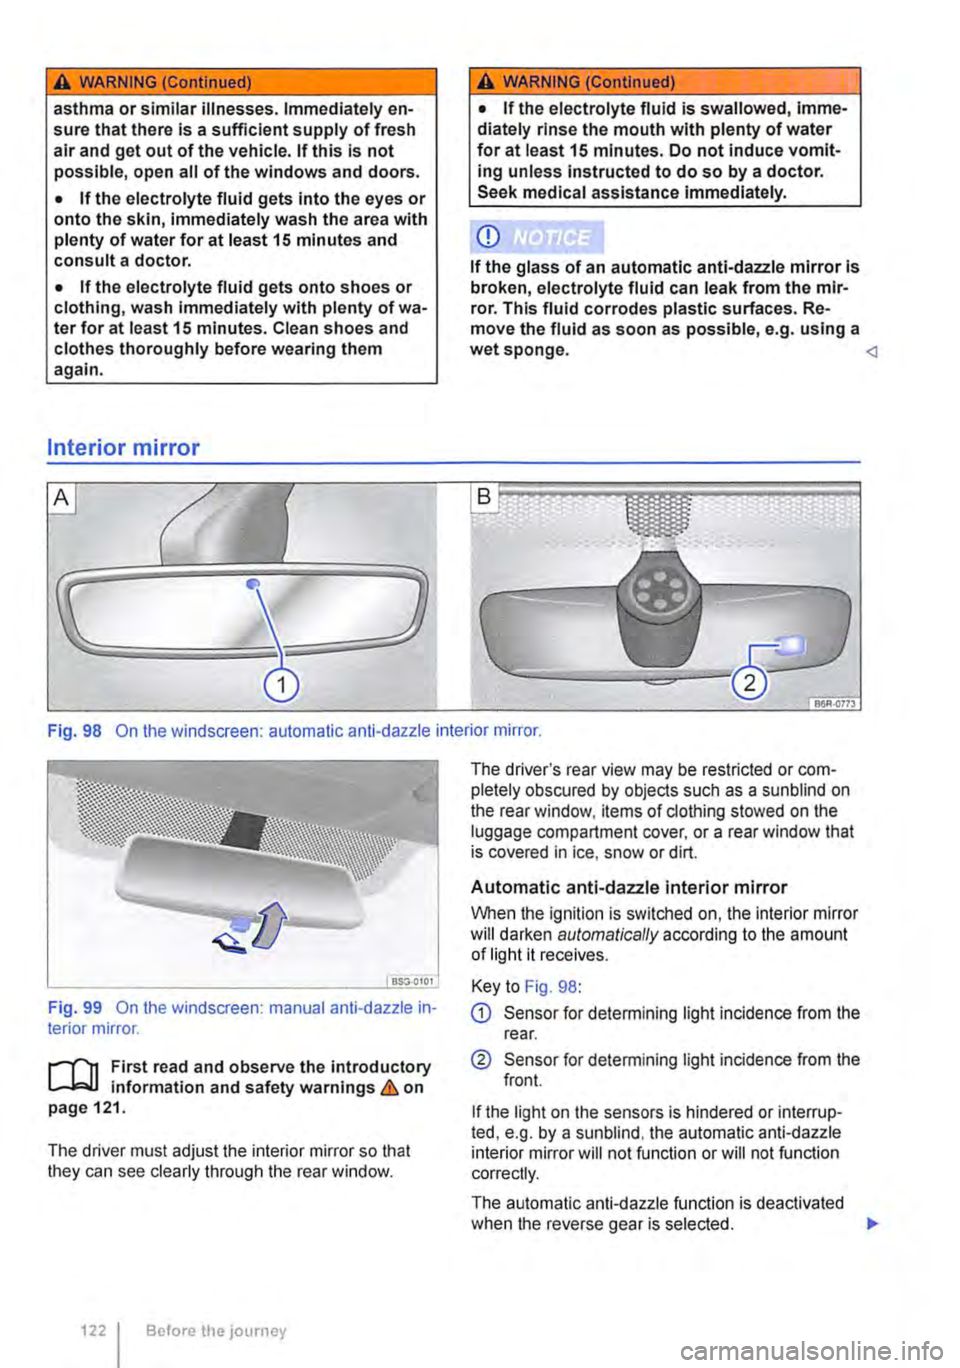
Interior mirror
A WARNING (Continued)
• If the electrolyte fluid is swallowed, imme-diately rinse the mouth with plenty of water for at least 15 minutes. Do not induce vomit-ing unless instructed to do so by a doctor. Seek medical assistance immediately.
CD
If the glass of an automatic anti-dazzle mirror is broken, electrolyte fluid can leak from the mir-ror. This fluid corrodes plastic surfaces. Re-move the fluid as soon as possible, e.g. using a wet sponge.
BSG-0101.
Fig. 99 On the windscreen: manual anti-dazzle in-terior mirror.
1"'111 First read and observe the introductory L-lo::JJ information and safety warnings & on page 121.
The driver must adjust the interior mirror so that they can see clearly through the rear window.
1221 Before the journey
The driver's rear view may be restricted or com-pletely obscured by objects such as a sun blind on the rear window, items of clothing stowed on the luggage compartment cover, or a rear window that is covered in ice, snow or dirt.
Automatic anti-dazzle interior mirror
When the ignition is switched on, the interior mirror will darken automatically according to the amount of light it receives.
Key to Fig. 98:
G) Sensor for detemnining light incidence from the rear.
® Sensor for detemnining light incidence from the front.
If the light on the sensors is hindered or interrup-ted, e.g. by a sunblind, the automatic anti-dazzle interior mirror will not function or will not function correctly.
The automatic anti-dazzle function is deactivated when the reverse gear is selected. .,..