2010 VOLKSWAGEN TRANSPORTER key
[x] Cancel search: keyPage 352 of 486
CD
When refilling or changing service fluids, please ensure that the correct fluids are added through the correct openings. Incorrect service fluids can cause serious functional problems and engine damage.
r:(ib Service fluids leaks are harmful to the envi-f!f:J ronment. So you should regularly check the ground underneath your vehicle. If there are spots of oil or other fluids on the ground, the vehicle should be inspected by a qualified workshop. Any spilt service fluids must be disposed of properly and with respect to environmental legislation.
1"1'11 First read and observe the Introductory L-.J,::,jJ Information and safety warnings & on page 350.
Checklist
The following steps should always be carried out in the specified order before working In the engine compartment =:-&,:
..( Park the vehicle on a level and stable sur-face.
..! Depress and hold the brake pedal until the engine has stopped.
Apply the handbrake firmly ::-page 269.
Select the neutral position or move the se-lector lever toP =:-page 260 .
..( Stop the engine and remove the key from the ignition =:-page 257.
Opening and closing the bonnet
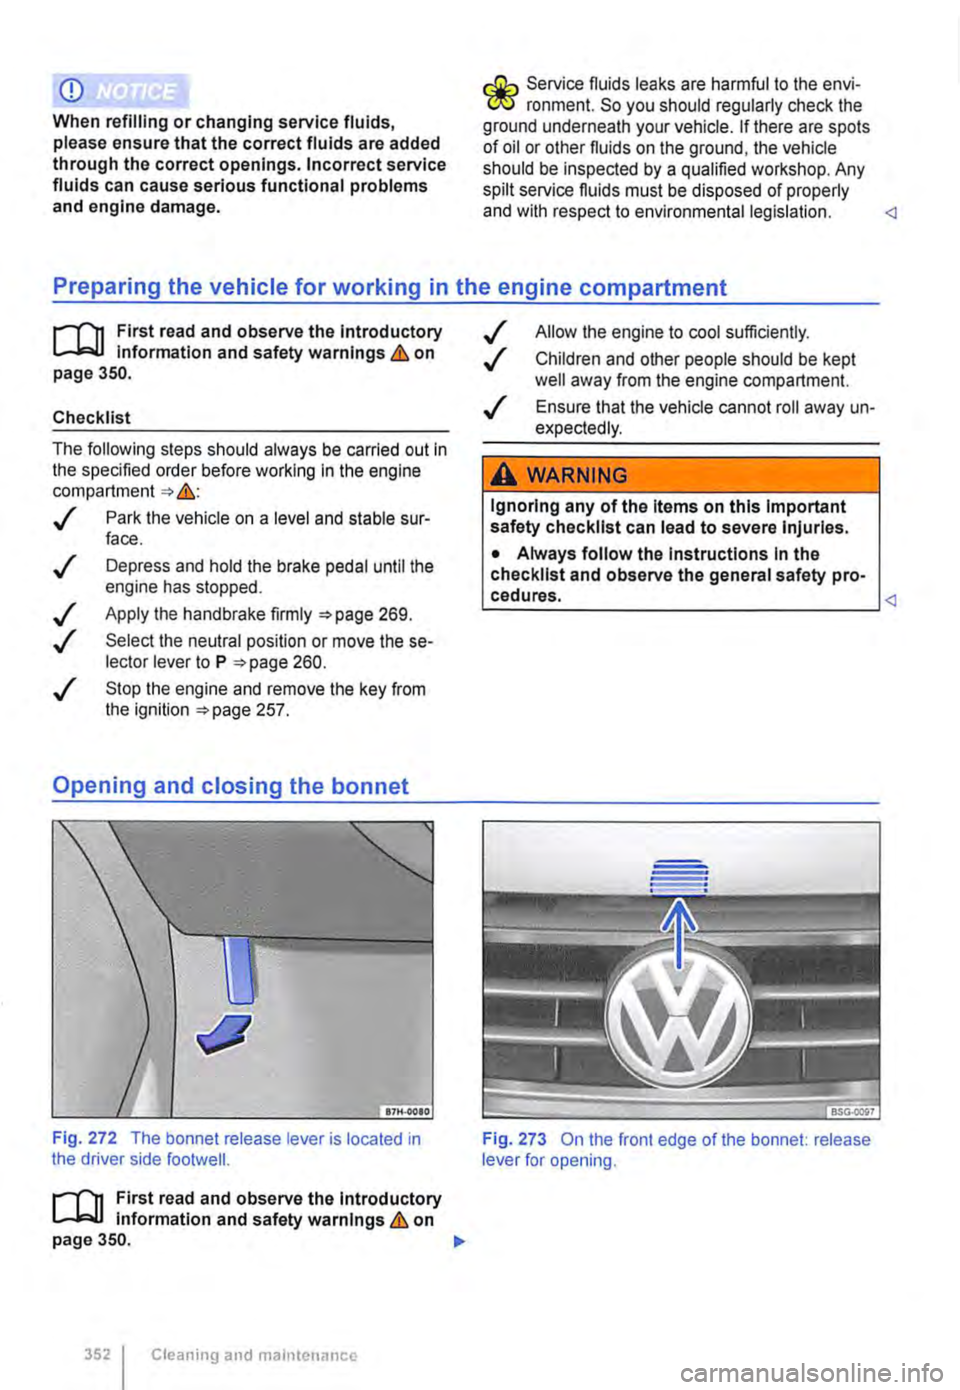
Fig. 272 The bonnet release lever is located in the driver side footwell.
1"1'11 First read and observe the introductory L-.J,::,,J Information and safety warnings & on page 350.
352 I Cleaning and maintenance
Allow the engine to cool sufficiently.
Children and other people should be kept well away from the engine compartment.
Ensure that the vehicle cannot roll away un-expectedly.
A WARNING
Ignoring any of the Items on this Important safety checklist can lead to severe Injuries.
• Always follow the Instructions In the checklist and observe the general safety pro-cedures.
Page 361 of 486
Checking the coolant level and refilling coolant
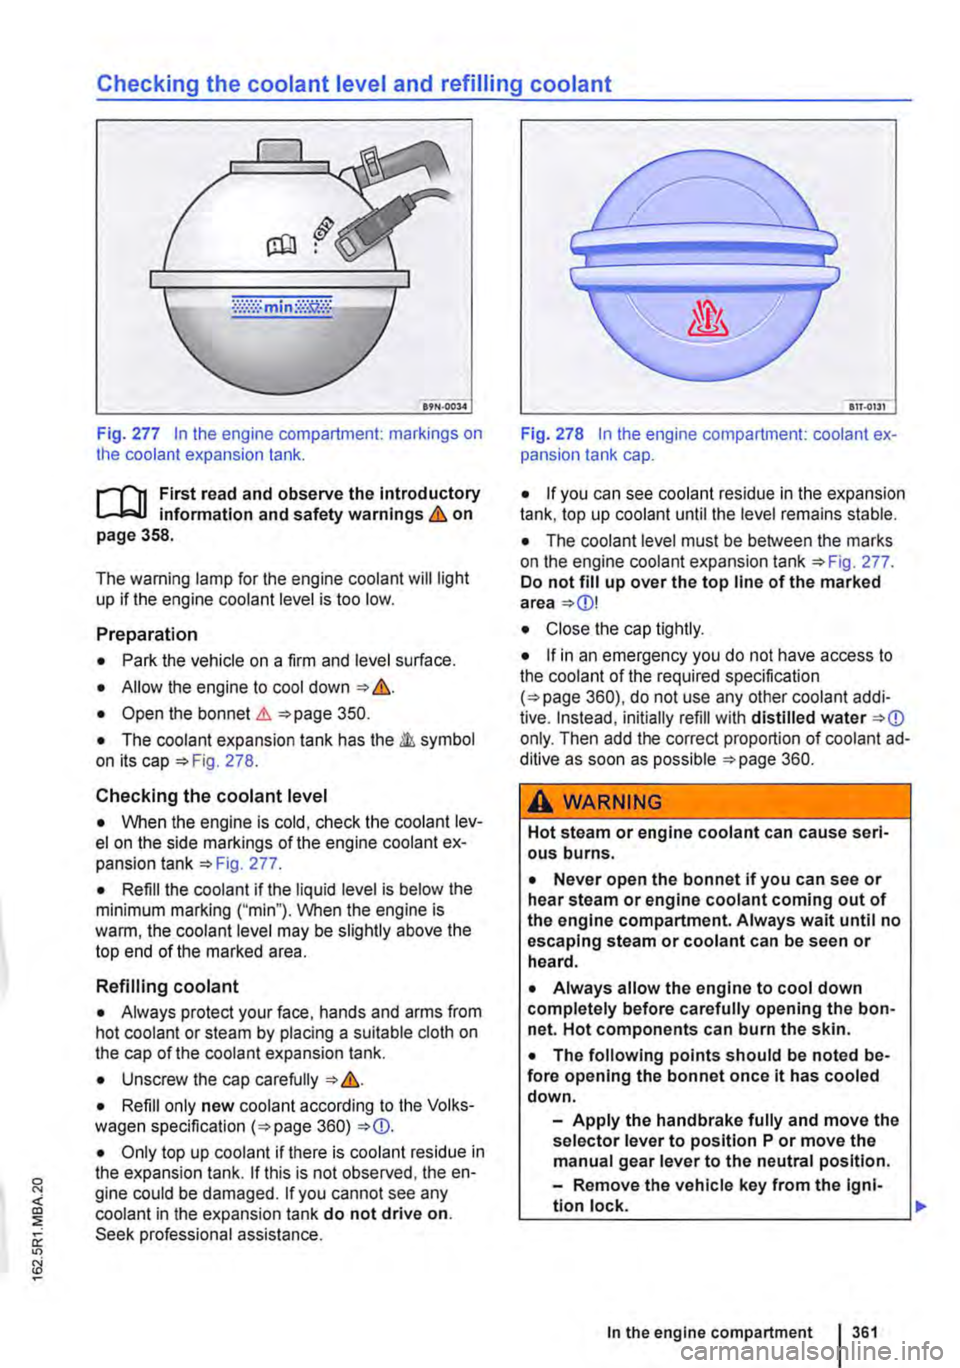
Fig. 277 In the engine compartment: markings on the coolant expansion tank.
r--f'n First read and observe the Introductory information and safety warnings & on page 358.
The warning lamp for the engine coolant will light up if the engine coolant level is too low.
Preparation
• Park the vehicle on a firm and level surface.
• Allow the engine to cool down &.
• Open the bonnet&. 350.
• The coolant expansion tank has the all. symbol on its cap 278.
Checking the coolant level
• When the engine is cold, check the coolant lev-el on the side markings of the engine coolant ex-pansion tank 277.
• Refill the coolant if the liquid level is below the minimum marking ("min"). When the engine is warm, the coolant level may be slightly above the top end of the marked area.
Refilling coolant
• Always protect your face, hands and arms from hot coolant or steam by placing a suitable cloth on the cap of the coolant expansion tank.
• Unscrew the cap carefully &.
• Refill only new coolant according to the Volks-wagen specification 360)
• Only top up coolant if there is coolant residue in the expansion tank. If this is not observed, the en-gine could be damaged. If you cannot see any coolant in the expansion tank do not drive on. Seek professional assistance.
Fig. 278 In the engine compartment: coolant ex-pansion tank cap.
• If you can see coolant residue in the expansion tank, top up coolant until the level remains stable.
• The coolant level must be between the marks on the engine coolant expansion tank 277. Do not fill up over the top line of the marked area
• Close the cap tightly.
• If in an emergency you do not have access to the coolant of the required specification 360), do not use any other coolant addi-tive. Instead, initially refill with distilled water only. Then add the correct proportion of coolant ad-ditive as soon as possible 360.
A WARNING
Hot steam or engine coolant can cause seri-ous burns.
• Never open the bonnet if you can see or hear steam or engine coolant coming out of the engine compartment. Always wait until no escaping steam or coolant can be seen or heard.
• Always allow the engine to cool down completely before carefully opening the bon-net. Hot components can burn the skin.
• The following points should be noted be-fore opening the bonnet once it has cooled down.
-Apply the handbrake fully and move the selector lever to position P or move the manual gear lever to the neutral position.
-Remove the vehicle key from the lgni-
In the engine compartment I 361
Page 406 of 486
CD
• Volkswagen Commercial Vehicles Is not re-sponsible for any vehicle damage which Is caused by low-quality fuel, inadequate servic-ing work or lack of availability of Genuine Parts.
Radio reception and aerials
i"""(")1 First read and observe the Introductory l-J.::.U information and safety warnings & on page 404.
The vehicle aerials are located in the exterior mir-rors. If any metallic chrome plates, such as chrome mirror caps, are retrofitted to the exterior mirrors you may experience problems with the radio,
CD
• Volkswagen Commercial Vehicles cannot be held responsible If the vehicle does not comply with or only partly complies with the relevant legal requirements In other countries and conti-nents.
m Interference with AM radio reception could W occur if electrical devices are used in the vi-cinity of the aerial.
i"""(")1 and observe the introductory l-J.::.U mformat1on and safety warnings & on page 404.
Volkswagen Commercial Vehicles Service infonna-tion and official Volkswagen Commercial Vehicles repair infonnation can be purchased from the fol-lowing addresses:
Please contact a Volkswagen Commercial Vehicles dealership or a qualified workshop or order the lit-erature you require from www.erwin.volkswagen.de.
Declaration of conformity
i"""(")1 First read and observe the introductory l-J.::.U information and safety warnings & on page 404.
The individual manufacturer declares herewith that the following products conform, at the time of vehi-cle production, with the basic requirements and other relevant laws and regulations, including FCC Part 15.19, FCC Part 15.21 and RSS-Gen Issue 1:
4061 Clean1ng and mamtenance
A WARNING
Incorrect repairs and modifications can cause functional problems and damage to the vehicle and impair the effectiveness of the driver assist systems and the alrbag sys-tems. This can result In accidents and severe Injuries.
• Repairs and modifications to your vehicle should only be carried out by a qualified workshop.
• Electronic immobilizer.
• Remote control key for the vehicle.
• Remote control for the supplementary heating system (auxiliary heater).
Electrical equipment
• 12-volt socket.
Page 410 of 486

If and when
Practical tips
Frequently asked questions
If you suspect that a vehicle fault has arisen or your vehicle has been damaged, read and observe the following information before contacting a Volkswagen Commercial Vehicles dealership or
qualified workshop. You may also find useful infor-mation in the index under the headings "Things to note" or "Checklist".
To note Some possible causes Possible solution
Vehicle battery is discharged. -How to jump start =>page 443. -Recharge vehicle battery 362.
Engine does not start. The incorrect vehicle key is be-Use a valid vehicle key 36. ing used.
Fuel level is too low. Fill the tank 340.
Supplementary heating system Switch off the supplementary heating
Smoke is coming from the is running. system 332. wing. Supplementary heater is run-No solution 345. ning.
-Battery in the remote control -Replace the battery 36. Vehicle cannot be locked or key is flat. -Move closer to the vehicle. unlocked with the remote -Located too far away from the -Synchronise the vehicle key =>page 36. vehicle. control key. -Buttons were pressed outside -Lock or unlock the vehicle manually
the range. 413.
Cold engine. brake assist sys-Refer to the index under entries for Unusual noises. tems, supplementary heating "Noises". system.
Assist systems are active. Refer to the index under entries for "As-sist systems". Unusual handling. DSG® dual clutch gearbox is too Stop the vehicle immediately hot. 266.
Front seats cannot be ad-Vehicle battery is discharged. Recharge vehicle battery 362.
justed electrically. Fuse blown. Check fuse and replace as necessary 429.
The vehicle has no vehicle No direct solutions possible as it depends
jack, spare wheel or break-Equipment depends on type of on the equipment level. Contact a Volks-vehicle. wagen Commercial Vehicles dealership if down set. necessary 416.
-Windows or sliding roof are open. The interior monitoring sys--Item attached to the interior Remove any objects that could trigger a tem triggers a false alarm. mirror is moving. false alarm 44. -A mobile telephone is vibrating inside the vehicle.
Functions are not working Settings have been made in the Check and if necessary reset back to fac-as described in the owner's manual. Volkswagen information system. tory settings 24.
410 I If and when
Page 412 of 486
Making you and your vehicle safe
8S0.00)7
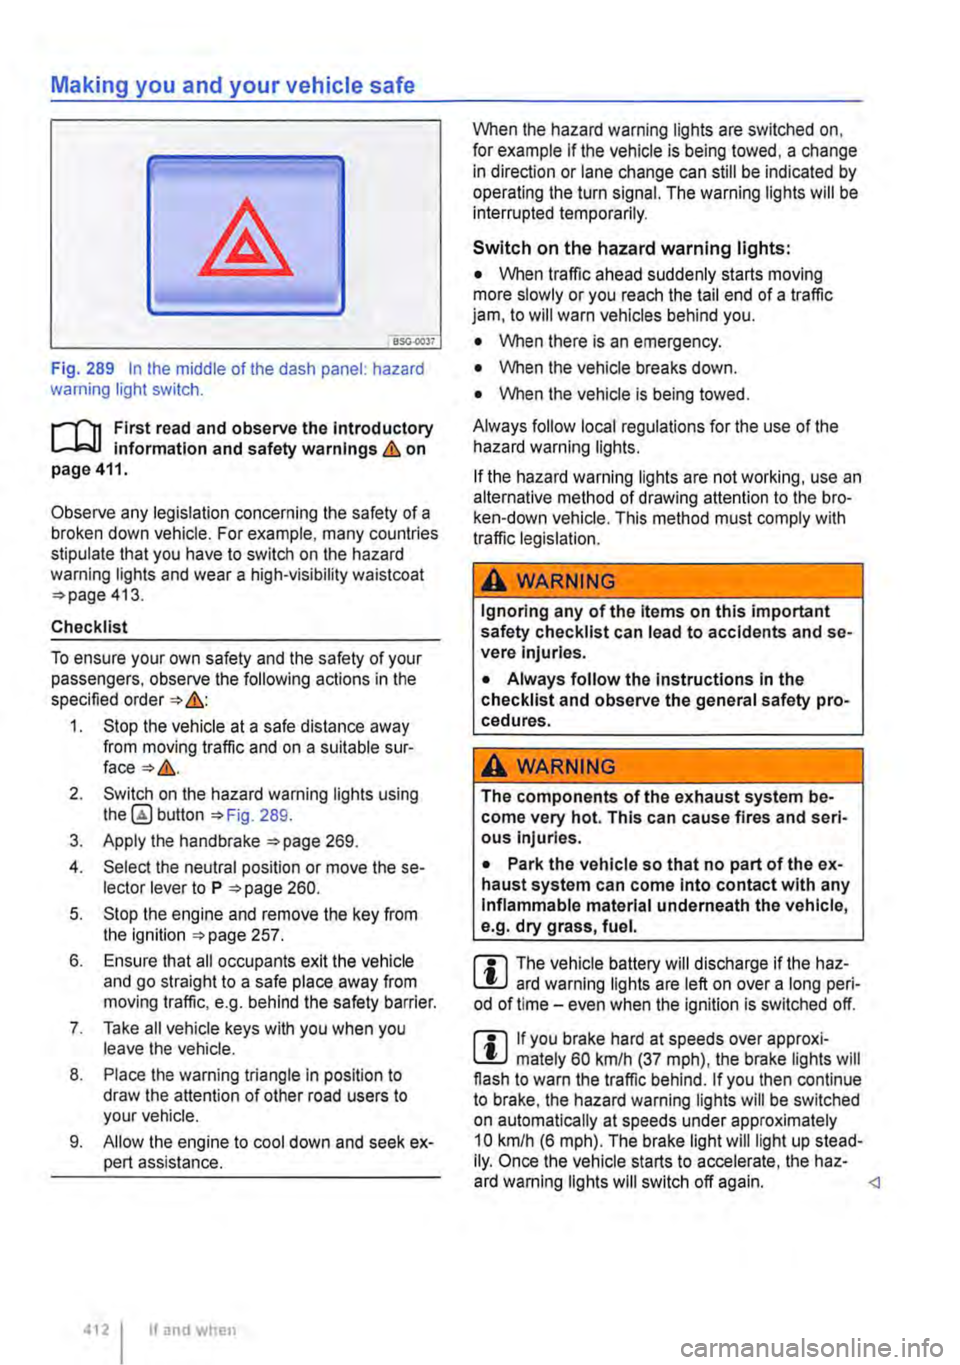
Fig. 289 In the middle of the dash panel: hazard warning light switch.
f"'""'('n First read and observe the Introductory L-lo:.U Information and safety warnings Lb. on page 411.
Observe any legislation concerning the safety of a broken down vehicle. For example, many countries stipulate that you have to switch on the hazard warning lights and wear a high-visibility waistcoat =>page 413.
Checklist
To ensure your own safety and the safety of your passengers, observe the following actions in the specified order => &:
1. Stop the vehicle at a safe distance away from moving traffic and on a suitable sur-face=>&.
2. Switch on the hazard warning lights using button =>Fig. 289.
3. Apply the handbrake =>page 269.
4. Select the neutral position or move the se-lector lever to P =>page 260.
5. Stop the engine and remove the key from the ignition =>page 257.
6. Ensure that all occupants exit the vehicle and go straight to a safe place away from moving traffic, e.g. behind the safety barrier.
7. Take all vehicle keys with you when you leave the vehicle.
8. Place the warning triangle in position to draw the attention of other road users to your vehicle.
9. Allow the engine to cool down and seek ex-pert assistance.
4121 If and when
When the hazard warning lights are switched on, for example if the vehicle is being towed, a change in direction or lane change can still be indicated by operating the turn signal. The warning lights will be interrupted temporarily.
Switch on the hazard warning lights:
• When traffic ahead suddenly starts moving more slowly or you reach the tail end of a traffic jam, to will warn vehicles behind you.
• When there is an emergency.
• When the vehicle breaks down.
• When the vehicle is being towed.
Always follow local regulations for the use of the hazard warning lights.
If the hazard warning lights are not working, use an alternative method of drawing attention to the bro-ken-down vehicle. This method must comply with traffic legislation.
A WARNING
Ignoring any of the items on this important safety checklist can lead to accidents and se-vere Injuries.
• Always follow the Instructions In the checklist and observe the general safety pro-cedures.
A wARNING
The components of the exhaust system be-come very hot. This can cause fires and seri-ous Injuries.
• Park the vehicle so that no part of the ex-haust system can come Into contact with any Inflammable material underneath the vehicle, e.g. dry grass, fuel.
m The vehicle battery will discharge if the haz-L.:!J ard warning lights are left on over a long peri-od of time -even when the Ignition is switched off.
m If you brake hard at speeds over approxi-L.:!J mately 60 km/h (37 mph), the brake lights will flash to warn the traffic behind. If you then continue to brake, the hazard warning lights will be switched on automatically at speeds under approximately 10 km/h (6 mph). The brake light will light up stead-Ily. Once the vehicle starts to accelerate, the haz-ard warning lights will switch off again.
Page 413 of 486
First aid kit, warning triangle, high-visibility waistcoat and fire
extinguisher
l"'""'('n First read and observe the introductory L.-J,::,JI Information and safety warnings & on page 411.
High-visibility waistcoat
In some vehicles there is a stowage compartment for a high-visibility waistcoat in the driver door 9.
Warning triangle
The warning triangle must comply with legal re-quirements.
First aid kit
The first aid kit must comply with legal require-ments. Comply with the expiry dates of the con-tents.
In some vehicles, there is a bag containing the warning triangle and first aid kit next to the vehicle toolkit.
To remove the bag, pull it inwards by the long end at the front while turning it downwards slightly.
Manual opening and closing
COl Introduction
This chapter contains information on the following subjects:
Unlocking the driver door manually . . . . . . . . . 414 Unlocking the tailgate manually ............ 414
Closing the sliding/tilting roof manually . . . . . 415
Unlocking the selector lever lock manually . . . 415
Should the radio signal of the remote control key or the central locking system fails, the doors, tailgate and sliding/tilting roof can be locked and, with some exceptions, unlocked manually.
Additional information and warnings:
• Vehicle key set 36
• Central locking system 39
• Doors 45
• Tailgate 49
• Sliding/tilting roof 58
• Closing the electric pop-up roof manually, Cali-fornia 192
In vehicles with a kitchenette, the first aid kit is lo-cated on the rear panel of the left stowage com-partment in the kitchen unit.
Fire extinguisher
Before using the fire extinguisher, make sure you are familiar with its operation. If an operating man-ual is supplied with the fire extinguisher, place it in the vehicle wallet.
The fire extinguisher must comply with the valid legal requirements. lt must be fully functional and checked regularly. See the test certificate on the fire extinguisher.
A WARNING
In the event of a sudden driving or braking manoeuvre or accident, loose objects could be flung though the vehicle and cause severe Injuries.
• Always secure the fire extinguisher, high-visibility waistcoat, first aid kit and warning triangle safely In the holders.
• In an emergency 411
A WARNING
Careless manual opening and closing can cause serious Injury.
• If the vehicle Is locked from the outside, the doors and windows cannot be opened from the inside.
• Never leave children or people requiring assistance alone In the vehicle. They could become trapped In the vehicle In an emergen-cy and may not be able to get themselves to safety.
• Temperatures Inside a locked vehicle may reach extremes of heat or cold, according to season. This can cause serious Injuries and Illness or fatalities, especially to small chil-dren. .,.
Practical tips 413
Page 414 of 486
A WARNING
The path of the doors, tailgate and sliding/tilt-ing roof is a dangerous area. Injuries could be sustained here.
Unlocking the driver door manually
rl'11 First read and observe the introductory L-J.:.I.I Information and safety warnings & on page 413.
If unlocked manually, only the driver door is un-locked. Observe information on the anti-theft alarm 39.
Unlocking the tailgate manually
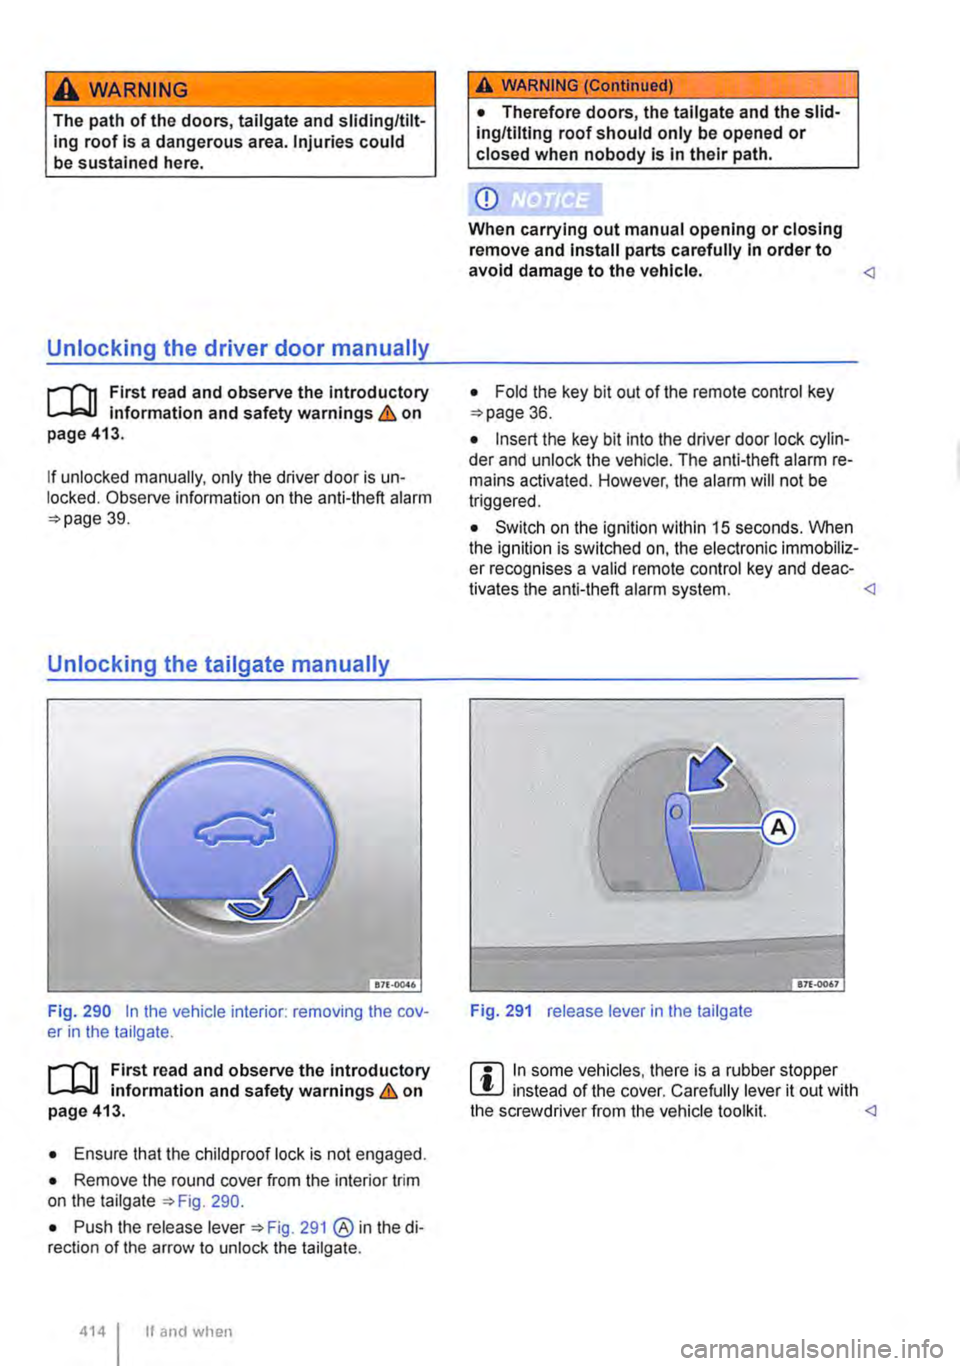
Fig. 290 In the vehicle interior: removing the cov-er in the tailgate.
rl'11 First read and observe the introductory L-J.:.I.I information and safety warnings & on page 413.
• Ensure that the child proof lock is not engaged.
• Remove the round cover from the interior trim on the tailgate 290.
• Push the release lever 291 @ in the di-rection of the arrow to unlock the tailgate.
4141 If and when
A WARNING (Continued)
• Therefore doors, the tailgate and the slid-ing/tilting roof should only be opened or closed when nobody is in their path.
CD
When carrying out manual opening or closing remove and Install parts carefully In order to avoid damage to the vehicle.
• Insert the key bit into the driver door lock cylin-der and unlock the vehicle. The anti-theft alarm re-mains activated. However, the alarm will not be triggered.
• Switch on the ignition within 15 seconds. When the ignition is switched on, the electronic immobiliz-er recognises a valid remote control key and deac-tivates the anti-theft alarm system.
m In some vehicles, there is a rubber stopper l!.J instead of the cover. Carefully lever it out with the screwdriver from the vehicle toolkit.
Page 415 of 486
Closing the sliding/tilting roof manually
r-111 First read and observe the introductory L-J,.:.U information and safety warnings & on page 413.
• Take the screwdriver from the vehicle tool kit.
• Remove cover with the sliding/tilting roof rotary button. Use the flat blade of the screwdriver side-ways between the cover and the roof console and pull it downwards.
• Fit a commercially available hexagon key1) of the right size in the hexagon socket head bolt and push the hexagon key approximately 2 mm up-wards.
• Turn the hexagon key to close the sliding/tilting roof.
• Remove the hexagon key and fit the cover again. The cover should lie flush with the surround-ing parts.
• The sliding/tilting roof should be checked by a qualified workshop. The functioning and roll-back function of the sliding/tilting roof could malfunction if it is closed manually.
BSG-
r-111 First read and observe the introductory L-J,.:.lJ information and safety warnings & on page 413.
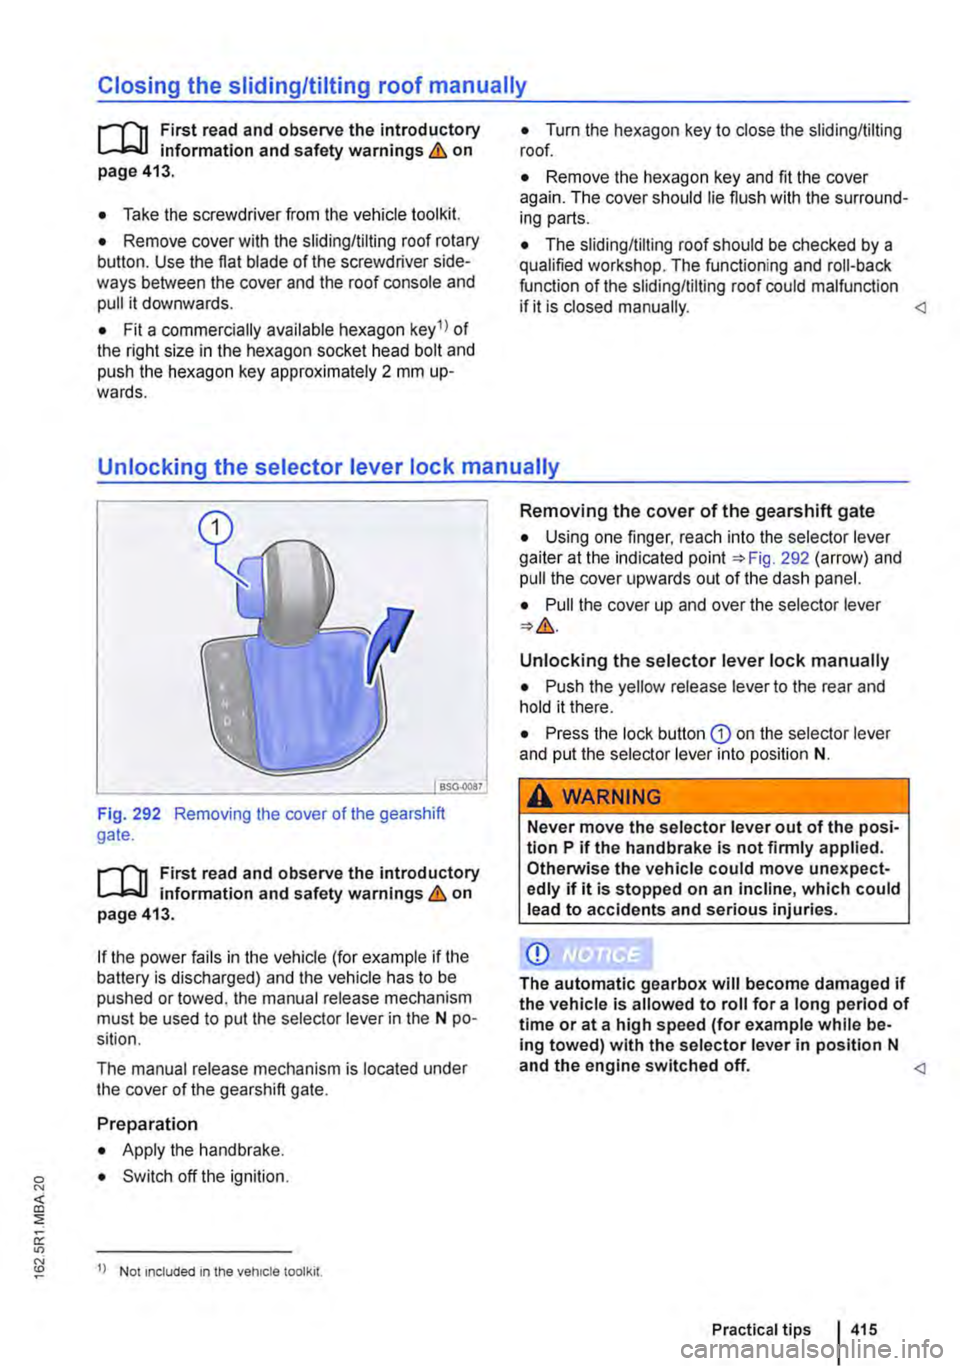
If the power fails in the vehicle (for example if the battery is discharged) and the vehicle has to be pushed or towed, the manual release mechanism must be used to put the selector lever in the N po-sition.
The manual release mechanism is located under the cover of the gearshift gate.
Preparation
• Apply the handbrake.
• Switch off the ignition.
< CD
;;;: "' 1) Not included in the vehicle toolkit.
Removing the cover of the gearshift gate
• Using one finger, reach into the selector lever gaiter at the indicated Fig. 292 (arrow) and pull the cover upwards out of the dash panel.
• Pull the cover up and over the selector lever
Unlocking the selector lever lock manually
• Push the yellow release lever to the rear and hold it there.
• Press the lock button G) on the selector lever and put the selector lever into position N.
A WARNING
Never move the selector lever out of the posi-tion P if the handbrake is not finnly applied. Otherwise the vehicle could move unexpect-edly if it is stopped on an incline, which could lead to accidents and serious injuries.
CD
The automatic gearbox will become damaged if the vehicle is allowed to roll for a long period of time or at a high speed (for example while be-ing towed) with the selector lever in position N and the engine switched off.