Page 211 of 360

AUDIO/VIDEO SYSTEM
211
Some parts of the audio system can be ad-
justed using the switches on the steering
wheel.
Details of the specific switches, controls,
and features are described below.
1Volume control switch
2“ �� ” switch
3“MODE” switch
1Volume control switch
Push “
+” side to increase the volume. The
volume continues to increase while the
switch is being pressed.
Push “
–” side to decrease the volume.
The volume continues to decrease while
the switch is being pressed.
2“ �� ” switch
Radio
This switch has the following features —
To select a preset station:
Quickly push and release the “� ” or “ �”
side of the switch. Do this again to select
the next preset station.
To seek a station:
Push and hold the “� ” or “ �” side of the
switch until you hear a beep. Do this again
to find the next station. If you push the
switch on either side during the seek
mode, seeking will be cancelled.
To step up or down the frequency, push
and hold the switch even after you hear a
beep. When you release from the switch,
the radio will begin seeking up or down for
a station. Do this again to find the next sta-
tion.
XM � Satellite Radio (if equipped) —
To select a preset channel, push the “ �”
or “� ” side of the switch. Repeat until a
desired channel is found.
Audio/video remote controls
(steering switches)
Page 212 of 360

AUDIO/VIDEO SYSTEM
212
DVD changer
Use this switch to skip up or down to a dif-
ferent track, file or chapter in either direc-
tion.
To select a desired track, file or chapter:
Quickly push and release the “� ” or “ �”
side of the switch until the track, file or
chapter you want to play is set. If you want
to return to the beginning of the current
track, file or chapter, push the “�” side of
the switch once, quickly.
To select a desired disc:
Push and hold the “� ” or “� ” switch until
you hear a beep to change to the next or
the previous disc. Repeat this operation
until you reach the disc you want to listen
to.
Bluetooth � audio player
Use this switch to skip up or down to a dif-
ferent track or album in either direction.
To select a desired track:
Quickly push and release the “ �” or “� ”
side of the switch until the track you want
to listen to is set. If you want to return to the
beginning of the current track, push the
“ � ” side of the switch once quickly.
To select a desired album:
Push and hold “�” or “�” switch until you
hear a beep to change to the next or the
previous album. Repeat this operation un-
til you reach the album you want to listen
to. USB memory/iPod
�
Use this switch to skip up or down to a dif-
ferent file or track in either direction.
To select a desired file or track:
Push the “�” or “ �” side of the switch un-
til the file or track you want to listen to is set.
If you want to return to the beginning of the
current file or track, push the “ �” side of
the switch once quickly.
To select a desired folder (USB memory
only):
Push and hold “�” or “�” switch until you
hear a beep to change to the next or the
previous folder. Repeat this operation until
you reach the folder you want to listen to.
3“MODE” switch
Push “MODE” switch to select an audio
mode. Each push changes the mode se-
quentially if the desired mode is ready to
use.
To turn the audio/video system on, push
the “MODE” switch.
To turn the audio/video system off, push
and hold the “MODE” switch until you hear
a beep.
Page 213 of 360
AUDIO/VIDEO SYSTEM
213
The rear seat entertainment system is designed for the rear passengers to e\
njoy audio
and DVD video separately from the front audio system.
1Front audio system
2Display
3Rear seat entertainment system controller
4Headphone volume control dials and headphone jacks
5A/V input adapter
Rear seat entertainment system features (if equipped) —
Page 214 of 360
AUDIO/VIDEO SYSTEM
214
The rear seat entertainment system can
be used when the “ENGINE START
STOP” switch is in ACCESSORY or IGNI-
TION ON mode.
�Display
The display is installed in the ceiling. When
audio−video equipment is connected to
the A/V input adapter, rear passengers can
enjoy dif ferent audio sources on each dis-
play. See “— Using the video mode” on
page 235.
�Opening and closing the display
� Open
Push the “OPEN/CLOSE”, “DVD”,
“MAP”, “VIDEO” , “
�|” or “ON”.
� CLOSE
Push the “OPEN/CLOSE” or “OFF”.
If the display is closed with an image
shown, the image will automatically turn
off. (The sound will not be turned off.)
Opening and closing operations can be
performed from the front seat. (See page
31.)
INFORMATION
The display will stop closing and re-
turn to its previous position if some-
thing gets in the way of it closing.
Page 215 of 360
AUDIO/VIDEO SYSTEM
215
�
Tilting the display
The display angles change as follows each
time “TILT” is pushed.
1 →2 →3 →4 →1
The display angle is memorized and will be
recalled when the “ENGINE START
STOP” switch is turned to ACCESSORY
or IGNITION ON mode again.
�Before using the controller
(for new vehicle owners)
An insulating sheet is set to prevent the
batteries from being discharged. Remove
the insulating sheet before using the re-
mote control.
Page 216 of 360
AUDIO/VIDEO SYSTEM
216
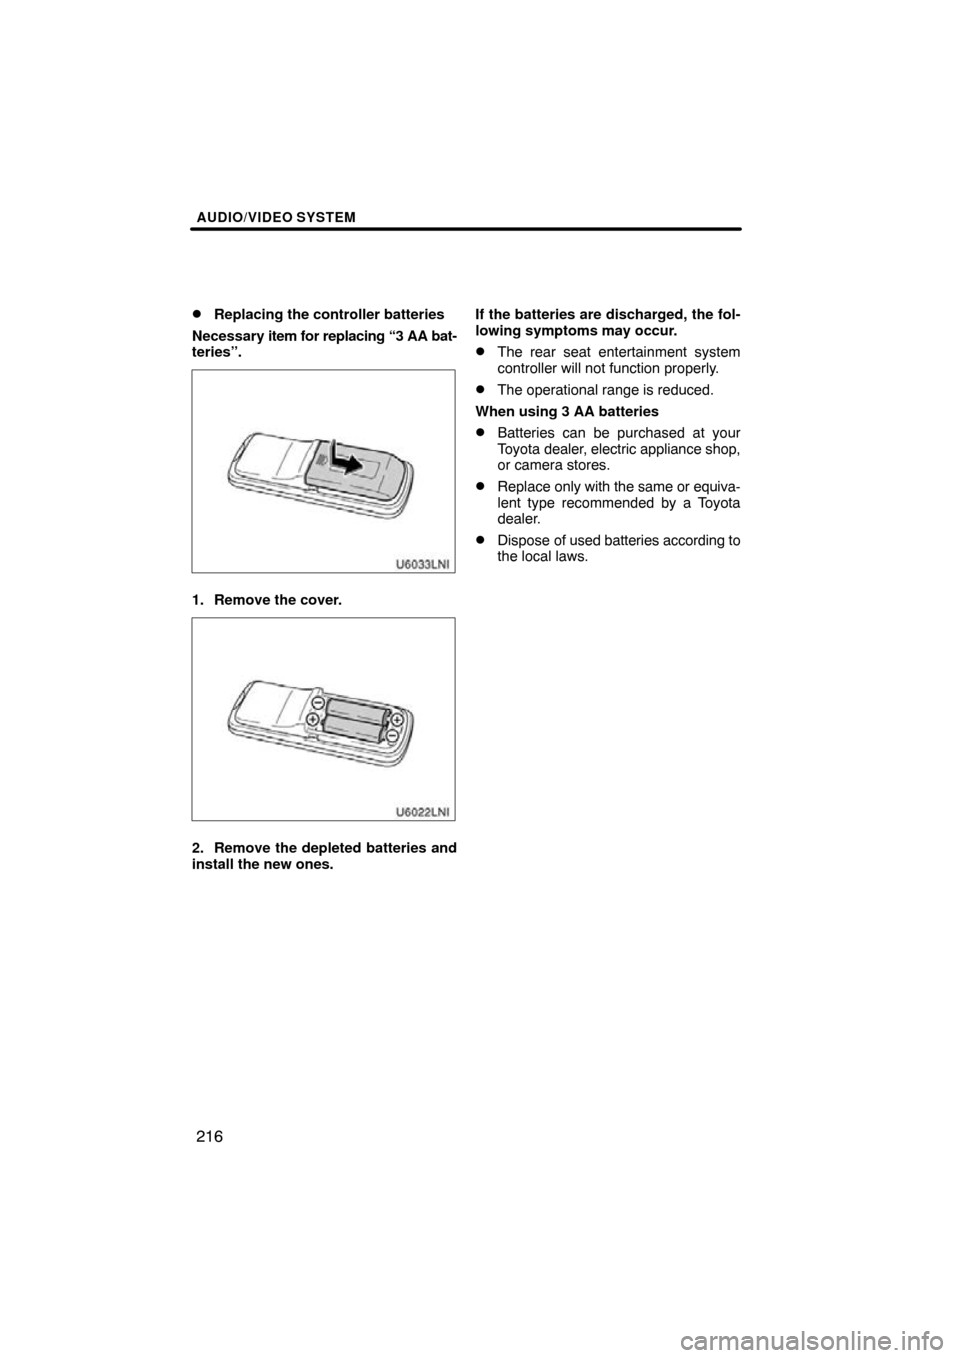
�
Replacing the controller batteries
Necessary item for replacing “3 AA bat-
teries”.
1. Remove the cover.
2. Remove the depleted batteries and
install the new ones. If the batteries are discharged, the fol-
lowing symptoms may occur.
�The rear seat entertainment system
controller will not function properly.
�The operational range is reduced.
When using 3 AA batteries
�Batteries can be purchased at your
Toyota dealer, electric appliance shop,
or camera stores.
�Replace only with the same or equiva-
lent type recommended by a Toyota
dealer.
�Dispose of used batteries according to
the local laws.
Page 217 of 360
AUDIO/VIDEO SYSTEM
217
�
Headphone jacks
1To use the headphones, connect
them to the jack.
2To adjust the volume
1. Push the knob.
2. Turn the knob clockwise to increase
the volume. Turn the knob counter-
clockwise to decrease the volume.
3. Push the knob again.
�Headphones
To listen to the rear audio, use headpho-
nes.
With some headphones generally avail-
able in the market, it may be difficult to
catch signals properly. Toyota recom-
mends the use of T oyota genuine wireless
headphones.
Please contact your Toyota dealer for fur-
ther details.
�Volume
Adjust the volume when you connect the
headphones to the jack. Loud sounds may
have a significant impact on the human
body.
�Caution screen
This screen appears for a few seconds
when the rear display is opened. During
this time, only “OPEN/CLOSE” can be op-
erated.
Page 218 of 360
AUDIO/VIDEO SYSTEM
218
�
Changing the source
1Turning on the
audio source selection
screen
2Inputting the selected icon
3Selecting an icon
Push “SOURCE” to display the audio
source selection screen.
Select an audio source.
�Changing the speaker output
To play the rear audio over the speakers in
the vehicle, turn “Speaker Output” on.