Page 1 of 264

Table of Contents
Quick guide —
— Overview buttons and guidance screen 5. . . . . . . . . . . .
— Registering home 7 . . . . . . . . . . . . . . . . . . . . . . . . . . . . . . . .
— Registering preset memory points (Quick access) 9 . .
— Operation flow: guiding the route 11 . . . . . . . . . . . . . . . . .
— Setting home as the destination 12 . . . . . . . . . . . . . . . . . .
1 Basic Functions (Basic information before operation)
Initial screen 22
. . . . . . . . . . . . . . . . . . . . . . . . . . . . . . . . . . . . \
. . . . . . . . . .
Touch screen operation 24
. . . . . . . . . . . . . . . . . . . . . . . . . . . . . . . . . . . . \
Inputting letters and numbers/list screen operation 24
. . . . . . . . . . . . .
Function help 28
. . . . . . . . . . . . . . . . . . . . . . . . . . . . . . . . . . . . \
. . . . . . . . .
Map screen operation 28
. . . . . . . . . . . . . . . . . . . . . . . . . . . . . . . . . . . . \
.
Current position display 28
. . . . . . . . . . . . . . . . . . . . . . . . . . . . . . . . .
Screen scroll operation 29
. . . . . . . . . . . . . . . . . . . . . . . . . . . . . . . . .
Switching the screens 33
. . . . . . . . . . . . . . . . . . . . . . . . . . . . . . . . . .
Map scale 35
. . . . . . . . . . . . . . . . . . . . . . . . . . . . . . . . . . . . \
. . . . . . . . .
Foot print map 36
. . . . . . . . . . . . . . . . . . . . . . . . . . . . . . . . . . . . \
. . . . .
Orientation of the map 37
. . . . . . . . . . . . . . . . . . . . . . . . . . . . . . . . . .
Quick
Guide
Page 13 of 264
9
0U5074X
0U5007F
0U5008F
0U5009F
1Push the “MENU” button.
2Touch “My Places”.
3Touch “Register” of the memory
points.
4There are 13 different methods to
search preset memory points.
See “Destination search” on page 41.
— Registering preset memory points
(Quick access)
Page 14 of 264
10
0U5010F
0U5011F
0U5012F
0U5013F
5Touch “Enter”.
The “Memory Point” screen is displayed.
6Touch “Quick Access”.
7Touch one of preset buttons 1 to
5.
8Touch “OK”.
Registration of preset memory points is
complete.
You can change the icon, quick access,
name, location and phone number. (See
“ — Editing memory points” on page 94.)
The registered points can be used on the
“Destination” screen. (See “ — Destination
search by Quick access” on page 44.)
Page 37 of 264

DESTINATION SEARCH
41
8“Intersection”
The names of two intersecting streets can
be entered. This is helpful if only the gen-
eral vicinity, not the specific address, is
known. 57 . . . . . . . . . . . . . . . . . . . . . . . . . . .
9“Freeway Ent./Exit”
The name of a freeway (interstate) en-
trance or exit can be entered. 58 . . . . . . .
10“?”
Function help for the “Destination” screen
can be viewed on this screen. 28 . . . . . . .
11“Change”
To change the search area, touch this
touch−screen button. 42
. . . . . . . . . . . . . .
12Quick access touch�screen but-
tons
One of 5 preset destinations can be se-
lected by touching the screen directly. To
use this function, it is necessary to set the
“Quick access” for each memory point. (To
register a “Quick Access”, see “ — Editing
memory points” on page 94.) 44 . . . . . . . .
13Home touch�screen button
A personal home address can be selected
without entering the address each time. To
use this function, it is necessary to set
“Home” for the memory point. (To register
“Home”, see “ — Registering home” on
page 100.) 44 . . . . . . . . . . . . . . . . . . . . . . . .
14“Phone #”
A destination can be entered by the tele-
phone number. 60 . . . . . . . . . . . . . . . . . . . .
15“Coordinates”
A destination can be set by using latitude
and longitude as coordinates. 59 . . . . . . .
Push the “DEST” button.
You can use one of 13 different methods to
search your destination. (See pages 44
through 60.)
INFORMATION
When searching the destination, the
response to the touch�screen button
may be slow.
Destination search —
Page 102 of 264
ADVANCED FUNCTIONS
106
The previous destination can be deleted.
1. Push the “MENU” button.
2. Touch “My Places” on the “Menu”
screen.
3. Touch “Delete Previous Points”.
4. Touch the touch�screen button you
want to delete.
“Delete All”: To delete all previous points
in the system.
5. To delete the point, touch “Yes”. To
cancel the deletion, touch “No”. Setting the items shown on the “Setup”
screen can be done. (See page 87.)
1. Push the “MENU” button.
2. Touch “Setup”.
3. Touch the items to be set.
4. Touch “OK”.
The previous screen will be displayed.
INFORMATION
To reset all setup items, touch “De-
fault”.
— Deleting previous pointsSetup
Page 114 of 264
OTHER FUNCTIONS
11 8
When the Navigation System is turned on,
the “Information” screen displays when it is
time to replace a part or certain compo-
nents. (See page 23.)
1. Push the “INFO” button.
2. Touch “Maintenance”.
3. Touch the desired touch�screen
button.
For details of each touch −screen button,
see “INFORMA TION ITEMS” on page 119.
“Delete All”: To cancel all conditions
which have been inputted.
“Reset All”: To reset the item which has
satisfied a condition.
“Set Dealer”: To register or edit dealer in-
formation. (See “ — Dealer setting” on
page 120.)
If “ON” is selected, the system gives main-
tenance information with the “Information”
screen when the system is turned on. (See
page 23.)
If “OFF” is selected, the “Information”
screen is disabled.
When the vehicle needs to be serviced, the
touch−screen button color will change to
orange.
Maintenance information —
— Maintenance information
setting
Page 115 of 264

OTHER FUNCTIONS
11 9
INFORMATION ITEMS
“ENGINE OIL”: Replace engine oil
“OIL FILTER”: Replace engine oil filter
“ROTATION”: Rotate tires
“TIRES”: Replace tires
“BATTERY”: Replace battery
“BRAKE PAD”: Replace brake linings
“WIPERS”: Replace wiper blades
“LLC”: Replace engine coolant
“BRAKE OIL”: Replace brake fluid
“ATF”: Replace ATF
“SERVICE”: Scheduled maintenance
“AIR FILTER”: Replace air filter
“PERSONAL”: New information items
can be created separately from provided
ones
4. Input the conditions.
Notice of “Date”: The next maintenance
date can be input.
Notice of “Distance”: The driving dis-
tance until the next maintenance check
can be input.
“Delete”: To cancel the date and distance
conditions.
“Reset”: To reset the date and distance
conditions .
5. Touch “OK”.
The screen then returns to the “Mainte-
nance” screen.
INFORMATION
� For scheduled maintenance infor-
mation, please refer to the “Sched-
uled Maintenance Guide” or “Own-
er’s Manual Supplement”.
� Depending on driving or road con-
ditions, the actual date and dis-
tance may differ from the stored
date and distance in the system.
Page 148 of 264
OTHER FUNCTIONS
152
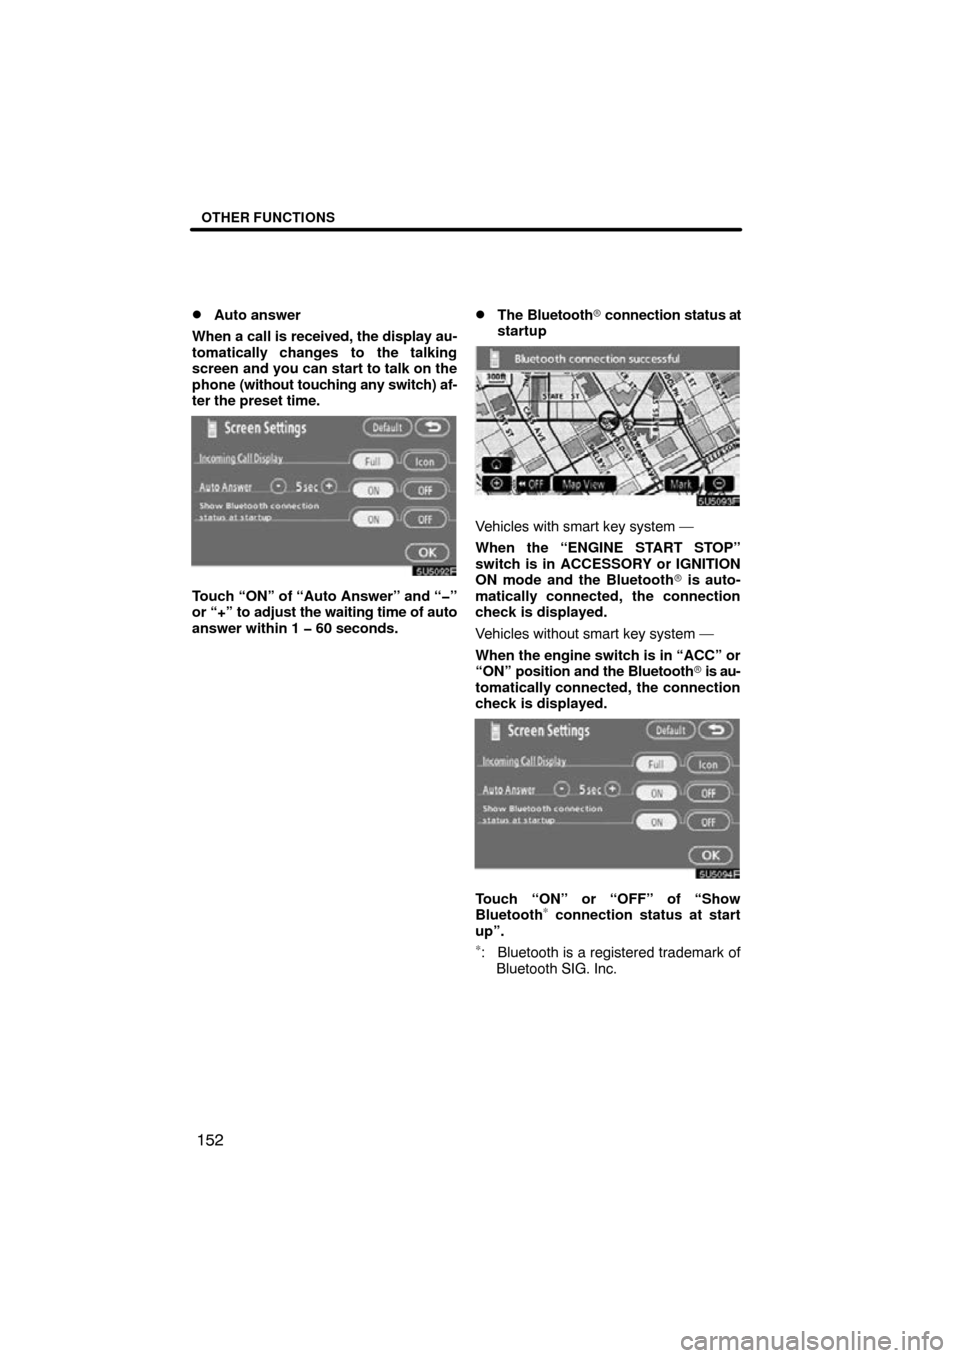
�
Auto answer
When a call is received, the display au-
tomatically changes to the talking
screen and you can start to talk on the
phone (without touching any switch) af-
ter the preset time.
Touch “ON” of “Auto Answer” and “�”
or “+” to adjust the waiting time of auto
answer within 1 � 60 seconds.
�The Bluetooth� connection status at
startup
Vehicles with smart key system —
When the “ENGINE START STOP”
switch is in ACCESSORY or IGNITION
ON mode and the Bluetooth� is auto-
matically connected, the connection
check is displayed.
Vehicles without smart key system —
When the engine switch is in “ACC” or
“ON” position and the Bluetooth � is au-
tomatically connected, the connection
check is displayed.
Touch “ON” or “OFF” of “Show
Bluetooth∗ connection status at start
up”.
∗: Bluetooth is a registered trademark of Bluetooth SIG. Inc.


1. Push the “INFO” b")