2010 SUZUKI SX4 check oil
[x] Cancel search: check oilPage 81 of 297

2-64
BEFORE DRIVING
80J23-03E
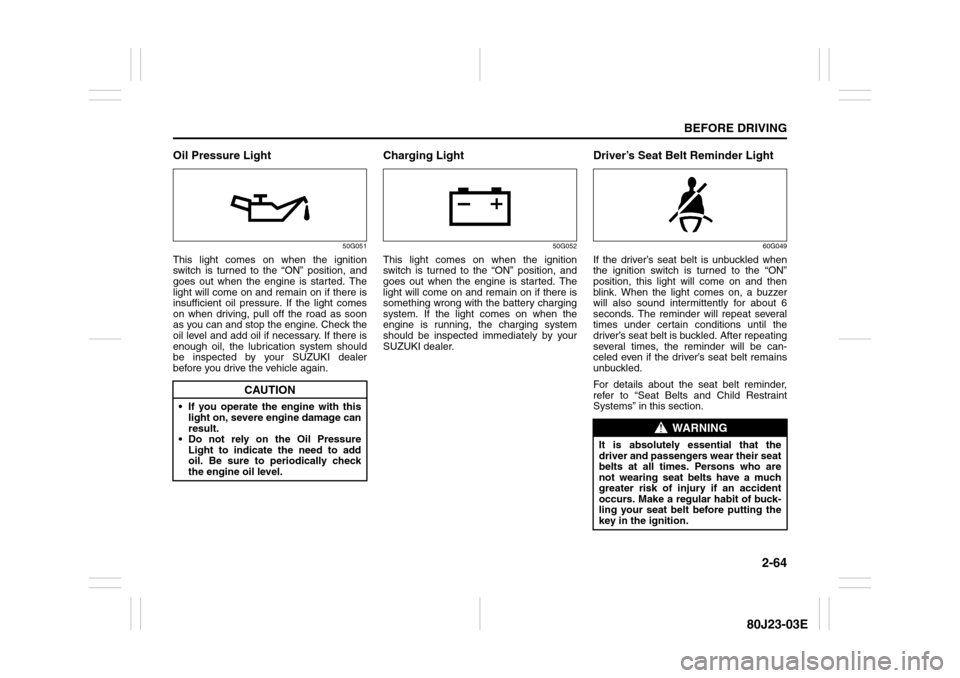
Oil Pressure Light
50G051
This light comes on when the ignition
switch is turned to the “ON” position, and
goes out when the engine is started. The
light will come on and remain on if there is
insufficient oil pressure. If the light comes
on when driving, pull off the road as soon
as you can and stop the engine. Check the
oil level and add oil if necessary. If there is
enough oil, the lubrication system should
be inspected by your SUZUKI dealer
before you drive the vehicle again.
Charging Light
50G052
This light comes on when the ignition
switch is turned to the “ON” position, and
goes out when the engine is started. The
light will come on and remain on if there is
something wrong with the battery charging
system. If the light comes on when the
engine is running, the charging system
should be inspected immediately by your
SUZUKI dealer.
Driver’s Seat Belt Reminder Light
60G049
If the driver’s seat belt is unbuckled when
the ignition switch is turned to the “ON”
position, this light will come on and then
blink. When the light comes on, a buzzer
will also sound intermittently for about 6
seconds. The reminder will repeat several
times under certain conditions until the
driver’s seat belt is buckled. After repeating
several times, the reminder will be can-
celed even if the driver’s seat belt remains
unbuckled.
For details about the seat belt reminder,
refer to “Seat Belts and Child Restraint
Systems” in this section.
CAUTION
If you operate the engine with this
light on, severe engine damage can
result.
Do not rely on the Oil Pressure
Light to indicate the need to add
oil. Be sure to periodically check
the engine oil level.
WARNING
It is absolutely essential that the
driver and passengers wear their seat
belts at all times. Persons who are
not wearing seat belts have a much
greater risk of injury if an accident
occurs. Make a regular habit of buck-
ling your seat belt before putting the
key in the ignition.
Page 84 of 297

2-67BEFORE DRIVING
80J23-03E
Illumination Indicator Light
64J045
This indicator light comes on while the
position lights, tail light and/or the head-
lights are on.Turn Signal Indicators
50G055
When you turn on the left or right turn sig-
nals, the corresponding green arrow on the
instrument panel will flash along with the
respective turn signal lights.
When you turn on the hazard warning
switch, both arrows will flash along with all
of the turn signal lights.
High Beam Indicator Light
50G056
This indicator comes on when headlight
high beams are turned on.intelligent All Wheel Drive (i-AWD)
AUTO Indicator Light (if equipped)
79J040
When the ignition switch is turned to the
“ON” position, the light comes on briefly so
you can check that the light is working.
When the 2WD/i-AWD switch is in the “i-
AWD AUTO” mode with the ignition switch
in the “ON” position, the light comes on
and stays on.
If the light and the “i-AWD LOCK” indicator
light stay on or come on simultaneously
when driving, there may be something
wrong with the i-AWD system. Have thesystem inspected by an authorized
SUZUKI dealer.
If the oil temperature of the parts for i-AWD
system is high, this light will blink. The “i-
AWD AUTO” or “i-AWD LOCK” mode will
be changed to the “2WD” mode automati-
cally to prevent a damage of the parts for i-
AWD system.
NOTE:
If you restart the engine, the light will stop
blinking temporarily.
For details, refer to “Using the 2WD/i-AWD
Switch” in the “OPERATING YOUR VEHI-
CLE” section.
NOTE:
When the vehicle speed is increased, the
“i-AWD LOCK” mode will be changed to
the “i-AWD AUTO” mode automatically.
The “i-AWD AUTO” indicator light will come
on and stay on.
Page 102 of 297

3-1OPERATING YOUR VEHICLE
80J23-03E
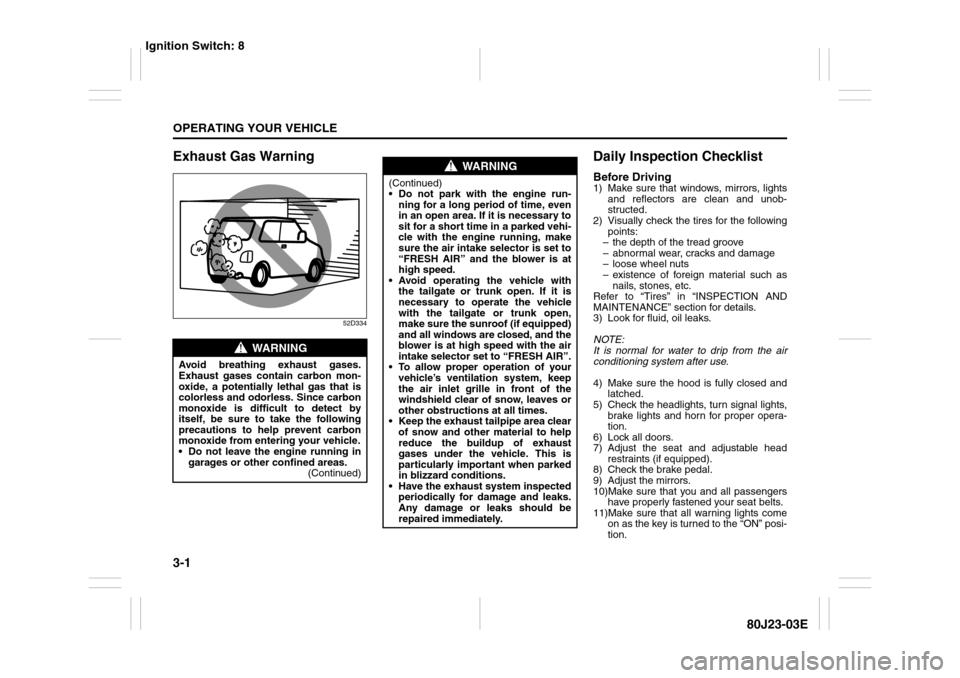
Exhaust Gas Warning
52D334
Daily Inspection ChecklistBefore Driving1) Make sure that windows, mirrors, lights
and reflectors are clean and unob-
structed.
2) Visually check the tires for the following
points:
– the depth of the tread groove
– abnormal wear, cracks and damage
– loose wheel nuts
– existence of foreign material such as
nails, stones, etc.
Refer to “Tires” in “INSPECTION AND
MAINTENANCE” section for details.
3) Look for fluid, oil leaks.
NOTE:
It is normal for water to drip from the air
conditioning system after use.
4) Make sure the hood is fully closed and
latched.
5) Check the headlights, turn signal lights,
brake lights and horn for proper opera-
tion.
6) Lock all doors.
7) Adjust the seat and adjustable head
restraints (if equipped).
8) Check the brake pedal.
9) Adjust the mirrors.
10)Make sure that you and all passengers
have properly fastened your seat belts.
11)Make sure that all warning lights come
on as the key is turned to the “ON” posi-
tion.
WARNING
Avoid breathing exhaust gases.
Exhaust gases contain carbon mon-
oxide, a potentially lethal gas that is
colorless and odorless. Since carbon
monoxide is difficult to detect by
itself, be sure to take the following
precautions to help prevent carbon
monoxide from entering your vehicle.
Do not leave the engine running in
garages or other confined areas.
(Continued)
WARNING
(Continued)
Do not park with the engine run-
ning for a long period of time, even
in an open area. If it is necessary to
sit for a short time in a parked vehi-
cle with the engine running, make
sure the air intake selector is set to
“FRESH AIR” and the blower is at
high speed.
Avoid operating the vehicle with
the tailgate or trunk open. If it is
necessary to operate the vehicle
with the tailgate or trunk open,
make sure the sunroof (if equipped)
and all windows are closed, and the
blower is at high speed with the air
intake selector set to “FRESH AIR”.
To allow proper operation of your
vehicle’s ventilation system, keep
the air inlet grille in front of the
windshield clear of snow, leaves or
other obstructions at all times.
Keep the exhaust tailpipe area clear
of snow and other material to help
reduce the buildup of exhaust
gases under the vehicle. This is
particularly important when parked
in blizzard conditions.
Have the exhaust system inspected
periodically for damage and leaks.
Any damage or leaks should be
repaired immediately.
Ignition Switch: 8
Page 103 of 297

3-2
OPERATING YOUR VEHICLE
80J23-03E
12)Check all gauges.
13)Make sure that the BRAKE light turns
off when the parking brake is released.
Once a week, or each time you fill your fuel
tank, perform the following under-hood
checks:
1) Engine oil level
2) Coolant level
3) Brake fluid level
4) Power steering (if equipped) fluid level
5) Windshield washer fluid level
6) Hood latch operation
Pull the hood release handle inside the
vehicle. Make sure that you cannot
open the hood all the way without
releasing the secondary latch. Be sure
to close the hood securely after check-
ing for proper latch operation. See the
item “All latches, hinges and locks” of
“CHASSIS AND BODY” in the “Periodic
Maintenance Schedule” section in the
“INSPECTION AND MAINTENANCE”
section for lubrication schedule.Once a month, or each time you fill your
fuel tank, check the tire pressure using a
tire pressure gauge. Also check the tire
pressure of the spare tire.
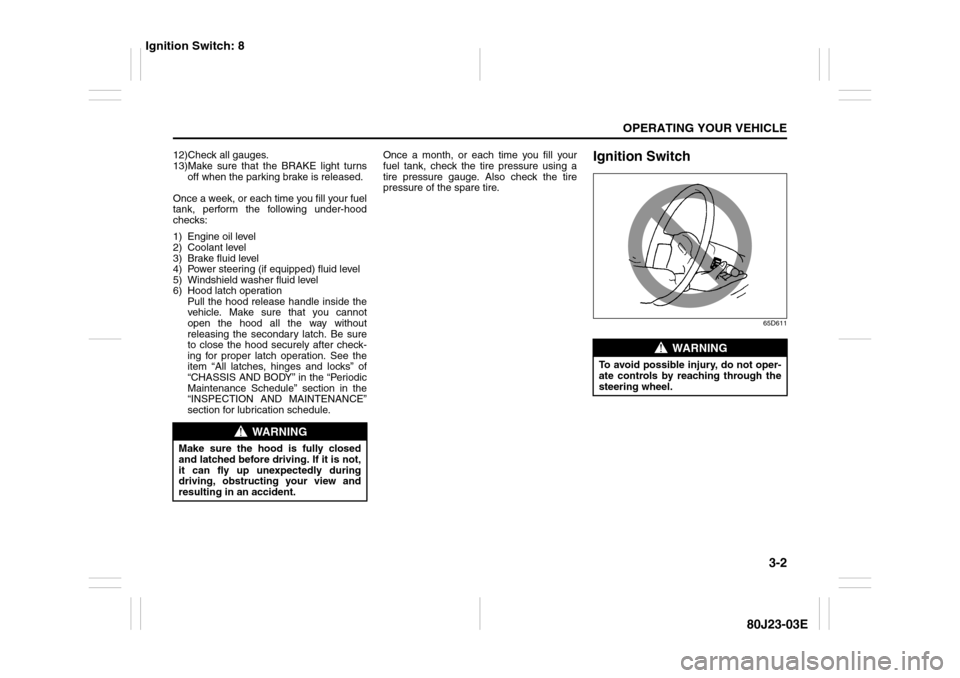
Ignition Switch
65D611
WARNING
Make sure the hood is fully closed
and latched before driving. If it is not,
it can fly up unexpectedly during
driving, obstructing your view and
resulting in an accident.
WARNING
To avoid possible injury, do not oper-
ate controls by reaching through the
steering wheel.
Ignition Switch: 8
Page 208 of 297

7-3INSPECTION AND MAINTENANCE
80J23-03E
Periodic Maintenance ScheduleR: Replace or change
I : Inspect, clean, adjust, lubricate or replace as necessary
#1: Be sure to perform the engine coolant level check under the daily inspection in “OPERATING YOUR VEHICLE” section.
If you replace the engine coolant other than the SUZUKI LLC: Super (Blue), follow the schedule of SUZUKI LLC: Standard (Green).Interval: This interval should be judged by
odometer reading or months, whichever comes
first.miles (x 1000) 7.5 15 22.5 30 37.5 45 52.5 60 67.5 75
km (x 1000) 12.5 25 37.5 50 62.5 75 87.5 100 112.5 125
months 7.5 15 22.5 30 37.5 45 52.5 60 67.5 75ENGINE & EMISSION CONTROL
1. Drive belt
Inspect for damage
–
–
–
I
–
–
–
I
–
–
*2.Valve lash (clearance) ––––––– I ––3.Engine oil and oil filter
R
R
R
R
R
R
R
R
R
R
*4. Cooling system hoses and connections – – – I – – – I – –5.Engine coolant
SUZUKI LLC: Standard (Green)
–
–
–
R
–
–
–
R
–
–
SUZUKI LLC: Super (Blue) (#1) First time only: Replace at 150000 km (90000 miles) or 90 months
Second time and after: Replace every 75000 km (45000 miles) or 45 months
*6. Exhaust pipes and mountings – – – I – – – I – –*7.
EVAP canister
Replace every 250000 km (150000 miles) or 180 months
*8.Emission-related hoses & tubes ––––––– I ––9.Spark plugs
–
–
–
–
–
–
–
R
–
–
*10. Ignition coil (plug cap) – – – I – – – I – –*11.
Fuel tank & cap
–
I
–
I
–
I
–
I
–
I
12. Air cleaner filter element (paved road) – – – R – – – R – –*13.
Fuel filter
–
–
–
–
–
–
–
–
–
–
*14. Fuel lines and connections – – – I – – – I – –*15.
Canister air suction filter
Replace every 250000 km (150000 miles) or 180 months
Driving on Slippery Roads: NO
Page 209 of 297

7-4
INSPECTION AND MAINTENANCE
80J23-03E
R: Replace or change
I : Inspect, clean, adjust, lubricate or replace as necessary
#1: Be sure to perform the engine coolant level check under the daily inspection in “OPERATING YOUR VEHICLE” section.
If you replace the engine coolant other than the SUZUKI LLC: Super (Blue), follow the schedule of SUZUKI LLC: Standard (Green).
#2: Inspect at 250000 km (150000 miles) or 180 months.
NOTE:
The maintenance services enclosed with rectangle are recommended maintenance items.Interval: This interval should be judged by
odometer reading or months, whichever comes
first.miles (x 1000) 82.5 90 97.5 105 112.5 120 127.5 135 142.5 150
km (x 1000) 137.5 150 162.5 175 187.5 200 212.5 225 237.5 250
months 82.5 90 97.5 105 112.5 120 127.5 135 142.5 150ENGINE & EMISSION CONTROL
1. Drive beltInspect for damage
–
I
–
–
–
I
–
–
–
I
*2. Valve lash (clearance) – – – – – I – – – –3.Engine oil and oil filter
R
R
R
R
R
R
R
R
R
R
*4. Cooling system hoses and connections – I – – – I – – – I5.Engine coolant
SUZUKI LLC: Standard (Green)
–
R
–
–
–
R
–
–
–
R
SUZUKI LLC: Super (Blue) (#1) First time only: Replace at 150000 km (90000 miles) or 90 months
Second time and after: Replace every 75000 km (45000 miles) or 45 months
*6. Exhaust pipes and mountings – I – – – I – – – I*7.
EVAP canister
Replace every 250000 km (150000 miles) or 180 months
*8. Emission-related hoses & tubes – – – – – I – – – I9.Spark plugs
–
–
–
–
–
R
–
–
–
–
*10. Ignition coil (plug cap) – I – – – I – – – I*11.
Fuel tank & cap
–
I
–
I
–
I
–
I
–
I (#2)
12. Air cleaner filter element (paved road) – R – – – R – – – R*13.
Fuel filter
–
–
–
–
–
–
–
–
–
R
*14. Fuel lines and connections – I – – – I – – – I (#2)*15.
Canister air suction filter
Replace every 250000 km (150000 miles) or 180 months
The U.S. Environmental Protection Agency or the California Air Resources Board has determined that the failure to perform recom-
mended maintenance items enclosed with a rectangle will not nullify the emission warranty or limit recall liability prior to the completion
of the vehicle’s useful life. SUZUKI, however, urges that all recommended maintenance services be performed at the indicated inter-
vals and the maintenance recorded.
Driving on Slippery Roads: NO
Page 210 of 297

7-5INSPECTION AND MAINTENANCE
80J23-03E
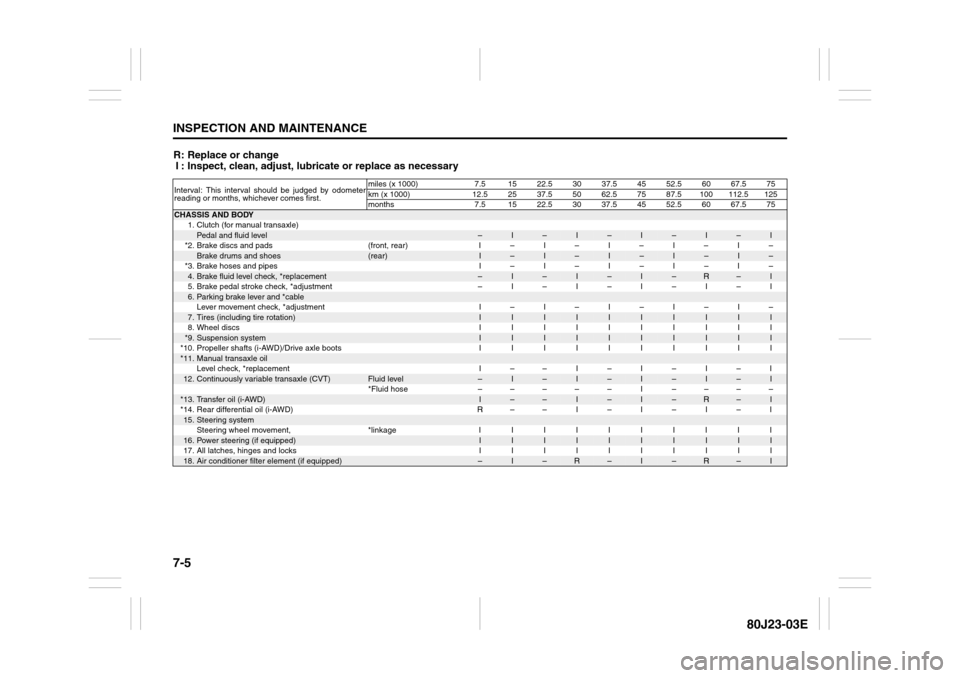
R: Replace or change
I : Inspect, clean, adjust, lubricate or replace as necessaryInterval: This interval should be judged by odometer
reading or months, whichever comes first.miles (x 1000) 7.5 15 22.5 30 37.5 45 52.5 60 67.5 75
km (x 1000) 12.5 25 37.5 50 62.5 75 87.5 100 112.5 125
months 7.5 15 22.5 30 37.5 45 52.5 60 67.5 75CHASSIS AND BODY
1. Clutch (for manual transaxle)
Pedal and fluid level
–
I
–
I
–
I
–
I
–
I
*2. Brake discs and pads (front, rear) I – I – I – I – I –
Brake drums and shoes
(rear)
I
–
I
–
I
–
I
–
I
–
*3. Brake hoses and pipes I – I – I – I – I –
4.Brake fluid level check, *replacement
–
I
–
I
–
I
–
R
–
I
5. Brake pedal stroke check, *adjustment – I – I – I – I – I
6.Parking brake lever and *cableLever movement check, *adjustment I – I – I – I – I –7.Tires (including tire rotation)
I
I
I
I
I
I
I
I
I
I
8. Wheel discs I I I I I I I I I I
*9.
Suspension system
I
I
I
I
I
I
I
I
I
I
*10. Propeller shafts (i-AWD)/Drive axle boots I I I I I I I I I I
*11.
Manual transaxle oilLevel check, *replacement I – – I – I – I – I
12.
Continuously variable transaxle (CVT)
Fluid level
–
I
–
I
–
I
–
I
–
I
*Fluid hose ––––– I ––––
*13.
Transfer oil (i-AWD)
I
–
–
I
–
I
–
R
–
I
*14. Rear differential oil (i-AWD) R – – I – I – I – I
15.
Steering systemSteering wheel movement, *linkage I I I I I I I I I I
16.
Power steering (if equipped)
I
I
I
I
I
I
I
I
I
I
17. All latches, hinges and locks I I I I I I I I I I
18.
Air conditioner filter element (if equipped)
–
I
–
R
–
I
–
R
–
I
Page 211 of 297

7-6
INSPECTION AND MAINTENANCE
80J23-03E
R: Replace or change
I : Inspect, clean, adjust, lubricate or replace as necessary
NOTE:
This table shows the service schedule up to 250000 km (150000 miles).
Beyond 250000 km (150000 miles), perform the same services at the same intervals shown in the chart.
Beyond 250000 km (150000 miles), the maintenance services enclosed with a rectangle are required.Interval: This interval should be judged by odometer
reading or months, whichever comes first.miles (x 1000) 82.5 90 97.5 105 112.5 120 127.5 135 142.5 150
km (x 1000) 137.5 150 162.5 175 187.5 200 212.5 225 237.5 250
months 82.5 90 97.5 105 112.5 120 127.5 135 142.5 150CHASSIS AND BODY
1. Clutch (for manual transaxle)
Pedal and fluid level
–
I
–
I
–
I
–
I
–
I
*2. Brake discs and pads (front, rear) I – I – I – I – I –
Brake drums and shoes
(rear)
I
–
I
–
I
–
I
–
I
–
*3. Brake hoses and pipes I – I – I – I – I –
4.Brake fluid level check, *replacement
–
I
–
I
–
R
–
I
–
I
5. Brake pedal stroke check, *adjustment – I – I – I – I – I
6.Parking brake lever and *cableLever movement check, *adjustment I – I – I – I – I –7.Tires (including tire rotation)
I
I
I
I
I
I
I
I
I
I
8. Wheel discs I I I I I I I I I I
*9.
Suspension system
I
I
I
I
I
I
I
I
I
I
*10. Propeller shafts (i-AWD)/Drive axle boots I I I I I I I I I I
*11.
Manual transaxle oilLevel check, *replacement – R – I – I – I – I
12.
Continuously variable transaxle (CVT)
Fluid level
–
I
–
I
–
I
–
I
–
I
*Fluid hose – I ––––– I ––
*13.
Transfer oil (i-AWD)
–
I
–
I
–
R
–
I
–
I
*14. Rear differential oil (i-AWD) – I – I – I – I – I
15.
Steering systemSteering wheel movement, *linkage I I I I I I I I I I
16.
Power steering (if equipped)
I
I
I
I
I
I
I
I
I
I
17. All latches, hinges and locks I I I I I I I I I I
18.
Air conditioner filter element (if equipped)
–
R
–
I
–
R
–
I
–
R