2010 SUZUKI SX4 ECO mode
[x] Cancel search: ECO modePage 24 of 297

2-7BEFORE DRIVING
80J23-03E
NOTE:
The maximum operating distance of the
remote controller is about 5 m (16 ft.),
but this can vary depending on the sur-
roundings, especially near other trans-
mitting devices such as radio towers or
CB (Citizen’s Band) radios.
The door locks cannot be operated with
the remote controller if the ignition switch
is in a position other than “LOCK”, or the
ignition key is inserted in the ignition
switch, or if any door is open.
If any door is open, you cannot lock the
door by operating the remote controller,
however unlock the door.
You cannot lock the door unless all of the
door are closed completely.
If you lose one of the remote controllers,
ask your SUZUKI dealer as soon as pos-
sible for a replacement. Be sure to have
your dealer program the new remote
controller code in your vehicle’s memory
so that the old code is erased, or per-
form the programming procedure your-
self according to the instructions in this
section.“PANIC” button (3) function
This function is to get the attention of oth-
ers.
Press the “PANIC” button (3) for more than
1 second. The headlights and taillights will
blink for about 30 seconds. Also, the horn
will sound intermittently for about 30 sec-
onds at the same time.
To cancel the “PANIC” mode, press any
button (PANIC, LOCK or UNLOCK) on the
remote controller. You can also insert the
key in the ignition switch and turn to the
“ON” position to cancel the “PANIC” mode.
NOTE:
The “PANIC” button function will not acti-
vate when the key is in the ignition switch.Keyless unlocking/locking using the
request switches
SX4
80JC054
SX4 SEDAN
56KN008
(1)
EXAMPLE
(1)
EXAMPLE
Door Locks: 3, 5, 8
Page 31 of 297

2-14
BEFORE DRIVING
80J23-03E
The turn signal lights will flash once when
the doors are locked.
When the doors are unlocked:
The turn signal lights will flash twice.
If the interior light switch is in the
“DOOR” position, the interior light will
turn on for about 15 seconds and then
fade out. If you insert the key into the
ignition switch during this time, the light
will start to fade out immediately.
Be sure the doors are locked after you
operate the “LOCK” button (1).
If no door is opened within about 30 sec-
onds after the “UNLOCK” button (2) is
operated, the doors will automatically lock
again.
NOTE:
The maximum operating distance of the
keyless entry system transmitter is about
5 m (16 ft.), but this can vary depending
on the surroundings, especially near
other transmitting devices such as radio
towers or CB (Citizen’s Band) radios.
The door locks cannot be operated with
the transmitter, if the ignition key is
inserted in the ignition switch.
If you lose one of the transmitters, ask
your SUZUKI dealer as soon as possible
for a replacement. Be sure to have your
dealer program the new transmitter code
in your vehicle’s memory so that the old
code is erased, or perform the program-
ming procedure yourself according to the
instructions in this section.“PANIC” button (3) function
This function is to get the attention of oth-
ers.
Press the “PANIC” button (3) for more than
1 second. The headlights and taillights will
blink for about 30 seconds. Also, the horn
will sound intermittently for about 30 sec-
onds at the same time.
To cancel the “PANIC” mode, press any
button (PANIC, LOCK or UNLOCK) on the
transmitter. You can also insert the key in
the ignition switch and turn to the “ON”
position to cancel the “PANIC” mode.
NOTE:
The “PANIC” button function will not acti-
vate when the key is in the ignition switch.Replacement of the battery
If the transmitter becomes unreliable,
replace the battery.
To replace the battery of the transmitter:
52D210
1) Put the edge of a coin or a flat blade
screwdriver in the slot of the transmitter
and pry it open.
CAUTION
The transmitter is a sensitive elec-
tronic instrument. To avoid damaging
the transmitter:
Do not expose it to impacts, mois-
ture or high temperature such as by
leaving it on the dashboard under
direct sunlight.
Keep the transmitter away from
magnetic objects such as a televi-
sion.
Head Restraints: 3
Seat Belts and Child Restraint Systems: 3
Page 74 of 297

2-57BEFORE DRIVING
80J23-03E
65D610
54G582
Note that even though your vehicle may be
moderately damaged in a collision, the col-
lision may not have been severe enough to
trigger the front, side, or side curtain air
bags to inflate. If your car sustains ANY
front-end or side damage, have the air bag
system inspected by an authorized
SUZUKI dealer to ensure it is in proper
working order.
Your vehicle is equipped with a diagnostic
module which records information about
the air bag system if the air bags deploy in
a crash. The module records information
about overall system status, which sensors
activated the deployment, and whether the
front seat belts were in use.
WARNING
The driver should not lean over the
steering wheel. The front passen-
ger should not rest his or her body
against the dashboard, or other-
wise get too close to the dash-
board. For vehicles with side air
bags and side curtain air bags,
occupants should not lean on or
sleep against the door. In these sit-
uations, the out-of-position occu-
pant would be too close to an
inflating air bag, and may suffer
severe injury.
Do not attach any objects to, or
place any objects over, the steering
wheel or dashboard. Do not place
any objects between the air bag
and the driver or front passenger.
These objects may interfere with air
bag operation or may be propelled
by the air bag in the event of a
crash. Either of these conditions
may cause severe injury.
For vehicles with side air bags, do
not place seat covers on the front
seats, because seat covers could
restrict the air bag’s inflation. Also,
do not place any cup holders or
other objects on the door, as these
objects could be propelled by the
air bag in the event of a crash.
Either of these conditions may
cause severe injury.
Page 77 of 297

2-60
BEFORE DRIVING
80J23-03E
Warning and Indicator LightsLow Tire Pressure Warning Light
52D305
As an added safety feature, your vehicle
has been equipped with a tire pressure
monitoring system (TPMS) that uses a low
tire pressure warning light to inform you
when one or more of your tires is signifi-
cantly under-inflated.
When the ignition switch is turned to the
“ON” position, this light comes on briefly so
you can check that the light is working.
When the low tire pressure warning light is
lit, one or more of your tires is significantly
under-inflated. You should stop and check
your tires as soon as possible, and inflate
them to the proper pressure as indicated
on the vehicle’s tire information placard.
Driving on a significantly under-inflated tire
causes the tire to overheat and can lead to
tire failure. Under-inflation also reduces
fuel efficiency and tire tread life, and may
affect the vehicle’s handling and stopping
ability. Each tire, including the spare,
should be checked at least once a month
when cold and set to the recommendedinflation pressure as specified in the vehi-
cle placard and owner’s manual.
The low tire pressure warning light is also
used to inform you of a TPMS malfunction.
When the system detects a malfunction,
this light will flash for approximately one
minute and then remain continuously illu-
minated. This sequence will be repeated
approximately ten minutes after subse-
quent the ignition switch is turned on as
long as the malfunction exists.
NOTE:
The low tire pressure warning light may not
come on immediately if you have a sudden
loss of air pressure.
WARNING
If the low tire pressure warning light
does not come on when the ignition
is turned to the “ON” position, or
comes on and blinks while driving
there may be a problem with the tire
pressure monitoring system. Have
your vehicle inspected by an autho-
rized SUZUKI dealer. Even if the light
turns off after blinking, indicating
that monitoring system has recov-
ered, make sure to have an autho-
rized SUZUKI dealer check the
system.
WARNING
The load rating of your tires is
reduced at lower inflation pressures.
If your tires become even moderately
under-inflated, the vehicle load may
exceed the load rating of the tires,
which can lead to tire failure. The low
tire pressure warning light will not
alert you of this condition. The warn-
ing light will only come on when one
or more of your tires become signifi-
cantly under-inflated. Check and
adjust your tire inflation pressure at
least once a month. Refer to “Tires”
in the “INSPECTION AND MAINTE-
NANCE” section.
Page 90 of 297

2-73BEFORE DRIVING
80J23-03E
Thermometer
The thermometer indicates the outside
temperature.
80J2030
If the outside temperature nears freezing,
the mark (f) will appear on the display.
NOTE:
The outside temperature indication is not
the actual outside temperature when
driving at low speed, or when stopped.
If there is something wrong with the ther-
mometer, or just after the ignition switch
is turned to the “ON” position, the display
may not indicate the outside tempera-
ture.
The mark (f) will appear whenever the
outside temperature is near freezing,
even if the display does not show the
thermometer.
To change the unit of temperature, while
pushing and holding the trip meter selector
knob (1), turn the indicator selector knob
(2).
80J2031
NOTE:
When you reconnect the negative (–) ter-
minal to the battery, the unit of temperature
will be reinitialized. Change the unit again
to your preference.Transaxle selector position indicator
(for CVT)
80J2032
When the ignition switch is in the “ON”
position, the display (C) indicates the gear
position (g).
When using the manual mode, the display
(C) indicates the manual mode indicator
(h).
For details on how to use the transaxle,
refer to “Using the Transaxle” in the
“OPERATING YOUR VEHICLE” section.
(f)
EXAMPLE
EXAMPLE
(Initial
setting)
(h)
(g)
EXAMPLE
Page 114 of 297

3-13OPERATING YOUR VEHICLE
80J23-03E
D (Drive)
Use this position for all normal driving.
With the gearshift lever in “D” range you
can get an automatic downshift by press-
ing the accelerator pedal. The higher the
vehicle speed is, the more you need to
press the accelerator pedal to get a down-
shift.
M (manual mode)
Use this position for driving in the manual
mode.
Refer to “Manual mode” later in this section
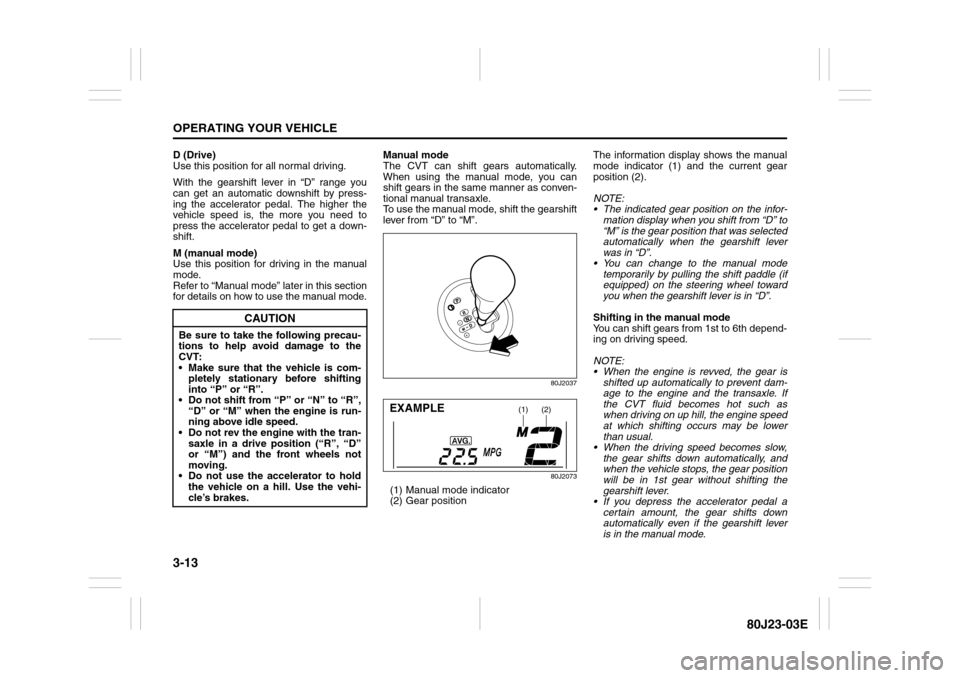
for details on how to use the manual mode.Manual mode
The CVT can shift gears automatically.
When using the manual mode, you can
shift gears in the same manner as conven-
tional manual transaxle.
To use the manual mode, shift the gearshift
lever from “D” to “M”.
80J2037
80J2073
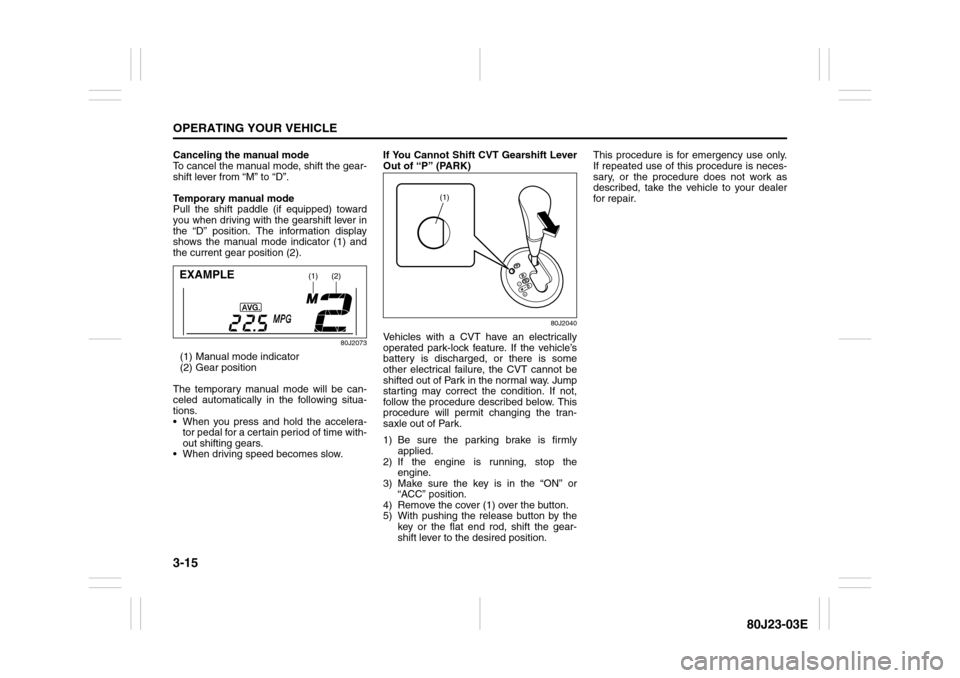
(1) Manual mode indicator
(2) Gear positionThe information display shows the manual
mode indicator (1) and the current gear
position (2).
NOTE:
The indicated gear position on the infor-
mation display when you shift from “D” to
“M” is the gear position that was selected
automatically when the gearshift lever
was in “D”.
You can change to the manual mode
temporarily by pulling the shift paddle (if
equipped) on the steering wheel toward
you when the gearshift lever is in “D”.
Shifting in the manual mode
You can shift gears from 1st to 6th depend-
ing on driving speed.
NOTE:
When the engine is revved, the gear is
shifted up automatically to prevent dam-
age to the engine and the transaxle. If
the CVT fluid becomes hot such as
when driving on up hill, the engine speed
at which shifting occurs may be lower
than usual.
When the driving speed becomes slow,
the gear shifts down automatically, and
when the vehicle stops, the gear position
will be in 1st gear without shifting the
gearshift lever.
If you depress the accelerator pedal a
certain amount, the gear shifts down
automatically even if the gearshift lever
is in the manual mode.
CAUTION
Be sure to take the following precau-
tions to help avoid damage to the
CVT:
Make sure that the vehicle is com-
pletely stationary before shifting
into “P” or “R”.
Do not shift from “P” or “N” to “R”,
“D” or “M” when the engine is run-
ning above idle speed.
Do not rev the engine with the tran-
saxle in a drive position (“R”, “D”
or “M”) and the front wheels not
moving.
Do not use the accelerator to hold
the vehicle on a hill. Use the vehi-
cle’s brakes.
(1)
(2)
EXAMPLE
Page 116 of 297

3-15OPERATING YOUR VEHICLE
80J23-03E
Canceling the manual mode
To cancel the manual mode, shift the gear-
shift lever from “M” to “D”.
Temporary manual mode
Pull the shift paddle (if equipped) toward
you when driving with the gearshift lever in
the “D” position. The information display
shows the manual mode indicator (1) and
the current gear position (2).
80J2073
(1) Manual mode indicator
(2) Gear position
The temporary manual mode will be can-
celed automatically in the following situa-
tions.
When you press and hold the accelera-
tor pedal for a certain period of time with-
out shifting gears.
When driving speed becomes slow.If You Cannot Shift CVT Gearshift Lever
Out of “P” (PARK)
80J2040
Vehicles with a CVT have an electrically
operated park-lock feature. If the vehicle’s
battery is discharged, or there is some
other electrical failure, the CVT cannot be
shifted out of Park in the normal way. Jump
starting may correct the condition. If not,
follow the procedure described below. This
procedure will permit changing the tran-
saxle out of Park.
1) Be sure the parking brake is firmly
applied.
2) If the engine is running, stop the
engine.
3) Make sure the key is in the “ON” or
“ACC” position.
4) Remove the cover (1) over the button.
5) With pushing the release button by the
key or the flat end rod, shift the gear-
shift lever to the desired position.This procedure is for emergency use only.
If repeated use of this procedure is neces-
sary, or the procedure does not work as
described, take the vehicle to your dealer
for repair.
(1)
(2)
EXAMPLE
(1)
Page 118 of 297

3-17OPERATING YOUR VEHICLE
80J23-03E
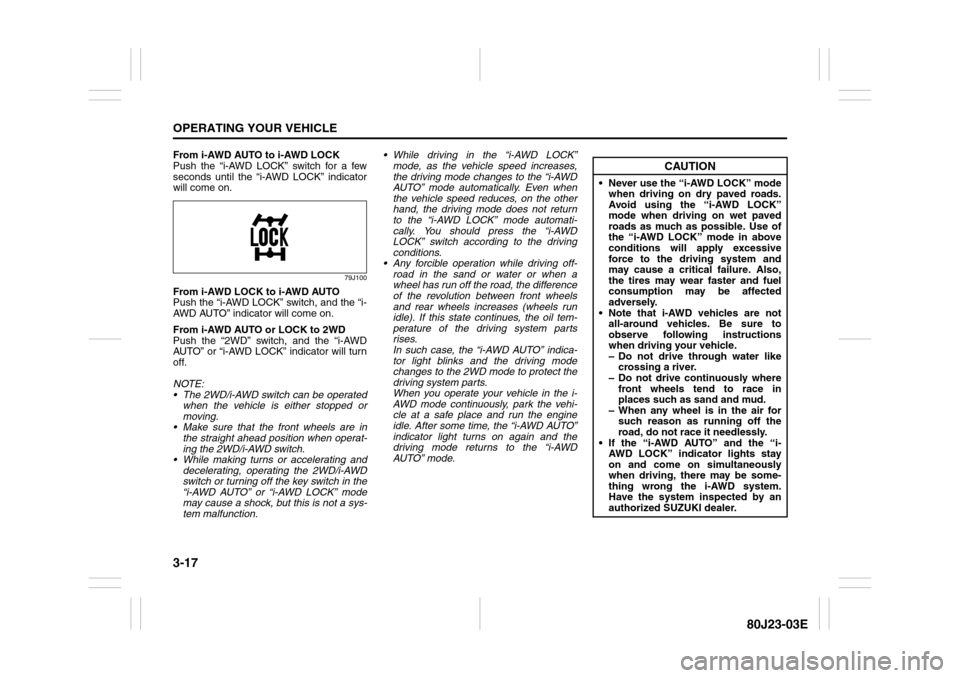
From i-AWD AUTO to i-AWD LOCK
Push the “i-AWD LOCK” switch for a few
seconds until the “i-AWD LOCK” indicator
will come on.
79J100
From i-AWD LOCK to i-AWD AUTO
Push the “i-AWD LOCK” switch, and the “i-
AWD AUTO” indicator will come on.
From i-AWD AUTO or LOCK to 2WD
Push the “2WD” switch, and the “i-AWD
AUTO” or “i-AWD LOCK” indicator will turn
off.
NOTE:
The 2WD/i-AWD switch can be operated
when the vehicle is either stopped or
moving.
Make sure that the front wheels are in
the straight ahead position when operat-
ing the 2WD/i-AWD switch.
While making turns or accelerating and
decelerating, operating the 2WD/i-AWD
switch or turning off the key switch in the
“i-AWD AUTO” or “i-AWD LOCK” mode
may cause a shock, but this is not a sys-
tem malfunction. While driving in the “i-AWD LOCK”
mode, as the vehicle speed increases,
the driving mode changes to the “i-AWD
AUTO” mode automatically. Even when
the vehicle speed reduces, on the other
hand, the driving mode does not return
to the “i-AWD LOCK” mode automati-
cally. You should press the “i-AWD
LOCK” switch according to the driving
conditions.
Any forcible operation while driving off-
road in the sand or water or when a
wheel has run off the road, the difference
of the revolution between front wheels
and rear wheels increases (wheels run
idle). If this state continues, the oil tem-
perature of the driving system parts
rises.
In such case, the “i-AWD AUTO” indica-
tor light blinks and the driving mode
changes to the 2WD mode to protect the
driving system parts.
When you operate your vehicle in the i-
AWD mode continuously, park the vehi-
cle at a safe place and run the engine
idle. After some time, the “i-AWD AUTO”
indicator light turns on again and the
driving mode returns to the “i-AWD
AUTO” mode.
CAUTION
Never use the “i-AWD LOCK” mode
when driving on dry paved roads.
Avoid using the “i-AWD LOCK”
mode when driving on wet paved
roads as much as possible. Use of
the “i-AWD LOCK” mode in above
conditions will apply excessive
force to the driving system and
may cause a critical failure. Also,
the tires may wear faster and fuel
consumption may be affected
adversely.
Note that i-AWD vehicles are not
all-around vehicles. Be sure to
observe following instructions
when driving your vehicle.
– Do not drive through water like
crossing a river.
– Do not drive continuously where
front wheels tend to race in
places such as sand and mud.
– When any wheel is in the air for
such reason as running off the
road, do not race it needlessly.
If the “i-AWD AUTO” and the “i-
AWD LOCK” indicator lights stay
on and come on simultaneously
when driving, there may be some-
thing wrong the i-AWD system.
Have the system inspected by an
authorized SUZUKI dealer.