2010 SUZUKI SX4 section 7
[x] Cancel search: section 7Page 233 of 297
7-28
INSPECTION AND MAINTENANCE
80J23-03E
Tire Inspection
Inspect your vehicle’s tires at least
once a month by performing the fol-
lowing checks:
1) Measure the air pressure with a tire
gauge. Adjust the pressure if nec-
essary. Remember to check the
spare tire, too. Refer to the “Mea-
suring Air Pressure” section.
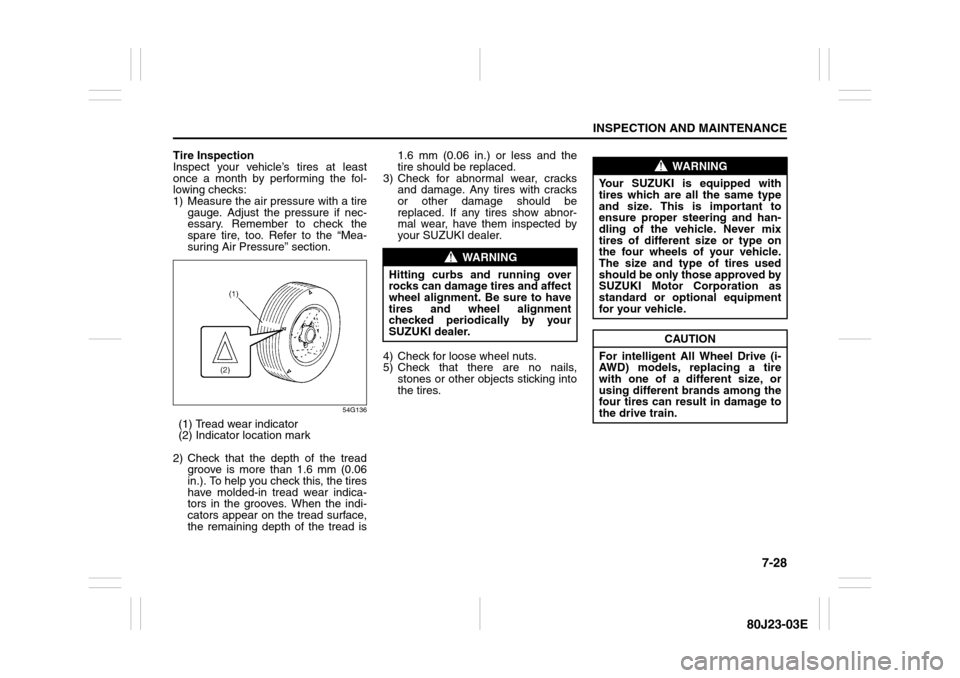
54G136
(1) Tread wear indicator
(2) Indicator location mark
2) Check that the depth of the tread
groove is more than 1.6 mm (0.06
in.). To help you check this, the tires
have molded-in tread wear indica-
tors in the grooves. When the indi-
cators appear on the tread surface,
the remaining depth of the tread is1.6 mm (0.06 in.) or less and the
tire should be replaced.
3) Check for abnormal wear, cracks
and damage. Any tires with cracks
or other damage should be
replaced. If any tires show abnor-
mal wear, have them inspected by
your SUZUKI dealer.
4) Check for loose wheel nuts.
5) Check that there are no nails,
stones or other objects sticking into
the tires.
WARNING
Hitting curbs and running over
rocks can damage tires and affect
wheel alignment. Be sure to have
tires and wheel alignment
checked periodically by your
SUZUKI dealer.
WARNING
Your SUZUKI is equipped with
tires which are all the same type
and size. This is important to
ensure proper steering and han-
dling of the vehicle. Never mix
tires of different size or type on
the four wheels of your vehicle.
The size and type of tires used
should be only those approved by
SUZUKI Motor Corporation as
standard or optional equipment
for your vehicle.
CAUTION
For intelligent All Wheel Drive (i-
AWD) models, replacing a tire
with one of a different size, or
using different brands among the
four tires can result in damage to
the drive train.
Page 234 of 297
7-29INSPECTION AND MAINTENANCE
80J23-03E
Uniform Tire Quality Grading
The U.S. National Highway Traffic
Safety Administration has developed a
grading system for evaluating the per-
formance of passenger car tires. The
following information will help you
understand the grading system, which
applies to vehicles sold in the U.S.
Consult your SUZUKI dealer or tire
retailer for help in choosing the correct
replacement tires for your vehicle.
Quality grades can be found where
applicable on the tire sidewall between
tread shoulder and maximum section
width. For example:
Treadwear 200 Traction AA Tempera-
ture A
DOT Quality Grades
Treadwear
Traction AA A B C
Temperature A B C
All Passenger Car Tires Must Conform
To Federal Safety Requirements in
Addition To These GradesTreadwear
The treadwear grade is a comparative
rating based on the wear rate of the tire
when tested under controlled condi-
tions on a specified government test
course. For example, a tire graded 150
would wear one and one-half (1 1/2)
times as well on the government course
as a tire graded 100. The relative per-
formance of tires depends upon the
actual conditions of their use, however
and may depart significantly from the
norm due to variations in driving habits,
service practices and differences in
road characteristics and climate.
Traction – AA, A, B, C
The traction grades, from highest to
lowest, are AA, A, B and C. Those
grades represent the tire’s ability to
stop on wet pavement as measured
under controlled conditions on speci-
fied government test surfaces of
asphalt and concrete. A tire marked C
may have poor traction performance.
WARNING
Replacing the wheels and tires
equipped on your vehicle with
certain combinations of aftermar-
ket wheels and tires can signifi-
cantly change the steering and
handling characteristics of your
vehicle. Oversized tires may also
rub against the fender over
bumps, causing vehicle damage
or tire failure. Therefore, use only
those wheel and tire combina-
tions approved by SUZUKI Motor
Corporation as standard or
optional equipment for your vehi-
cle. For information regarding the
specified tires, refer to the Tire
Information Label located on the
driver’s side door pillar or the
“SPECIFICATIONS” section.
CAUTION
Replacing the original tires with
tires of a different size may result
in false speedometer or odometer
readings. Check with your
SUZUKI dealer before purchas-
ing replacement tires that differ in
size from the original tires.
WARNING
The traction grade assigned to
this tire is based on straight-
ahead braking traction tests, and
does not include acceleration,
cornering, hydroplaning or peak
traction characteristics.
Page 241 of 297

7-36
INSPECTION AND MAINTENANCE
80J23-03E
Your vehicle is equipped with a battery that
requires infrequent maintenance. You will
never have to add water. You should, how-
ever, periodically check the battery, battery
terminals and battery hold-down bracket
for corrosion. Remove corrosion using a
stiff brush and ammonia mixed with water,
or baking soda mixed with water. After
removing corrosion, rinse with clean water.
The test indicator on the top of the battery
provides information on the condition of
the battery.
If your vehicle is not going to be driven for
a month or longer, disconnect the cable
from the negative terminal of the battery to
help prevent discharge.
FusesYour vehicle has three types of fuses, as
described below:
Main Fuse – The main fuse takes current
directly from the battery.
Primary Fuses – These fuses are between
the main fuse and individual fuses, and are
for electrical load groups.
Individual Fuses – These fuses are for indi-
vidual electrical circuits.
For details on protected circuits, refer to
the “Fuses and Protected Circuits” section
in this manual.
To remove a fuse, use the fuse puller pro-
vided in the fuse box.
63J095
Fuses in the Engine Compartment
80J051
80J052
WARNING
To avoid harm to yourself or damage
to your vehicle or battery, follow the
jump starting instructions in the
“EMERGENCY SERVICE” section of
this manual if it is necessary to jump
start your vehicle.
WARNING
Battery posts, terminals and related
accessories contain lead and lead
compounds. Wash hands after han-
dling.
(1)
(2) (3)
(28) (27) (26) (25) (6) (7) (9) (11)
(15) (16) (17) (18) (19)
(24)
(8) (4) (5) (10)
(22) (21)
(23)(20)(12) (13) (14)
(30)
(29)
Page 261 of 297

8-4
EMERGENCY SERVICE
80J23-03E
Changing WheelsTo change a wheel, use the following pro-
cedure:
1) Remove the jack, tools and spare wheel
from the vehicle.
2) Loosen, but do not remove the wheel
nuts.
3) Jack up the vehicle (follow the jacking
instructions in this section).
4) Remove the wheel nuts and wheel.
5) Before installing the new wheel, clean
any mud or dirt off from the surface of
the wheel and hub with a clean cloth.
Clean the hub carefully; it may be hot
from driving.
6) Install the new wheel and replace the
wheel nuts with their cone shaped end
facing the wheel. Tighten each nut
snugly by hand until the wheel is
securely seated on the hub.
81A057
7) Lower the jack and fully tighten the nuts
in a crisscross fashion with a wrench as
shown in the illustration.
Full Wheel Cover (if equipped)
60G309
(1) or (2) Flat end tool
Your vehicle includes two tools, a wheel
brace and a jack crank, one of which has a
flat end.
Use the tool with the flat end to remove the
full wheel cap, as shown above.
54G117
When installing the cover, make sure that it
is positioned so that it does not cover or
foul the air valve.
WARNING
Be sure to shift into “P” (Park) in
CVT, or shift into “R” (Reverse) in
manual transaxle when you jack up
the vehicle.
Never jack up the vehicle with the
transaxle in “N” (Neutral). Other-
wise, unstable jack may cause an
accident.
Wheel tightening torque
85 Nm (61.5 lb-ft, 8.5 kg-m)
WARNING
Use genuine wheel nuts and tighten
them to the specified torque as soon
as possible after changing wheels.
Incorrect wheel nuts or improperly
tightened wheel nuts may come
loose or fall off, which can result in
an accident. If you do not have a
torque wrench, have the wheel nut
torque checked by an authorized
SUZUKI dealer.
EXAMPLEEXAMPLE
Towing Your Vehicle (recreational towing): 13
Page 263 of 297
8-6
EMERGENCY SERVICE
80J23-03E
4) If the booster battery you are using is
installed on another vehicle, start the
engine of the vehicle with the booster
battery. Run the engine at moderate
speed.
5) Start the engine of the vehicle with the
discharged battery.
6) Remove the jumper cables in the exact
reverse order in which you connected
them.
Towing a Disabled VehicleEmergency TowingIf your vehicle is disabled, it may be towed
by a tow truck using one of the following
methods:
1) Tow the vehicle with two wheels lifted
by the tow truck and the other two
wheels on a towing dolly.
2) Use the appropriate towing method
specified for your vehicle in the “Towing
Your Vehicle (recreational towing)” sec-
tion, but with the wheels lifted by the
tow truck instead of on a towing dolly.
Be sure to carefully follow the specific
instructions provided in the “Towing
Your Vehicle (recreational towing)” sec-
tion.
If the Starter Does Not
Operate1) Try turning the ignition switch to the
“START” position with the headlights
turned on to determine the battery con-
dition. If the headlights go excessively
dim or go off, it usually means that
either the battery has run down or bat-
tery terminal contact is poor. Recharge
the battery or correct battery terminal
contact if necessary.
2) If the headlights remain bright, check
the fuses. If the reason for failure of the
starter is not obvious, there may be a
major electrical problem. Have the vehi-
cle inspected by your authorized
SUZUKI dealer.
WARNING
Never connect the jumper cable
directly to the negative (–) terminal of
the discharged battery, or an explo-
sion may occur.
CAUTION
If vehicle damage (such as steering
or drivetrain damage, etc.) prevents
normal use of the towing procedures
for your vehicle described in the
“Towing Your Vehicle (recreational
towing)” section, have your vehicle
towed with two wheels lifted by the
tow truck and the other two wheels
on a towing dolly.
Page 264 of 297
8-7EMERGENCY SERVICE
80J23-03E
If the Engine is FloodedIf the engine is flooded with gasoline, it
may be hard to start. If this happens, press
the accelerator pedal all the way to the
floor and hold it there while cranking the
engine. (Do not operate the starter motor
for more than 15 seconds).
If the Engine OverheatsThe engine could overheat temporarily
under severe driving conditions. If the
engine coolant temperature gauge indi-
cates overheating during driving:
1) Turn off the air conditioner, if equipped.
2) Take the vehicle to a safe place and
park.
3) Let the engine run at normal idle speed
for a few minutes until the indicator is
within the normal, acceptable tempera-
ture range shown by the white band
between “H” and “C”.If the temperature indication does not
come down to within the normal, accept-
able range:
1) Turn off the engine and check that the
water pump belt and pulleys are not
damaged or slipping. If any abnormality
is found, correct it.
2) Check the coolant level in the reservoir.
If it is found to be lower than the “LOW”
line, look for leaks at the radiator, water
pump and radiator and heater hoses. If
you locate any leaks that may have
caused the overheating, do not run the
engine until these problems have been
corrected.
3) If you do not find a leak, carefully add
coolant to the reservoir and then the
radiator, if necessary. (Refer to “Engine
Coolant” in the “INSPECTION AND
MAINTENANCE” section.)
WARNING
If you see or hear escaping steam,
stop the vehicle in a safe place and
immediately turn off the engine to let
it cool. Do not open the hood when
steam is present. When the steam
can no longer be seen or heard, open
the hood to see if the coolant is still
boiling. If it is, you must wait until it
stops boiling before you proceed.
Also, be careful not to touch hot
engine parts (radiator, water hoses,
engine etc.).
Page 268 of 297
9-1APPEARANCE CARE
80J23-03E
Corrosion PreventionIt is important to take good care of your
vehicle to protect it from corrosion.
Listed below are instructions for how to
maintain your vehicle to prevent corrosion.
Please read and follow these instructions
carefully.Important Information About
CorrosionCommon causes of corrosion
1) Accumulation of road salt, dirt, moisture
or chemicals in hard-to-reach areas of
the vehicle underbody or frame.
2) Chipping, scratches and any damage to
treated or painted metal surfaces
resulting from minor accidents or
impact from stones and gravel.
Environmental conditions which accel-
erate corrosion
1) Road salt, dust control chemicals, sea
air or industrial pollution will all acceler-
ate the corrosion of metal.
2) High humidity will increase the rate of
corrosion particularly when the temper-
ature range is just above the freezing
point.
3) Moisture in certain areas of a vehicle
for an extended period of time may pro-
mote corrosion even though other body
sections may be completely dry.
4) High temperatures will cause an accel-
erated rate of corrosion to parts of thevehicle which are not well ventilated to
permit quick drying.
52D151
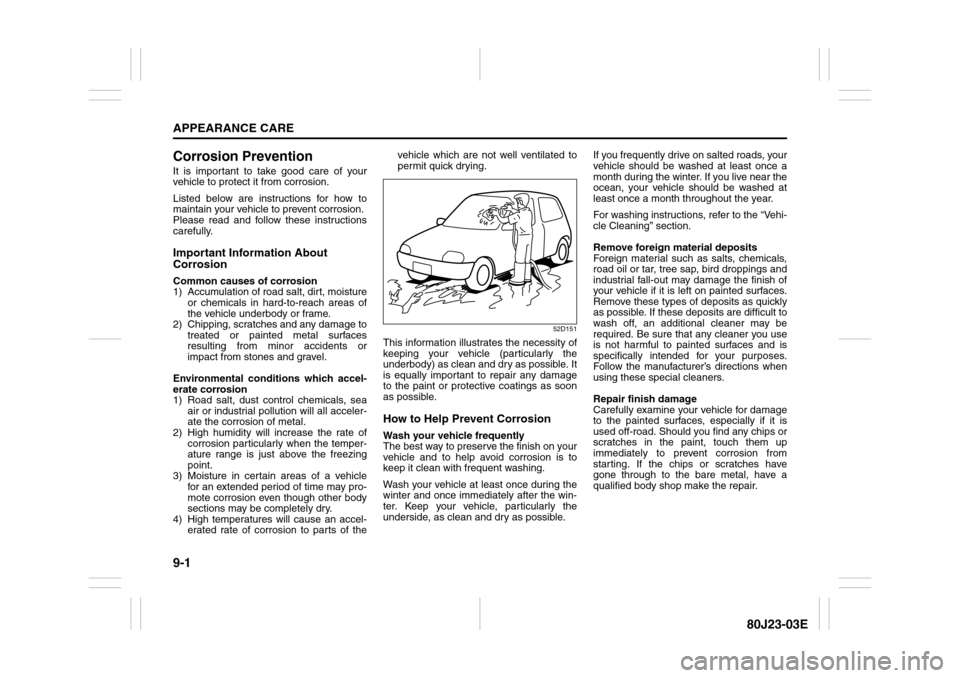
This information illustrates the necessity of
keeping your vehicle (particularly the
underbody) as clean and dry as possible. It
is equally important to repair any damage
to the paint or protective coatings as soon
as possible.How to Help Prevent CorrosionWash your vehicle frequently
The best way to preserve the finish on your
vehicle and to help avoid corrosion is to
keep it clean with frequent washing.
Wash your vehicle at least once during the
winter and once immediately after the win-
ter. Keep your vehicle, particularly the
underside, as clean and dry as possible.If you frequently drive on salted roads, your
vehicle should be washed at least once a
month during the winter. If you live near the
ocean, your vehicle should be washed at
least once a month throughout the year.
For washing instructions, refer to the “Vehi-
cle Cleaning” section.
Remove foreign material deposits
Foreign material such as salts, chemicals,
road oil or tar, tree sap, bird droppings and
industrial fall-out may damage the finish of
your vehicle if it is left on painted surfaces.
Remove these types of deposits as quickly
as possible. If these deposits are difficult to
wash off, an additional cleaner may be
required. Be sure that any cleaner you use
is not harmful to painted surfaces and is
specifically intended for your purposes.
Follow the manufacturer’s directions when
using these special cleaners.
Repair finish damage
Carefully examine your vehicle for damage
to the painted surfaces, especially if it is
used off-road. Should you find any chips or
scratches in the paint, touch them up
immediately to prevent corrosion from
starting. If the chips or scratches have
gone through to the bare metal, have a
qualified body shop make the repair.
Page 288 of 297

12-2SPECIFICATIONS
80J23-03E
ITEM: Engine
Type J20B (16V DOHC)
Number of cylinders 4
Bore 84.0 mm (3.31 in.)
Stroke 90.0 mm (3.54 in.)
Piston displacement 1995 cm
3 (1995cc, 121.7 cu.in)
Compression ratio 10.2 : 1
ITEM: Electrical
Ignition timing 3° – 17° B.T.D.C. at idle speed
Standard spark plug NGK SILFR5A11
Battery DELKOR 24-700 12V
Fuses See “INSPECTION AND MAINTENANCE” and “FUSES AND PRO-
TECTED CIRCUITS” sections.
Specifications: 1, 2, 5, 6, 7, 10, 11