2010 SUZUKI SX4 lock
[x] Cancel search: lockPage 84 of 297

2-67BEFORE DRIVING
80J23-03E
Illumination Indicator Light
64J045
This indicator light comes on while the
position lights, tail light and/or the head-
lights are on.Turn Signal Indicators
50G055
When you turn on the left or right turn sig-
nals, the corresponding green arrow on the
instrument panel will flash along with the
respective turn signal lights.
When you turn on the hazard warning
switch, both arrows will flash along with all
of the turn signal lights.
High Beam Indicator Light
50G056
This indicator comes on when headlight
high beams are turned on.intelligent All Wheel Drive (i-AWD)
AUTO Indicator Light (if equipped)
79J040
When the ignition switch is turned to the
“ON” position, the light comes on briefly so
you can check that the light is working.
When the 2WD/i-AWD switch is in the “i-
AWD AUTO” mode with the ignition switch
in the “ON” position, the light comes on
and stays on.
If the light and the “i-AWD LOCK” indicator
light stay on or come on simultaneously
when driving, there may be something
wrong with the i-AWD system. Have thesystem inspected by an authorized
SUZUKI dealer.
If the oil temperature of the parts for i-AWD
system is high, this light will blink. The “i-
AWD AUTO” or “i-AWD LOCK” mode will
be changed to the “2WD” mode automati-
cally to prevent a damage of the parts for i-
AWD system.
NOTE:
If you restart the engine, the light will stop
blinking temporarily.
For details, refer to “Using the 2WD/i-AWD
Switch” in the “OPERATING YOUR VEHI-
CLE” section.
NOTE:
When the vehicle speed is increased, the
“i-AWD LOCK” mode will be changed to
the “i-AWD AUTO” mode automatically.
The “i-AWD AUTO” indicator light will come
on and stay on.
Page 85 of 297

2-68
BEFORE DRIVING
80J23-03E
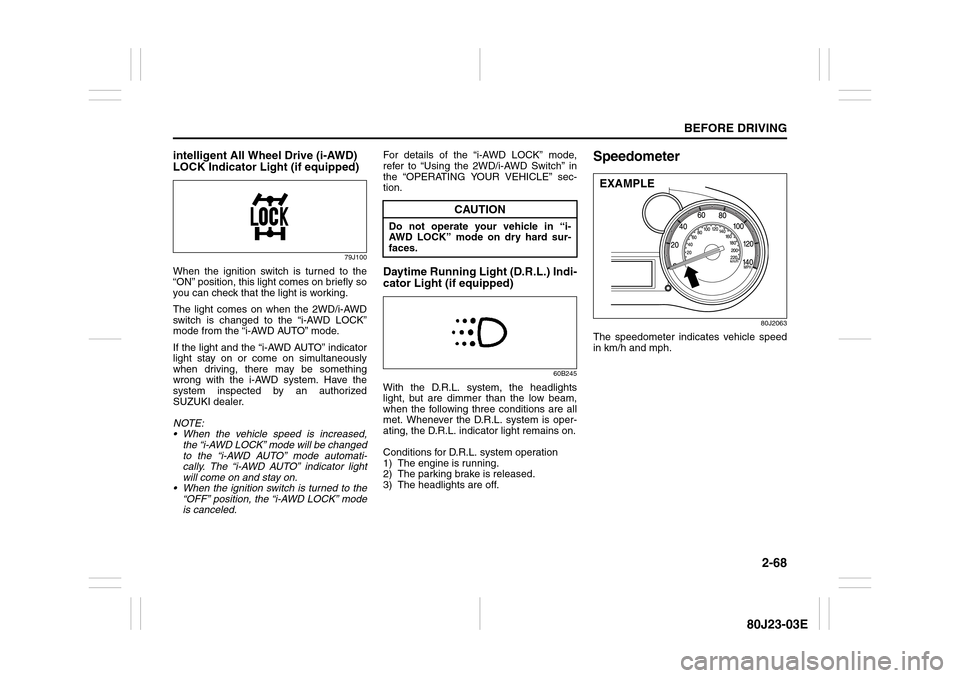
intelligent All Wheel Drive (i-AWD)
LOCK Indicator Light (if equipped)
79J100
When the ignition switch is turned to the
“ON” position, this light comes on briefly so
you can check that the light is working.
The light comes on when the 2WD/i-AWD
switch is changed to the “i-AWD LOCK”
mode from the “i-AWD AUTO” mode.
If the light and the “i-AWD AUTO” indicator
light stay on or come on simultaneously
when driving, there may be something
wrong with the i-AWD system. Have the
system inspected by an authorized
SUZUKI dealer.
NOTE:
When the vehicle speed is increased,
the “i-AWD LOCK” mode will be changed
to the “i-AWD AUTO” mode automati-
cally. The “i-AWD AUTO” indicator light
will come on and stay on.
When the ignition switch is turned to the
“OFF” position, the “i-AWD LOCK” mode
is canceled.For details of the “i-AWD LOCK” mode,
refer to “Using the 2WD/i-AWD Switch” in
the “OPERATING YOUR VEHICLE” sec-
tion.
Daytime Running Light (D.R.L.) Indi-
cator Light (if equipped)
60B245
With the D.R.L. system, the headlights
light, but are dimmer than the low beam,
when the following three conditions are all
met. Whenever the D.R.L. system is oper-
ating, the D.R.L. indicator light remains on.
Conditions for D.R.L. system operation
1) The engine is running.
2) The parking brake is released.
3) The headlights are off.
Speedometer
80J2063
The speedometer indicates vehicle speed
in km/h and mph.
CAUTION
Do not operate your vehicle in “i-
AWD LOCK” mode on dry hard sur-
faces.
EXAMPLE
Page 87 of 297

2-70
BEFORE DRIVING
80J23-03E
Temperature Gauge
80JM103
When the ignition switch is in the “ON”
position, this gauge indicates the engine
coolant temperature. Under normal driving
conditions, the indicator should stay within
the normal, acceptable temperature range
between “H” and “C”. If the indicator
approaches “H”, overheating is indicated.
Follow the instructions for engine overheat-
ing in the “EMERGENCY SERVICE” sec-
tion.
Information display
80JM104
(1) Trip meter selector knob
(2) Indicator selector knob
(3) Information display
When the ignition switch is in the “ON”
position, the information display shows the
following information.
Display (A)
Instantaneous fuel consumption
Display (B)
Trip meter / Average fuel consumption /
Driving range / Thermometer
Display (C)
Transaxle selector position indicator
(for CVT)
Display (D)
Odometer / Illumination control settingDisplay (E)
Clock (if equipped)
Instantaneous Fuel Consumption
The display (A) shows instantaneous fuel
consumption with a bar graph only when
the vehicle is moving.
80J2026
NOTE:
The display does not show the bar graph
unless the vehicle is moving.
The indicated maximum value of instan-
taneous fuel consumption is 80. No
more than 80 will be indicated on the dis-
play even if the actual instantaneous fuel
consumption is higher.
The indication on the display may be
delayed if fuel consumption is greatly
affected by driving conditions.
The display shows estimated values.
Indications may not be the same as
actual values.
CAUTION
Continuing to drive the vehicle when
engine overheating is indicated can
result in severe engine damage.
(1) (2)(3) (D) (B)(A)
(C)
(E)
EXAMPLE
Page 91 of 297

2-74
BEFORE DRIVING
80J23-03E
Odometer / Illumination Control Setting
When the ignition switch is in the “ON”
position, the display (D) shows the odome-
ter.
If you turn the indicator selector knob (2)
clockwise or counterclockwise, the display
will change to the illumination control set-
ting.
Odometer
The odometer records the total distance
the vehicle has been driven.Illumination control setting
When the ignition switch is turned to the
“ON” position, the instrument panel lights
come on.
Your vehicle has a system to automatically
dim the brightness of the instrument panel
lights when the position lights or headlights
are on.
You can change the brightness of the
instrument panel lights regardless of
whether the position lights or headlights
are off or on.
To increase the brightness of the instru-
ment panel lights, turn the indicator selec-
tor knob (1) clockwise.
To reduce the brightness of the instrument
panel lights, turn the indicator selector
knob (1) counterclockwise.
80JM039
CAUTION
Keep track of your odometer reading
and check the maintenance schedule
regularly for required services.
Increased wear or damage to certain
parts can result from failure to per-
form required services at the proper
mileage intervals.
(Brightest)
(Initial setting)
(Dimmest)
Page 92 of 297

2-75BEFORE DRIVING
80J23-03E
NOTE:
If you push the indicator selector knob or
do not turn the knob for more than 5 sec-
onds while activating the illumination
control, the illumination control will be
canceled automatically and the display
(D) will show the odometer indication.
You can change the brightness when the
position lights or headlights are on even
if the ignition switch is in the “ACC” or
“LOCK” position.
When you reconnect the negative (–) ter-
minal to the battery, the brightness of the
instrument panel lights will be reinitial-
ized. Readjust the brightness according
to your preference.
NOTE:
If you select the lowest brightness level
when the position lights or headlights are
on, the instrument panel lights other than
meter lights are turned off.
Clock (if equipped)
When the ignition switch is in the “ON”
position, the display (E) shows the time.To change the time indication:
1) Push the trip meter selector knob (1)
and the indicator selector knob (2)
together.
2) To change the hour indication, turn the
indicator selector knob (2) left or right
repeatedly when the hour indication
flashes. To change the hour indication
quickly, turn and hold the indicator
selector knob (2). To set the hour indi-
cation, push the the indicator selector
knob (2) and the minute indication will
flash.
3) To change the minute indication, turn
the indicator selector knob (2) left or
right repeatedly when the minute indi-
cation flashes. To change the minute
indication quickly, turn and hold the
indicator selector knob (2). To set the
minute indication, push the indicator
selector knob (2).
NOTE:
When you reconnect the negative (–) ter-
minal to the battery, the clock indication will
be reinitialized. Change the indication
again to your preference.
Lighting Control Lever
65D611
WARNING
If you attempt to adjust the display
while driving, you could lose control
of the vehicle.
Do not attempt to adjust the display
while driving.
WARNING
If you attempt to adjust the display
while driving, you could lose control
of the vehicle.
Do not attempt to adjust the display
while driving.
WARNING
To avoid possible injury, do not oper-
ate controls by reaching through the
steering wheel.
Page 98 of 297

2-81BEFORE DRIVING
80J23-03E
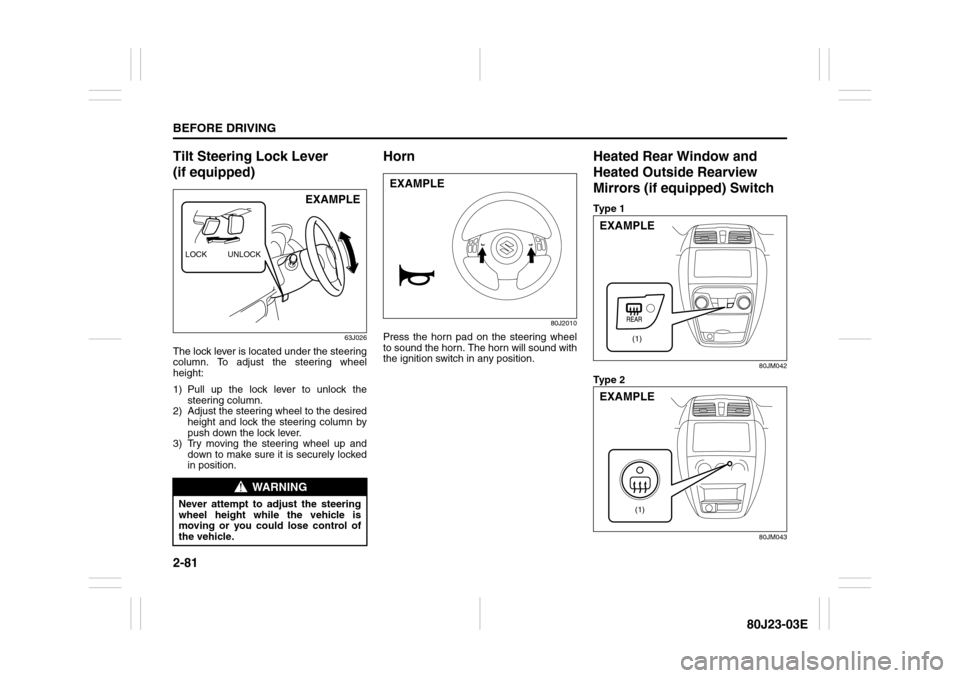
Tilt Steering Lock Lever
(if equipped)
63J026
The lock lever is located under the steering
column. To adjust the steering wheel
height:
1) Pull up the lock lever to unlock the
steering column.
2) Adjust the steering wheel to the desired
height and lock the steering column by
push down the lock lever.
3) Try moving the steering wheel up and
down to make sure it is securely locked
in position.
Horn
80J2010
Press the horn pad on the steering wheel
to sound the horn. The horn will sound with
the ignition switch in any position.
Heated Rear Window and
Heated Outside Rearview
Mirrors (if equipped) SwitchTy p e 1
80JM042
Ty p e 2
80JM043
WARNING
Never attempt to adjust the steering
wheel height while the vehicle is
moving or you could lose control of
the vehicle.LOCK UNLOCK
EXAMPLE
EXAMPLE
(1)
EXAMPLE
(1)
EXAMPLE
Page 101 of 297

OPERATING YOUR VEHICLE
3
80J23-03E
60G408
OPERATING YOUR VEHICLEExhaust Gas Warning ......................................................... 3-1
Daily Inspection Checklist .................................................. 3-1
Ignition Switch ..................................................................... 3-2
Parking Brake Lever ........................................................... 3-6
Pedals ................................................................................... 3-7
Starting the Engine ............................................................. 3-8
Engine Block Heater (if equipped) ..................................... 3-9
Using the Transaxle ............................................................ 3-10
Using the 2WD/i-AWD (intelligent All Wheel Drive)
Switch (if equipped) ............................................................ 3-16
Cruise Control (if equipped) ............................................... 3-18
Braking ................................................................................. 3-20
Electronic Stability Program (ESP
®) (if equipped) ........... 3-23
Tire Pressure Monitoring System (TPMS) ........................ 3-26
Page 102 of 297

3-1OPERATING YOUR VEHICLE
80J23-03E
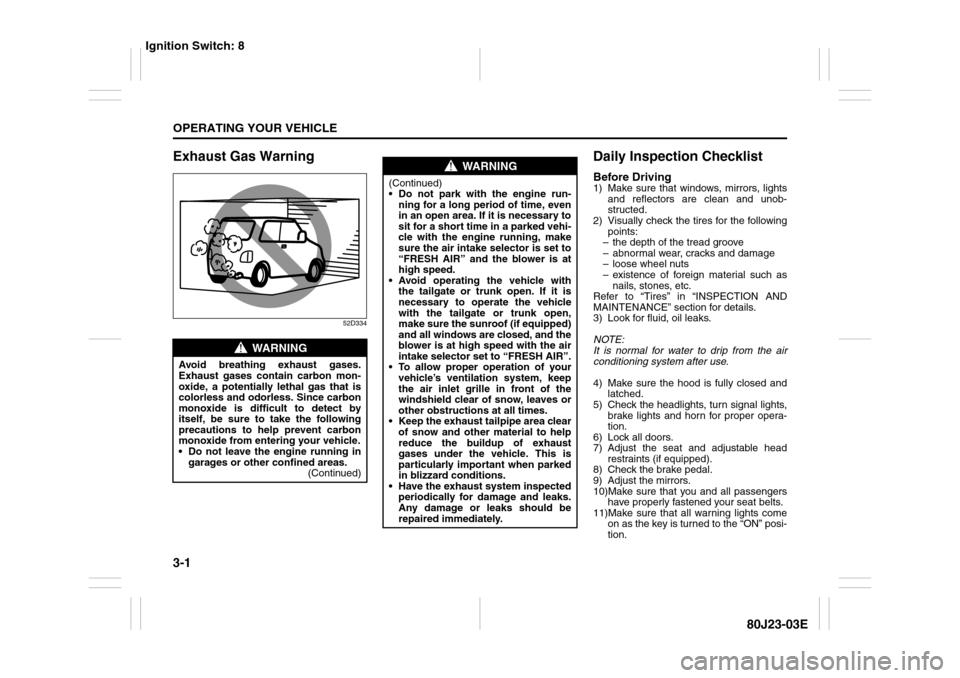
Exhaust Gas Warning
52D334
Daily Inspection ChecklistBefore Driving1) Make sure that windows, mirrors, lights
and reflectors are clean and unob-
structed.
2) Visually check the tires for the following
points:
– the depth of the tread groove
– abnormal wear, cracks and damage
– loose wheel nuts
– existence of foreign material such as
nails, stones, etc.
Refer to “Tires” in “INSPECTION AND
MAINTENANCE” section for details.
3) Look for fluid, oil leaks.
NOTE:
It is normal for water to drip from the air
conditioning system after use.
4) Make sure the hood is fully closed and
latched.
5) Check the headlights, turn signal lights,
brake lights and horn for proper opera-
tion.
6) Lock all doors.
7) Adjust the seat and adjustable head
restraints (if equipped).
8) Check the brake pedal.
9) Adjust the mirrors.
10)Make sure that you and all passengers
have properly fastened your seat belts.
11)Make sure that all warning lights come
on as the key is turned to the “ON” posi-
tion.
WARNING
Avoid breathing exhaust gases.
Exhaust gases contain carbon mon-
oxide, a potentially lethal gas that is
colorless and odorless. Since carbon
monoxide is difficult to detect by
itself, be sure to take the following
precautions to help prevent carbon
monoxide from entering your vehicle.
Do not leave the engine running in
garages or other confined areas.
(Continued)
WARNING
(Continued)
Do not park with the engine run-
ning for a long period of time, even
in an open area. If it is necessary to
sit for a short time in a parked vehi-
cle with the engine running, make
sure the air intake selector is set to
“FRESH AIR” and the blower is at
high speed.
Avoid operating the vehicle with
the tailgate or trunk open. If it is
necessary to operate the vehicle
with the tailgate or trunk open,
make sure the sunroof (if equipped)
and all windows are closed, and the
blower is at high speed with the air
intake selector set to “FRESH AIR”.
To allow proper operation of your
vehicle’s ventilation system, keep
the air inlet grille in front of the
windshield clear of snow, leaves or
other obstructions at all times.
Keep the exhaust tailpipe area clear
of snow and other material to help
reduce the buildup of exhaust
gases under the vehicle. This is
particularly important when parked
in blizzard conditions.
Have the exhaust system inspected
periodically for damage and leaks.
Any damage or leaks should be
repaired immediately.
Ignition Switch: 8