2010 SUZUKI SX4 window
[x] Cancel search: windowPage 107 of 297
3-6
OPERATING YOUR VEHICLE
80J23-03E
81A297S
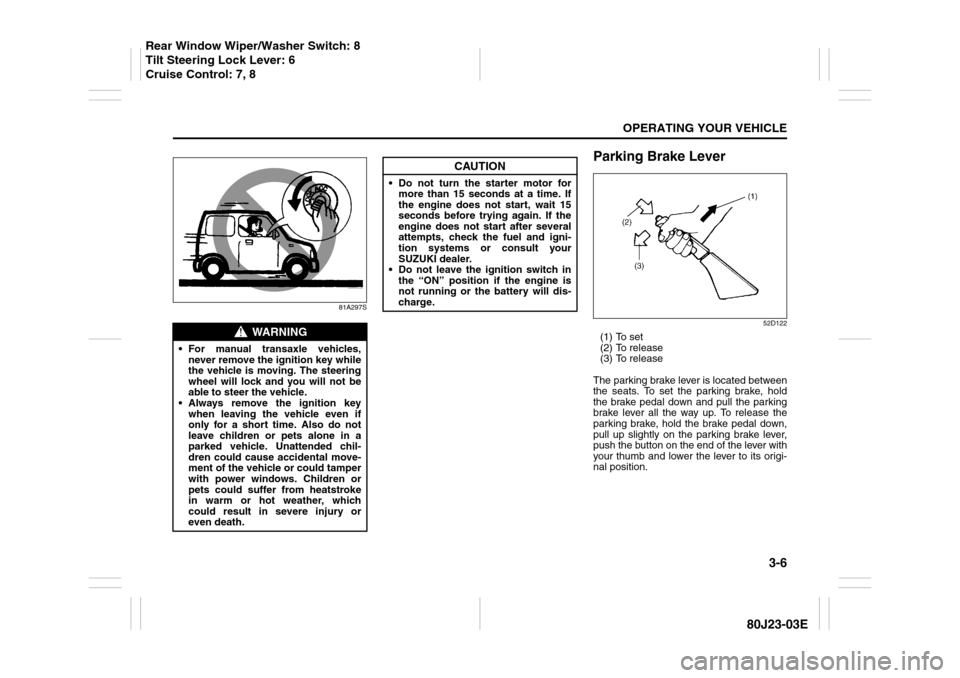
Parking Brake Lever
52D122
(1) To set
(2) To release
(3) To release
The parking brake lever is located between
the seats. To set the parking brake, hold
the brake pedal down and pull the parking
brake lever all the way up. To release the
parking brake, hold the brake pedal down,
pull up slightly on the parking brake lever,
push the button on the end of the lever with
your thumb and lower the lever to its origi-
nal position.
WARNING
For manual transaxle vehicles,
never remove the ignition key while
the vehicle is moving. The steering
wheel will lock and you will not be
able to steer the vehicle.
Always remove the ignition key
when leaving the vehicle even if
only for a short time. Also do not
leave children or pets alone in a
parked vehicle. Unattended chil-
dren could cause accidental move-
ment of the vehicle or could tamper
with power windows. Children or
pets could suffer from heatstroke
in warm or hot weather, which
could result in severe injury or
even death.
CAUTION
Do not turn the starter motor for
more than 15 seconds at a time. If
the engine does not start, wait 15
seconds before trying again. If the
engine does not start after several
attempts, check the fuel and igni-
tion systems or consult your
SUZUKI dealer.
Do not leave the ignition switch in
the “ON” position if the engine is
not running or the battery will dis-
charge.
Rear Window Wiper/Washer Switch: 8
Tilt Steering Lock Lever: 6
Cruise Control: 7, 8
Page 145 of 297
5-4
OTHER CONTROLS AND EQUIPMENT
80J23-03E
System Operating InstructionsNatural ventilation
Select “VENTILATION” and “FRESH AIR”,
the temperature selector to the desired
temperature position, and the blower
speed selector to “OFF”. Fresh air will flow
through the vehicle during driving.
Forced ventilation
The control settings are the same as for
natural ventilation except you set the
blower speed selector to a position other
than “OFF”.
Normal heating (using outside air)
Select “HEAT” and “FRESH AIR”, the tem-
perature selector to the desired tempera-
ture position and the blower speed selector
to the desired blower speed position. Set-
ting the blower speed selector to a higher
blower speed position increases heating
efficiency.
Quick heating (using recirculated air)
The control settings are the same as for
normal heating except you select “RECIR-
CULATED AIR”. If you use this heating
method for an extended period of time, the
air in the vehicle can become contami-
nated and the windows can become misty.
Therefore, use this method only for quick
heating and change to the normal heating
method as soon as possible.
Head cooled/Feet warmed heating
Select “BI-LEVEL” and “FRESH AIR”, the
temperature selector to the desired tem-perature position, and the blower speed
selector to the desired blower speed posi-
tion. Unless the temperature selector is in
the fully COLD position or fully HOT posi-
tion, the air that comes out of the center
and side outlets will be cooler than the air
that comes out of the floor outlets.
Defrosting/Feet warmed heating
Select “HEAT & DEFROST” and “FRESH
AIR”, the temperature selector to the
desired temperature position, and the
blower speed selector to HIGH. When the
windshield has become clear, set the
blower speed selector to the desired
blower speed position.
Defrosting
Select “DEFROST” and “FRESH AIR”, the
temperature selector to the desired tem-
perature position (higher temperature pro-
vides more efficient defrosting), and the
blower speed selector to HIGH. When the
windshield has become clear, set the
blower speed selector to the desired
blower speed position.
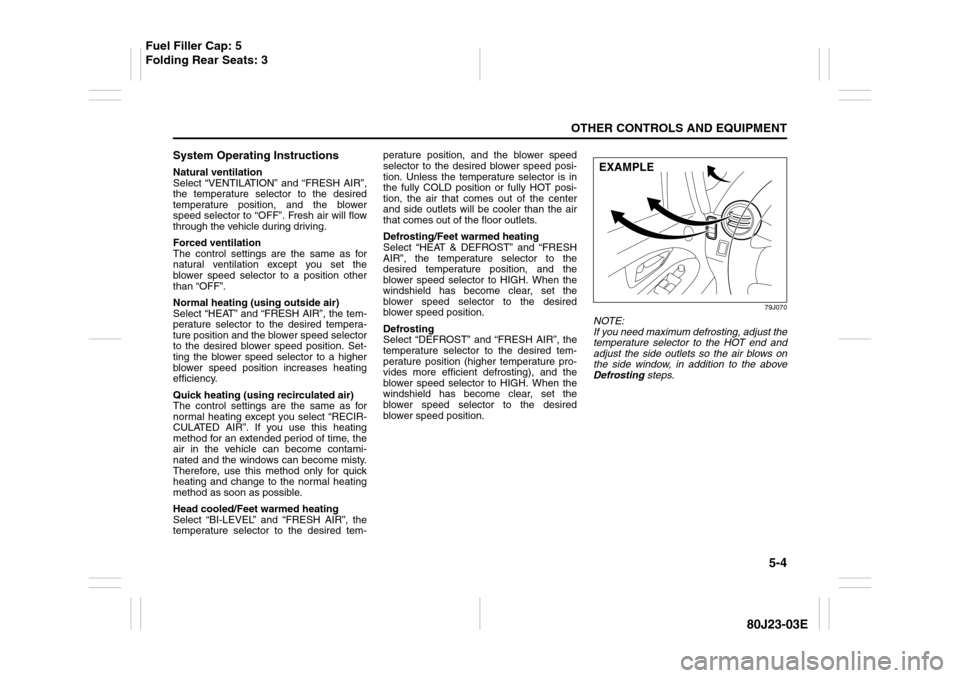
79J070
NOTE:
If you need maximum defrosting, adjust the
temperature selector to the HOT end and
adjust the side outlets so the air blows on
the side window, in addition to the above
Defrosting steps.EXAMPLE
Fuel Filler Cap: 5
Folding Rear Seats: 3
Page 148 of 297
5-7OTHER CONTROLS AND EQUIPMENT
80J23-03E
Air conditioning switch (5)
To turn on the air conditioning system,
push in the “A/C” switch and set the blower
speed selector to a position other than
“OFF”. With this “A/C” switch operation, a
indicator light will come on when the air
conditioning system is on. To turn off the
air conditioning system, push the “A/C”
switch again.
During operation of the air conditioner, you
may notice slight changes in engine
speed. These changes are normal, the
system is designed so that the compressor
turns on or off to maintain the desired tem-
perature.
Less operation of the compressor results
in better fuel economy.
System Operating InstructionsNatural ventilation
Select “VENTILATION” and “FRESH AIR”,
the temperature selector to the desired
temperature position, and the blower
speed selector to “OFF”. Fresh air will flow
through the vehicle during driving.
Forced ventilation
The control settings are the same as for
natural ventilation except you set the
blower speed selector to a position other
than “OFF”.
Normal heating (using outside air)
Select “HEAT” and “FRESH AIR”, the tem-
perature selector to the desired tempera-
ture position and the blower speed selector
to the desired blower speed position. Set-
ting the blower speed selector to a higher
blower speed position increases heating
efficiency.
Quick heating (using recirculated air)
The control settings are the same as for
normal heating except you select “RECIR-
CULATED AIR”. If you use this heating
method for an extended period of time, the
air in the vehicle can become contami-
nated and the windows can become misty.
Therefore, use this method only for quick
heating and change to the normal heating
method as soon as possible.Head cooled/Feet warmed heating
Select “BI-LEVEL” and “FRESH AIR”, the
temperature selector to the desired tem-
perature position, and the blower speed
selector to the desired blower speed posi-
tion. Unless the temperature selector is in
the fully COLD position or fully HOT posi-
tion, the air that comes out of the center
and side outlets will be cooler than the air
that comes out of the floor outlets.
Normal cooling
Turn on the “A/C” switch, set the air flow
selector to “VENTILATION”, the tempera-
ture selector to the desired temperature
position and the blower speed selector to
the desired blower speed position. Setting
the blower speed selector to a higher
blower speed position increases cooling
efficiency.
You can switch the air intake selector to
either “FRESH AIR” or “RECIRCULATED
AIR” as you desire. Choosing “RECIRCU-
LATED AIR” increases cooling efficiency.
Folding Rear Seats: 3
Page 149 of 297
5-8
OTHER CONTROLS AND EQUIPMENT
80J23-03E
Quick cooling (using recirculated air)
The control settings are the same as for
normal cooling except you select “RECIR-
CULATED AIR” and the highest blower
speed.
NOTE:
If you select “RECIRCULATED AIR” for
an extended period of time, the air in the
vehicle can become contaminated.
Therefore, you should occasionally
select “FRESH AIR”.
If your vehicle has been left in the sun
with the windows closed, it will cool
faster if you open the windows briefly
while you operate the air conditioner with
the air intake selector at “FRESH AIR”
and the blower at high speed.
Dehumidifying
Turn on the “A/C” switch, set the air flow
selector to a desired air flow selector posi-
tion, and select “FRESH AIR”, the temper-
ature selector to the desired temperature
position, and the blower speed selector to
the desired blower speed position.
NOTE:
Because the air conditioner dehumidifies
the air, turning it on will help keep the win-
dows clear, even when blowing heated air
using the “DEFROST” or “HEAT &
DEFROST” functions.
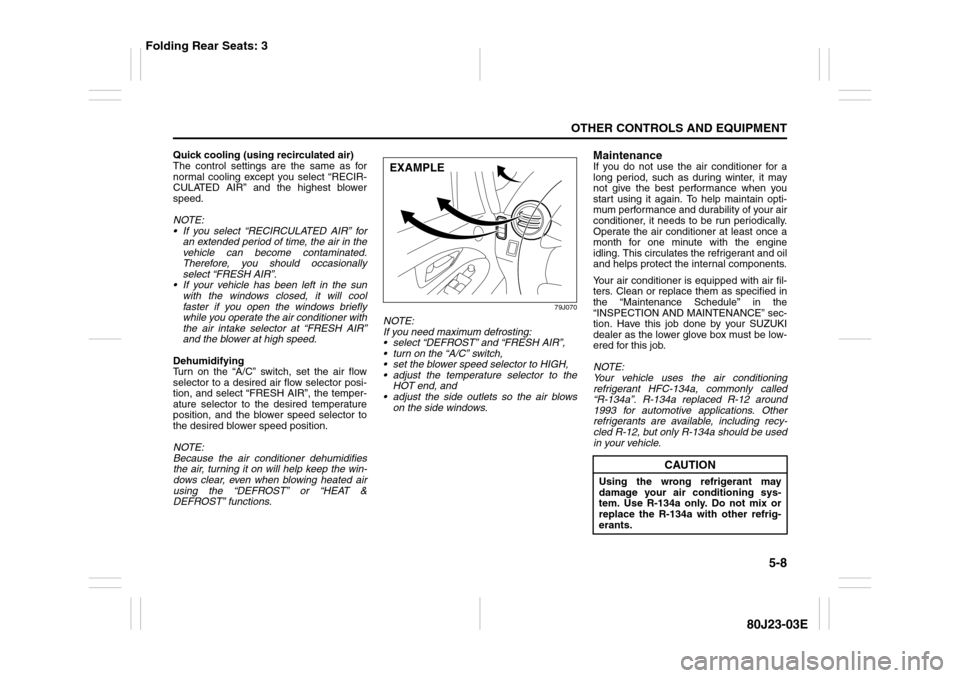
79J070
NOTE:
If you need maximum defrosting:
select “DEFROST” and “FRESH AIR”,
turn on the “A/C” switch,
set the blower speed selector to HIGH,
adjust the temperature selector to the
HOT end, and
adjust the side outlets so the air blows
on the side windows.
MaintenanceIf you do not use the air conditioner for a
long period, such as during winter, it may
not give the best performance when you
start using it again. To help maintain opti-
mum performance and durability of your air
conditioner, it needs to be run periodically.
Operate the air conditioner at least once a
month for one minute with the engine
idling. This circulates the refrigerant and oil
and helps protect the internal components.
Your air conditioner is equipped with air fil-
ters. Clean or replace them as specified in
the “Maintenance Schedule” in the
“INSPECTION AND MAINTENANCE” sec-
tion. Have this job done by your SUZUKI
dealer as the lower glove box must be low-
ered for this job.
NOTE:
Your vehicle uses the air conditioning
refrigerant HFC-134a, commonly called
“R-134a”. R-134a replaced R-12 around
1993 for automotive applications. Other
refrigerants are available, including recy-
cled R-12, but only R-134a should be used
in your vehicle.
EXAMPLE
CAUTION
Using the wrong refrigerant may
damage your air conditioning sys-
tem. Use R-134a only. Do not mix or
replace the R-134a with other refrig-
erants.
Folding Rear Seats: 3
Page 154 of 297
5-13OTHER CONTROLS AND EQUIPMENT
80J23-03E
Defrost
80JM051
Temperature-controlled air comes out of
the windshield defroster outlets, the side
defroster outlets and the side outlets.
NOTE:
When the defrost switch (5) is pushed to
turn on the defroster, the air conditioning
system will come on and the “FRESH AIR”
mode will be selected automatically. In
very cold weather, however, the air condi-
tioning system will not turn on.
System Operating InstructionsAutomatic operation
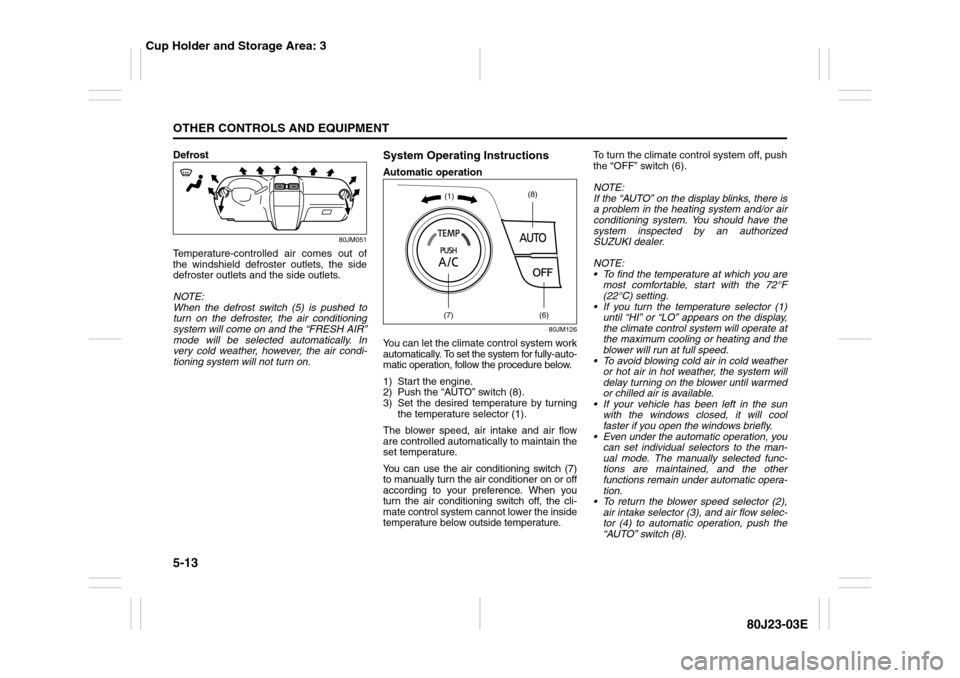
80JM126
You can let the climate control system work
automatically. To set the system for fully-auto-
matic operation, follow the procedure below.
1) Start the engine.
2) Push the “AUTO” switch (8).
3) Set the desired temperature by turning
the temperature selector (1).
The blower speed, air intake and air flow
are controlled automatically to maintain the
set temperature.
You can use the air conditioning switch (7)
to manually turn the air conditioner on or off
according to your preference. When you
turn the air conditioning switch off, the cli-
mate control system cannot lower the inside
temperature below outside temperature.To turn the climate control system off, push
the “OFF” switch (6).
NOTE:
If the “AUTO” on the display blinks, there is
a problem in the heating system and/or air
conditioning system. You should have the
system inspected by an authorized
SUZUKI dealer.
NOTE:
To find the temperature at which you are
most comfortable, start with the 72°F
(22°C) setting.
If you turn the temperature selector (1)
until “HI” or “LO” appears on the display,
the climate control system will operate at
the maximum cooling or heating and the
blower will run at full speed.
To avoid blowing cold air in cold weather
or hot air in hot weather, the system will
delay turning on the blower until warmed
or chilled air is available.
If your vehicle has been left in the sun
with the windows closed, it will cool
faster if you open the windows briefly.
Even under the automatic operation, you
can set individual selectors to the man-
ual mode. The manually selected func-
tions are maintained, and the other
functions remain under automatic opera-
tion.
To return the blower speed selector (2),
air intake selector (3), and air flow selec-
tor (4) to automatic operation, push the
“AUTO” switch (8).
(7)
(6)
(8)
(1)
Cup Holder and Storage Area: 3
Page 155 of 297

5-14
OTHER CONTROLS AND EQUIPMENT
80J23-03E
80JM127
Be careful not to cover the interior temper-
ature sensor (10) located between the
steering wheel and the climate control
panel, or the solar sensor (11) located at
the top of the driver’s side dashboard.
These sensors are used by the automatic
system to regulate temperature.
Manual operationYou can manually control the climate con-
trol system. Set the selectors to the
desired positions.
79J070
NOTE:
If you need maximum defrosting:
push the defrost switch (5) to turn on the
defroster (the air conditioning system will
come on and the “FRESH AIR” mode will
be selected automatically),
set the blower speed selector to HIGH,
adjust the temperature selector to the
“HI” indication on the display, and
adjust the side outlets so the air blows
on the side windows.
MaintenanceIf you do not use the air conditioner for a
long period, such as during winter, it may
not give the best performance when you
start using it again. To help maintain opti-
mum performance and durability of your air
conditioner, it needs to be run periodically.
Operate the air conditioner at least once a
month for one minute with the engineidling.
This circulates the refrigerant and oil and
helps protect the internal components.
Your air conditioner is equipped with air fil-
ters. Clean or replace them as specified in
the “Maintenance Schedule” in the
“INSPECTION AND MAINTENANCE” sec-
tion. Have this job done by your SUZUKI
dealer as the lower glove box must be low-
ered for this job.
NOTE:
Your vehicle uses the air conditioning
refrigerant HFC-134a, commonly called
“R-134a”. R-134a replaced R-12 around
1993 for automotive applications. Other
refrigerants are available, including recy-
cled R-12, but only R-134a should be used
in your vehicle.
(11)
(10)
EXAMPLE
EXAMPLE
CAUTION
Using the wrong refrigerant may
damage your air conditioning sys-
tem. Use R-134a only. Do not mix or
replace the R-134a with other refrig-
erants.
Accessory Socket: 8
Frame Hooks: 5, 6
Page 156 of 297
5-15OTHER CONTROLS AND EQUIPMENT
80J23-03E
Radio AntennaSX4
63J055
The radio antenna on the roof is remov-
able. To remove the antenna, turn it coun-
terclockwise. To reinstall the antenna, turn
it clockwise firmly by hand.SX4 SEDAN
The radio antenna wire is printed inside
the rear window.
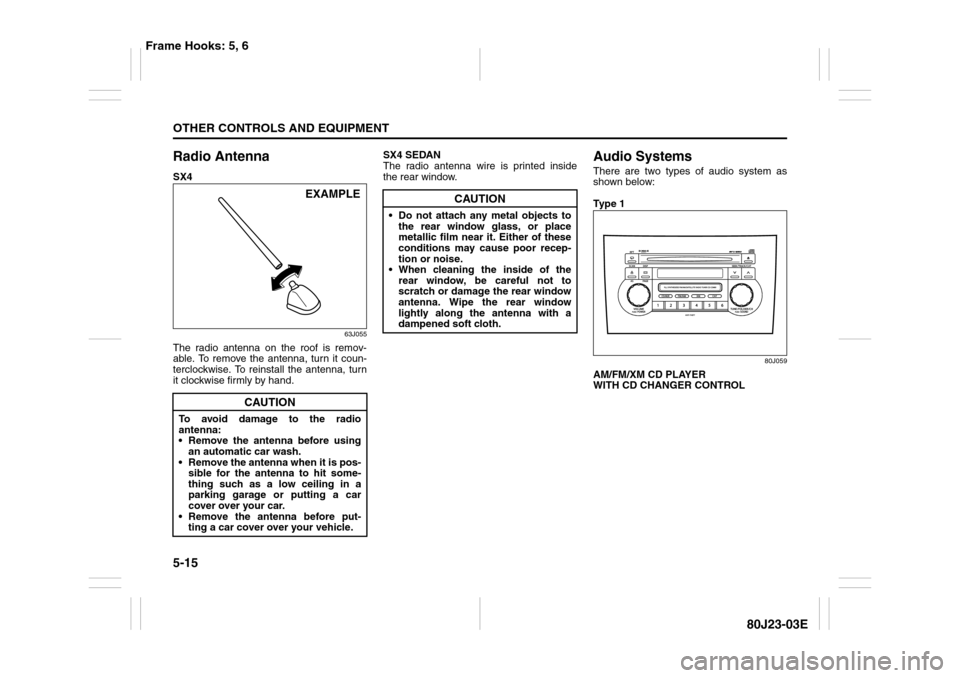
Audio SystemsThere are two types of audio system as
shown below:
Ty p e 1
80J059
AM/FM/XM CD PLAYER
WITH CD CHANGER CONTROL
CAUTION
To avoid damage to the radio
antenna:
Remove the antenna before using
an automatic car wash.
Remove the antenna when it is pos-
sible for the antenna to hit some-
thing such as a low ceiling in a
parking garage or putting a car
cover over your car.
Remove the antenna before put-
ting a car cover over your vehicle.
EXAMPLE
CAUTION
Do not attach any metal objects to
the rear window glass, or place
metallic film near it. Either of these
conditions may cause poor recep-
tion or noise.
When cleaning the inside of the
rear window, be careful not to
scratch or damage the rear window
antenna. Wipe the rear window
lightly along the antenna with a
dampened soft cloth.
Frame Hooks: 5, 6
Page 170 of 297

5-29OTHER CONTROLS AND EQUIPMENT
80J23-03E
What is MP3/WMA?
MP3 (MPEG1/2 Audio Layer-III) and WMA
(Windows Media
TM
Audio) are the com-
pression formats of digital audio. The
former is developed by MPEG (Motion Pic-
ture Experts Group), and the latter is
developed by Microsoft Corporation. Using
these compression formats, you can
record the contents of about 10 music CDs
on a single CD media (This figures refer to
data recorded on a 650 MB CD-R or CD-
RW at a fixed bit rate of 128 kbps and a
sampling frequency of 44.1 kHz).
Points to remember when making MP3/
WMA files
Common
High bit rate and high sampling fre-
quency are recommended for high qual-
ity sounds.
Selecting VBR (Variable Bit Rate) is not
recommended because playing time is
not displayed properly and sound may
be skipped.
The playback sound quality differs
depending on the encoding circum-
stances. For details, refer to the user
manual of your own encoding software
and writing software.
MP3
It is recommended to set the bit rate to
“128 kbps or more” and “fixed”.WMA
It is recommended to set the bit rate to
“64 kbps or more” and “fixed”.
Do not set the copy protect attribute on
the WMA file to enable this unit to play
back.
NOTE:
Never assign the “.mp3”, or “.wma” file
name extension to a file that is not in the
MP3/WMA format. This may not only pro-
duce noise from the speaker damage, but
also damage your hearing.
Recording MP3/WMA files on a CD-
media
You are recommended to minimize the
chances of making a disc that contains
both CD-DA files and MP3/WMA files.
If CD-DA files are on the same disc as
MP3 or WMA files, the songs may not
play in the intended order, or some
songs may not play at all.
When storing MP3 data and WMA data
on the same disc, use different folders
for each data.
Do not record files other than MP3/WMA
files and unnecessary folder on a disc.
The name of an MP3/WMA file should
be added by rules as shown in the fol-
lowing descriptions and also comply with
the rules of each file system.
The file extension “.mp3” or “.wma”
should be assigned to each file depend-
ing on the file format. You may encounter trouble in playing
MP3/WMA files or displaying the infor-
mation of MP3/WMA files recorded with
certain writing software or CD recorders.
This unit does not have a play list func-
tion.
Although Multi-session recording is sup-
ported, the use of Disc-at-Once is rec-
ommended.
Compression formats
MP3
Bit rate
MPEG1 Audio Layer III : 32 k – 320 kbps
MPEG2 Audio Layer III : 8 k – 160 kbps
Sampling frequency
MPEG1 Audio Layer III : 44.1 k/48 k/32
kHz
MPEG2 Audio Layer III :
22.05 k/24 k/16 kHz
WMA (Ver.7, Ver.8, Ver. 9*)
Bit rate
32 k – 192 kbps
Sampling frequency
44.1 k/48 k/32 kHz
* WMA 9 Professional/LossLess/Voice
are not supported.
Supported file systems
ISO 9660 Level 1/Level 2, Apple Extension
to ISO 9660, Joliet, Romeo
Maximum number of files/folders
Maximum number of files:
CD Player: 999(files + folders)
6-CD Player: 512(files + folders)