2010 SUZUKI SX4 tow
[x] Cancel search: towPage 115 of 297
3-14
OPERATING YOUR VEHICLE
80J23-03E
NOTE:
When you shift gears, the gear may not
shift to the desired position. This is to
maintain good drivability and to protect the
transaxle.
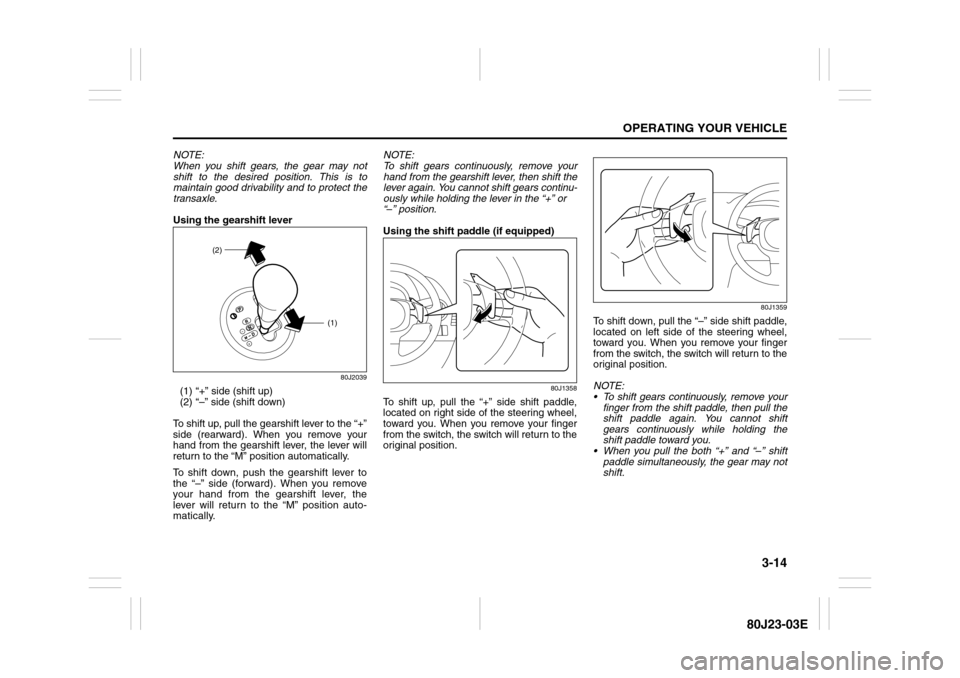
Using the gearshift lever
80J2039
(1) “+” side (shift up)
(2) “–” side (shift down)
To shift up, pull the gearshift lever to the “+”
side (rearward). When you remove your
hand from the gearshift lever, the lever will
return to the “M” position automatically.
To shift down, push the gearshift lever to
the “–” side (forward). When you remove
your hand from the gearshift lever, the
lever will return to the “M” position auto-
matically.NOTE:
To shift gears continuously, remove your
hand from the gearshift lever, then shift the
lever again. You cannot shift gears continu-
ously while holding the lever in the “+” or
“–” position.
Using the shift paddle (if equipped)
80J1358
To shift up, pull the “+” side shift paddle,
located on right side of the steering wheel,
toward you. When you remove your finger
from the switch, the switch will return to the
original position.
80J1359
To shift down, pull the “–” side shift paddle,
located on left side of the steering wheel,
toward you. When you remove your finger
from the switch, the switch will return to the
original position.
NOTE:
To shift gears continuously, remove your
finger from the shift paddle, then pull the
shift paddle again. You cannot shift
gears continuously while holding the
shift paddle toward you.
When you pull the both “+” and “–” shift
paddle simultaneously, the gear may not
shift.
(1)
(2)
Page 116 of 297
3-15OPERATING YOUR VEHICLE
80J23-03E
Canceling the manual mode
To cancel the manual mode, shift the gear-
shift lever from “M” to “D”.
Temporary manual mode
Pull the shift paddle (if equipped) toward
you when driving with the gearshift lever in
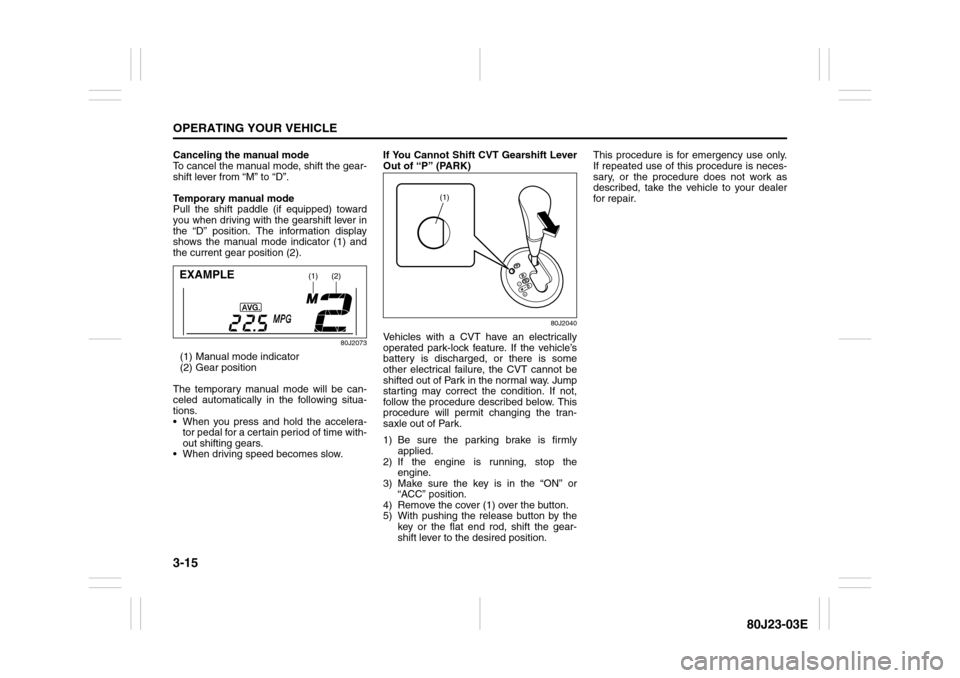
the “D” position. The information display
shows the manual mode indicator (1) and
the current gear position (2).
80J2073
(1) Manual mode indicator
(2) Gear position
The temporary manual mode will be can-
celed automatically in the following situa-
tions.
When you press and hold the accelera-
tor pedal for a certain period of time with-
out shifting gears.
When driving speed becomes slow.If You Cannot Shift CVT Gearshift Lever
Out of “P” (PARK)
80J2040
Vehicles with a CVT have an electrically
operated park-lock feature. If the vehicle’s
battery is discharged, or there is some
other electrical failure, the CVT cannot be
shifted out of Park in the normal way. Jump
starting may correct the condition. If not,
follow the procedure described below. This
procedure will permit changing the tran-
saxle out of Park.
1) Be sure the parking brake is firmly
applied.
2) If the engine is running, stop the
engine.
3) Make sure the key is in the “ON” or
“ACC” position.
4) Remove the cover (1) over the button.
5) With pushing the release button by the
key or the flat end rod, shift the gear-
shift lever to the desired position.This procedure is for emergency use only.
If repeated use of this procedure is neces-
sary, or the procedure does not work as
described, take the vehicle to your dealer
for repair.
(1)
(2)
EXAMPLE
(1)
Page 135 of 297
4-2
DRIVING TIPS
80J23-03E
54G584S
Improving Fuel EconomyThe following instructions will help you
improve fuel economy.
Avoid excessive idling
If you are to wait for more than a minute
while you are parked, stop the engine and
start it again later. When warming up a
cold engine, allow the engine to idle until
the temperature gauge pointer comes up
to the “C” position. In this position, the
engine is sufficiently warm for starting off.
Avoid “jackrabbit” starts
Fast starts away from lights or stop signs
will consume fuel unnecessarily and
shorten engine life. Start off slowly.
Avoid unnecessary stops
Avoid unnecessary deceleration and stop-
ping. Try to maintain a slow, steady speed
whenever possible. Slowing down and then
accelerating again uses more fuel.
Keep a steady cruising speed
Keep as constant a speed as road and traf-
fic conditions will permit.
CAUTION
To minimize the possibility of catalyst
or other vehicle damage:
Maintain the engine in the proper
operating condition.
In the event of an engine malfunc-
tion, particularly one involving
engine misfire or other apparent
loss of performance, have the vehi-
cle serviced promptly.
Do not shut off the engine or inter-
rupt the ignition when the transaxle
is in gear and the vehicle is in
motion.
Do not try to start the engine by
pushing or towing the vehicle or
coasting down a hill.
Do not idle the engine with any
spark plug wires disconnected or
removed, such as during diagnos-
tic testing.
Do not idle the vehicle for pro-
longed periods if idling seems
rough or there are other malfunc-
tions.
Do not allow the fuel tank to get
near the empty level.
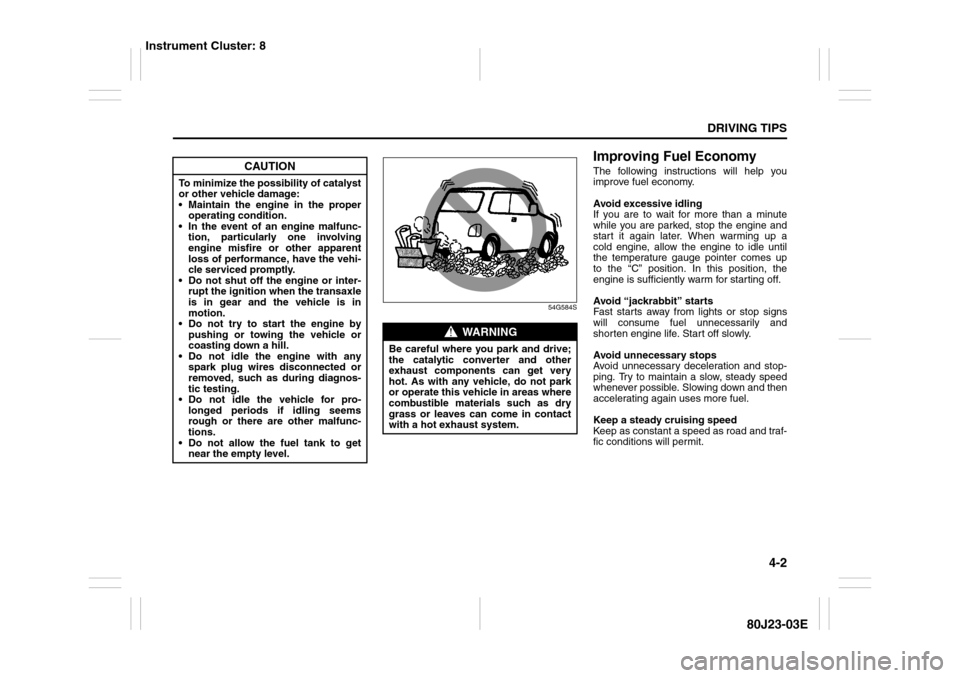
WARNING
Be careful where you park and drive;
the catalytic converter and other
exhaust components can get very
hot. As with any vehicle, do not park
or operate this vehicle in areas where
combustible materials such as dry
grass or leaves can come in contact
with a hot exhaust system.
Instrument Cluster: 8
Page 192 of 297
5-51OTHER CONTROLS AND EQUIPMENT
80J23-03E
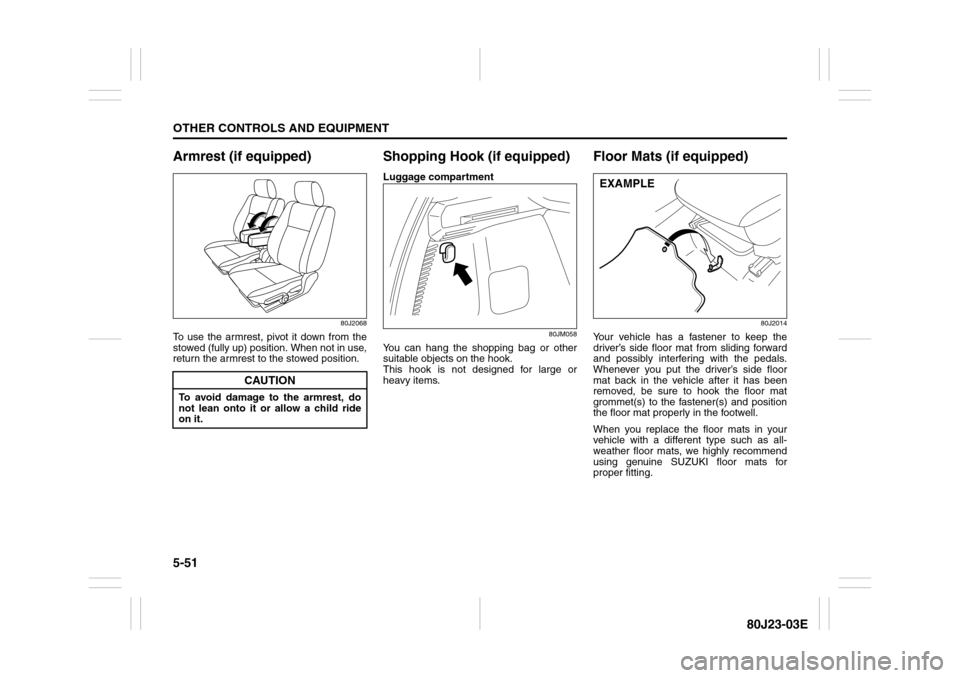
Armrest (if equipped)
80J2068
To use the armrest, pivot it down from the
stowed (fully up) position. When not in use,
return the armrest to the stowed position.
Shopping Hook (if equipped)Luggage compartment
80JM058
You can hang the shopping bag or other
suitable objects on the hook.
This hook is not designed for large or
heavy items.
Floor Mats (if equipped)
80J2014
Your vehicle has a fastener to keep the
driver’s side floor mat from sliding forward
and possibly interfering with the pedals.
Whenever you put the driver’s side floor
mat back in the vehicle after it has been
removed, be sure to hook the floor mat
grommet(s) to the fastener(s) and position
the floor mat properly in the footwell.
When you replace the floor mats in your
vehicle with a different type such as all-
weather floor mats, we highly recommend
using genuine SUZUKI floor mats for
proper fitting.
CAUTION
To avoid damage to the armrest, do
not lean onto it or allow a child ride
on it.
EXAMPLE
Page 194 of 297
5-53OTHER CONTROLS AND EQUIPMENT
80J23-03E
Luggage Compartment Board
(if equipped)
80JM059
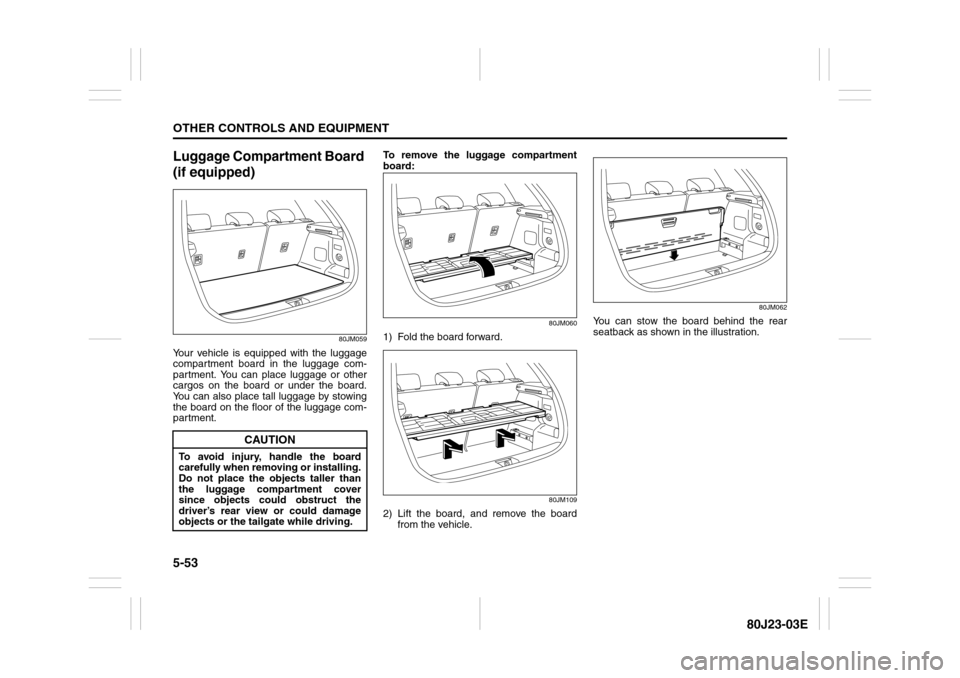
Your vehicle is equipped with the luggage
compartment board in the luggage com-
partment. You can place luggage or other
cargos on the board or under the board.
You can also place tall luggage by stowing
the board on the floor of the luggage com-
partment.To remove the luggage compartment
board:
80JM060
1) Fold the board forward.
80JM109
2) Lift the board, and remove the board
from the vehicle.
80JM062
You can stow the board behind the rear
seatback as shown in the illustration.
CAUTION
To avoid injury, handle the board
carefully when removing or installing.
Do not place the objects taller than
the luggage compartment cover
since objects could obstruct the
driver’s rear view or could damage
objects or the tailgate while driving.
Page 196 of 297
5-55OTHER CONTROLS AND EQUIPMENT
80J23-03E
Roof Rails or Roof Rack
Anchors (if equipped)Roof rails
79J167
Roof rack anchors
80J082
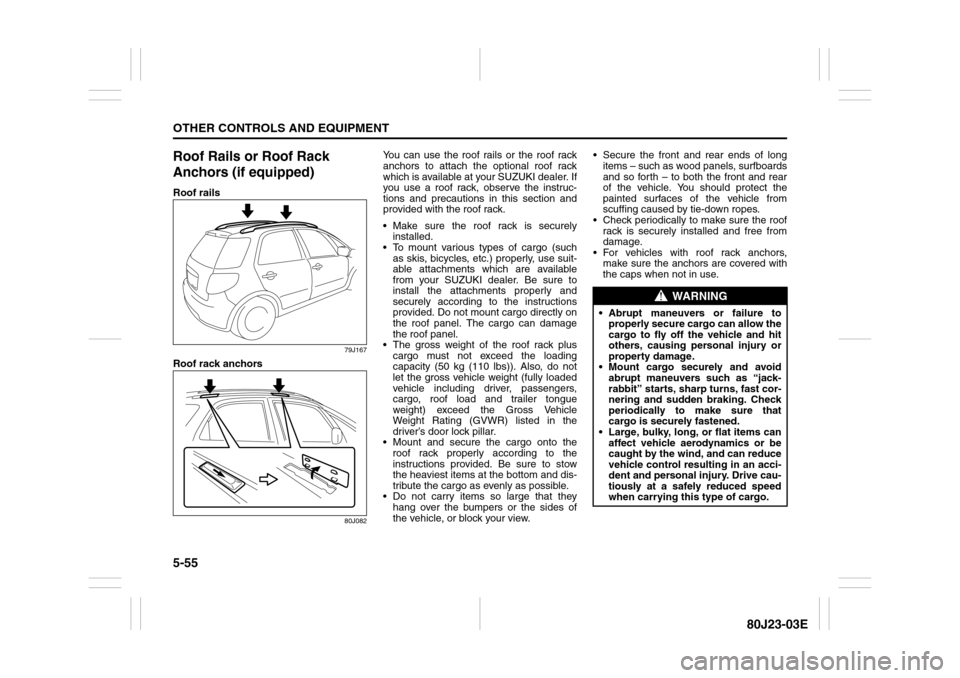
You can use the roof rails or the roof rack
anchors to attach the optional roof rack
which is available at your SUZUKI dealer. If
you use a roof rack, observe the instruc-
tions and precautions in this section and
provided with the roof rack.
Make sure the roof rack is securely
installed.
To mount various types of cargo (such
as skis, bicycles, etc.) properly, use suit-
able attachments which are available
from your SUZUKI dealer. Be sure to
install the attachments properly and
securely according to the instructions
provided. Do not mount cargo directly on
the roof panel. The cargo can damage
the roof panel.
The gross weight of the roof rack plus
cargo must not exceed the loading
capacity (50 kg (110 lbs)). Also, do not
let the gross vehicle weight (fully loaded
vehicle including driver, passengers,
cargo, roof load and trailer tongue
weight) exceed the Gross Vehicle
Weight Rating (GVWR) listed in the
driver’s door lock pillar.
Mount and secure the cargo onto the
roof rack properly according to the
instructions provided. Be sure to stow
the heaviest items at the bottom and dis-
tribute the cargo as evenly as possible.
Do not carry items so large that they
hang over the bumpers or the sides of
the vehicle, or block your view. Secure the front and rear ends of long
items – such as wood panels, surfboards
and so forth – to both the front and rear
of the vehicle. You should protect the
painted surfaces of the vehicle from
scuffing caused by tie-down ropes.
Check periodically to make sure the roof
rack is securely installed and free from
damage.
For vehicles with roof rack anchors,
make sure the anchors are covered with
the caps when not in use.
WARNING
Abrupt maneuvers or failure to
properly secure cargo can allow the
cargo to fly off the vehicle and hit
others, causing personal injury or
property damage.
Mount cargo securely and avoid
abrupt maneuvers such as “jack-
rabbit” starts, sharp turns, fast cor-
nering and sudden braking. Check
periodically to make sure that
cargo is securely fastened.
Large, bulky, long, or flat items can
affect vehicle aerodynamics or be
caught by the wind, and can reduce
vehicle control resulting in an acci-
dent and personal injury. Drive cau-
tiously at a safely reduced speed
when carrying this type of cargo.
Page 197 of 297
5-56
OTHER CONTROLS AND EQUIPMENT
80J23-03E
Frame HooksSX4
Front (1)
80J2049
SX4 SEDAN
Front (1)
80J2050
Front bumper cover (if equipped)
80JM111
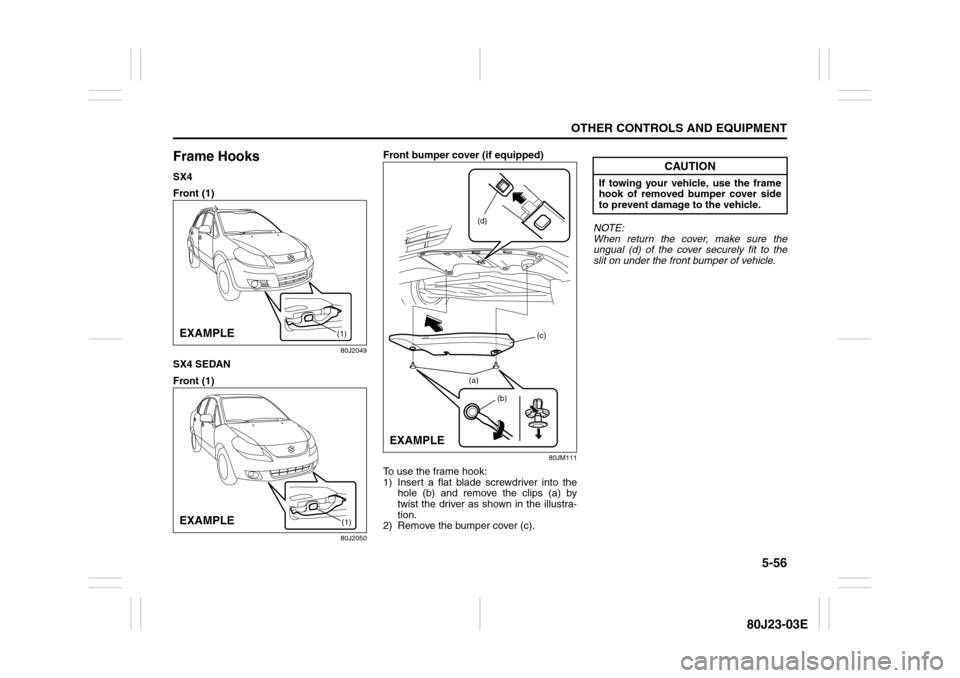
To use the frame hook:
1) Insert a flat blade screwdriver into the
hole (b) and remove the clips (a) by
twist the driver as shown in the illustra-
tion.
2) Remove the bumper cover (c).NOTE:
When return the cover, make sure the
ungual (d) of the cover securely fit to the
slit on under the front bumper of vehicle.
(1)
EXAMPLE
(1)
EXAMPLE
(b)
(c)
(a)(d)
EXAMPLE
CAUTION
If towing your vehicle, use the frame
hook of removed bumper cover side
to prevent damage to the vehicle.
Page 198 of 297
5-57OTHER CONTROLS AND EQUIPMENT
80J23-03E
SX4
Rear (2)
80JC061
SX4 SEDAN
Rear (2)
56KN033
Side (3)
80JC062
79J132
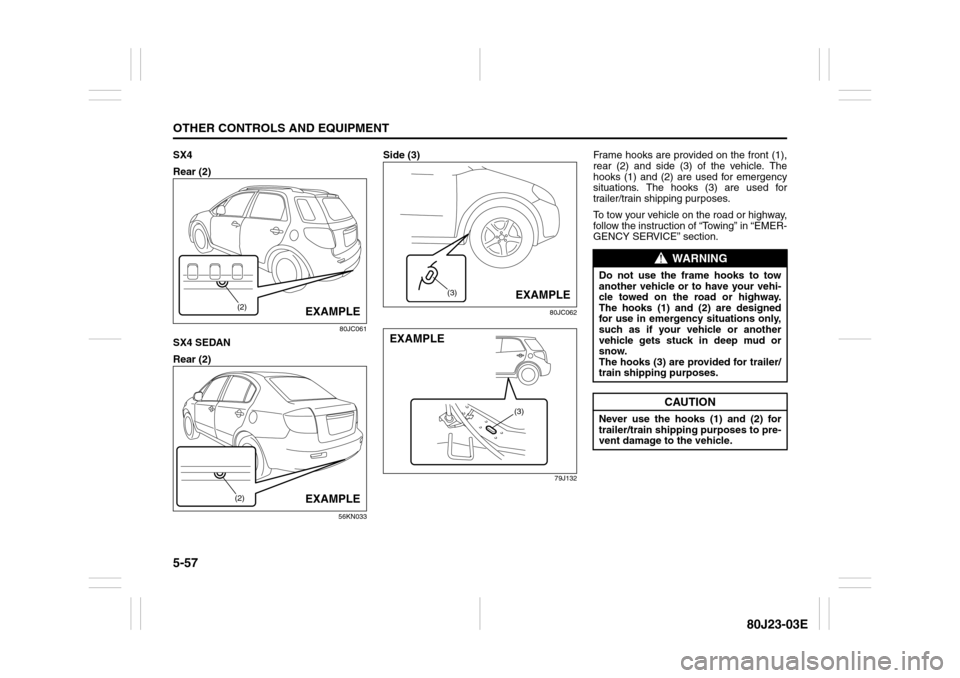
Frame hooks are provided on the front (1),
rear (2) and side (3) of the vehicle. The
hooks (1) and (2) are used for emergency
situations. The hooks (3) are used for
trailer/train shipping purposes.
To tow your vehicle on the road or highway,
follow the instruction of “Towing” in “EMER-
GENCY SERVICE” section.
(2)
EXAMPLE
(2)
EXAMPLE
(3)
EXAMPLE(3)
EXAMPLE
WARNING
Do not use the frame hooks to tow
another vehicle or to have your vehi-
cle towed on the road or highway.
The hooks (1) and (2) are designed
for use in emergency situations only,
such as if your vehicle or another
vehicle gets stuck in deep mud or
snow.
The hooks (3) are provided for trailer/
train shipping purposes.
CAUTION
Never use the hooks (1) and (2) for
trailer/train shipping purposes to pre-
vent damage to the vehicle.