2010 SUZUKI SX4 stop start
[x] Cancel search: stop startPage 121 of 297
3-20
OPERATING YOUR VEHICLE
80J23-03E
To Change Cruising Speed
Using the accelerator pedal
To reset at a faster cruising speed, acceler-
ate to the desired speed using the acceler-
ator pedal and push the “SET/COAST”
switch (3). The new speed will be main-
tained.
Using the brake pedal
To reset at a slower cruising speed, decel-
erate to the desired speed using the brake
pedal and push the “SET/COAST” switch
(3). The new speed will be maintained.
NOTE:
When the brake pedal is depressed, the
“SET” indicator light goes off until reset the
cruising speed.
Using the cruise control switch
To reset at a faster cruising speed, press
repeatedly or hold in the “RES/ACC”
switch (4). Vehicle speed will steadily
increase. When you release the switch, the
new speed will be maintained.
To reset at a slower cruising speed, press
repeatedly or hold in the “SET/COAST”
switch (3) until the vehicle has slowed to
the desired speed, then release the switch.
The new speed will be maintained.
NOTE:
You can adjust the set speed by approxi-
mately 1.0 mph (1.6 km/h) by pushing a
cruise control switch quickly.Cancellation of the Cruise Control
The “SET” indicator light will go off and the
cruise control will be canceled temporarily
with following procedures:
Push the “CANCEL” switch (2).
Depress the brake pedal.
For manual transaxle, depress the clutch
pedal.
For CVT, downshift from 3rd to 2nd in the
manual mode.
The vehicle speed falls more than about
20 percent from the set speed.
Any time the vehicle speed falls below
25 mph (40 km/h).
When the vehicle skids and ESP
® (if
equipped) is activated.
To resume the previously set speed, push
the “RES/ACC” switch (4) and turn on the
“SET” indicator light. Besides, the vehicle
speed has to be above 25 mph (40 km/h)
when the vehicle is not in the above condi-
tions.
To turn off the cruise control system, push
the “CRUISE” switch (1) and make sure
the “CRUISE” indicator light is off.
Also, if the malfunction indicator light in the
instrument cluster comes on or blinks, the
cruise control system will be turned off.
NOTE:
If you turn off the cruise control system, the
previously set speed in the memory is
cleared. Reset your cruising speed again.
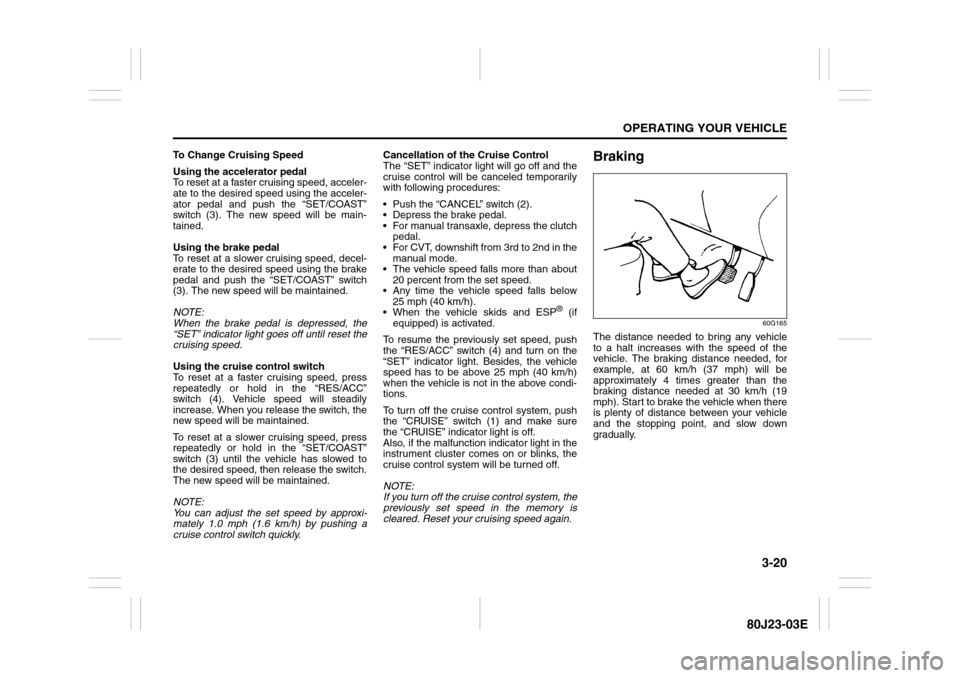
Braking
60G165
The distance needed to bring any vehicle
to a halt increases with the speed of the
vehicle. The braking distance needed, for
example, at 60 km/h (37 mph) will be
approximately 4 times greater than the
braking distance needed at 30 km/h (19
mph). Start to brake the vehicle when there
is plenty of distance between your vehicle
and the stopping point, and slow down
gradually.
Page 123 of 297
3-22
OPERATING YOUR VEHICLE
80J23-03E
65D451
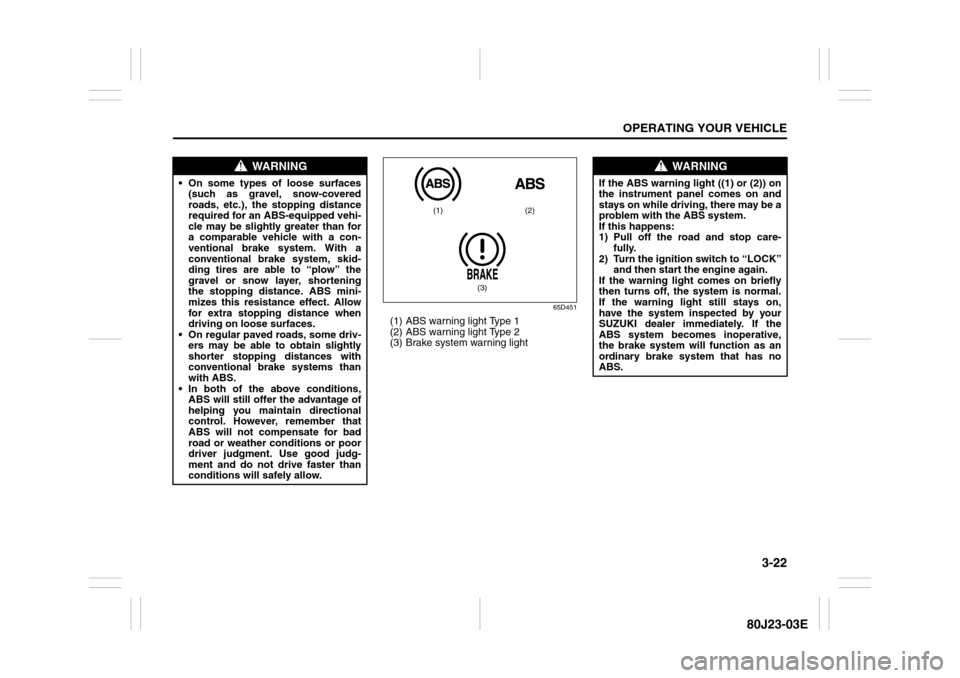
(1) ABS warning light Type 1
(2) ABS warning light Type 2
(3) Brake system warning light
WARNING
On some types of loose surfaces
(such as gravel, snow-covered
roads, etc.), the stopping distance
required for an ABS-equipped vehi-
cle may be slightly greater than for
a comparable vehicle with a con-
ventional brake system. With a
conventional brake system, skid-
ding tires are able to “plow” the
gravel or snow layer, shortening
the stopping distance. ABS mini-
mizes this resistance effect. Allow
for extra stopping distance when
driving on loose surfaces.
On regular paved roads, some driv-
ers may be able to obtain slightly
shorter stopping distances with
conventional brake systems than
with ABS.
In both of the above conditions,
ABS will still offer the advantage of
helping you maintain directional
control. However, remember that
ABS will not compensate for bad
road or weather conditions or poor
driver judgment. Use good judg-
ment and do not drive faster than
conditions will safely allow.
(1) (2)
(3)
WARNING
If the ABS warning light ((1) or (2)) on
the instrument panel comes on and
stays on while driving, there may be a
problem with the ABS system.
If this happens:
1) Pull off the road and stop care-
fully.
2) Turn the ignition switch to “LOCK”
and then start the engine again.
If the warning light comes on briefly
then turns off, the system is normal.
If the warning light still stays on,
have the system inspected by your
SUZUKI dealer immediately. If the
ABS system becomes inoperative,
the brake system will function as an
ordinary brake system that has no
ABS.
Page 124 of 297
3-23OPERATING YOUR VEHICLE
80J23-03E
How the ABS WorksA computer continuously monitors wheel
speed. The computer compares the
changes in wheel speed when braking. If
the wheels slow suddenly, indicating a
skidding situation, the computer will
change braking pressure several times
each second to prevent the wheels from
locking. When you start your vehicle or
when you accelerate after a hard stop, you
may hear a momentary motor or clicking
noise as the system resets or checks itself.
Electronic Stability Program
(ESP
®) (if equipped)
ESP
® is a registered trademark of Daimler
AG.
The Electronic Stability Program (ESP
®)
helps to control the vehicle during corner-
ing if front wheels or rear wheels skid. It
also assists you in maintaining traction
while accelerating on loose or slippery
road surfaces. It does this by regulating the
engine’s output, and by selectively apply-
ing the brakes. In addition, ESP
® helps to
avoid skidding by controlling braking pres-
sure.
WARNING
If the ABS warning light ((1) or (2))
and the Brake system warning light
(3) on the instrument panel simulta-
neously stay on or come on when
driving, both anti-lock function and
rear brake force control function (pro-
portioning valve function) of the ABS
system may have failed. This could
cause the rear wheels to skid or the
vehicle to spin during braking on a
slippery road or hard braking on a
dry paved road. If both warning lights
come on, drive carefully, avoiding
hard braking as much as possible,
and ask your SUZUKI dealer to
inspect the ABS system immediately.
WARNING
The ABS may not work properly if
tires or wheels other than those
specified in the owner’s manual are
used. This is because the ABS works
by comparing changes in wheel
speed. When replacing tires or
wheels, use only the size and type
specified in this owner’s manual.
WARNING
The ESP
® cannot enhance the vehi-
cle’s driving stability in all situations
and does not control your vehicle’s
entire braking system. The ESP
® can-
not prevent accidents, including
those resulting from excessive speed
in turns, or hydroplaning. Only a safe
and attentive driver can prevent acci-
dents. The capabilities of an ESP
®-
equipped vehicle must never be used
as a substitute for careful driving.
Page 134 of 297
4-1DRIVING TIPS
80J23-03E
52D078S
Break-In Catalytic Converter
68KM085
The purpose of the catalytic converter is to
minimize the amount of harmful pollutants
in your vehicle’s exhaust. Use of leaded
fuel in vehicles equipped with catalytic
converters is prohibited by federal law,
because lead deactivates the pollutant-
reducing components of the catalyst sys-
tem.
The converter is designed to last the life of
the vehicle under normal usage and when
unleaded fuel is used. No special mainte-
nance is required on the converter. How-
ever, it is very important to keep the engine
properly tuned. Engine misfiring, which
can result from an improperly tuned
engine, may cause overheating of the cat-
alyst. This may result in permanent heat
damage to the catalyst and other vehicle
components.
WARNING
Wear Your Seat Belts at All Times.
Even though air bags are equipped
at the front seating positions, the
driver and all passengers should
be properly restrained at all times,
using the seat belts provided. Refer
to the “Seat Belts and Child
Restraint Systems” section for
instructions on proper use of the
seat belts.
Never drive while under the influ-
ence of alcohol or other drugs.
Alcohol and drugs can seriously
impair your ability to drive safely,
greatly increasing the risk of injury
to yourself and others. You should
also avoid driving when you are
tired, sick, irritated or under stress.
CAUTION
The future performance and reliabil-
ity of the engine depends on the care
and restraint exercised during its
early life. It is especially important to
observe the following precautions
during the initial 960 km (600 miles)
of vehicle operation.
After starting, do not race the
engine. Warm it up gradually.
Avoid prolonged vehicle operation
at a constant speed. Moving parts
will break in better if you vary your
speed.
Start off from a stop slowly. Avoid
full throttle starts.
Avoid hard stopping, especially
during the first 320 km (200 miles)
of driving.
Do not drive slowly with the tran-
saxle in a high gear.
Drive the vehicle at moderate
engine speeds.
Instrument Panel: 3, 8
Page 135 of 297
4-2
DRIVING TIPS
80J23-03E
54G584S
Improving Fuel EconomyThe following instructions will help you
improve fuel economy.
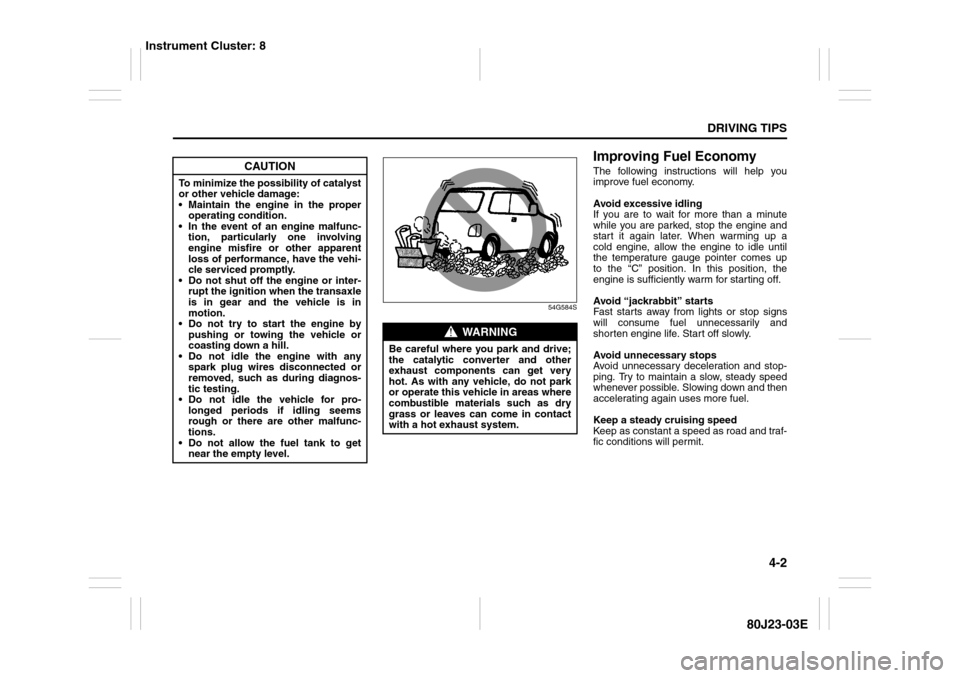
Avoid excessive idling
If you are to wait for more than a minute
while you are parked, stop the engine and
start it again later. When warming up a
cold engine, allow the engine to idle until
the temperature gauge pointer comes up
to the “C” position. In this position, the
engine is sufficiently warm for starting off.
Avoid “jackrabbit” starts
Fast starts away from lights or stop signs
will consume fuel unnecessarily and
shorten engine life. Start off slowly.
Avoid unnecessary stops
Avoid unnecessary deceleration and stop-
ping. Try to maintain a slow, steady speed
whenever possible. Slowing down and then
accelerating again uses more fuel.
Keep a steady cruising speed
Keep as constant a speed as road and traf-
fic conditions will permit.
CAUTION
To minimize the possibility of catalyst
or other vehicle damage:
Maintain the engine in the proper
operating condition.
In the event of an engine malfunc-
tion, particularly one involving
engine misfire or other apparent
loss of performance, have the vehi-
cle serviced promptly.
Do not shut off the engine or inter-
rupt the ignition when the transaxle
is in gear and the vehicle is in
motion.
Do not try to start the engine by
pushing or towing the vehicle or
coasting down a hill.
Do not idle the engine with any
spark plug wires disconnected or
removed, such as during diagnos-
tic testing.
Do not idle the vehicle for pro-
longed periods if idling seems
rough or there are other malfunc-
tions.
Do not allow the fuel tank to get
near the empty level.
WARNING
Be careful where you park and drive;
the catalytic converter and other
exhaust components can get very
hot. As with any vehicle, do not park
or operate this vehicle in areas where
combustible materials such as dry
grass or leaves can come in contact
with a hot exhaust system.
Instrument Cluster: 8
Page 138 of 297
4-5DRIVING TIPS
80J23-03E
Tire ChainsTire chains should only be used if they are
needed to increase traction or are required
by law. Make sure that the chains you use
are small-link chains or cable-type chains
and are the correct size for your vehicle’s
tires. Also make sure that there is enough
clearance between the fenders and the
chains as installed on the tires.
Install the chains on the front tires tightly,
according to the chain manufacturer’s
instructions. Retighten the chains after
driving about 1.0 km (1/2 mile) if neces-
sary. With the chains installed, drive slowly.Do not drive through deep or rushing
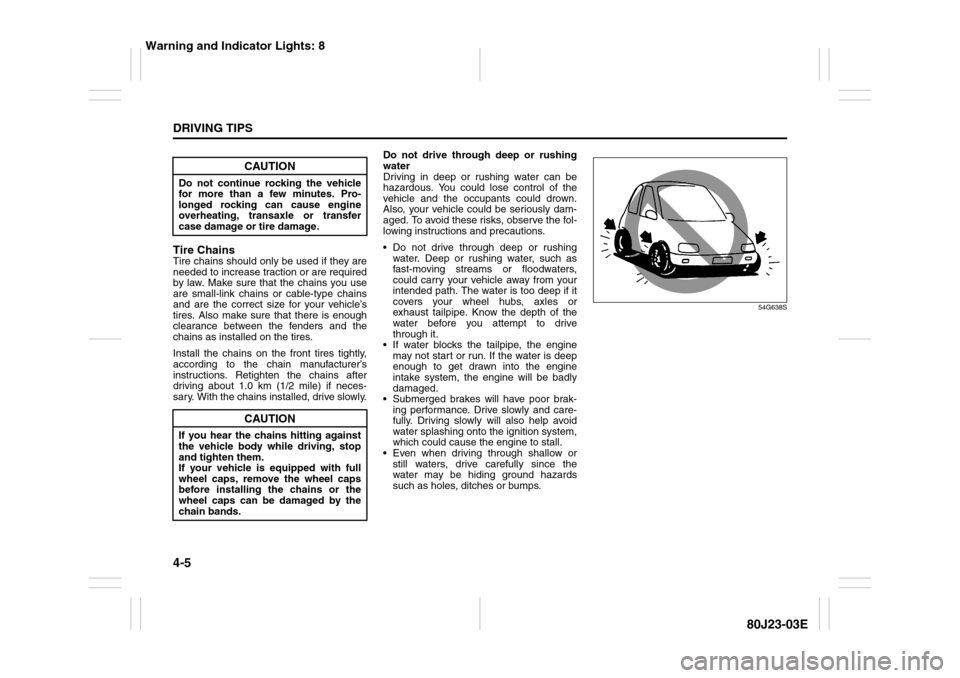
water
Driving in deep or rushing water can be
hazardous. You could lose control of the
vehicle and the occupants could drown.
Also, your vehicle could be seriously dam-
aged. To avoid these risks, observe the fol-
lowing instructions and precautions.
Do not drive through deep or rushing
water. Deep or rushing water, such as
fast-moving streams or floodwaters,
could carry your vehicle away from your
intended path. The water is too deep if it
covers your wheel hubs, axles or
exhaust tailpipe. Know the depth of the
water before you attempt to drive
through it.
If water blocks the tailpipe, the engine
may not start or run. If the water is deep
enough to get drawn into the engine
intake system, the engine will be badly
damaged.
Submerged brakes will have poor brak-
ing performance. Drive slowly and care-
fully. Driving slowly will also help avoid
water splashing onto the ignition system,
which could cause the engine to stall.
Even when driving through shallow or
still waters, drive carefully since the
water may be hiding ground hazards
such as holes, ditches or bumps.
54G638S
CAUTION
Do not continue rocking the vehicle
for more than a few minutes. Pro-
longed rocking can cause engine
overheating, transaxle or transfer
case damage or tire damage.
CAUTION
If you hear the chains hitting against
the vehicle body while driving, stop
and tighten them.
If your vehicle is equipped with full
wheel caps, remove the wheel caps
before installing the chains or the
wheel caps can be damaged by the
chain bands.
Warning and Indicator Lights: 8
Page 162 of 297
5-21OTHER CONTROLS AND EQUIPMENT
80J23-03E
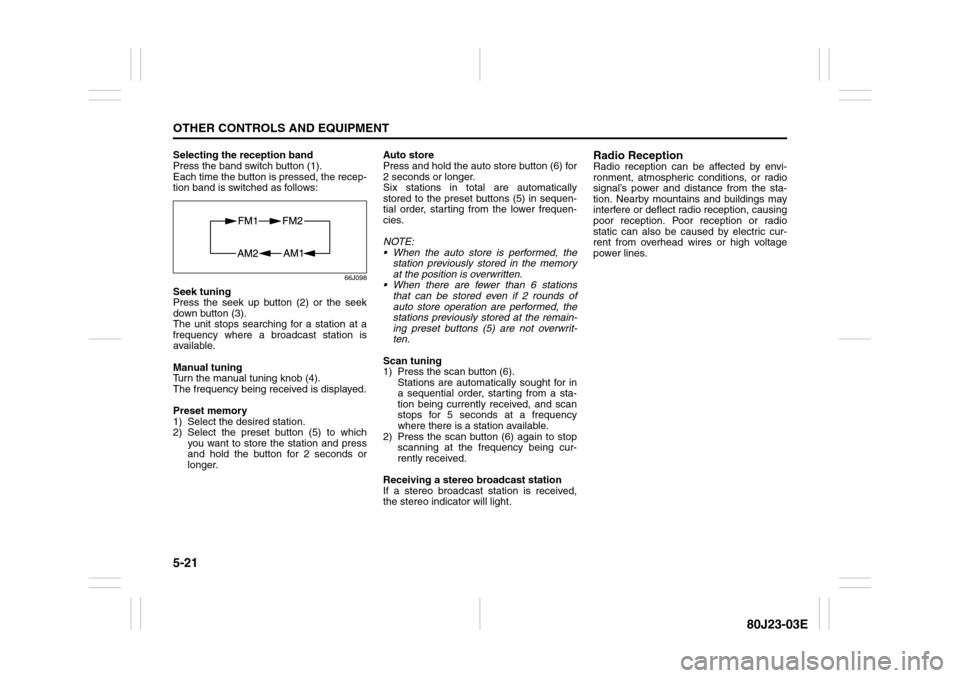
Selecting the reception band
Press the band switch button (1).
Each time the button is pressed, the recep-
tion band is switched as follows:
66J098
Seek tuning
Press the seek up button (2) or the seek
down button (3).
The unit stops searching for a station at a
frequency where a broadcast station is
available.
Manual tuning
Turn the manual tuning knob (4).
The frequency being received is displayed.
Preset memory
1) Select the desired station.
2) Select the preset button (5) to which
you want to store the station and press
and hold the button for 2 seconds or
longer.Auto store
Press and hold the auto store button (6) for
2 seconds or longer.
Six stations in total are automatically
stored to the preset buttons (5) in sequen-
tial order, starting from the lower frequen-
cies.
NOTE:
When the auto store is performed, the
station previously stored in the memory
at the position is overwritten.
When there are fewer than 6 stations
that can be stored even if 2 rounds of
auto store operation are performed, the
stations previously stored at the remain-
ing preset buttons (5) are not overwrit-
ten.
Scan tuning
1) Press the scan button (6).
Stations are automatically sought for in
a sequential order, starting from a sta-
tion being currently received, and scan
stops for 5 seconds at a frequency
where there is a station available.
2) Press the scan button (6) again to stop
scanning at the frequency being cur-
rently received.
Receiving a stereo broadcast station
If a stereo broadcast station is received,
the stereo indicator will light.
Radio ReceptionRadio reception can be affected by envi-
ronment, atmospheric conditions, or radio
signal’s power and distance from the sta-
tion. Nearby mountains and buildings may
interfere or deflect radio reception, causing
poor reception. Poor reception or radio
static can also be caused by electric cur-
rent from overhead wires or high voltage
power lines.
Page 173 of 297
5-32
OTHER CONTROLS AND EQUIPMENT
80J23-03E
XM MODE
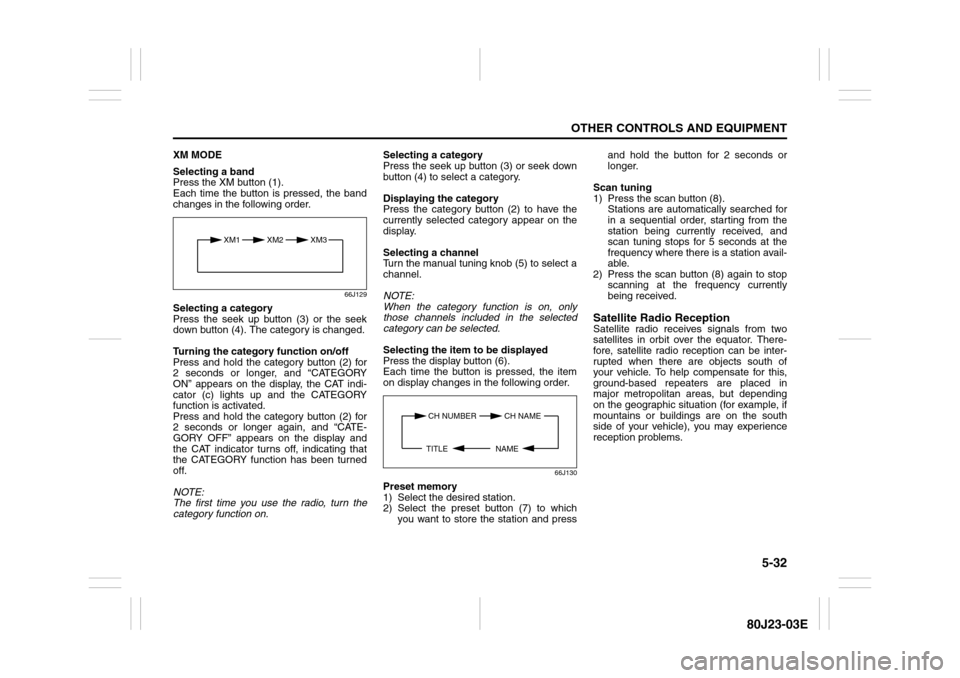
Selecting a band
Press the XM button (1).
Each time the button is pressed, the band
changes in the following order.
66J129
Selecting a category
Press the seek up button (3) or the seek
down button (4). The category is changed.
Turning the category function on/off
Press and hold the category button (2) for
2 seconds or longer, and “CATEGORY
ON” appears on the display, the CAT indi-
cator (c) lights up and the CATEGORY
function is activated.
Press and hold the category button (2) for
2 seconds or longer again, and “CATE-
GORY OFF” appears on the display and
the CAT indicator turns off, indicating that
the CATEGORY function has been turned
off.
NOTE:
The first time you use the radio, turn the
category function on.Selecting a category
Press the seek up button (3) or seek down
button (4) to select a category.
Displaying the category
Press the category button (2) to have the
currently selected category appear on the
display.
Selecting a channel
Turn the manual tuning knob (5) to select a
channel.
NOTE:
When the category function is on, only
those channels included in the selected
category can be selected.
Selecting the item to be displayed
Press the display button (6).
Each time the button is pressed, the item
on display changes in the following order.
66J130
Preset memory
1) Select the desired station.
2) Select the preset button (7) to which
you want to store the station and pressand hold the button for 2 seconds or
longer.
Scan tuning
1) Press the scan button (8).
Stations are automatically searched for
in a sequential order, starting from the
station being currently received, and
scan tuning stops for 5 seconds at the
frequency where there is a station avail-
able.
2) Press the scan button (8) again to stop
scanning at the frequency currently
being received.
Satellite Radio ReceptionSatellite radio receives signals from two
satellites in orbit over the equator. There-
fore, satellite radio reception can be inter-
rupted when there are objects south of
your vehicle. To help compensate for this,
ground-based repeaters are placed in
major metropolitan areas, but depending
on the geographic situation (for example, if
mountains or buildings are on the south
side of your vehicle), you may experience
reception problems.
XM1 XM2
XM3
CH NUMBER CH NAME
NAME TITLE