2010 SUBARU TRIBECA oil type
[x] Cancel search: oil typePage 112 of 422
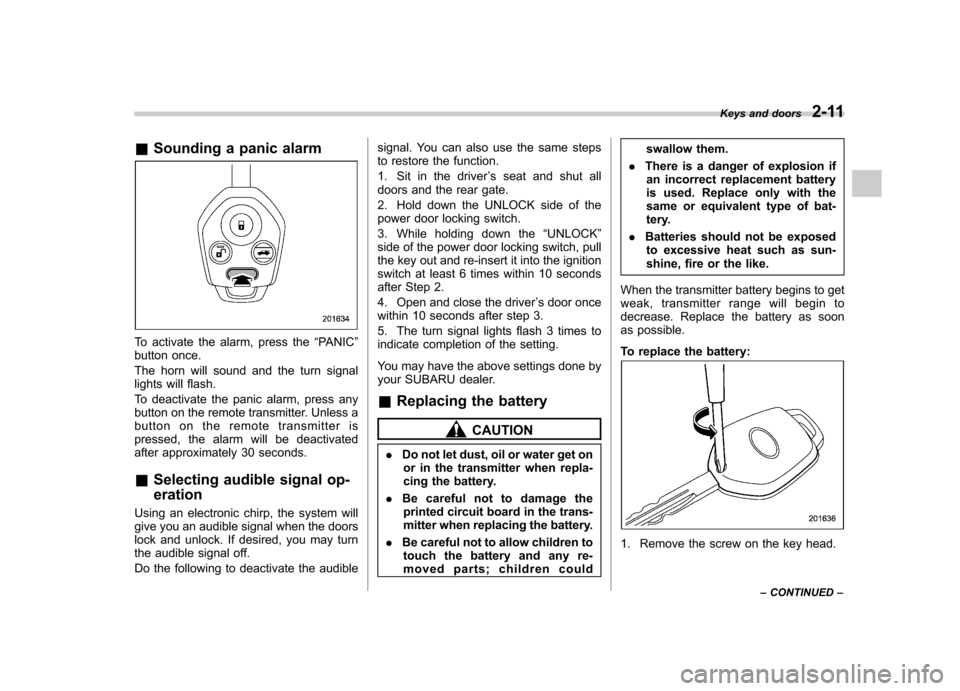
&Sounding a panic alarm
To activate the alarm, press the “PANIC ”
button once.
The horn will sound and the turn signal
lights will flash.
To deactivate the panic alarm, press any
button on the remote transmitter. Unless a
button on the remote transmitter is
pressed, the alarm will be deactivated
after approximately 30 seconds. & Selecting audible signal op- eration
Using an electronic chirp, the system will
give you an audible signal when the doors
lock and unlock. If desired, you may turn
the audible signal off.
Do the following to deactivate the audible signal. You can also use the same steps
to restore the function.
1. Sit in the driver
’s seat and shut all
doors and the rear gate.
2. Hold down the UNLOCK side of the
power door locking switch.
3. While holding down the “UNLOCK ”
side of the power door locking switch, pull
the key out and re-insert it into the ignition
switch at least 6 times within 10 seconds
after Step 2.
4. Open and close the driver ’s door once
within 10 seconds after step 3.
5. The turn signal lights flash 3 times to
indicate completion of the setting.
You may have the above settings done by
your SUBARU dealer.
& Replacing the battery
CAUTION
. Do not let dust, oil or water get on
or in the transmitter when repla-
cing the battery.
. Be careful not to damage the
printed circuit board in the trans-
mitter when replacing the battery.
. Be careful not to allow children to
touch the battery and any re-
moved parts; children could swallow them.
. There is a danger of explosion if
an incorrect replacement battery
is used. Replace only with the
same or equivalent type of bat-
tery.
. Batteries should not be exposed
to excessive heat such as sun-
shine, fire or the like.
When the transmitter battery begins to get
weak, transmitter range will begin to
decrease. Replace the battery as soon
as possible.
To replace the battery:
1. Remove the screw on the key head. Keys and doors
2-11
– CONTINUED –
Page 254 of 422
sing the brake pedal repeatedly will toggle
the feature ON or OFF each time.
7. To exit the remote transmitter and
feature programming mode, turn the igni-
tion switch to the“LOCK ”position, remove
the key from the ignition switch and test
operation of the remote transmitter(s) and
horn confirmation feature. & System maintenance
! Changing the batteries
CAUTION
. Do not let dust, oil or water get on
or in the remote engine start
transmitter when replacing the
battery.
. Be careful not to damage the
printed circuit board in the re-
mote engine start transmitter
when replacing the battery.
. Be careful not to allow children to
touch the battery and any re-
moved parts; children could
swallow them.
. There is a danger of explosion if
an incorrect replacement battery
is used. Replace only with the
same or equivalent type of bat-
tery. .
Batteries should not be exposed
to excessive heat such as sun-
shine, fire or the like.
The two 3-volt lithium batteries (modelCR-1220 ) supplied in your remote engine
start transmitter should last approximately
three years, depending on usage. When
the batteries begin to weaken, you will
notice a decrease in range (distance from
the vehicle that your remote engine start
system operates). Follow the instructions
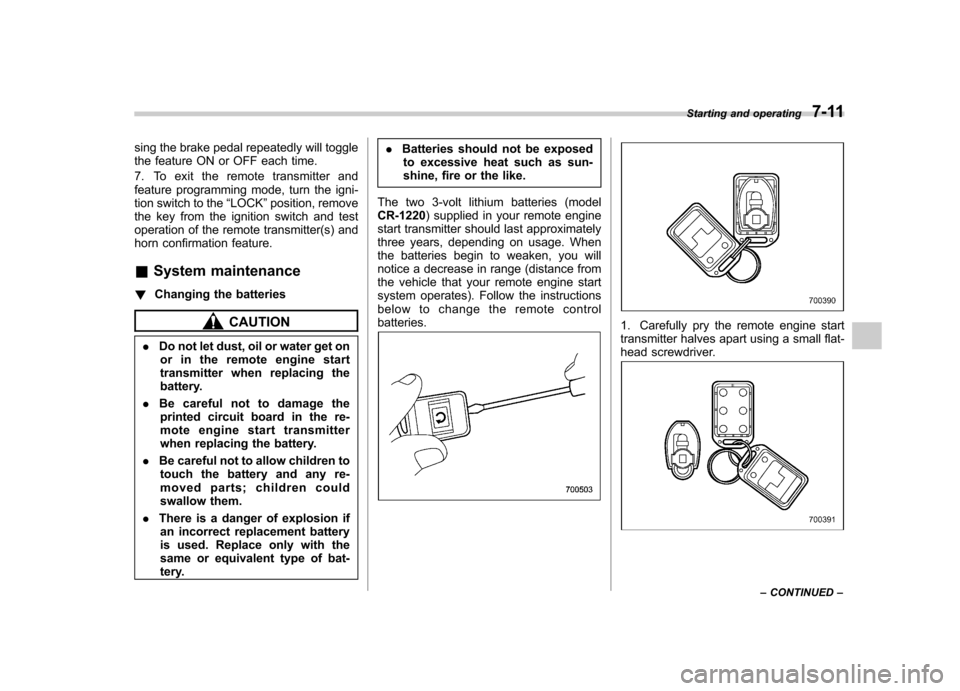
below to change the remote controlbatteries.1. Carefully pry the remote engine start
transmitter halves apart using a small flat-
head screwdriver.
Starting and operating 7-11
– CONTINUED –
Page 314 of 422
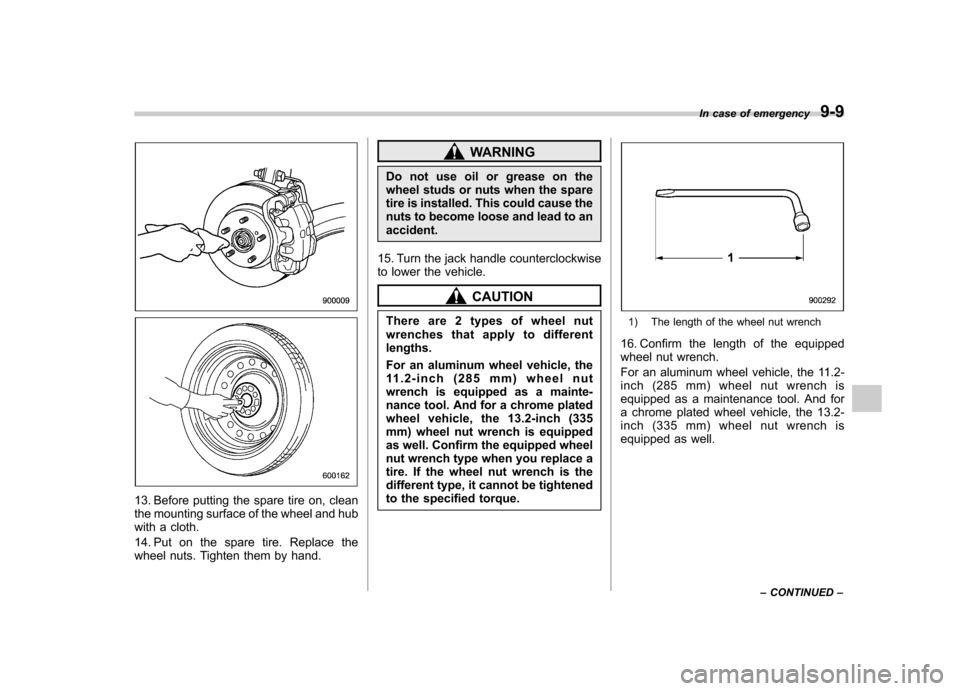
13. Before putting the spare tire on, clean
the mounting surface of the wheel and hub
with a cloth.
14. Put on the spare tire. Replace the
wheel nuts. Tighten them by hand.
WARNING
Do not use oil or grease on the
wheel studs or nuts when the spare
tire is installed. This could cause the
nuts to become loose and lead to anaccident.
15. Turn the jack handle counterclockwise
to lower the vehicle.
CAUTION
There are 2 types of wheel nut
wrenches that apply to differentlengths.
For an aluminum wheel vehicle, the
11.2-inch (285 mm) wheel nut
wrench is equipped as a mainte-
nance tool. And for a chrome plated
wheel vehicle, the 13.2-inch (335
mm) wheel nut wrench is equipped
as well. Confirm the equipped wheel
nut wrench type when you replace a
tire. If the wheel nut wrench is the
different type, it cannot be tightened
to the specified torque.
1) The length of the wheel nut wrench
16. Confirm the length of the equipped
wheel nut wrench.
For an aluminum wheel vehicle, the 11.2-
inch (285 mm) wheel nut wrench is
equipped as a maintenance tool. And for
a chrome plated wheel vehicle, the 13.2-
inch (335 mm) wheel nut wrench is
equipped as well. In case of emergency
9-9
– CONTINUED –
Page 332 of 422
Maintenance schedule....................................... 11-3
Maintenance precautions ................................... 11-3
Before checking or servicing in the engine compartment .................................................... 11-4
When you do checking or servicing in the engine compartment while the engine is running .......... 11-4
Engine hood ....................................................... 11-4
Engine compartment overview .......................... 11-6
Engine oil ............................................................ 11-7
Checking the oil level ......................................... 11-7
Changing the oil and oil filter .............................. 11-8
Recommended grade and viscosity .................... 11-9
Recommended grade and viscosity under severe driving conditions ............................... 11-10
Cooling system ................................................ 11-11
Hose and connections ...................................... 11-11
Engine coolant ................................................. 11-11
Air cleaner element .......................................... 11-14
Replacing the air cleaner element ..................... 11-14
Spark plugs ...................................................... 11-15
Recommended spark plugs .............................. 11-15
Drive belts ........................................................ 11-15
Automatic transmission fluid .......................... 11-16
Checking the fluid level .................................... 11-16
Recommended fluid ......................................... 11-17
Front differential gear oil ................................. 11-17
Checking the oil level ....................................... 11-17
Recommended grade and viscosity .................. 11-18
Rear differential gear oil .................................. 11-18
Checking the gear oil level ............................... 11-18 Recommended grade and viscosity
.................. 11-19
Power steering fluid ........................................ 11-19
Checking the fluid level .................................... 11-19
Recommended fluid ......................................... 11-20
Brake fluid ........................................................ 11-20
Checking the fluid level .................................... 11-20
Recommended brake fluid ............................... 11-21
Brake booster .................................................. 11-21
Brake pedal ...................................................... 11-22
Checking the brake pedal free play .................. 11-22
Checking the brake pedal reserve distance....... 11-22
Replacement of brake pad and lining ............ 11-22
Breaking-in of new brake pads and linings ....... 11-23
Parking brake stroke ....................................... 11-23
Tires and wheels .............................................. 11-24
Types of tires ................................................... 11-24
Tire pressure monitoring system (TPMS) .......... 11-24
Tire inspection ................................................. 11-25
Tire pressures and wear .................................. 11-26
Wheel balance ................................................. 11-28
Wear indicators ............................................... 11-28
Tire rotation direction mark .............................. 11-28
Tire rotation ..................................................... 11-29
Tire replacement .............................................. 11-29
Wheel replacement .......................................... 11-30
Aluminum wheels ............................................ 11-30
Chrome plated wheels (if equipped) .............. 11-31
Windshield washer fluid .................................. 11-32
Replacement of wiper blades ......................... 11-33
Windshield wiper blade assembly ..................... 11-34
Maintenance and service
11
Page 342 of 422
Cooling system
WARNING
Never attempt to remove the radia-
tor cap until the engine has been
shut off and has cooled down
completely. Since the coolant is
under pressure, you may suffer
serious burns from a spray of boil-
ing hot coolant when the cap isremoved.
CAUTION
. Vehicles are filled at the factory
with SUBARU Super Coolant that
does not require the first change
for 11 years/137,500 miles (11
years/220,000 km). This coolant
should not be mixed with any
other brand or type of coolant
during this period. Mixing with a
different coolant will reduce the
life of the coolant. Should it be
necessary to top off the coolant
for any reason, use only
SUBARU Super Coolant.
If the SUBARU Super Coolant is
diluted with another brand or
type, the maintenance interval is shortened to that of the mixingcoolant.
. Do not splash the engine coolant
over painted parts. The alcohol
contained in the engine coolant
may damage the paint surface.
& Hose and connections
Your vehicle employs an electric cooling
fan which is thermostatically controlled to
operate when the engine coolant reaches
a specific temperature.
If the radiator cooling fan does not operate
even when the engine coolant tempera-
ture gauge exceeds the normal operating
range, the cooling fan circuit may be
defective. Check the fuse and replace it
if necessary. If the fuse is not blown, have
the cooling system checked by your
SUBARU dealer.
If frequent addition of coolant is neces-
sary, there may be a leak in the engine
cooling system. It is recommended that
the cooling system and connections be
checked for leaks, damage, or looseness. &
Engine coolant
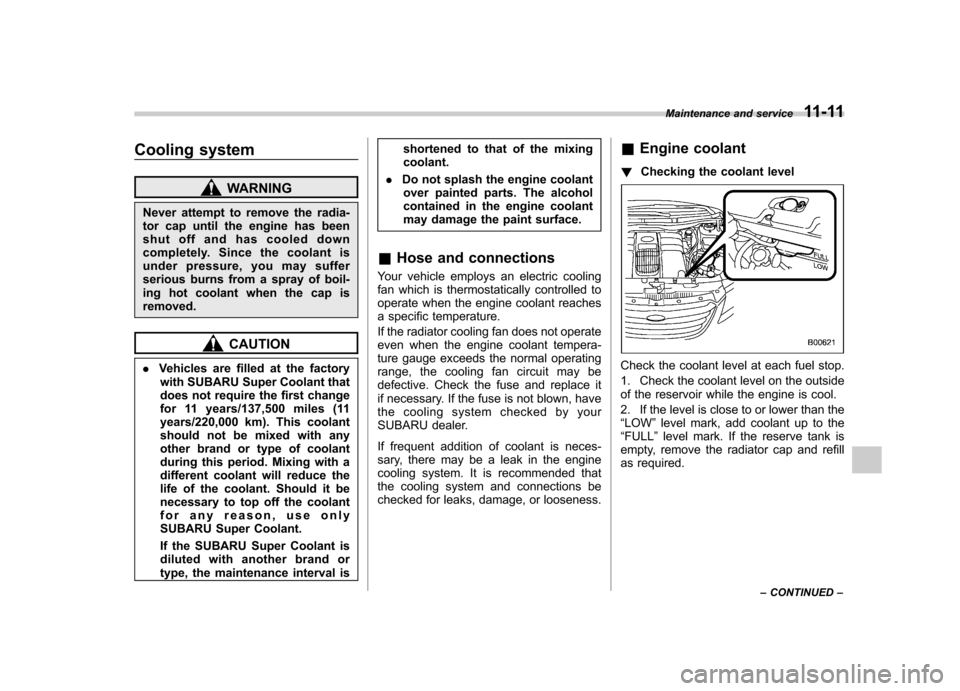
! Checking the coolant level
Check the coolant level at each fuel stop.
1. Check the coolant level on the outside
of the reservoir while the engine is cool.
2. If the level is close to or lower than the “LOW ”level mark, add coolant up to the
“ FULL ”level mark. If the reserve tank is
empty, remove the radiator cap and refill
as required. Maintenance and service
11-11
– CONTINUED –
Page 348 of 422
&Recommended fluid
Use one of the following types of auto-
matic transmission fluid. SUBARU ATF
IDEMITSU ATF HP
NOTE
Using any non-specified type of auto-
matic transmission fluid could result in
damage inside the transmission. When
replacing the automatic transmission
fluid, be sure to use a fluid of the types
specified above. Front differential gear oil &
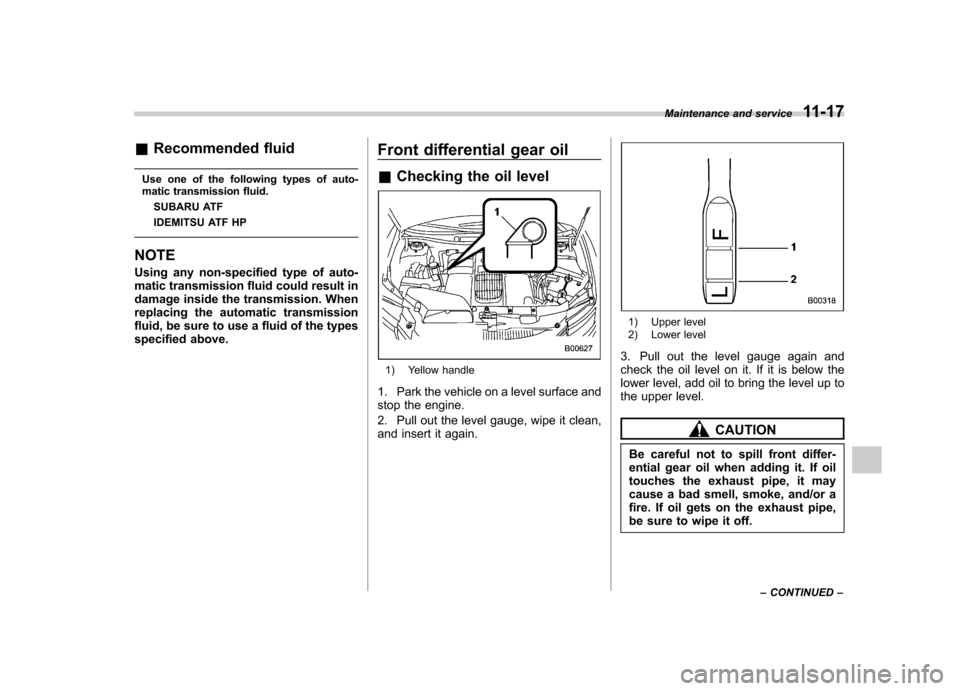
Checking the oil level
1) Yellow handle
1. Park the vehicle on a level surface and
stop the engine.
2. Pull out the level gauge, wipe it clean,
and insert it again.
1) Upper level
2) Lower level
3. Pull out the level gauge again and
check the oil level on it. If it is below the
lower level, add oil to bring the level up to
the upper level.
CAUTION
Be careful not to spill front differ-
ential gear oil when adding it. If oil
touches the exhaust pipe, it may
cause a bad smell, smoke, and/or a
fire. If oil gets on the exhaust pipe,
be sure to wipe it off. Maintenance and service
11-17
– CONTINUED –
Page 351 of 422
11-20Maintenance and service
.Be careful not to spill power
steering fluid when adding it. If
power steering fluid touches the
exhaust pipe, it may cause a bad
smell, smoke, and/or a fire. If
power steering fluid gets on the
exhaust pipe, be sure to wipe itoff.
The power steering fluid expands greatly
as its temperature rises; the fluid level
differs according to fluid temperature.
Therefore, the reservoir tank has two
different checking ranges for hot and coldfluids.
Check the power steering fluid level
monthly.
1. Park the vehicle on a level surface,
and stop the engine.
2. Check the fluid level of the reservoir tank.
When the fluid is hot after the vehicle has
been run: Check that the oil level isbetween “HOT MIN ”and “HOT MAX ”on
the surface of the reservoir tank.
When the fluid is cool before the vehicle is
run: Check that the oil level is between“ COLD MIN ”and “COLD MAX ”on the
surface of the reservoir tank.
3. If the fluid level is lower than the
applicable “MIN ”line, add the recom- mended fluid as necessary to bring the
level between the
“MIN ”and “MAX ”line.
If the fluid level is extreme low, it may
indicate possible leakage. Consult your
SUBARU dealer for inspection.
& Recommended fluid
Use one of the following types of auto-
matic transmission fluid. SUBARU ATF
IDEMITSU ATF HP “Dexron III ”Type Automatic Transmis-
sion Fluid Brake fluid &
Checking the fluid level
WARNING
. Never let brake fluid contact your
eyes because brake fluid can be
harmful to your eyes. If brake
fluid gets in your eyes, immedi-
ately flush them thoroughly with
clean water. For safety, when
performing this work, wearing
eye protection is advisable.
. Brake fluid absorbs moisture
from the air. Any absorbed moist-
ure can cause a dangerous loss
of braking performance.
. If the vehicle requires frequent
refilling, there may be a leak. If
you suspect a problem, have the
vehicle checked at your SUBARU
dealer.
CAUTION
. When adding brake fluid, be care-
ful not to allow any dirt into the
reservoir.
. Never splash the brake fluid over
painted surfaces or rubber parts.
Page 362 of 422
as well. Always use a wheel nut
wrench for an aluminum wheel. If
you use a wrench for a chrome
plated wheel, you cannot tighten it
to the specified torque.
. When any of the wheels are removed
and replaced for tire rotation or to change
a flat tire, always check the tightness of
the wheel nuts after driving approximately
600 miles (1,000 km). If any nut is loose,
tighten it to the following specified torque.
A tightening sequence specification for the
wheel nuts can be found in “Flat tires ”F 9-
6.
Wheel nuts tightening torque for alu-
minum wheel:
74 to 89 lbf·ft (100 to 120 N·m, 10 to 12 kgf·m)
This torque is equivalent to applying
approximately 88 to 110 lbs (40 to 50 kg)
at the top of the wheel nut wrench. . Never apply oil to the threaded parts,
wheel nuts, or tapered surface of the wheel. . Never let the wheel rub against sharp
protrusions or curbs.. When wheel nuts, balance weights, or
the center cap is replaced, be sure to
replace them with genuine SUBARU parts
designed for aluminum wheels. Chrome plated wheels (if equipped)
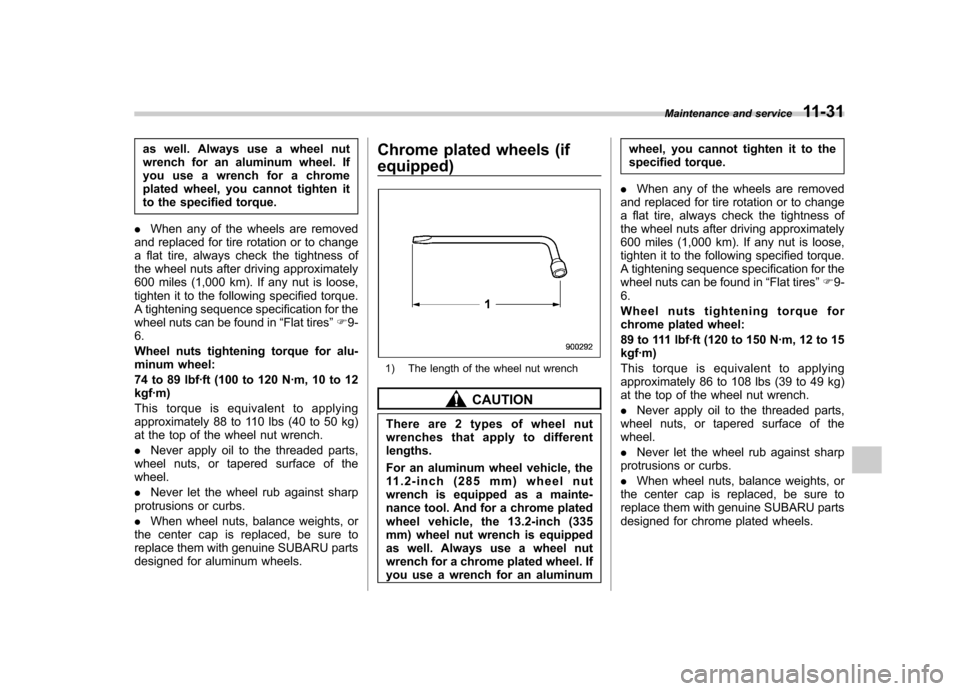
1) The length of the wheel nut wrench
CAUTION
There are 2 types of wheel nut
wrenches that apply to differentlengths.
For an aluminum wheel vehicle, the
11.2-inch (285 mm) wheel nut
wrench is equipped as a mainte-
nance tool. And for a chrome plated
wheel vehicle, the 13.2-inch (335
mm) wheel nut wrench is equipped
as well. Always use a wheel nut
wrench for a chrome plated wheel. If
you use a wrench for an aluminum wheel, you cannot tighten it to the
specified torque.
. When any of the wheels are removed
and replaced for tire rotation or to change
a flat tire, always check the tightness of
the wheel nuts after driving approximately
600 miles (1,000 km). If any nut is loose,
tighten it to the following specified torque.
A tightening sequence specification for the
wheel nuts can be found in “Flat tires ”F 9-
6.
Wheel nuts tightening torque for
chrome plated wheel:
89 to 111 lbf·ft (120 to 150 N·m, 12 to 15 kgf·m)
This torque is equivalent to applying
approximately 86 to 108 lbs (39 to 49 kg)
at the top of the wheel nut wrench. . Never apply oil to the threaded parts,
wheel nuts, or tapered surface of the wheel. . Never let the wheel rub against sharp
protrusions or curbs.. When wheel nuts, balance weights, or
the center cap is replaced, be sure to
replace them with genuine SUBARU parts
designed for chrome plated wheels. Maintenance and service
11-31