2010 SUBARU TRIBECA jump start
[x] Cancel search: jump startPage 145 of 422
3-16Instruments and controls
work properly.
When the warning light illuminates,
the ABS function shuts down; how-
ever, the conventional brake system
continues to operate normally. .The warning light does not illu-
minate when the ignition switch
is turned to the “ON ”position.
. The warning light illuminates
when the ignition switch is
turned to the “ON ”position, but
it does not turn off even when the
vehicle speed exceeds approxi-
mately 8 mph (12 km/h).
. The warning light illuminates dur-
ing driving.
If any of these conditions occur,
have the ABS system repaired at
the first available opportunity by
your SUBARU dealer.
The ABS warning light illuminates to-
gether with the brake system warning light
if the EBD system becomes malfunction-
ing. For further details of the EBD system
malfunction warning, refer to “Brake sys-
tem warning light ”F 3-16.
NOTE
If the warning light behavior is as
described in the following, the ABS system may be considered normal. .
The warning light illuminates right
after the engine is started but turns off
immediately, remaining off.. The warning light remains illumi-
nated after the engine has been started,
but it turns off when the vehicle speed
reaches approximately 8 mph (12km/h).. The warning light illuminates during
driving, but it turns off immediately and
remains off.
When driving with an insufficient battery
voltage such as when the engine is jump
started, the ABS warning light may illumi-
nate. This is due to the low battery voltage
and does not indicate a malfunction.
When the battery becomes fully charged,
the light will turn off.
& Brake system
warning light
WARNING
. Driving with the brake system
warning light illuminated is dan-
gerous. This indicates your brake
system may not be working
properly. If the light remains
illuminated, have the brakes in-
spected by a SUBARU dealer immediately.
. If at all in doubt about whether
the brakes are operating prop-
erly, do not drive the vehicle.
Have your vehicle towed to the
nearest SUBARU dealer for re-
pair.
This light has the following three functions. ! Parking brake warning
The light illuminates with the parking
brake applied while the ignition switch is
in the “ON ”position. It turns off when the
parking brake is fully released. ! Brake fluid level warning
This light illuminates when the brake fluid
level has dropped to near the “MIN ”level
of the brake fluid reservoir with the ignition
switch in the “ON ”position and with the
parking brake fully released.
If the brake system warning light should
illuminate while driving (with the parking
brake fully released and with the ignition
switch positioned in “ON ”), it could be an
indication of leaking of brake fluid or worn
brake pads. If this occurs, immediately
stop the vehicle at the nearest safe place
and check the brake fluid level. If the fluid
level is below the “MIN ”mark in the
reservoir, do not drive the vehicle. Have
Page 255 of 422
7-12Starting and operating
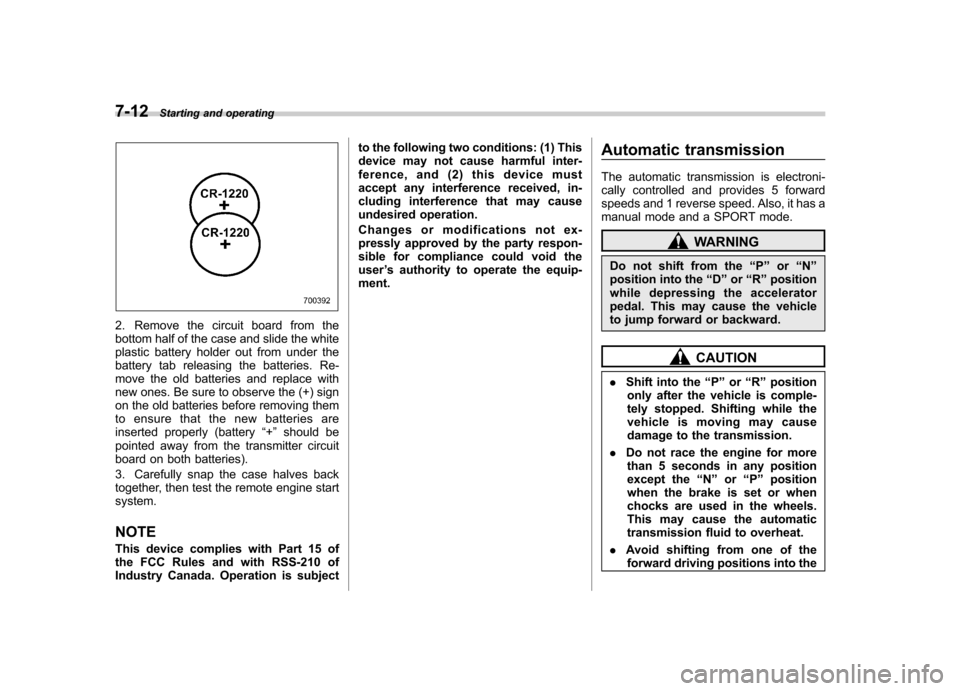
2. Remove the circuit board from the
bottom half of the case and slide the white
plastic battery holder out from under the
battery tab releasing the batteries. Re-
move the old batteries and replace with
new ones. Be sure to observe the (+) sign
on the old batteries before removing them
to ensure that the new batteries are
inserted properly (battery “+ ” should be
pointed away from the transmitter circuit
board on both batteries).
3. Carefully snap the case halves back
together, then test the remote engine startsystem.
NOTE
This device complies with Part 15 of
the FCC Rules and with RSS-210 of
Industry Canada. Operation is subject to the following two conditions: (1) This
device may not cause harmful inter-
ference, and (2) this device must
accept any interference received, in-
cluding interference that may cause
undesired operation.
Changes or modifications not ex-
pressly approved by the party respon-
sible for compliance could void theuser
’s authority to operate the equip-
ment. Automatic transmission
The automatic transmission is electroni-
cally controlled and provides 5 forward
speeds and 1 reverse speed. Also, it has a
manual mode and a SPORT mode.
WARNING
Do not shift from the “P ” or “N ”
position into the “D ” or “R ” position
while depressing the accelerator
pedal. This may cause the vehicle
to jump forward or backward.
CAUTION
. Shift into the “P ” or “R ” position
only after the vehicle is comple-
tely stopped. Shifting while the
vehicle is moving may cause
damage to the transmission.
. Do not race the engine for more
than 5 seconds in any position
except the “N ” or “P ” position
when the brake is set or when
chocks are used in the wheels.
This may cause the automatic
transmission fluid to overheat.
. Avoid shifting from one of the
forward driving positions into the
Page 265 of 422
7-22Starting and operating
voltage such as when the engine is jump
started, the ABS warning light may illumi-
nate. This is due to the low battery voltage
and does not indicate a malfunction.
When the battery becomes fully charged,
the light will turn off. Electronic Brake Force Dis-
tribution (EBD) system
The EBD system maximizes the effective-
ness of the brakes by allowing the rear
brakes to supply a greater proportion of
the braking force. It functions by adjusting
the distribution of braking force to the rear
wheels in accordance with the vehicle
’s
loading condition and speed.
The EBD system is an integral part of the
ABS system and uses some of the ABSsystem ’s components to perform its func-
tion of optimizing the distribution of brak-
ing force. If any of the ABS components
used by the EBD system malfunction, the
EBD system also stops working.
When the EBD system is operating, you
may hear a chattering noise or feel a slight
vibration in the brake pedal. This is normal
and does not indicate a malfunction. &
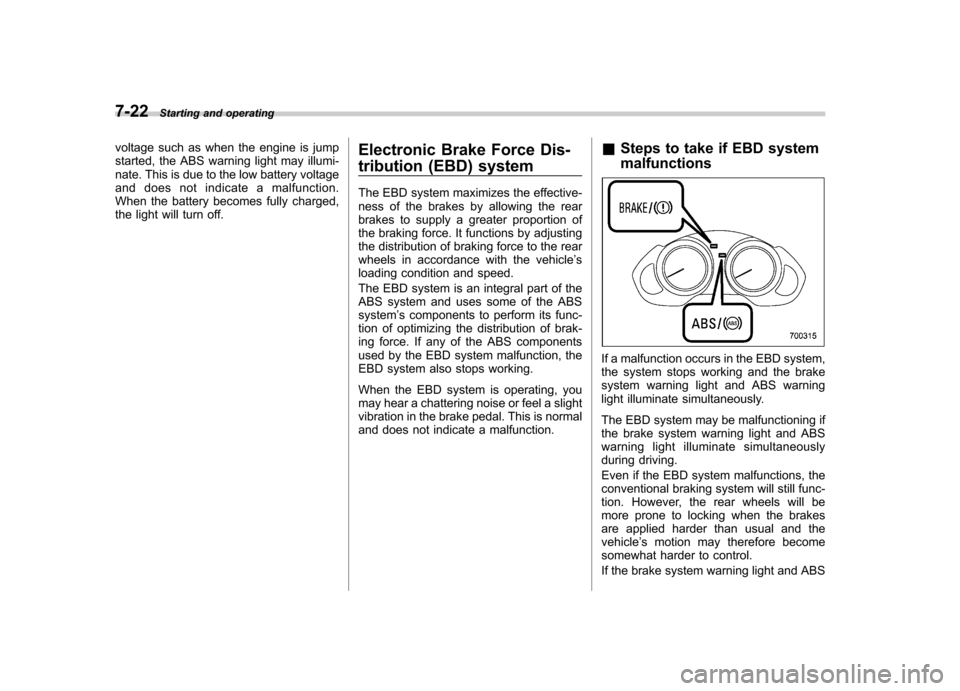
Steps to take if EBD system malfunctions
If a malfunction occurs in the EBD system,
the system stops working and the brake
system warning light and ABS warning
light illuminate simultaneously.
The EBD system may be malfunctioning if
the brake system warning light and ABS
warning light illuminate simultaneously
during driving.
Even if the EBD system malfunctions, the
conventional braking system will still func-
tion. However, the rear wheels will be
more prone to locking when the brakes
are applied harder than usual and thevehicle ’s motion may therefore become
somewhat harder to control.
If the brake system warning light and ABS
Page 284 of 422
underbody. Clear off any such matter from
the underbody. If the vehicle is used with
these materials trapped or adhering to the
underbody, a mechanical breakdown or
fire could occur. .Secure all cargo carried inside the
vehicle and make certain that it is not
piled higher than the seatbacks. During
sudden stops or jolts, unsecured cargo
could be thrown around in the vehicle and
cause injury. Do not pile heavy loads on
the roof. Those loads raise the vehicle ’s
center of gravity and make it more prone
to tip over. . If you must rock the vehicle to free it
from sand or mud, depress the accelerator
pedal slightly and move the select lever
back and forth between “D ” and “R ”
repeatedly. Do not race the engine. For
the best possible traction, avoid spinning
the wheels when trying to free the vehicle. . When the road surface is extremely
slippery, you can obtain better traction by
starting the vehicle with the transmission
in 2nd than 1st. . Never equip your vehicle with tires
larger than those specified in this manual.. Wash the vehicle ’s underbody after off-
road driving. Suspension components are
particularly prone to dirt buildup, so they
need to be washed thoroughly. . Frequent driving of an AWD model under hard-driving conditions such as
rough roads or off roads will necessitate
more frequent replacement of engine oil,
brake fluid and transmission oil than that
specified in the maintenance schedule
described in the
“Warranty and Mainte-
nance Booklet ”.
Remember that damage done to your
SUBARU while operating it off-road and
not using common sense precautions
such as those listed above is not eligible
for warranty coverage. Winter driving
&
Operation during cold weather
Carry some emergency equipment, such
as a window scraper, a bag of sand,
flares, a small shovel and jumper cables.
Check the battery and cables. Cold
temperatures reduce battery capacity.
The battery must be in good condition to
provide enough power for cold winterstarts.
Use an engine oil of proper grade and
viscosity for cold weather. Heavy summer
oil will cause harder starting.
Keep the door locks from freezing by
squirting them with deicer or glycerin. Driving tips
8-7
– CONTINUED –
Page 306 of 422
If you park your vehicle in an emergency......... 9-2
Spare tire ............................................................. 9-2
Removing the spare tire ...................................... 9-3
Re-storage of spare tire ....................................... 9-4
Temporary spare tire ........................................... 9-5
Flat tires ............................................................... 9-6
Changing a flat tire .............................................. 9-6
Tire pressure monitoring system (TPMS) . ........... 9-11
Jump starting ..................................................... 9-12
How to jump start ............................................... 9-12 Engine overheating
........................................... 9-14
If steam is coming from the engine compartment ................................................... 9-14
If no steam is coming from the engine compartment ................................................... 9-14
Towing ................................................................ 9-14
Towing and tie-down hooks. ............................... 9-15
Using a flat-bed truck. ........................................ 9-17
Towing with all wheels on the ground ................. 9-17
Rear gate –if the rear gate cannot be
unlocked .......................................................... 9-18
Maintenance tools ............................................. 9-19
Jack and jack handle ......................................... 9-19
In case of emergency
9
Page 317 of 422
9-12In case of emergency
Jump starting
WARNING
. Battery fluid is SULFURIC ACID.
Do not let it come in contact with
the eyes, skin, clothing or thevehicle.
If battery fluid gets on you,
thoroughly flush the exposed
area with water immediately. Get
medical help if the fluid has
entered your eyes.
If battery fluid is accidentally
swallowed, immediately drink a
large amount of milk or water,
and obtain immediate medicalhelp.
Keep everyone including chil-
dren away from the battery.
. The gas generated by a battery
explodes if a flame or spark is
brought near it. Do not smoke or
light a match while jump starting.
. Never attempt jump starting if the
discharged battery is frozen. It
could cause the battery to burst
or explode.
. Whenever working on or around
a battery, always wear suitable eye protectors, and remove metal
objects such as rings, bands or
other metal jewelry.
. Be sure the jumper cables and
clamps on them do not have
loose or missing insulation.
Do not jump start unless cables
in suitable condition are avail-able.
. A running engine can be danger-
ous. Keep your fingers, hands,
clothing, hair and tools away
from the cooling fan, belts and
any other moving engine parts.
Removing rings, watches and
ties is advisable.
. Jump starting is dangerous if it is
done incorrectly. If you are un-
sure about the proper procedure
for jump starting, consult a com-
petent mechanic.
When your vehicle does not start due to a
run down (discharged) battery, the vehicle
may be jump started by connecting your
battery to another battery (called the
booster battery) with jumper cables. &
How to jump start
1. Make sure the booster battery is 12
volts and the negative terminal isgrounded.
2. If the booster battery is in another
vehicle, do not let the two vehicles touch.
3. Turn off all unnecessary lights and accessories.
4. Connect the jumper cables exactly in
the sequence illustrated.
Page 318 of 422
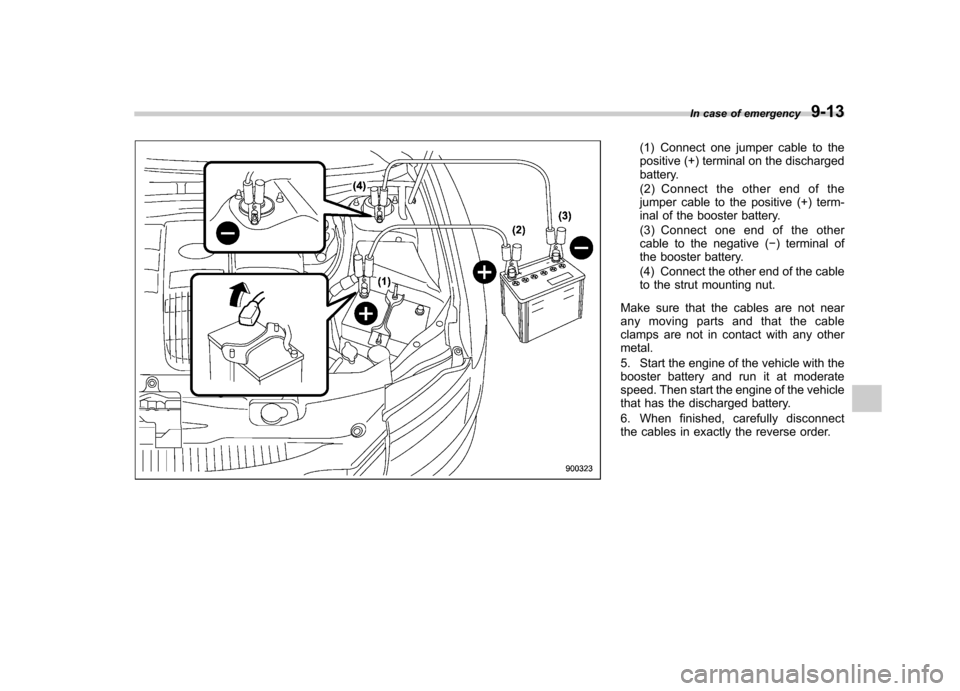
(1) Connect one jumper cable to the
positive (+) terminal on the discharged
battery.
(2) Connect the other end of the
jumper cable to the positive (+) term-
inal of the booster battery.
(3) Connect one end of the other
cable to the negative (�) terminal of
the booster battery.
(4) Connect the other end of the cable
to the strut mounting nut.
Make sure that the cables are not near
any moving parts and that the cable
clamps are not in contact with any othermetal.
5. Start the engine of the vehicle with the
booster battery and run it at moderate
speed. Then start the engine of the vehicle
that has the discharged battery.
6. When finished, carefully disconnect
the cables in exactly the reverse order. In case of emergency
9-13
Page 411 of 422
14-2Index
A
ABS (Anti-lock Brake System) ..................................... 7-20
Warning light ................................................. 3-15, 7-21
Accessories ....................................................... 5-2, 11-40
Accessory power outlet ............................................... 6-10
Active head restraint ..................................................... 1-6
Air cleaner element ................................................... 11-14
Air conditioner Automatic climate control system ............................... 4-5
Air filtration system ..................................................... 4-11
Airflow ........................................................................ 4-2
Airflow mode selection .................................................. 4-3
Airflow selection
Automatic climate control system ............................... 4-8
Alarm system ............................................................ 2-16
All-Wheel Drive warning light ....................................... 3-18
Aluminum wheel ....................................................... 11-30
Cleaning ............................................................... 10-3
Antenna system ........................................................... 5-2
Anti-lock Brake System (ABS) ..................................... 7-20
Arming the system ..................................................... 2-17
Armrest ..................................................................... 1-13
AT OIL TEMP warning light ......................................... 3-13
Audio Antenna system ....................................................... 5-2
Auxiliary input jack ................................................. 5-28
Control button ........................................................ 5-26
Set......................................................................... 5-3
Auto-dimming mirror/compass .............................. 3-38, 3-41
Automatic climate control system ................................... 4-5 Automatic transmission
............................................... 7-12
Capacities ............................................................. 12-3
Fluid ................................................................... 11-16
MANUAL mode ...................................................... 7-16
Oil temperature warning light (AT OIL TEMP) ............. 3-13
Select lever ........................................................... 7-13
Shift lock function ................................................... 7-14
Shift lock release .................................................... 7-14
SPORT mode ........................................................ 7-18
Automatic/Emergency Locking Retractor (A/ELR) ........... 1-18
BBattery .................................................................... 11-37
Drainage prevention function ..................................... 2-6
Jump starting ......................................................... 9-12
Replacement (remote keyless entry system) .............. 2-11
Booster seat .............................................................. 1-37
Bottle holder ............................................................... 6-9
Brake Assist .................................................................... 7-19
Booster ....................................................... 7-19, 11-21
Fluid ................................................................... 11-20
Pad and lining ...................................................... 11-23
Parking ....................................................... 7-29, 11-23
Pedal .................................................................. 11-22
System .................................................................. 7-19
Brake pedal Free play ............................................................. 11-22
Reserve distance .................................................. 11-22
Brake system ............................................................. 7-19
Warning light .......................................................... 3-16