2010 SUBARU FORESTER tire type
[x] Cancel search: tire typePage 21 of 402

&Driving when tired or sleepy
WARNING
When you are tired or sleepy, your
reaction time will be delayed and
your perception, judgment and at-
tentiveness will be impaired. If you
drive when tired or sleepy, your,
your passengers ’and other per-
sons ’chances of being involved in
a serious accident may increase.
Please do not continue to drive but
instead find a safe place to rest if you
are tired or sleepy. On long trips, you
should make periodic rest stops to refresh
yourself before continuing on your journey.
When possible, you should share the
driving with others. &
Modification of your vehicleCAUTION
Your vehicle should not be modified
other than with genuine SUBARU
parts and accessories. Other types
of modifications could affect its
performance, safety or durability,
and may even violate governmental
regulations. In addition, damage or
performance problems resulting
from modification may not be cov-
ered under warranties.
& Car phone/cell phone and driving
CAUTION
Do not use a car phone/cell phone
while driving; it may distract your
attention from driving and can lead
to an accident. If you use a car
phone/cell phone, pull off the road
and park in a safe place before
using your phone. In some States/
Provinces, only hands-free phones
may legally be used while driving. &
Driving with pets
Unrestrained pets can interfere with your
driving and distract your attention from
driving. In a collision or sudden stop,
unrestrained pets or cages can be thrown
around inside the vehicle and hurt you or
your passengers. Besides, the pets can
be hurt under these situations. It is also for
their own safety that pets should be
properly restrained in your vehicle. Re-
strain a pet with a special traveling
harness which can be secured to the rear
seat with a seatbelt or use a pet carrier
which can be secured to the rear seat by
routing a seatbelt through the carrier ’s
handle. Never restrain pets or pet carriers
in the front passenger ’s seat. For further
information, consult your veterinarian,
local animal protection society or petshop. 7
– CONTINUED –
Page 22 of 402

8
&Tire pressures
Check and, if necessary, adjust the
pressure of each tire (including the spare)
at least once a month and before any long
journey.
Check the tire pressure when the tires are
cold. Use a pressure gauge to adjust the
tire pressures to the values shown on the
tire placard. For detailed information, referto “Tires and wheels ”F 11-30.
WARNING
Driving at high speeds with exces-
sively low tire pressures can cause
the tires to deform severely and to
rapidly become hot. A sharp in-
crease in temperature could cause
tread separation, and destruction of
the tires. The resulting loss of
vehicle control could lead to anaccident. &
California proposition 65 warning
WARNING
Engine exhaust, some of its consti-
tuents, and certain vehicle compo-
nents contain or emit chemicals
known to the State of California to
cause cancer and birth defects or
other reproductive harm. In addi-
tion, certain fluids in vehicles and
certain components of product wear
contain or emit chemicals known to
the State of California to cause
cancer and birth defects or other
reproductive harm.
& On-pavement and off-road driving
This vehicle is classified as a utility
vehicle. Utility vehicles have a significantly
higher rollover rate than other types of
vehicles. Your vehicle has a higher ground
clearance and higher center of gravity,
making it more likely to roll over than
ordinary passenger cars. It also handles
and maneuvers differently from other
passenger cars. For this reason, please
read carefully the following section and
follow the instructions and precautions in order to prevent serious injury or death
due to loss of control, rollover and other
accidents. Refer to
“On-pavement and off-
road driving ”F 8-6.
Page 34 of 402

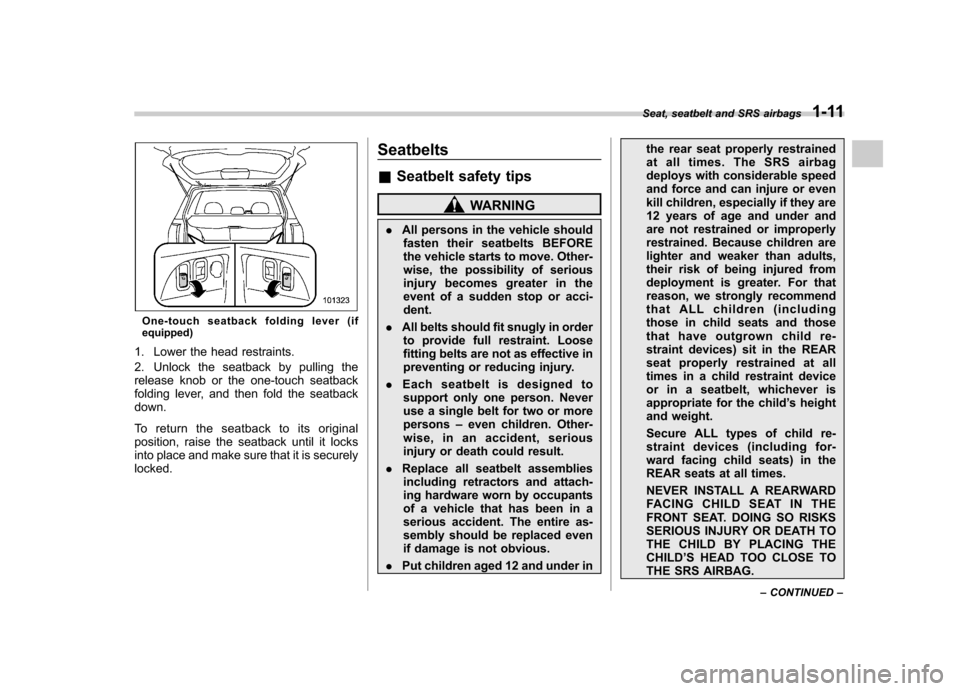
One-touch seatback folding lever (if equipped)
1. Lower the head restraints.
2. Unlock the seatback by pulling the
release knob or the one-touch seatback
folding lever, and then fold the seatbackdown.
To return the seatback to its original
position, raise the seatback until it locks
into place and make sure that it is securelylocked. Seatbelts &
Seatbelt safety tips
WARNING
. All persons in the vehicle should
fasten their seatbelts BEFORE
the vehicle starts to move. Other-
wise, the possibility of serious
injury becomes greater in the
event of a sudden stop or acci-dent.
. All belts should fit snugly in order
to provide full restraint. Loose
fitting belts are not as effective in
preventing or reducing injury.
. Each seatbelt is designed to
support only one person. Never
use a single belt for two or morepersons –even children. Other-
wise, in an accident, serious
injury or death could result.
. Replace all seatbelt assemblies
including retractors and attach-
ing hardware worn by occupants
of a vehicle that has been in a
serious accident. The entire as-
sembly should be replaced even
if damage is not obvious.
. Put children aged 12 and under in the rear seat properly restrained
at all times. The SRS airbag
deploys with considerable speed
and force and can injure or even
kill children, especially if they are
12 years of age and under and
are not restrained or improperly
restrained. Because children are
lighter and weaker than adults,
their risk of being injured from
deployment is greater. For that
reason, we strongly recommend
that ALL children (including
those in child seats and those
that have outgrown child re-
straint devices) sit in the REAR
seat properly restrained at all
times in a child restraint device
or in a seatbelt, whichever is
appropriate for the child
’s height
and weight.
Secure ALL types of child re-
straint devices (including for-
ward facing child seats) in the
REAR seats at all times.
NEVER INSTALL A REARWARD
FACING CHILD SEAT IN THE
FRONT SEAT. DOING SO RISKS
SERIOUS INJURY OR DEATH TO
THE CHILD BY PLACING THECHILD ’S HEAD TOO CLOSE TO
THE SRS AIRBAG.
Seat, seatbelt and SRS airbags
1-11
– CONTINUED –
Page 78 of 402

!Examples of the types of accidents in which the SRS curtain airbag will most
likely deploy.1) A severe side impact near the front seat
or the rear seat activates the SRS curtain airbag.
2) The vehicle rolls onto its side or the roof.
3) If the angle of vehicle tip-up is marginal or if the skidding vehicle ’s tires hit a
curbstone laterally.
Seat, seatbelt and SRS airbags
1-55
– CONTINUED –
Page 182 of 402

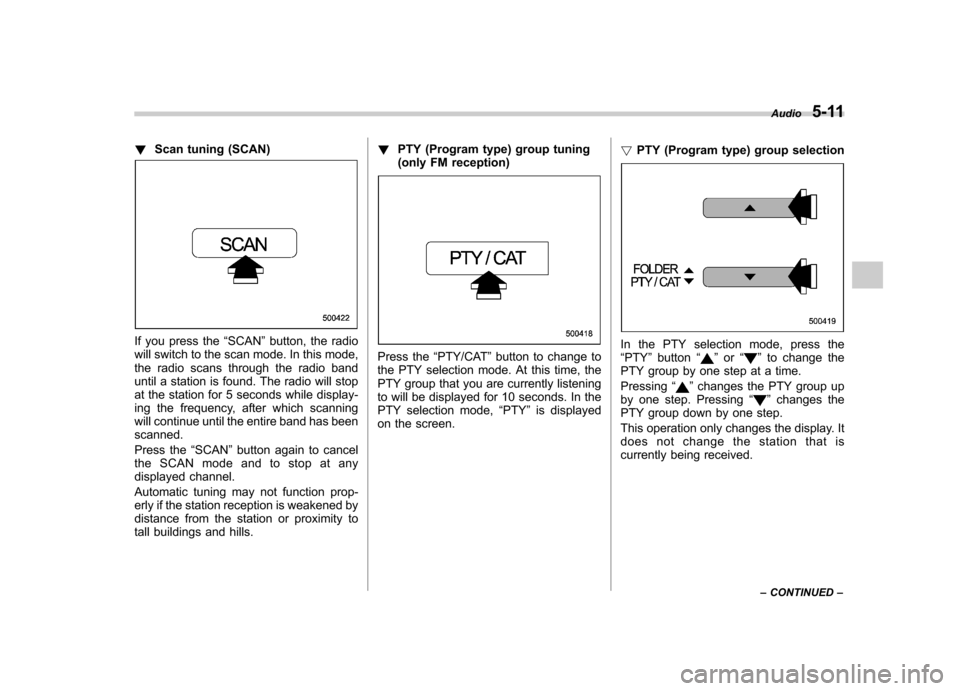
!Scan tuning (SCAN)
If you press the “SCAN ”button, the radio
will switch to the scan mode. In this mode,
the radio scans through the radio band
until a station is found. The radio will stop
at the station for 5 seconds while display-
ing the frequency, after which scanning
will continue until the entire band has beenscanned.
Press the “SCAN ”button again to cancel
the SCAN mode and to stop at any
displayed channel.
Automatic tuning may not function prop-
erly if the station reception is weakened by
distance from the station or proximity to
tall buildings and hills. !
PTY (Program type) group tuning
(only FM reception)
Press the “PTY/CAT ”button to change to
the PTY selection mode. At this time, the
PTY group that you are currently listening
to will be displayed for 10 seconds. In the
PTY selection mode, “PTY ”is displayed
on the screen. !
PTY (Program type) group selectionIn the PTY selection mode, press the “PTY ”button “”or “”to change the
PTY group by one step at a time. Pressing “
”changes the PTY group up
by one step. Pressing “”changes the
PTY group down by one step.
This operation only changes the display. It
does not change the station that is
currently being received. Audio
5-11
– CONTINUED –
Page 229 of 402

7-12Starting and operating
feature programming can be adjusted
using the following procedure.
1. Open the driver ’s door (the driver ’s
door must remain opened throughout the
entire process).
2. Insert the key into the vehicle ’s ignition
switch and turn to the “ON ”position.
3. Locate the small black programming
button behind the fuse box cover, on the
driver ’s side left under the dashboard
panel.
4. Press and hold the black programming
button for 10 to 15 seconds. The horn will
honk and the turn signal lights will flash
three times to indicate that the system has
entered programming mode. At this point
you can proceed to either step 5 or step 6.
5. To program a remote transmitter:
press and release the “
”button on each
transmitter. The horn will honk and the
turn signal lights will flash one time to
indicate a successful transmitter learn
each time the “
”button is pressed. You
can program up to eight transmitters.
6. To toggle the Horn Confirmation chirps
ON/OFF: press and release the brake to
toggle the feature. The horn will chirp and
the turn signal lights will flash one time to
indicate Confirmation Horn Chirps are“ OFF ”. The horn will honk and the turn
signal lights will flash 2 times to indicate
Confirmation Horn Chirps are “ON ”. Pressing the brake pedal repeatedly will
toggle the feature ON or OFF each time.
7. To exit the remote transmitter and
feature programming mode, turn the igni-
tion switch to the
“LOCK ”position, remove
the key from the ignition switch and test
operation of the remote transmitter(s) and
horn confirmation feature.
& System maintenance
! Changing the remote control bat-teries
CAUTION
. Do not let dust, oil or water get on
or in the remote engine start
transmitter when replacing the
battery.
. Be careful not to damage the
printed circuit board in the re-
mote engine start transmitter
when replacing the battery.
. Be careful not to allow children to
touch the battery and any re-
moved parts; children could
swallow them.
. There is a danger of explosion if
an incorrect replacement battery
is used. Replace only with the
same or equivalent type of bat- tery.
. Batteries should not be exposed
to excessive heat such as sun-
shine, fire or the like.
The two 3-volt lithium batteries (modelCR-1220 ) supplied in your remote control
should last approximately 3 years, de-
pending on usage. When the batteries
begin to weaken, you will notice a
decrease in range (distance from the
vehicle that your remote control operates).
Follow the instructions below to change
the remote control batteries.
Page 243 of 402

7-26Starting and operating
that full vehicle control will be
maintained at all times and under
all conditions, its activation
should be seen as a sign that
the speed of the vehicle should
be reduced considerably.
. Whenever suspension compo-
nents, steering components, or
an axle are removed from a
vehicle equipped with the Vehicle
Dynamics Control system, have
an inspection of that system
performedbyanauthorized
SUBARU dealer.
. The following precautions should
be observed in order to ensure
that the Vehicle Dynamics Con-
trol system is operating properly: – All four wheels should be
fitted with tires of the same
size, type, and brand. Further-
more, the amount of wear
should be the same for all
four tires.
– Keep the tire pressure at the
proper level as shown on the
vehicle placard attached to
the driver ’s side door pillar.
– Use only the specified tem-
porary spare tire to replace a
flat tire. With a temporary spare tire, the effectiveness of
the Vehicle Dynamics Control
system is reduced and this
should be taken into account
when driving the vehicle in
such a condition.
In the event of wheelspin and/or skidding
on a slippery road surface and/or during
cornering and/or an evasive maneuver,
the Vehicle Dynamics Control system
adjusts the engine ’s output and the
wheels ’respective braking forces to help
maintain traction and directional control. . Traction Control Function
The traction control function is designed to
prevent spinning of the driving wheels on
slippery road surfaces, thereby helping to
maintain traction and directional control.
Activation of this function is shown by
steady illumination of the Vehicle Dy-
namics Control operation indicator light. . Skid Suppression Function
The skid suppression function is designed
to help maintain directional stability by
suppressing the wheels ’tendency to slide
sideways during steering operations. Acti-
vation of this function is shown by flashing
of the Vehicle Dynamics Control operation
indicator light. NOTE .
Slight twitching of the brake pedal
may be felt when the Vehicle Dynamics
Control system operates; a small de-
gree of vehicle or steering wheel shak-
ing may also be noticed in this situa-
tion. These are normal characteristics
of Vehicle Dynamics Control operation
and are no cause for alarm.. When driving off immediately after
starting the engine, a short-lived opera-
tion noise may be noticed coming from
the engine compartment. This noise is
generated as a result of a check being
performed on the Vehicle Dynamics
Control system and is normal.. Depending on the timing of activa-
tion of the brakes, the brake pedal may
seem to jolt when you drive off after
starting the engine. This is a conse-
quence of the Vehicle Dynamics Con-
trol operational check and is normal.. In the circumstances listed in the
following, the vehicle may be more
unstable than it feels to the driver.
The Vehicle Dynamics Control System
may therefore operate. Such operation
does not indicate a system fault.
–on gravel-covered or rutted
roads – on unfinished roads
– when the vehicle is fitted with
Page 244 of 402

snow tires or winter tires
. Activation of the Vehicle Dynamics
Control system will cause operation of
the steering wheel to feel slightly
different compared to that for normalconditions. . Even if the vehicle is equipped with
a Vehicle Dynamics Control system, it
is important that winter tires be used
when driving on snow-covered or icy
roads. (All four wheels should be fitted
with tires of the same size and brand.) . It is always important to reduce
speed when approaching a corner,
even if the vehicle is equipped with
Vehicle Dynamics Control. . All four wheels should be fitted with
tires of the same size, type, and brand;
furthermore, the amount of wear
should be the same for all four tires. If
these precautions are not observed
and non-matching tires are used, it is
quite possible that the Vehicle Dy-
namics Control system will be unable
to operate correctly as intended. . Always turn off the engine before
replacing a tire. Failure to do so may
render the Vehicle Dynamics Control
system unable to operate correctly. &
Vehicle Dynamics Control
system monitor
! Vehicle Dynamics Control opera-
tion indicator light
The indicator light illuminates when the
ignition switch is turned to the ON position;
it turns off approximately 2 seconds later.
This indicator light flashes during activa-
tion of the skid suppression function and is
illuminated steadily during activation of the
traction control function.
The following two situations could indicate
a malfunction of the Vehicle Dynamics
Control system; if either should occur,
have an authorized SUBARU dealer carry
out an inspection of that system at the first
available opportunity. .The indicator light does not illuminate when the ignition switch is turned to the
ON position. .
The indicator light does not turn off
approximately 2 seconds after the ignition
switch has been turned to the ON position. ! Vehicle Dynamics Control warning
light/Vehicle Dynamics Control OFF
indicator light
This single light has the function of
indicating malfunctions in the Vehicle
Dynamics Control system and the function
of indicating that the Vehicle Dynamics
Control system is not operating. It illumi-
nates in the event of a malfunction in the
system and is illuminated whenever the
system is not operating. Starting and operating
7-27
– CONTINUED –