2010 Seat Leon 5D radio
[x] Cancel search: radioPage 13 of 43
Audio mode
12Audio modeRadioIntroductionAdditional information:•Safety notes
⇒ page 6
•System overview ⇒page 8•TP function (Traffic Programme) ⇒page 16•Settings menus ⇒page 33Note
•Please bear in mind that in car parks, tunnels, areas with high buildings
or mountains the radio signal can be impaired.•F o i l o r m e t a l - c o a t e d s t i ck e r s a t t a ch e d t o t h e w i n d o w s m a y a f f e c t r e ce p t i o n
on vehicles with a window aerial.
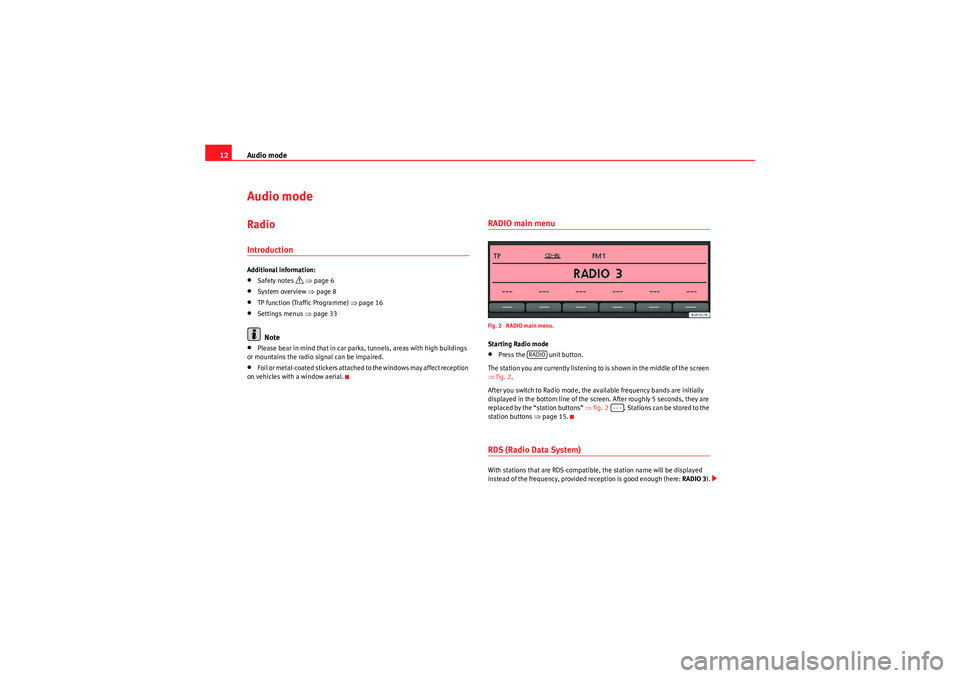
RADIO main menuFig. 2 RADIO main menu.Starting Radio mode•Press the unit button.
The station you are currently listening to is shown in the middle of the screen
⇒ fig. 2.
After you switch to Radio mode, the available frequency bands are initially
displayed in the bottom line of the screen. After roughly 5 seconds, they are
replaced by the “station buttons” ⇒fig. 2 . Stations can be stored to the
station buttons ⇒page 15.RDS (Radio Data System)With stations that are RDS-compatible, the station name will be displayed
instead of the frequency, provided reception is good enough (here: RADIO 3).
RADIO
- - -
sound_system_2_EN Seite 12 Mittwoch, 3. März 2010 6:03 18
Page 14 of 43
Audio mode13
Text information, known as radio text, can also be broadcast. It is possible to
adjust the display to show radio text ⇒page 34. Radio text will then be
shown instead of the station name. Not all stations support radio text. The
individual radio station is responsible for the texts displayed.
RDS also allows “automatic station tracking”. This means that the unit always
switches to the frequency that offers the best reception of the current radio
station as the vehicle travels from one area to the next. It is possible to
suppress automatic frequency changing ( ALTERNATIVE FREQUENCY
OFF)
⇒ page 34.
On some units it is possible to switch off the RDS function for travel in areas
where RDS is not used ⇒page 34.
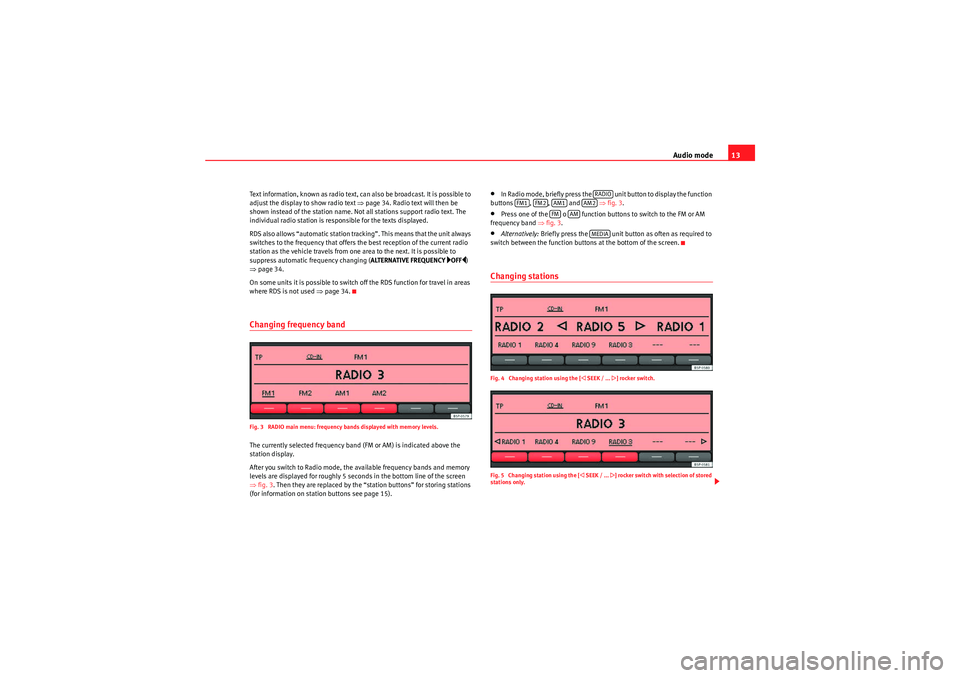
Changing frequency bandFig. 3 RADIO main menu: frequency bands displayed with memory levels.The currently selected frequency band (FM or AM) is indicated above the
station display.
After you switch to Radio mode, the available frequency bands and memory
levels are displayed for roughly 5 seconds in the bottom line of the screen
⇒fig. 3 . Then they are replaced by the “station buttons” for storing stations
(for information on station buttons see page 15).
•In Radio mode, briefly press the unit button to display the function
buttons , , and ⇒fig. 3 .•Press one of the o function buttons to switch to the FM or AM
frequency band ⇒fig. 3.•Alternatively: Briefly press the unit button as often as required to
switch between the function buttons at the bottom of the screen.Changing stationsFig. 4 Changing station using the [
SEEK / ...
] rocker switch.
Fig. 5 Changing station using the [
SEEK / ...
] rocker switch with selection of stored
stations only.
RADIO
FM1
FM2
AM1
AM2
FM
AM
MEDIA
sound_system_2_EN Seite 13 Mittwoch, 3. März 2010 6:03 18
Page 15 of 43
Audio mode
14Depending on the setting selected for the search mode ( SEEK MODE), the
unit either switches between all available stations or stored stations only
( SETUP : see page 34).•Briefly press the ⇒page 8, fig. 1 rocker switch to the left or
right.
AM mode: quickly browsing the frequency band
In AM mode it is possible to skip stations.•Press and hold the rocker switch.•When you release the rocker switch, the unit tunes to the
next station it can receive.
Tuning to a station frequency manually•Select the desired frequency band ⇒page 12.•Turn the setting knob ⇒page 8, fig. 1 until the desired station
frequency (e.g. 89.9 MHz) is displayed on the screen.
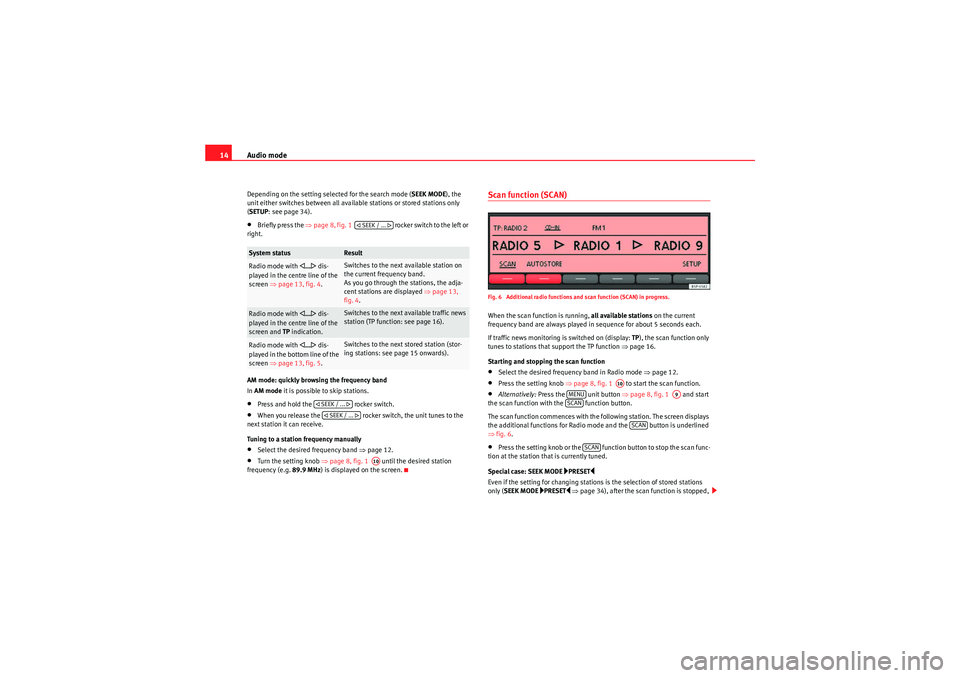
Scan function (SCAN)Fig. 6 Additional radio functions and scan function (SCAN) in progress.When the scan function is running, all available stations on the current
frequency band are always played in sequence for about 5 seconds each.
If traffic news monitoring is switched on (display: TP), the scan function only
tunes to stations that support the TP function ⇒page 16.
Starting and stopping the scan function•Select the desired frequency band in Radio mode ⇒page 12.•Press the setting knob ⇒page 8, fig. 1 to start the scan function.•Alternatively: Press the unit button ⇒page 8, fig. 1 and start
the scan function with the function button.
The scan function commences with the following station. The screen displays
the additional functions for Radio mode and the button is underlined
⇒ fig. 6.•Press the setting knob or the function button to stop the scan func-
tion at the station that is currently tuned.
Special case: SEEK MODE
PRESET
Even if the setting for changing stations is the selection of stored stations
only ( SEEK MODE
PRESET
⇒ page 34), after the scan function is stopped,
System status
Result
Radio mode with
... dis-
played in the centre line of the
screen ⇒page 13, fig. 4 .
Switches to the next available station on
the current frequency band.
As you go through the stations, the adja-
cent stations are displayed ⇒ page 13,
fig. 4 .
Radio mode with
... dis-
played in the centre line of the
screen and TP indication.
Switches to the next available traffic news
station (TP function: see page 16).
Radio mode with
... dis-
played in the bottom line of the
screen ⇒page 13, fig. 5 .
Switches to the next stored station (stor-
ing stations: see page 15 onwards).
SEEK / ...
SEEK / ... SEEK / ...
A10
A10
MENU
A9
SCAN
SCAN
SCAN
sound_system_2_EN Seite 14 Mittwoch, 3. März 2010 6:03 18
Page 16 of 43
Audio mode15
using the rocker switch will scan through all available stations
⇒ page 13, fig. 4.
Only when a station is selected using a station button, does the unit revert to
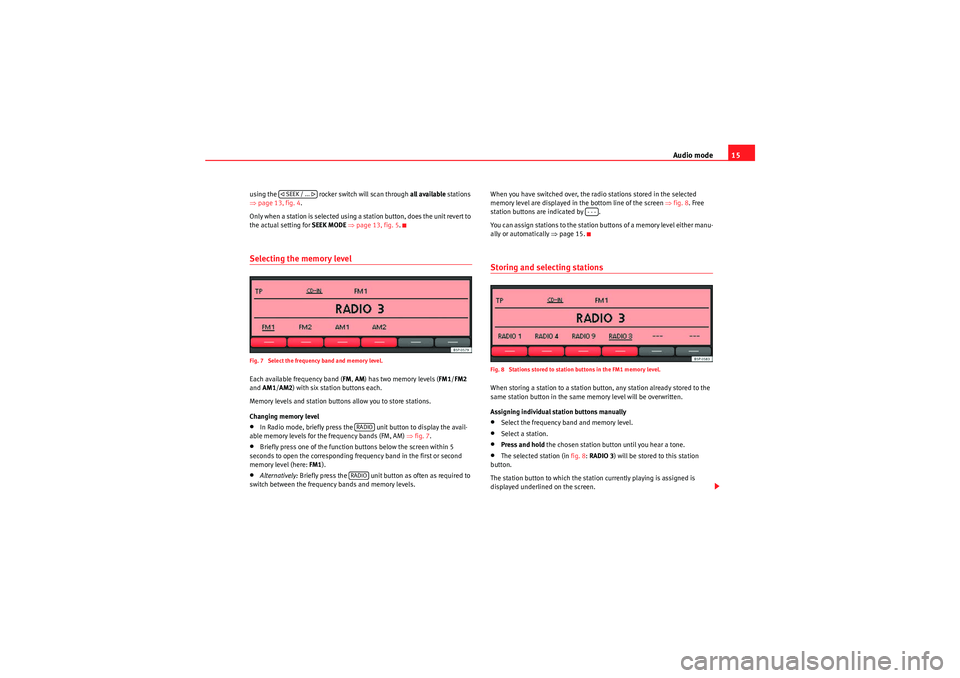
the actual setting for SEEK MODE ⇒ page 13, fig. 5 .Selecting the memory levelFig. 7 Select the frequency band and memory level.Each available frequency band ( FM, AM ) has two memory levels ( FM1/FM2
and AM1 /AM2 ) with six station buttons each.
Memory levels and station buttons allow you to store stations.
Changing memory level•In Radio mode, briefly press the unit button to display the avail-
able memory levels for the frequency bands (FM, AM) ⇒fig. 7.•Briefly press one of the function buttons below the screen within 5
seconds to open the corresponding frequency band in the first or second
memory level (here: FM1).•Alternatively: Briefly press the unit button as often as required to
switch between the frequency bands and memory levels. When you have switched over, the radio stations stored in the selected
memory level are displayed in the bottom line of the screen
⇒fig. 8 . Free
station buttons are indicated by .
You can assign stations to the station buttons of a memory level either manu-
ally or automatically ⇒page 15.
Storing and selecting stationsFig. 8 Stations stored to station buttons in the FM1 memory level.When storing a station to a station button, any station already stored to the
same station button in the same memory level will be overwritten.
Assigning individual station buttons manually•Select the frequency band and memory level.•Select a station.•Press and hold the chosen station button until you hear a tone.•The selected station (in fig. 8: RADIO 3 ) will be stored to this station
button.
The station button to which the station currently playing is assigned is
displayed underlined on the screen.
SEEK / ...
RADIORADIO
---
sound_system_2_EN Seite 15 Mittwoch, 3. März 2010 6:03 18
Page 17 of 43
Audio mode
16Storing stations automatically with Autostore (AUTOSTORE)
The Autostore function automatically stores the stations with the strongest
reception at the current moment to the six station buttons in the currently
selected memory level.•Select the frequency band and memory level.•Press the unit button to open the additional functions ⇒page 14,
fig. 6 .•Press and hold the function button until AUTOSTORE appears
in the centre line of the screen.•This procedure can take some seconds. When the stations have been
stored, AUTOSTORE disappears from the display.
Selecting stored stations•Select the frequency band and memory level in which the desired station
is stored.•Briefly press the station button above which the desired station is
displayed.•Alternatively: Depending on the settings, you can browse through the
stored stations with the rocker switch (SETUP: SEEK MODE PRESET
⇒ page 34).
It is only possible to play a stored station if it can be received at your current
location.
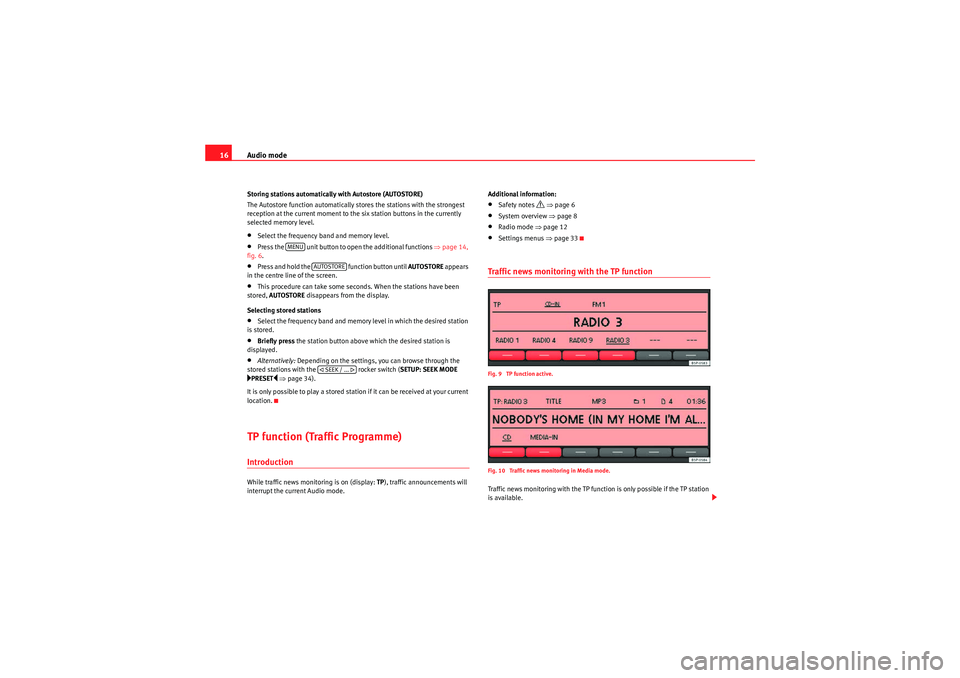
TP function (Traffic Programme)IntroductionWhile traffic news monitoring is on (display: TP), traffic announcements will
interrupt the current Audio mode. Additional information:
•Safety notes
⇒ page 6
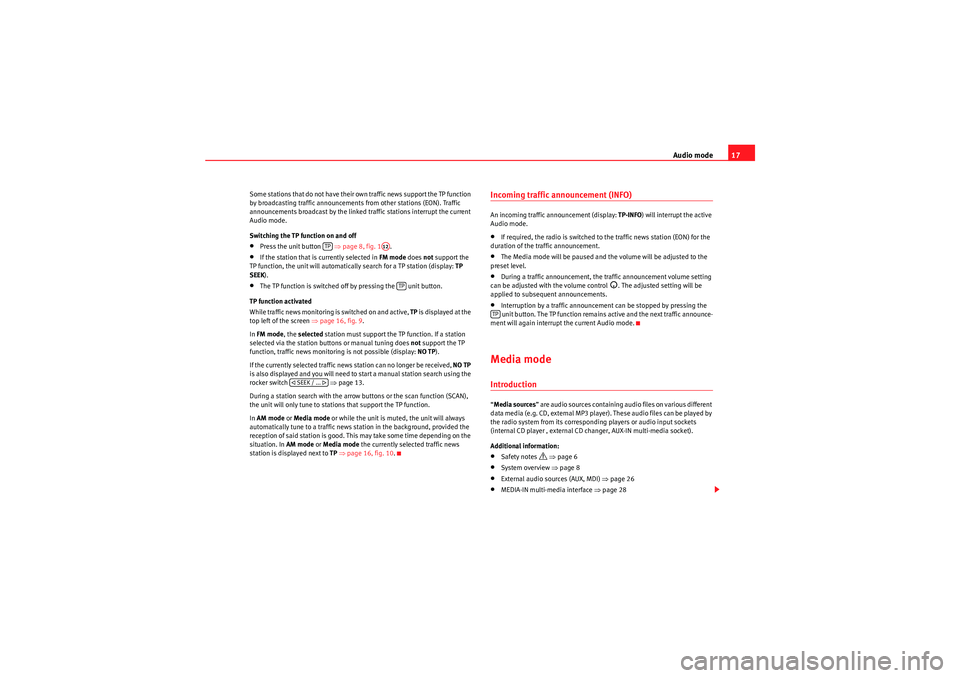
•System overview ⇒page 8•Radio mode ⇒page 12•Settings menus ⇒page 33Traffic news monitoring with the TP functionFig. 9 TP function active.
Fig. 10 Traffic news monitoring in Media mode.Traffic news monitoring with the TP function is only possible if the TP station
is available.
MENU
AUTOSTORE SEEK / ...
sound_system_2_EN Seite 16 Mittwoch, 3. März 2010 6:03 18
Page 18 of 43
Audio mode17
Some stations that do not have their own traffic news support the TP function
by broadcasting traffic announcements from other stations (EON). Traffic
announcements broadcast by the linked traffic stations interrupt the current
Audio mode.
Switching the TP function on and off•Press the unit button ⇒ page 8, fig. 1.•If the station that is currently selected in FM mode does not support the
TP function, the unit will automatically search for a TP station (display: TP
SEEK ).•The TP function is switched off by pressing the unit button.
TP function activated
While traffic news monitoring is switched on and active, TP is displayed at the
top left of the screen ⇒page 16, fig. 9 .
In FM mode , the selected station must support the TP function. If a station
selected via the station buttons or manual tuning does not support the TP
function, traffic news monitoring is not possible (display: NO TP).
If the currently selected traffic news station can no longer be received, NO TP
is also displayed and you will need to start a manual station search using the
rocker switch ⇒ page 13.
During a station search with the arrow buttons or the scan function (SCAN),
the unit will only tune to stations that support the TP function.
In AM mode or Media mode or while the unit is muted, the unit will always
automatically tune to a traffic news station in the background, provided the
reception of said station is good. This may take some time depending on the
situation. In AM mode or Media mode the currently selected traffic news
station is displayed next to TP ⇒ page 16, fig. 10 .
Incoming traffic announcement (INFO)An incoming traffic announcement (display: TP-INFO) will interrupt the active
Audio mode.•If required, the radio is switched to the traffic news station (EON) for the
duration of the traffic announcement.•The Media mode will be paused and the volume will be adjusted to the
preset level.•During a traffic announcement, the traffic announcement volume setting
can be adjusted with the volume control
. The adjusted setting will be
applied to subsequent announcements.
•Interruption by a traffic announcement can be stopped by pressing the
unit button. The TP function remains active and the next traffic announce-
ment will again interrupt the current Audio mode.Media modeIntroduction“ Media sources ” are audio sources containing audio files on various different
data media (e.g. CD, external MP3 player). These audio files can be played by
the radio system from its corresponding players or audio input sockets
(internal CD player , external CD changer, AUX-IN multi-media socket).
Additional information:•Safety notes
⇒ page 6
•System overview ⇒ page 8•External audio sources (AUX, MDI) ⇒page 26•MEDIA-IN multi-media interface ⇒page 28
TP
A12
TP
SEEK / ...
TP
sound_system_2_EN Seite 17 Mittwoch, 3. März 2010 6:03 18
Page 20 of 43

Audio mode19
Playing order for audio data CDsAudio files
on data media are often organised by means of folders
and
playlists
to determine a certain playing order.
Tracks, folders and playlists on a data medium are sorted by name in alpha-
betic or numeric order. Subfolders are treated like folders and numbered in accordance with the
sequence on the CD.
The illustration
⇒fig. 11 shows a typical MP3 CD that contains tracks
(titles), folders
and subfolders.
Accordingly, the tracks and folders on this CD are played and displayed in the
following order:
With regard to the playing order, playlists
are treated like folders.
Fig. 11 Example of an
MP3 CD structure.
Track
In folder
Radio display
and
Root directory
ROOT
and
F1
01
F1.1
02
F1.1.1
03
F1.2
04
and
F2
05
A1
A2
A3
A4
A5A6A7
A8
A9
sound_system_2_EN Seite 19 Mittwoch, 3. März 2010 6:03 18
Page 21 of 43
Audio mode
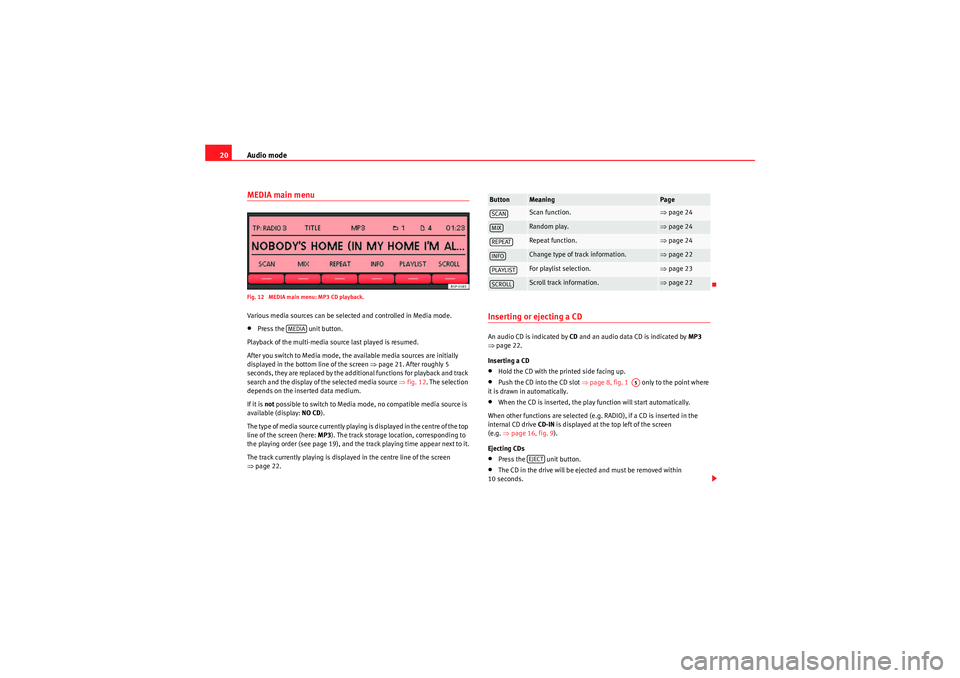
20MEDIA main menuFig. 12 MEDIA main menu: MP3 CD playback.Various media sources can be selected and controlled in Media mode.•Press the unit button.
Playback of the multi-media source last played is resumed.
After you switch to Media mode, the available media sources are initially
displayed in the bottom line of the screen ⇒page 21. After roughly 5
seconds, they are replaced by the additional functions for playback and track
search and the display of the selected media source ⇒fig. 12. The selection
depends on the inserted data medium.
If it is not possible to switch to Media mode, no compatible media source is
available (display: NO CD).
The type of media source currently playing is displayed in the centre of the top
line of the screen (here: MP3). The track storage location, corresponding to
the playing order (see page 19), and the track playing time appear next to it.
The track currently playing is displayed in the centre line of the screen
⇒ page 22.
Inserting or ejecting a CDAn audio CD is indicated by CD and an audio data CD is indicated by MP3
⇒ page 22.
Inserting a CD•Hold the CD with the printed side facing up.•Push the CD into the CD slot ⇒page 8, fig. 1 only to the point where
it is drawn in automatically.•When the CD is inserted, the play function will start automatically.
When other functions are selected (e.g. RADIO), if a CD is inserted in the
internal CD drive CD-IN is displayed at the top left of the screen
(e.g. ⇒page 16, fig. 9 ).
Ejecting CDs•Press the unit button.•The CD in the drive will be ejected and must be removed within
10 seconds.
MEDIA
Button
Meaning
Page
Scan function.
⇒ page 24
Random play.
⇒page 24
Repeat function.
⇒page 24
Change type of track information.
⇒page 22
For playlist selection.
⇒page 23
Scroll track information.
⇒page 22
SCANMIXREPEATINFOPLAYLISTSCROLL
A5
EJECT
sound_system_2_EN Seite 20 Mittwoch, 3. März 2010 6:03 18