Page 209 of 325
Trailer towing207
Safety First
Operating Instructions
Practical Tips
Technical Specifications
Fitting the ball joint (step 1)– Remove the cover piece ⇒ fig. 163 on the mounting fixture
below the bumper as far as it will go. The cover piece is held
automatically in the open position.
– Make sure the mounting fixture is clean. If not, clean it ⇒.Cont ⇒page 207, “Fitting the ball joint (step 2)”.
WARNING
It is important to keep the mounting fixture clean. Otherwise the ball joint
may fail to engage safely and securely. This could lead to an accident.
Fitting the ball joint (step 2)
Fig. 163 Rear bumper:
Open the cover piece
A2
A1
Fig. 164 Removable
towing bracket: Ball jointFig. 165 Removable
towing bracket: Ball joint
ExeoST_EN.book Seite 207 Freitag, 3. September 2010 11:41 11
Page 210 of 325

Trailer towing
208
Make sure the ball joint is clean and undamaged
– Check the locking pin , release pin , shaft section and knob ⇒page 207, fig. 164 on the ball joint to make sure they
are clean and undamaged.
The spring mechanism inside the ball joint must be in the ready
position
– Check that the red marking ⇒ page 207, fig. 165 on the knob
is inside the black zone marked on the ball joint.
– Check that the locking pin is inside the holes in the shaft section of the ball joint.
– Check that the knob protrudes visibly from the ball joint, so that there is a clear gap between the knob and the ball joint.The ball joint can only be installed if the internal spring mechanism is in the
ready position.
Cont ⇒page 208, “Fitting the ball joint (step 3)”.
Fitting the ball joint (step 3)
AA
AB
AC
AD
AAAB
AC
Fig. 166 Removable
towing bracket: Setting
the spring mechanism to
the "ready" positionFig. 167 Removable
towing bracket: Inserting
the ball joint
ExeoST_EN.book Seite 208 Freitag, 3. September 2010 11:41 11
Page 211 of 325

Trailer towing209
Safety First
Operating Instructions
Practical Tips
Technical Specifications
Setting the spring mechanism to the ready position (if required)
– Insert the key ⇒page 208, fig. 166 in the lock on the knob
and turn it towards the red marking.
– Pull out the knob in direction , hold and turn in direction
until the locking pin engages and the release pin moves
out visibly ⇒ .
Inserting the ball joint
– With the spring mechanism in the ready position, insert the ball joint into the mounting fixture and push it upwards ⇒page 208,
fig. 167 in the direction indicated (arrow) ⇒. It should lock
into position automatically. You should now clearly hear it click
into place.
– Lock the ball joint by turning the key to the green marking.
– Remove the key.Cont ⇒page 209, “Fitting the ball joint (step 4)”.
WARNING
•If it is not possible to set the spring mechanism to the ready position as
described above, do not use the ball joint. Please contact a qualified work-
shop.•To avoid injury, keep your hands away from the knob or cover piece
when inserting the ball joint in the mounting fixture. Otherwise, you could
be injured.
Fitting the ball joint (step 4)
A1
AA
AB
A2
A3
Fig. 168 Removable
towing bracket: Safety
checkFig. 169 Rear bumper:
Pulling down the power
socket
ExeoST_EN.book Seite 209 Freitag, 3. September 2010 11:41 11
Page 212 of 325

Trailer towing
210
Safety check
– Check that the green marking ⇒ page 209, fig. 168 on the
knob is inside the black zone marked on the ball joint.
– Check that the knob is directly against the ball joint, so that there is no gap between the knob and the ball joint -arrow-.
– Check that the ball joint is locked and the key is removed so that the knob cannot be pulled out ⇒.
– Check that the ball joint fits tightly in the mounting fixture (try moving it about to check).
To w i n g s o c k e t
– To plug in the electrical connection for the trailer, pull down the socket below the bumper ⇒ page 209, fig. 169.If the safety check is not satisfactory, the ball joint must be fitted again prop-
erly.
WARNING
To avoid accidents, the ball joint must meet all the safety requirements
listed in the safety check. The towing bracket must not be used if any one
of these requirements is not met. If this is the case, you should contact a
qualified workshop.
Removing the ball joint– Insert the key in the lock ⇒fig. 170 on the knob.
– Unlock the ball joint by turning the key to the red marking.
AA
Fig. 170 Removable
towing bracket: Removing
the ball jointFig. 171 Rear bumper:
fitting the cover piece
A1
ExeoST_EN.book Seite 210 Freitag, 3. September 2010 11:41 11
Page 213 of 325
Trailer towing211
Safety First
Operating Instructions
Practical Tips
Technical Specifications
– Take hold of the ball joint and pull out the knob in direction .
– Keep hold of the knob and turn it as far as it will go in direction
.
– Release the knob. The spring mechanism will remain in the ready position ⇒.
– Pull the ball joint down out of the mounting fixture ⇒page 210, fig. 171 . The cover piece will cover the mounting
fixture automatically .
– Put away the ball joint attachment under the floor panel in the luggage compartment.
– Move the socket back up to its original position.
WARNING
•To avoid injury, keep your hands away from the locking pin and the
release pin when releasing the locking mechanism.•Make sure that the cover piece is properly engaged on the mounting
fixture on the vehicle. Otherwise the ball joint may fail to engage securely
if dirt accumulates in the mounting fixture.
AA
AB
A1
A2
ExeoST_EN.book Seite 211 Freitag, 3. September 2010 11:41 11
Page 214 of 325
Trailer towing
212Fitting a towing bracket*
It is possible to fit a towing bracket to the rear of the vehicle.
Fig. 172 Attachment
points for towing bracket
ExeoST_EN.book Seite 212 Freitag, 3. September 2010 11:41 11
Page 215 of 325

Trailer towing213
Safety First
Operating Instructions
Practical Tips
Technical Specifications
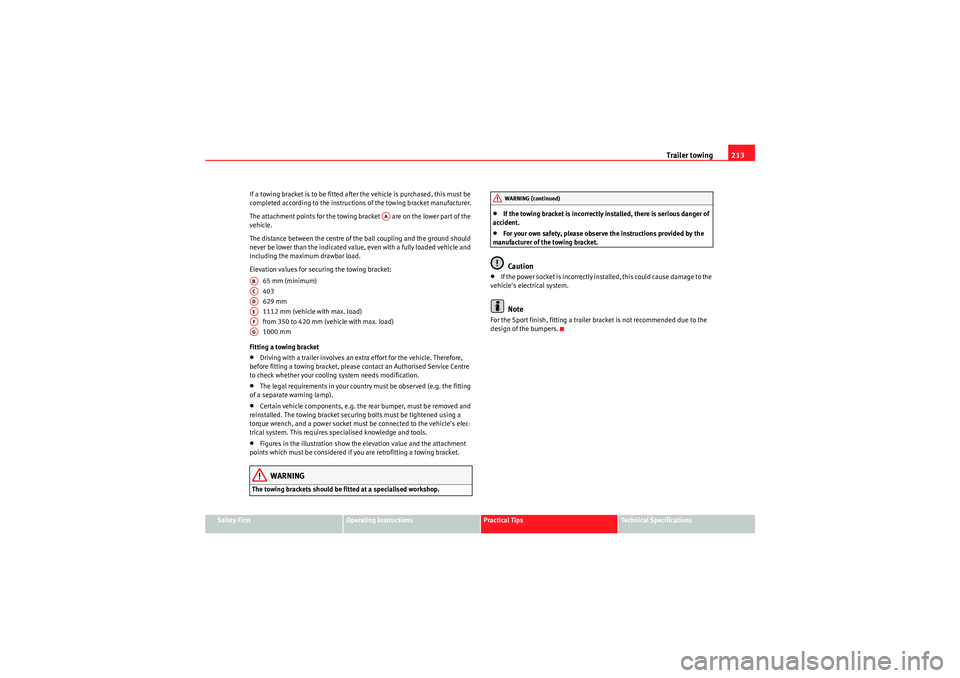
If a towing bracket is to be fitted after the vehicle is purchased, this must be
completed according to the instructions of the towing bracket manufacturer.
The attachment points for the towing bracket are on the lower part of the
vehicle.
The distance between the centre of the ball coupling and the ground should
never be lower than the indicated value, even with a fully loaded vehicle and
including the maximum drawbar load.
Elevation values for securing the towing bracket:
65 mm (minimum)
403
629 mm
1112 mm (vehicle with max. load)
from 350 to 420 mm (vehicle with max. load)
1000 mm
Fitting a towing bracket
•Driving with a trailer involves an extra effort for the vehicle. Therefore,
before fitting a towing bracket, please contact an Authorised Service Centre
to check whether your cooling system needs modification.•The legal requirements in your country must be observed (e.g. the fitting
of a separate warning lamp).•Certain vehicle components, e.g. the rear bumper, must be removed and
reinstalled. The towing bracket securi ng bolts must be tightened using a
torque wrench, and a power socket must be connected to the vehicle's elec-
trical system. This requires specialised knowledge and tools.•Figures in the illustration show the elevation value and the attachment
points which must be considered if you are retrofitting a towing bracket.WARNING
The towing brackets should be fitted at a specialised workshop.
•If the towing bracket is incorrectly installed, there is serious danger of
accident.•For your own safety, please observe the instructions provided by the
manufacturer of the towing bracket.Caution
•If the power socket is incorrectly installed, this could cause damage to the
vehicle's electrical system.Note
For the Sport finish, fitting a trailer bracket is not recommended due to the
design of the bumpers.
AA
ABACADAEAFAG
WARNING (continued)
ExeoST_EN.book Seite 213 Freitag, 3. September 2010 11:41 11
Page 216 of 325

Vehicle maintenance and cleaning
214Vehicle maintenance and cleaningGeneral notesRegular washing and care help maintain the value of your
vehicle.Vehicle maintenance
Regular care and washing help to maintain the value of the vehicle. This may
also be one of the requirements for acknowledging warranty claims in the
event of bodywork corrosion or paint defects.
The best way to protect your vehicle against the harmful effects of the envi-
ronment is through correct maintenance and frequent washing. The longer
substances such as insect remains, bird droppings, resinous tree sap, road
dirt, industrial deposits, tar, soot or road salt and other aggressive materials
remain on the vehicle, the more damage they do to the paintwork. High
temperatures (for instance in strong sunlight) further intensify the corrosive
effect.
After winter, a period when salt is put on the roads, it is important to have the
underside of the vehicle washed thoroughly.
Products for vehicle maintenance
Car care products are available in your Authorised Service Centre. Keep the
product instructions until you have used them up.
WARNING
•Car care products can be toxic. Because of this, they must always be
kept closed in their original container. Keep them out of the reach of chil-
dren. Failure to comply could result in poisoning.•Always read and observe the instructions and warnings on the package
before using vehicle care products. Improper use could cause health prob- lems or damage the vehicle. The use of certain products may produce
noxious vapours; they should be used in well ventilated areas.
•Never use fuel, turpentine, engine oil, nail varnish remover or other
volatile fluids. These are toxic and highly flammable. Risk of fire and explo-
sion.•Before washing your vehicle, or carrying out any maintenance, switch
the engine off, apply the handbrake firmly and remove the key from the
ignition.Caution
Never attempt to remove dirt, mud or dust if the surface of the vehicle is dry.
Never use a dry cloth or sponge for cleaning purposes. This could damage the
paintwork or the windows of your vehicle. Soak dirt, mud or dust with plenty
of water.
For the sake of the environment
•When purchasing products for your vehicle maintenance, select the ones
which are not harmful to the environment.•The waste from car care products should no t be disposed of with ordinar y
household waste. Observe the disposal information on the package.WARNING (continued)
ExeoST_EN.book Seite 214 Freitag, 3. September 2010 11:41 11