Page 97 of 343

Lights, Turn Signals and Windshield Wipers
95
Automatic Coming Home lights
(Welcome Home function/Entry function)Switching on Automatic Coming Home lights
fSet light switch to .
The following lights remain switched on for
a certain period to allow you to get in and out of
your vehicle safely and with improved visibility in
darkness:
– Daytime driving lights,
– Courtesy lights in the exterior mirrors (on vehicles with comfort memory),
– Front and rear side marker lights,
– Licence plate lights.
Welcome Home function (off delay)
When the vehicle is locked, the lights remain
switched on for the duration of the off delay preset
on the multi-function display.
For information on adjusting the off delay of the
external lights on the multi-function display:
f Please see the chapter “ADJUSTING EXTERIOR
LIGHTS” on page 142. Entry function
When the vehicle is unlocked, the area around the
vehicle is illuminated for the duration of the off
delay preset on the multi-function display.
The lights are switched off when the ignition is
switched on or the light sw
itch is set to a position
other than .
For information on adjusting the off delay of the
external lights on the multi-function display:
f Please see the chapter “ADJUSTING EXTERIOR
LIGHTS” on page 142.
Instrument lightingThe lighting is automatically adjusted to the
ambient brightness by the light sensor B.
In addition, when the vehicle lighting is switched
on, the instrument and switch brightness can be
adjusted manually.
f Turn adjustment button A in the appropriate
direction and hold until the desired brightness
has been reached.
Page 98 of 343

96
Lights, Turn Signals and Windshield Wipers Warning!
Risk of accident when adjusting brightness
while driving. You may lose control of the
vehicle.
f Do not reach through the steering-wheel spokes when driving.
Turn Signal/High Beam/Headlight
Flasher StalkTurn signals, low beam and high beam are ready
for operation when the ignition is on.
1 – Turn signal light, left
2 – Turn signal light, right
Push the stalk to the upper or lower pressure
point – turn signal lights flash three times
3 – High-beam headlight
4 – Headlight flasher
Stalk in center position – low beam
When the high beam is switched on or the
headlight flasher is operated, the blue indicator
light on the speedometer lights up.
Parking lightThe parking light can only be switched on when
the ignition is switched off.
f Move the stalk up or do wn to switch on the
right or left parking light.
If the parking light is switched on, the message
“Parking light on” will appear on the multi-function
display in the instrument panel after the ignition is
switched off.
For information on warning messages on the
multi-function display:
f Please see the chapter “OVERVIEW OF
WARNING MESSAGES” on page 152.
Page 99 of 343

Lights, Turn Signals and Windshield Wipers
97
The emergency flasher can be switched on
regardless of the position of the ignition lock.Switching on and offfPress the emergency fl asher button on the
center console.
All turn signal lights and the indicator light in the
button flash when the button is operated.
If the emergency flasher remains active for longer
periods, the illumination phase of the flashing
interval is shortened to preserve the lights.
Automatic activation of hazard warning
lights in the event of an accidentThe emergency flasher is activated automatically
in the event of an accident.
f To deactivate the emergency flasher, switch
off the ignition, wait approx. 5 seconds and
then switch the ignition back on again.
For information on switching the ignition on
and off:
f Please see the chapter “IGNITION LOCK,
STEERING LOCK” on page 164.
Danger!
Risk of an accident resutling in serious
personal injury or death.
f Whenever stalled or stopped for emergency
repairs, move the car well off the road. Switch
on the emergency flasher and mark the car
with road flares or other warning devices.
f Do not remain in the car. Someone
approaching from the rear may not realize your
vehicle is stopped and cause a collision.
Danger of fire.
f Do not park or operate the vehicle in areas
where the hot ehaust system may come in
contact with dry grass, brush, fuel spill or
other flammable material.
Hot engine compartment components can
burn skin on contact.
f Before working on any part in the engine
compartment, turn the engine off and let it cool down sufficiently.
Emergency Flasher
Page 100 of 343

98
Lights, Turn Signals and Windshield Wipers
A- Button for front interior light
B - Button for rear interior lights
C , D - Button for front reading lightsInterior LightingInterior lightsSwitching front interior light on and off
f Press button A.
Switching rear interior light on and off
f Press button B in the front overhead operating
console or button E above the relevant door. Dimming (brightness adjustment)
f
Press button A for the front interior light or
button E for the relevant rear interior light and
hold for at least 1 second until the desired
level of brightness is reached.
Reading lights Switching front reading lights on and off
f Press button C or D.
Switching rear reading lights on and off
f Press button E above the relevant door.
E- Button for rear reading and interior lightsDimming (brightness adjustment)
f Press button C or D for the front reading light
or button E for the relevant rear reading light
and hold for at least 1 second until the desired
level of brightness is reached.
Page 101 of 343

Lights, Turn Signals and Windshield Wipers
99
Switching automatic interior lighting on
and off fPress button A.
When the automatic interior lighting is switched
off, the indicator light in the button lights up.
When the automatic interior lighting is switched
on, in darkness the interior lighting is
– switched on when a door is unlocked or
opened, when the ignition key is removed from
the ignition lock or when the steering wheel is
locked on vehicles with Porsche Entry & Drive. –
switched off when the door is closed, after
a delay of approx. 120 seconds. The off delay
time can be preset on the multi-function
display.
The interior lighting goes out as soon as the
ignition is switched on or the vehicle is locked.
For information on setting the off delay for the
interior light:
f Please see the chapter “SETTING INTERIOR
LIGHTING OFF DELAY” on page 143.
Orientation lightingLights in the front operating console, the inner
door handles, the storage trays and the rear light
units help vehicle occupa nts to locate important
controls in the vehicle in darkness and ensure
better overall orientation. The lights are switched
on when the vehicle is unlocked and switched off
again automatically when the vehicle is locked.
Dimming (brightness adjustment)
The brightness of the orientation lighting is
adjusted on the multi-function display.
For information on adjusting the brightness
of the orientation lighting:
f Please see the chapter “ADJUSTING
BRIGHTNESS OF ORIENTATION LIGHTING” on
page 143.
Page 102 of 343
100
Lights, Turn Signals and Windshield Wipers
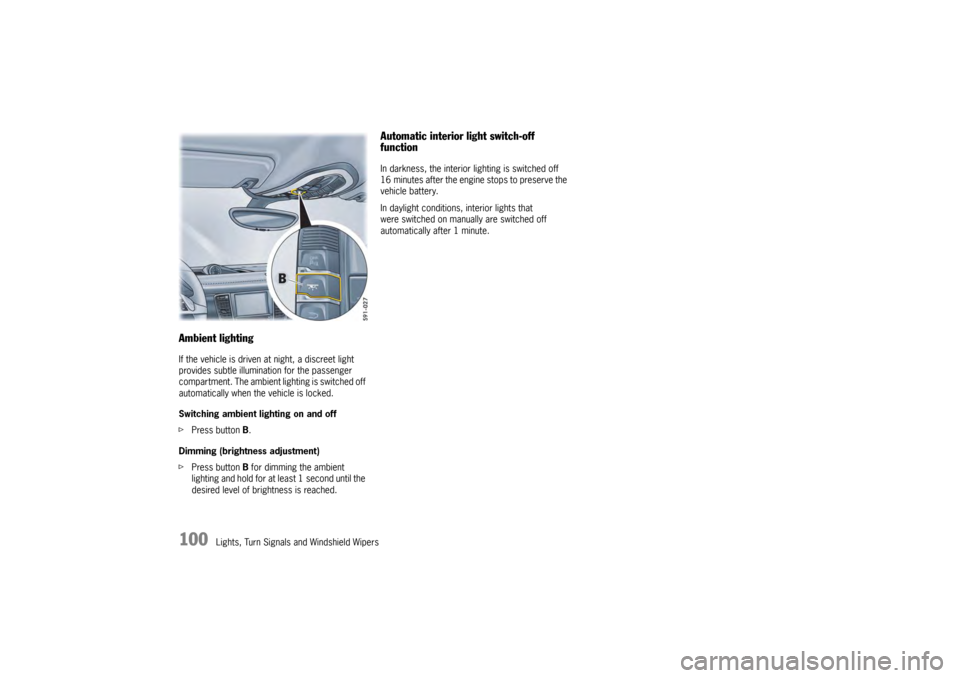
Ambient lightingIf the vehicle is driven at night, a discreet light
provides subtle illumination for the passenger
compartment. The ambient lighting is switched off
automatically when the vehicle is locked.
Switching ambient lighting on and off
fPress button B.
Dimming (brightness adjustment)
f Press button B for dimming the ambient
lighting and hold for at least 1 second until the
desired level of brightness is reached.
Automatic interior light switch-off
functionIn darkness, the interior lighting is switched off
16 minutes after the engine stops to preserve the
vehicle battery.
In daylight conditions, interior lights that
were switched on manually are switched off
automatically after 1 minute.
Page 103 of 343

Lights, Turn Signals and Windshield Wipers
101
Brief Overview – Windshield
WipersThis brief overview does not replace the
information provided under “WINDSHIELD WIPER/
WASHER STALK”.
Warnings, in particular, are not replaced by this
brief overview.
Windshield wiper stalkSwitches for wiping interval ( A) and rear wiper ( B)
What do I want to do?
What do I have to do?
Wipe automatically at front
(rain sensor/intermittent operation)Press the stalk to detent position 1 .
Adjust the rain sensor/wipe interval
Adjust switch A on the right of the stalk upwards (wipe mo re often) or downwards (wipe less often).
Wipe at front
Slow: Press the stalk to detent position 2.
Fast: Press the stalk to detent position 3 .
Once: Briefly move stalk to position 4 (holding stalk in position 4 accelerates wiping action).
Spray and wipe at front
Pull stalk to position 5 and hold.
Wipe at rear (intermittent wiping)
Push switch B upwards to detent position INT.
Wipe at rear (wipe once)
Push switch B all the way up or down.
Page 104 of 343

102
Lights, Turn Signals and Windshield Wipers
Windshield Wiper/Washer Stalk
Caution!
Danger of injury if the windshield wipers
operate unintentionally.
Risk of damage to the engine compartment
lid, windshield and wiper system.
f Only wipe the windshield when sufficiently wet,
otherwise it could become scratched.
f Loosen frozen wiper blades before starting
to drive.
f Do not operate a frozen headlight washer
system.
f Always switch off windshield wipers in car
washes to prevent them wiping unintentionally
(rain sensor operation).
f Do not operate headlight washer system in
car washes.
f Always switch off windshield wipers before
cleaning the windshield to avoid unintentional
operation (rain sensor operation).
f Always hold the wiper arm securely when
replacing the wiper blade.
f Always switch off windshield wipers before
opening the engine compartment lid (wiper switch in position 0).
Front wiper and headlight washer system0 – Windshield wipers off
When the windshield wipers are switched off,
the wipers move up slightly from their rest
position so that the wiping edges are aligned
correctly.
1 – Rain sensor operation Front windshield wipers
Move wiper stalk upwards to the first click.
2 – Front windshield wipers – slow Move wiper stalk upwards to the second
click.
3 – Front windshield wipers – fast Move wiper stalk upwards to the third click. 4 – Front windshield wipers – one-touch
operation
Move wiper stalk downwards.
The front windshield wipers carry out one
wiping cycle.
5 – Front windshield wiper and washer system
Pull wiper stalk toward s the steering wheel.
The washer system wipes and sprays while
the stalk is pulled towards the steering
wheel.
When the wiper stalk is released, a few
drying wipes are performed.
After every 10 wipes on the windshield,
the headlights are cleaned automatically.
Maintenance notes
f If heavily soiled, repeat wash.
f Persistent dirt (e.g. insect remains) should
be removed regularly.
For information on car care:
f Please see the chapter “CAR CARE
INSTRUCTIONS” on page 269.
The front windshield washer nozzles are
heated when the ignition is on, as a precaution
against freezing. However, this does not replace
the use of antifreeze.