2010 NISSAN TIIDA check engine
[x] Cancel search: check enginePage 2582 of 3745
![NISSAN TIIDA 2010 Service Repair Manual SERVICE DATA AND SPECIFICATIONS (SDS)EM-223
< SERVICE INFORMATION > [MR18DE]
C
D
E
F
G H
I
J
K L
M A
EM
NP
O
SERVICE DATA AND SPECIFICATIONS (SDS)
Standard and LimitINFOID:0000000005398149
GENERAL SPE NISSAN TIIDA 2010 Service Repair Manual SERVICE DATA AND SPECIFICATIONS (SDS)EM-223
< SERVICE INFORMATION > [MR18DE]
C
D
E
F
G H
I
J
K L
M A
EM
NP
O
SERVICE DATA AND SPECIFICATIONS (SDS)
Standard and LimitINFOID:0000000005398149
GENERAL SPE](/manual-img/5/57397/w960_57397-2581.png)
SERVICE DATA AND SPECIFICATIONS (SDS)EM-223
< SERVICE INFORMATION > [MR18DE]
C
D
E
F
G H
I
J
K L
M A
EM
NP
O
SERVICE DATA AND SPECIFICATIONS (SDS)
Standard and LimitINFOID:0000000005398149
GENERAL SPECIFICATIONS
DRIVE BELT
WATER CONTROL VALVE
EXHAUST MANIFOLD
Unit: mm (in)
THERMOSTAT
SPARK PLUG
Unit: mm (in)
*: Always check with the Parts Department for the latest parts information
CYLINDER HEAD
Engine type
MR18DE
Cylinder arrangement In-line 4
Displacement cm
3 (cu in)1,797 (109.65)
Bore and stroke mm (in) 84.0 x 81.1 (3.307 x 3.192)
Valve arrangement DOHC
Firing order 1-3-4-2
Number of piston rings Compression
2
Oil 1
Compression ratio 9.9
Compression pressure
kPa (bar, kg/cm
2, psi) / 250 rpm Standard
1,500 (15.0, 15.3, 217.6)
Minimum 1,200 (12.0, 12.2, 174)
Differential limit between cylinders 100 (1.0, 1.0, 15)
Tension of drive belt Auto adjustment by auto-tensioner
Valve opening temperature 93.5 - 96.5°C (200 - 206 °F)
Full-open valve lift amount 8 mm/ 108°C (0.315 in/ 226 °F)
Valve closing temperature More than 90°C (194 °F)
Items Limit
Surface distortion Each exhaust port
0.3 (0.012)
Entire part 0.7 (0.028)
Valve opening temperature 80.5 - 83.5°C (177 - 182 °F)
Full-open valve lift amount 8 mm/ 95°C (0.315 in/ 203 °F)
Valve closing temperature More than 77°C (171 °F)
Make DENSO
Standard type* FXE20HR11
Spark plug gap Nominal: 1.1 (0.043)
Revision: January 20102010 Versa
Page 2593 of 3745

EX-1
ENGINE
C
DE
F
G H
I
J
K L
M
SECTION EX
A
EX
N
O P
CONTENTS
EXHAUST SYSTEM
HR16DE
PRECAUTION ....... ........................................
2
PRECAUTIONS .............................................. .....2
Precaution for Supplemental Restraint System
(SRS) "AIR BAG" and "SEAT BELT PRE-TEN-
SIONER" ............................................................. ......
2
Precaution Necessary for Steering Wheel Rota-
tion After Battery Disconnect ............................... ......
2
PREPARATION ............................................4
PREPARATION .............................................. .....4
Special Service Tool ........................................... ......4
Commercial Service Tool ..........................................4
ON-VEHICLE MAINTENANCE .....................5
EXHAUST SYSTEM ....................................... .....5
Checking Exhaust System .................................. ......5
ON-VEHICLE REPAIR ..................................6
EXHAUST SYSTEM ...........................................6
Component .......................................................... .....6
Removal and Installation ..........................................6
MR18DE
SERVICE INFORMATION .. ..........................
8
PRECAUTIONS ..................................................8
Precaution for Supplemental Restraint System
(SRS) "AIR BAG" and "SEAT BELT PRE-TEN-
SIONER" ............................................................. .....
8
Precaution Necessary for Steering Wheel Rota-
tion After Battery Disconnect ....................................
8
PREPARATION .................................................10
Special Service Tool ................................................10
Commercial Service Tool ........................................10
EXHAUST SYSTEM ..........................................11
Checking Exhaust System ................................... ....11
Component ..............................................................11
Removal and Installation .........................................11
Revision: January 20102010 Versa
Page 2599 of 3745
![NISSAN TIIDA 2010 Service Repair Manual EXHAUST SYSTEMEX-7
< ON-VEHICLE REPAIR > [HR16DE]
C
D
E
F
G H
I
J
K L
M A
EX
NP
O
Be careful not to damage heated oxygen sensor.
INSTALLATION
Installation is in the reverse order of removal.
CAUTION:
NISSAN TIIDA 2010 Service Repair Manual EXHAUST SYSTEMEX-7
< ON-VEHICLE REPAIR > [HR16DE]
C
D
E
F
G H
I
J
K L
M A
EX
NP
O
Be careful not to damage heated oxygen sensor.
INSTALLATION
Installation is in the reverse order of removal.
CAUTION:](/manual-img/5/57397/w960_57397-2598.png)
EXHAUST SYSTEMEX-7
< ON-VEHICLE REPAIR > [HR16DE]
C
D
E
F
G H
I
J
K L
M A
EX
NP
O
Be careful not to damage heated oxygen sensor.
INSTALLATION
Installation is in the reverse order of removal.
CAUTION:
• Always replace exhaust gaskets and seal bearings with new ones
when installing.
• Before installing a new heated oxygen sensor, clean and apply an ti-seize lubricant to exhaust sys-
tem threads using suitable tool.
• Discard any heated oxygen sensor which has been dr opped from a height of more than 0.5 m (19.7
in) onto a hard surface such as a co ncrete floor; install a new one.
• Do not over-tighten the heated oxygen sensor. Doing so may damage the heated oxygen sensor,
resulting in the MIL coming on.
• Remove deposits from the sealing surface of each connection. Connect them securely to avoid
exhaust leakage.
• Temporarily tighten nuts on the exhaust manifold side and bolts on the vehicle side. Check each part
for unusual interference, and then tighten them to the specified torque.
• When installing each mounting rubber, avoid twisting or unusual extension in up/down and right/left
directions.
NOTE:
If ground cable was removed, it is not necessary to reinstall it.
Exhaust Manifold to Exhaust Front Tube
1. Securely insert seal bearing (2) into exhaust manifold (1) side in the direction shown.
• Exhaust front tube (5)
CAUTION:
Be careful not to damage seal bearing surface when install-
ing.
2. Install spring (3), tighten nut (4). • Be careful that the stud bolt nut does not interfere with the
flanged area ( ).
• Make sure the spring (3) sits properly on the flange surface by aligning it to the locator dimples.
Exhaust Front Tube to Center Muffler
1. Securely insert seal bearing (2) into exhaust front tube (1) side
in the direction shown.
• Center muffler (5)
CAUTION:
Be careful not to damage seal bearing surface when install-
ing.
2. Install spring (3), tighten bolt (4). • Be careful that the stud bolt does not interfere with the flanged
area ( ).
• Make sure the spring (3) sits properly on the flange surface by aligning it to the locator dimples.
INSPECTION AFTER INSTALLATION
• With the engine running, check exhaust tube joints for exhaust leakage and unusual noise.
• Check to ensure that brackets and mounting rubbers are installed properly and free from undue stress. Improper installation could result in excessive noise and vibration. Oxygen sensor thread cleaner : — (J-43897-18)
Oxygen sensor thread cleaner : — (J-43897-12)
PBIC3797E
PBIC3798E
Revision: January 20102010 Versa
Page 2603 of 3745
![NISSAN TIIDA 2010 Service Repair Manual EXHAUST SYSTEMEX-11
< SERVICE INFORMATION > [MR18DE]
C
D
E
F
G H
I
J
K L
M A
EX
NP
O
EXHAUST SYSTEM
Checking Exhaust SystemINFOID:0000000005399818
Check exhaust pipes, muffler and mounting for imprope NISSAN TIIDA 2010 Service Repair Manual EXHAUST SYSTEMEX-11
< SERVICE INFORMATION > [MR18DE]
C
D
E
F
G H
I
J
K L
M A
EX
NP
O
EXHAUST SYSTEM
Checking Exhaust SystemINFOID:0000000005399818
Check exhaust pipes, muffler and mounting for imprope](/manual-img/5/57397/w960_57397-2602.png)
EXHAUST SYSTEMEX-11
< SERVICE INFORMATION > [MR18DE]
C
D
E
F
G H
I
J
K L
M A
EX
NP
O
EXHAUST SYSTEM
Checking Exhaust SystemINFOID:0000000005399818
Check exhaust pipes, muffler and mounting for improper attachment,
leaks, cracks, damage or deterioration.
• If necessary, repair or replace damaged parts.
ComponentINFOID:0000000005399819
Removal and InstallationINFOID:0000000005399820
WARNING:
• Perform the procedure with the exhaust system fully cooled down because the system will be hot
just after the engine is turned off.
SMA211A
1. Main muffler 2. Mounting rubber3. Ring gasket
4. Center muffler 5. Mounting rubber6. Spring
7. Seal bearing 8. Heated oxygen sensor 29. Exhaust front tube
10. Seal bearing 11. Stud bolt12. Spring
13. Ground cable ( If equipped )
AWBIA0746GB
Revision: January 20102010 Versa
Page 2605 of 3745
![NISSAN TIIDA 2010 Service Repair Manual EXHAUST SYSTEMEX-13
< SERVICE INFORMATION > [MR18DE]
C
D
E
F
G H
I
J
K L
M A
EX
NP
O
INSPECTION AFTER INSTALLATION
• With the engine running, check exhaust tube
joints for exhaust leakage and unusu NISSAN TIIDA 2010 Service Repair Manual EXHAUST SYSTEMEX-13
< SERVICE INFORMATION > [MR18DE]
C
D
E
F
G H
I
J
K L
M A
EX
NP
O
INSPECTION AFTER INSTALLATION
• With the engine running, check exhaust tube
joints for exhaust leakage and unusu](/manual-img/5/57397/w960_57397-2604.png)
EXHAUST SYSTEMEX-13
< SERVICE INFORMATION > [MR18DE]
C
D
E
F
G H
I
J
K L
M A
EX
NP
O
INSPECTION AFTER INSTALLATION
• With the engine running, check exhaust tube
joints for exhaust leakage and unusual noise.
• Check to ensure that brackets and mounting rubbers are installed properly and free from undue stress.
Improper installation could result in excessive noise and vibration.
Revision: January 20102010 Versa
Page 2631 of 3745

FL-1
ENGINE
C
DE
F
G H
I
J
K L
M
SECTION FL
A
FL
N
O P
CONTENTS
FUEL SYSTEM
SERVICE INFORMATION .. ..........................2
PRECAUTIONS .............................................. .....2
Precaution for Supplemental Restraint System
(SRS) "AIR BAG" and "SEAT BELT PRE-TEN-
SIONER" ............................................................. ......
2
Precaution Necessary for Steering Wheel Rota-
tion After Battery Disconnect ............................... ......
2
PREPARATION ...................................................4
Special Service Tool ........................................... ......4
Commercial Service Tool ..........................................4
FUEL SYSTEM ....................................................5
Checking Fuel Line ............................................. ......5
General Precaution .............................................. .....5
FUEL LEVEL SENSOR UNIT, FUEL FILTER
AND FUEL PUMP ASSEMBLY .........................
6
Component ...............................................................6
Removal and Installation ..........................................6
FUEL TANK ......................................................12
Component .......................................................... ....12
Removal and Installation .........................................12
SERVICE DATA AND SPECIFICATIONS
(SDS) .................................................................
17
Standard and Limit ..................................................17
Revision: January 20102010 Versa
Page 2635 of 3745

FUEL SYSTEMFL-5
< SERVICE INFORMATION >
C
DE
F
G H
I
J
K L
M A
FL
NP
O
FUEL SYSTEM
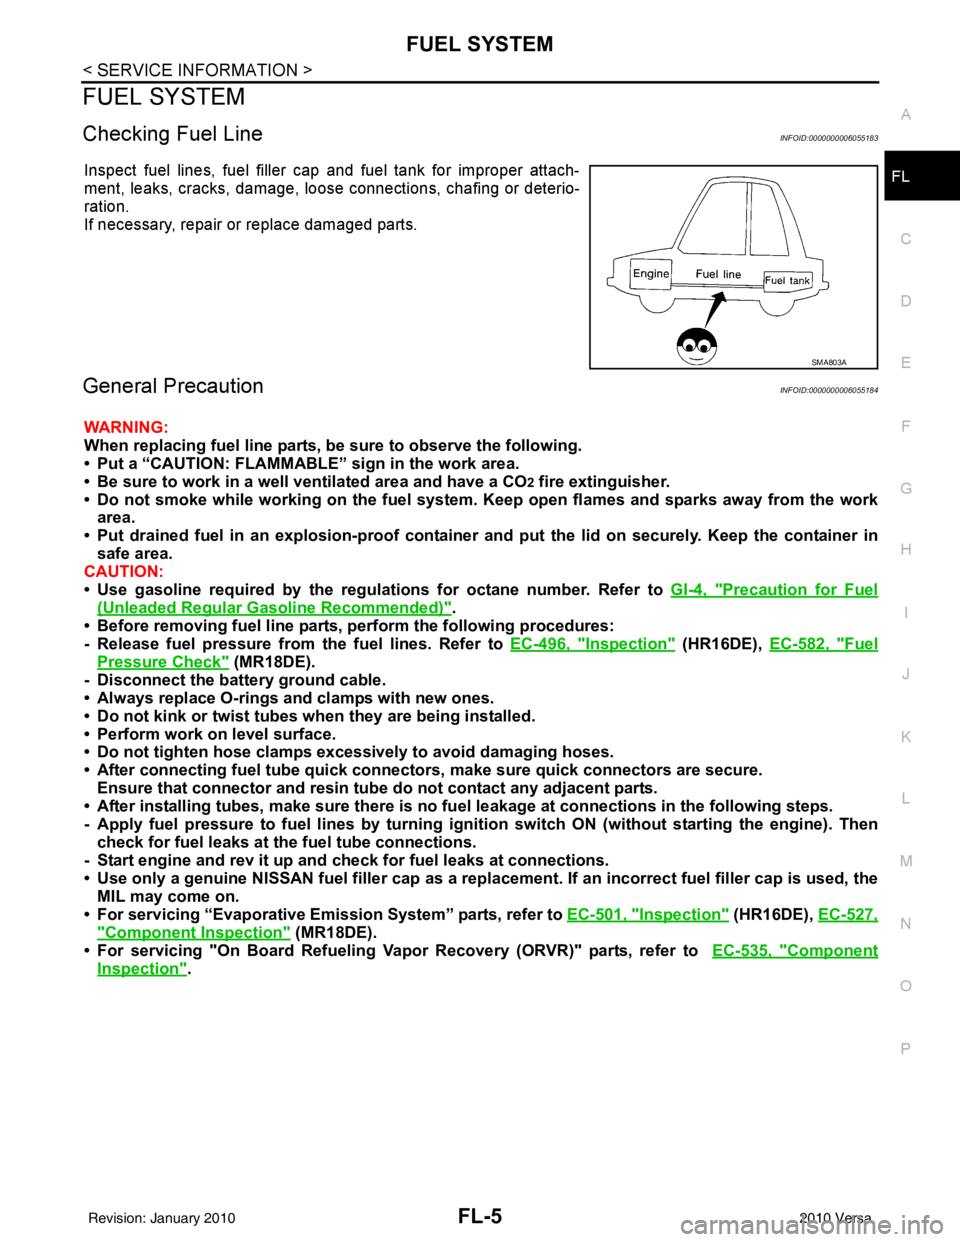
Checking Fuel LineINFOID:0000000006055183
Inspect fuel lines, fuel filler cap and fuel tank for improper attach-
ment, leaks, cracks, damage, loos
e connections, chafing or deterio-
ration.
If necessary, repair or replace damaged parts.
General PrecautionINFOID:0000000006055184
WARNING:
When replacing fuel line parts, be sure to observe the following.
• Put a “CAUTION: FLAMMABLE” sign in the work area.
• Be sure to work in a well ventilated area and have a CO
2 fire extinguisher.
• Do not smoke while working on the fuel system. Keep open flames and sparks away from the work area.
• Put drained fuel in an explosion-proof containe r and put the lid on securely. Keep the container in
safe area.
CAUTION:
• Use gasoline required by the regulations for octane number. Refer to GI-4, "
Precaution for Fuel
(Unleaded Regular Gasoline Recommended)".
• Before removing fuel line parts, perform the following procedures:
- Release fuel pressure from the fuel lines. Refer to EC-496, "
Inspection" (HR16DE), EC-582, "Fuel
Pressure Check" (MR18DE).
- Disconnect the battery ground cable.
• Always replace O-rings and clamps with new ones.
• Do not kink or twist tubes when they are being installed.
• Perform work on level surface.
• Do not tighten hose clamps excessi vely to avoid damaging hoses.
• After connecting fuel tube quick connector s, make sure quick connectors are secure.
Ensure that connector and resin tube do not contact any adjacent parts.
• After installing tubes, make sure there is no fu el leakage at connections in the following steps.
- Apply fuel pressure to fuel lin es by turning ignition switch ON (without starting the engine). Then
check for fuel leaks at the fuel tube connections.
- Start engine and rev it up and check for fuel leaks at connections.
• Use only a genuine NISSAN fuel filler cap as a replacemen t. If an incorrect fuel filler cap is used, the
MIL may come on.
• For servicing “Evaporative Emission System” parts, refer to EC-501, "
Inspection" (HR16DE), EC-527,
"Component Inspection" (MR18DE).
• For servicing "On Board Refueling Vapo r Recovery (ORVR)" parts, refer to EC-535, "
Component
Inspection".
SMA803A
Revision: January 20102010 Versa
Page 2641 of 3745

FUEL LEVEL SENSOR UNIT, FUEL FILTER AND FUEL PUMP ASSEMBLYFL-11
< SERVICE INFORMATION >
C
DE
F
G H
I
J
K L
M A
FL
NP
O
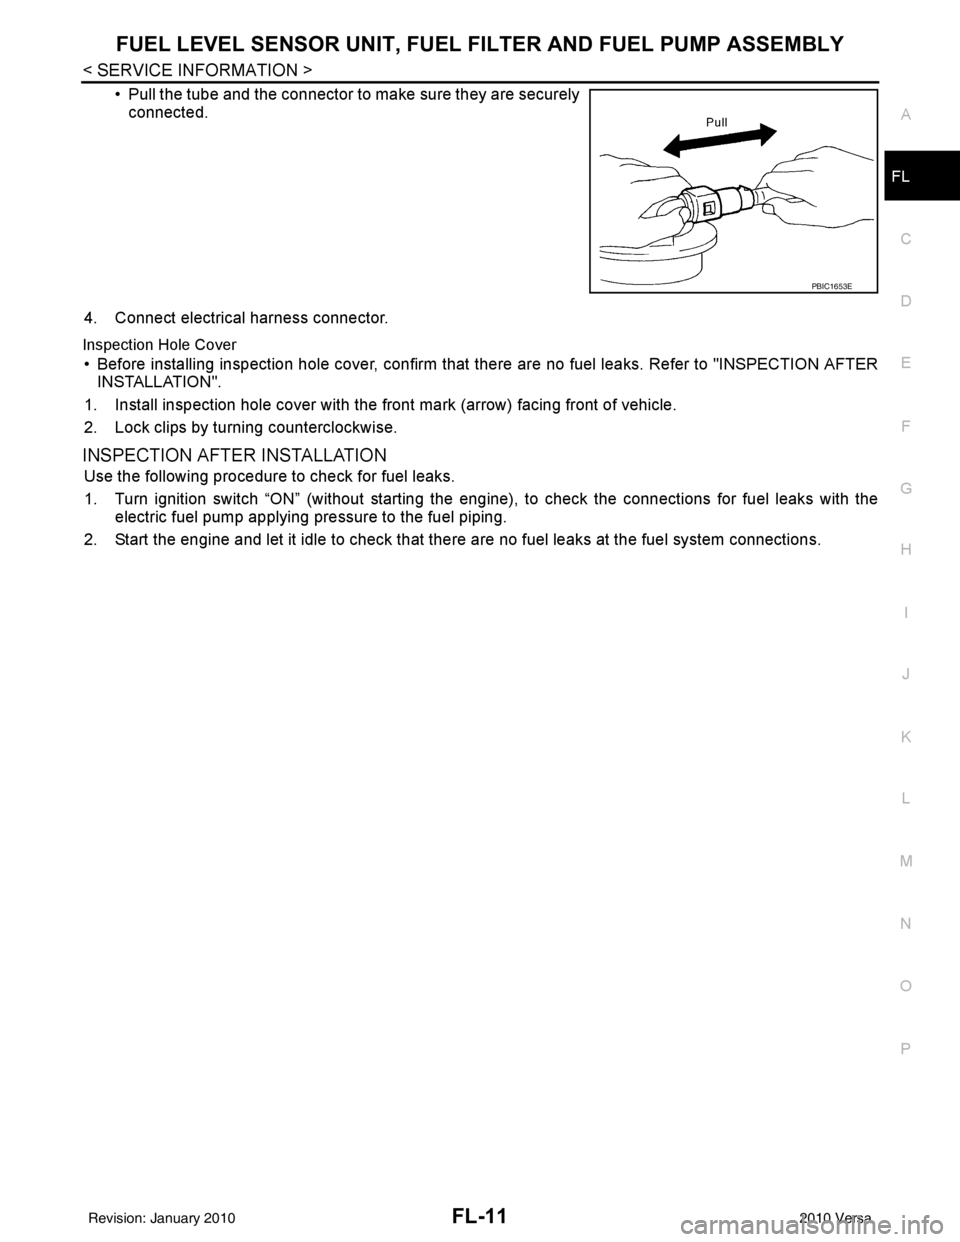
• Pull the tube and the connector to make sure they are securely
connected.
4. Connect electrical harness connector.
Inspection Hole Cover
• Before installing inspection hole cover, confirm that there are no fuel leaks. Refer to "INSPECTION AFTER INSTALLATION".
1. Install inspection hole cover with the front mark (arrow) facing front of vehicle.
2. Lock clips by turning counterclockwise.
INSPECTION AFTER INSTALLATION
Use the following procedure to check for fuel leaks.
1. Turn ignition switch “ON” (without starting the engi ne), to check the connections for fuel leaks with the
electric fuel pump applying pressure to the fuel piping.
2. Start the engine and let it idle to check that ther e are no fuel leaks at the fuel system connections.
PBIC1653E
Revision: January 20102010 Versa