2010 NISSAN QASHQAI check engine
[x] Cancel search: check enginePage 70 of 297
![NISSAN QASHQAI 2010 Owners Manual Downloaded from www.Manualslib.com manuals search engine For more information, contact your NISSAN dealer
or qualified workshop.
[Language]
Select the submenu to set the desired language of
the displa NISSAN QASHQAI 2010 Owners Manual Downloaded from www.Manualslib.com manuals search engine For more information, contact your NISSAN dealer
or qualified workshop.
[Language]
Select the submenu to set the desired language of
the displa](/manual-img/5/56766/w960_56766-69.png)
Downloaded from www.Manualslib.com manuals search engine For more information, contact your NISSAN dealer
or qualified workshop.
[Language]
Select the submenu to set the desired language of
the display
[Factory]
Select the submenu to reset the factory settings of
the display.
NOTE
When resetting [Factory], all previous settings
made are changed to default.
CRUISE CONTROL/SPEED LIMITER
INDICATOR (where fitted)
The CRUISE indicator is displayed when the
cruise control main “ON/OFF” switch is pushed.
When the main switch is pushed again, theCRUISE indicator disappears. When the
CRUISE indicator is displayed, the cruise con-
trol system is operational.
The cruise control SET indicator is displayed
while the vehicle speed is controlled by the cruise
control system. If the SET indicator blinks while
the engine is running, it may indicate that the
cruise control system is not functioning properly.
Have the system checked by an NISSAN dealer
or qualified workshop.
For more details, see “Cruise control (where
fitted)” in the “5. Starting and driving” section.
The LIMIT indicator is displayed when the speed
limiter main “ON/OFF” switch is pushed. When
the main switch is pushed again, the LIMIT indi-
cator disappears.
When the LIMIT indicator is displayed, the speed
limiter is operational. The speed limiter is active,
when the SET indicator is displayed.
For more details, see “Speed limiter” in the
“5. Starting and driving” section.
When the trip computer was set before using the
cruise control or speed limiter function, the trip com-
puter menu item
jA is shown together with the
cruise control or speed limiter. See “Trip computer”
earlier in this section
WARNING
In freezing temperatures the washer fluid may
freeze on the windscreen and obscure your vi-
sion. Warm the windscreen with the defroster
before you wash it.
CAUTION
Do not open/release the bonnet when the
front wiper arms are raised from their original
position.
Do not operate the washer continuously for
more than 15 seconds.
Do not operate the washer if the reservoir
tank is empty or frozen.
NIC1550
WIPER AND WASHER SWITCH
Instruments and controls2-21
Page 78 of 297
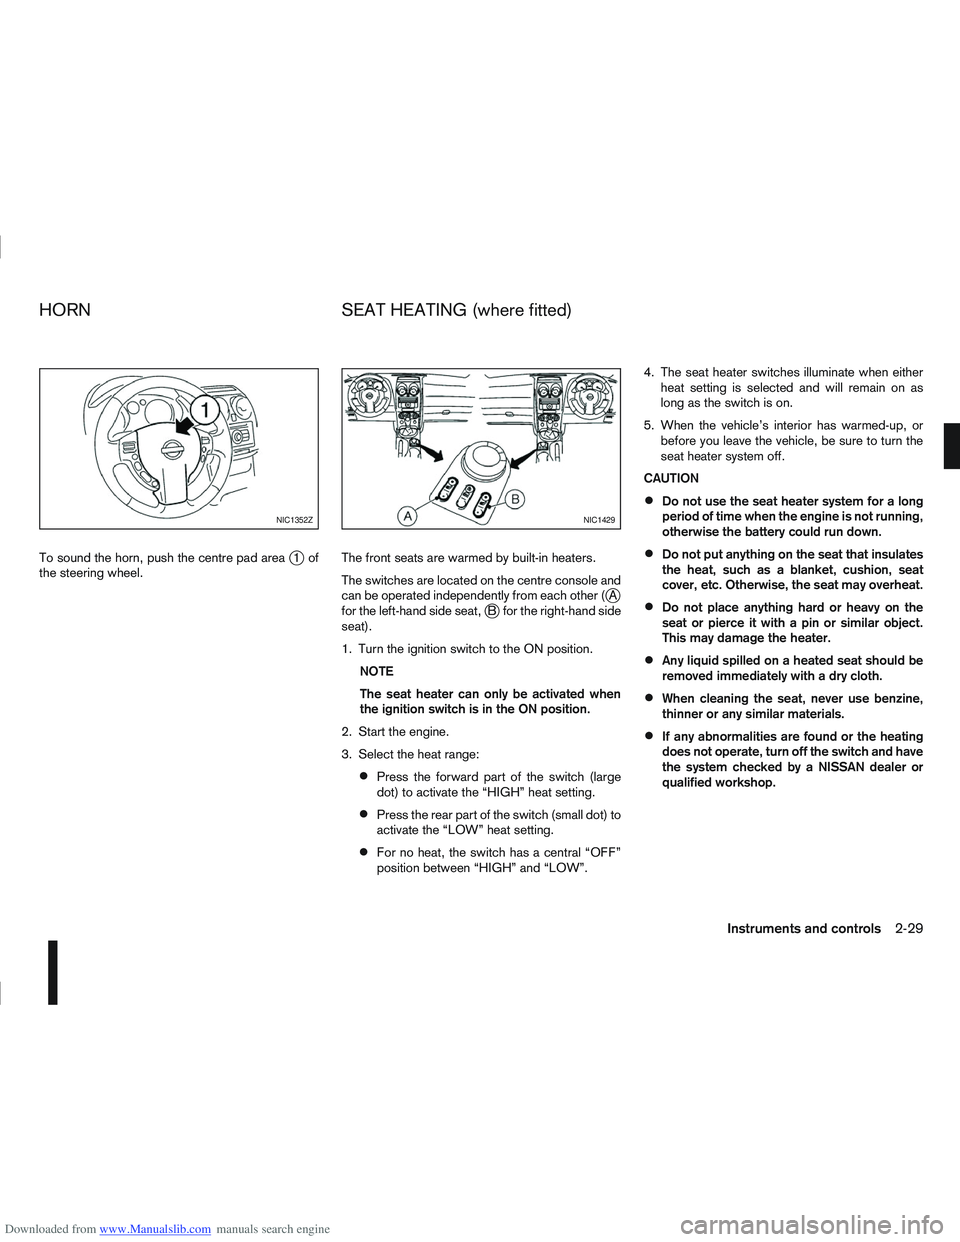
Downloaded from www.Manualslib.com manuals search engine To sound the horn, push the centre pad areaj1of
the steering wheel. The front seats are warmed by built-in heaters.
The switches are located on the centre console and
can be operated independently from each other (
jA
for the left-hand side seat,jB for the right-hand side
seat).
1. Turn the ignition switch to the ON position.
NOTE
The seat heater can only be activated when
the ignition switch is in the ON position.
2. Start the engine.
3. Select the heat range:
Press the forward part of the switch (large
dot) to activate the “HIGH” heat setting.
Press the rear part of the switch (small dot) to
activate the “LOW” heat setting.
For no heat, the switch has a central “OFF”
position between “HIGH” and “LOW”. 4. The seat heater switches illuminate when either
heat setting is selected and will remain on as
long as the switch is on.
5. When the vehicle’s interior has warmed-up, or before you leave the vehicle, be sure to turn the
seat heater system off.
CAUTION
Do not use the seat heater system for a long
period of time when the engine is not running,
otherwise the battery could run down.
Do not put anything on the seat that insulates
the heat, such as a blanket, cushion, seat
cover, etc. Otherwise, the seat may overheat.
Do not place anything hard or heavy on the
seat or pierce it with a pin or similar object.
This may damage the heater.
Any liquid spilled on a heated seat should be
removed immediately with a dry cloth.
When cleaning the seat, never use benzine,
thinner or any similar materials.
If any abnormalities are found or the heating
does not operate, turn off the switch and have
the system checked by a NISSAN dealer or
qualified workshop.
NIC1352ZNIC1429
HORN SEAT HEATING (where fitted)
Instruments and controls2-29
Page 88 of 297
Downloaded from www.Manualslib.com manuals search engine 3Pre-driving checks and adjustments
Pre-driving checks and adjustments
Keys ........................................................................\
3-2
NISSAN Anti-Theft System (NATS)* key ............. 3-2
Intelligent Key (where fitted)................................ 3-2
Key number ........................................................ 3-3
New keys ........................................................... 3-3
Emergency/mechanical key (Intelligent Key
models) .............................................................. 3-3
Integrated keyfob/remote control system .................. 3-3 Switching from Convenience mode to
Anti-hijack mode ................................................. 3-4
Using the remote keyless entry system ................ 3-5
Locking the doors ............................................... 3-5
Unlocking the doors ............................................ 3-5
Keyfob operation failure ...................................... 3-6
Intelligent Key system (where fitted) ......................... 3-6 Intelligent Key operating range ............................ 3-6
Using Intelligent Key system................................ 3-7
Locking/unlocking .............................................. 3-7
Starting the engine with the Intelligent Key .......... 3-8
Door locks ............................................................... 3-9 Super Lock system (RHD models) ...................... 3-9
Locking/unlocking with the key (vehicle dead
battery) ............................................................... 3-9 Inside door handle .............................................. 3-10
Power door lock switch ...................................... 3-10
Child safety lock — rear doors............................ 3-11
Back door lock ................................................... 3-12
Security system ....................................................... 3-13 Alarm system (where fitted) ................................ 3-13
NISSAN Anti-Theft System (NATS)..................... 3-13
Bonnet release ........................................................ 3-14
Fuel filler lid ............................................................. 3-15 Fuel filler lid opener lever .................................... 3-15
Fuel filler cap ...................................................... 3-15
Handbrake lever ...................................................... 3-16
Steering wheel......................................................... 3-16
Sun visors ............................................................... 3-17
Mirrors..................................................................... 3-17 Inside rear-view mirror ........................................ 3-17
Automatic anti-dazzling inside mirror (where
fitted).................................................................. 3-17
Outside rear-view mirrors.................................... 3-17
Vanity mirror ....................................................... 3-19
Page 89 of 297
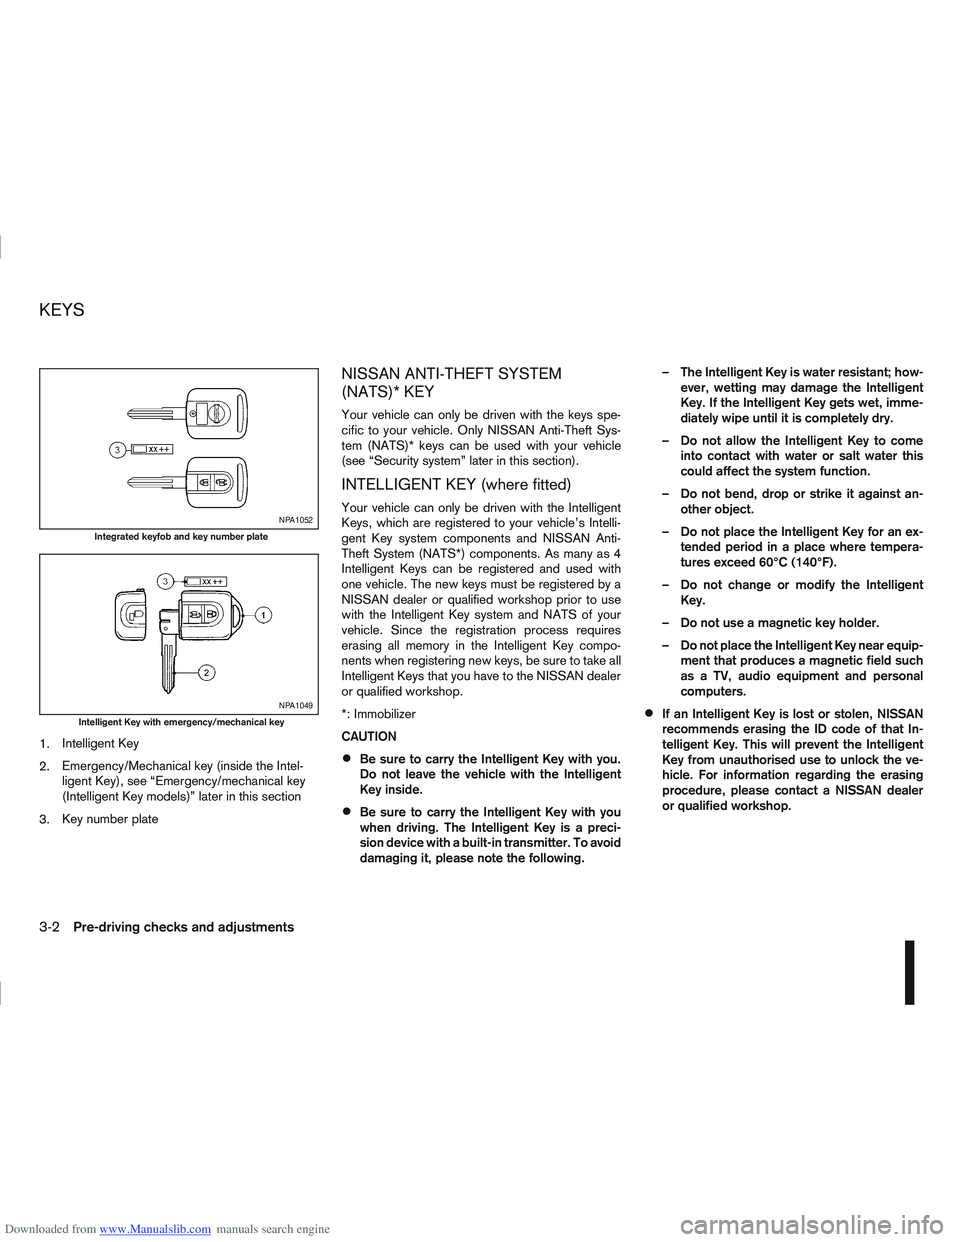
Downloaded from www.Manualslib.com manuals search engine 1.Intelligent Key
2. Emergency/Mechanical key (inside the Intel-
ligent Key), see “Emergency/mechanical key
(Intelligent Key models)” later in this section
3. Key number plate
NISSAN ANTI-THEFT SYSTEM
(NATS)* KEY
Your vehicle can only be driven with the keys spe-
cific to your vehicle. Only NISSAN Anti-Theft Sys-
tem (NATS)* keys can be used with your vehicle
(see “Security system” later in this section).
INTELLIGENT KEY (where fitted)
Your vehicle can only be driven with the Intelligent
Keys, which are registered to your vehicle’s Intelli-
gent Key system components and NISSAN Anti-
Theft System (NATS*) components. As many as 4
Intelligent Keys can be registered and used with
one vehicle. The new keys must be registered by a
NISSAN dealer or qualified workshop prior to use
with the Intelligent Key system and NATS of your
vehicle. Since the registration process requires
erasing all memory in the Intelligent Key compo-
nents when registering new keys, be sure to take all
Intelligent Keys that you have to the NISSAN dealer
or qualified workshop.
*: Immobilizer
CAUTION
Be sure to carry the Intelligent Key with you.
Do not leave the vehicle with the Intelligent
Key inside.
Be sure to carry the Intelligent Key with you
when driving. The Intelligent Key is a preci-
sion device with a built-in transmitter. To avoid
damaging it, please note the following. – The Intelligent Key is water resistant; how-
ever, wetting may damage the Intelligent
Key. If the Intelligent Key gets wet, imme-
diately wipe until it is completely dry.
– Do not allow the Intelligent Key to come into contact with water or salt water this
could affect the system function.
– Do not bend, drop or strike it against an- other object.
– Do not place the Intelligent Key for an ex- tended period in a place where tempera-
tures exceed 60°C (140°F).
– Do not change or modify the Intelligent Key.
– Do not use a magnetic key holder.
– Do not place the Intelligent Key near equip- ment that produces a magnetic field such
as a TV, audio equipment and personal
computers.
If an Intelligent Key is lost or stolen, NISSAN
recommends erasing the ID code of that In-
telligent Key. This will prevent the Intelligent
Key from unauthorised use to unlock the ve-
hicle. For information regarding the erasing
procedure, please contact a NISSAN dealer
or qualified workshop.
NPA1052
Integrated keyfob and key number plate
NPA1049
Intelligent Key with emergency/mechanical key
KEYS
3-2Pre-driving checks and adjustments
Page 90 of 297
Downloaded from www.Manualslib.com manuals search engine KEY NUMBER
A key number platej3 is supplied with your key
Record the key number on the “Security Informa-
tion” page at the end of this manual and keep it in a
safe place, but not in the vehicle . The key can only
be duplicated using an original key or the original
key number. The key number is required when you
have lost all of the keys and do not have the original
key to duplicate from. If the key is lost, or you need
extra keys, provide an original key or the key number
to a NISSAN dealer or qualified workshop.
NISSAN does not record key numbers, so it is very
important that you keep a record of your key num-
ber.
NEW KEYS
As many as four NATS keys can be registered to
one vehicle at any one time. New keys must be reg-
istered to the NATS components of your vehicle by
a NISSAN dealer.
When registering a new key at a NISSAN dealer,
you are requested to bring all of your NATS keys
with you. This is necessary because the registration
process will erase and reprogram the memory of
your vehicle’s NATS components.
NOTE
A key number is only required if you have lost all
of your keys and do not have one to duplicate
from. If you still have a key, this key can be dupli-
cated by a NISSAN dealer.
EMERGENCY/MECHANICAL KEY
(Intelligent Key models)
The emergency key can be used to unlock the driv-
er’s door and start the engine in emergency situa-
tions (e.g. Intelligent Key dead battery).
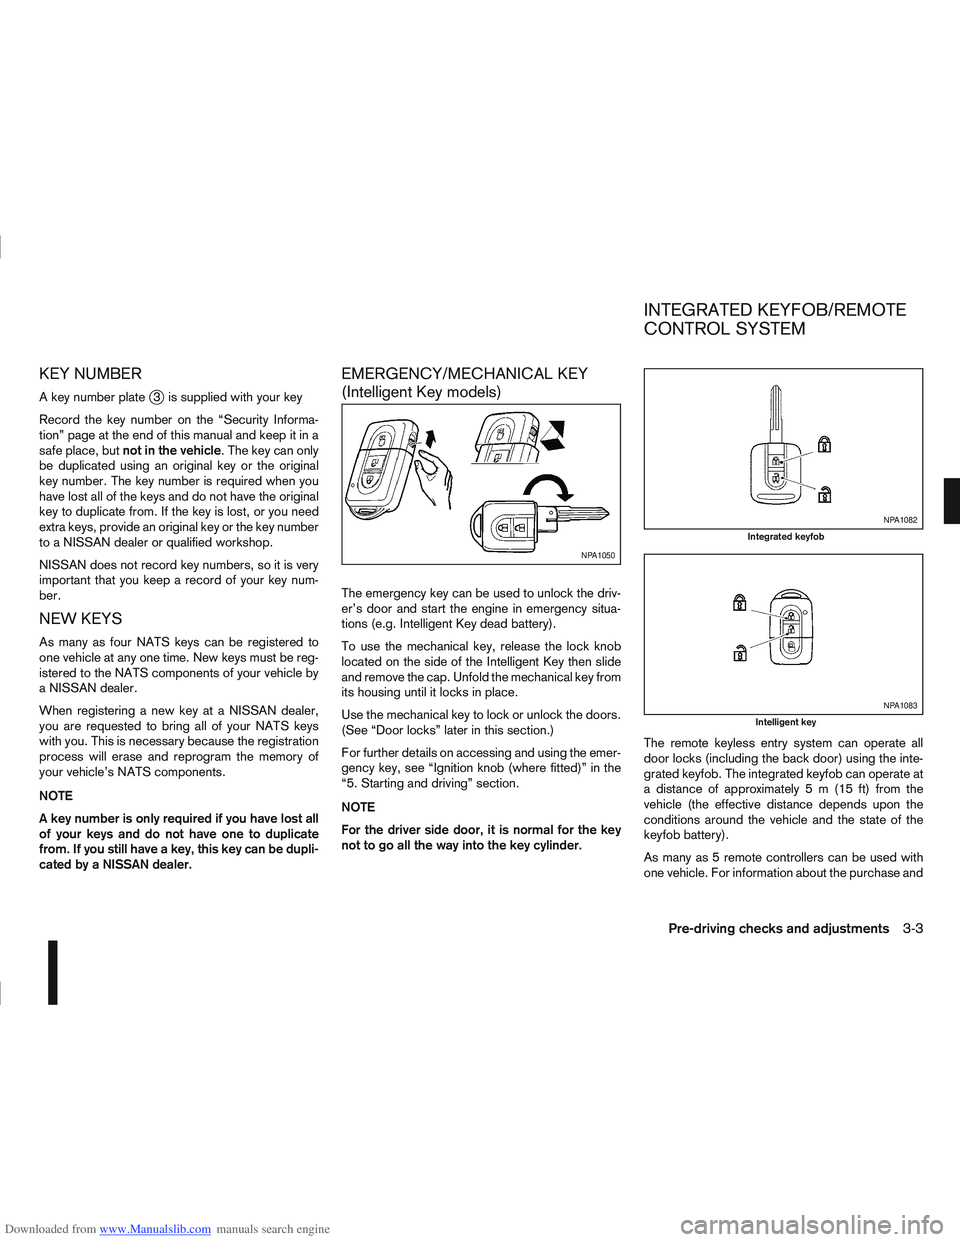
To use the mechanical key, release the lock knob
located on the side of the Intelligent Key then slide
and remove the cap. Unfold the mechanical key from
its housing until it locks in place.
Use the mechanical key to lock or unlock the doors.
(See “Door locks” later in this section.)
For further details on accessing and using the emer-
gency key, see “Ignition knob (where fitted)” in the
“5. Starting and driving” section.
NOTE
For the driver side door, it is normal for the key
not to go all the way into the key cylinder. The remote keyless entry system can operate all
door locks (including the back door) using the inte-
grated keyfob. The integrated keyfob can operate at
a distance of approximately 5 m (15 ft) from the
vehicle (the effective distance depends upon the
conditions around the vehicle and the state of the
keyfob battery).
As many as 5 remote controllers can be used with
one vehicle. For information about the purchase and
NPA1050
NPA1082
Integrated keyfob
NPA1083
Intelligent key
INTEGRATED KEYFOB/REMOTE
CONTROL SYSTEM
Pre-driving checks and adjustments3-3
Page 91 of 297
Downloaded from www.Manualslib.com manuals search engine use of additional remote controllers, contact a
NISSAN dealer or qualified workshop.
The integrated keyfob will not function under the fol-
lowing conditions:
When the distance between the integrated key-
fob and vehicle is more than approximately 5 m
(15 ft).
When the integrated keyfob battery is
discharged.
When the key is in the ignition switch.
All doors can be locked or unlocked from the out-
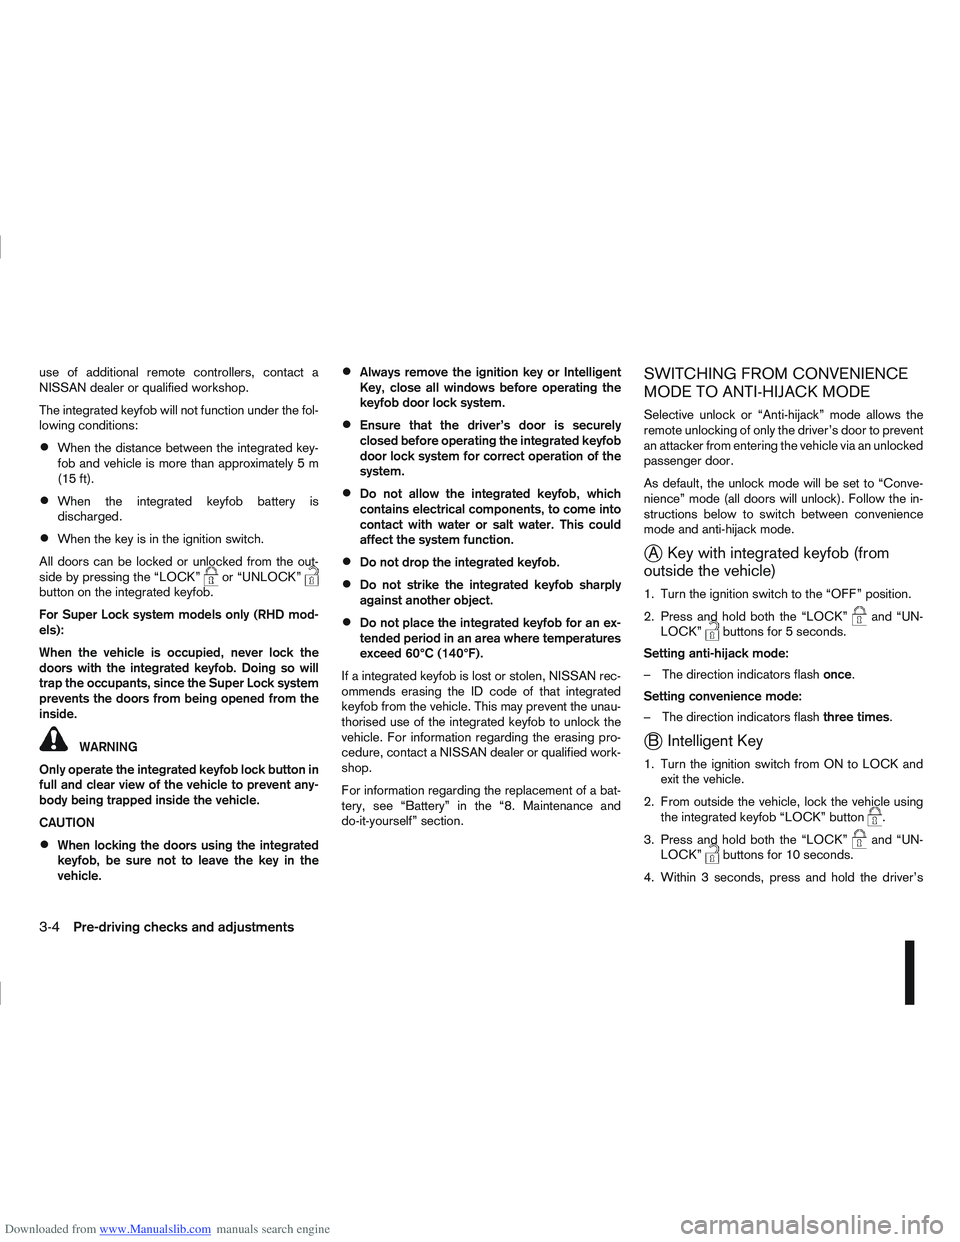
side by pressing the “LOCK”
or “UNLOCK”button on the integrated keyfob.
For Super Lock system models only (RHD mod-
els):
When the vehicle is occupied, never lock the
doors with the integrated keyfob. Doing so will
trap the occupants, since the Super Lock system
prevents the doors from being opened from the
inside.
WARNING
Only operate the integrated keyfob lock button in
full and clear view of the vehicle to prevent any-
body being trapped inside the vehicle.
CAUTION
When locking the doors using the integrated
keyfob, be sure not to leave the key in the
vehicle.
Always remove the ignition key or Intelligent
Key, close all windows before operating the
keyfob door lock system.
Ensure that the driver’s door is securely
closed before operating the integrated keyfob
door lock system for correct operation of the
system.
Do not allow the integrated keyfob, which
contains electrical components, to come into
contact with water or salt water. This could
affect the system function.
Do not drop the integrated keyfob.
Do not strike the integrated keyfob sharply
against another object.
Do not place the integrated keyfob for an ex-
tended period in an area where temperatures
exceed 60°C (140°F).
If a integrated keyfob is lost or stolen, NISSAN rec-
ommends erasing the ID code of that integrated
keyfob from the vehicle. This may prevent the unau-
thorised use of the integrated keyfob to unlock the
vehicle. For information regarding the erasing pro-
cedure, contact a NISSAN dealer or qualified work-
shop.
For information regarding the replacement of a bat-
tery, see “Battery” in the “8. Maintenance and
do-it-yourself” section.
SWITCHING FROM CONVENIENCE
MODE TO ANTI-HIJACK MODE
Selective unlock or “Anti-hijack” mode allows the
remote unlocking of only the driver’s door to prevent
an attacker from entering the vehicle via an unlocked
passenger door.
As default, the unlock mode will be set to “Conve-
nience” mode (all doors will unlock). Follow the in-
structions below to switch between convenience
mode and anti-hijack mode.
jA Key with integrated keyfob (from
outside the vehicle)
1. Turn the ignition switch to the “OFF” position.
2. Press and hold both the “LOCK”
and “UN-
LOCK”buttons for 5 seconds.
Setting anti-hijack mode:
– The direction indicators flash once.
Setting convenience mode:
– The direction indicators flash three times.
jB Intelligent Key
1. Turn the ignition switch from ON to LOCK and
exit the vehicle.
2. From outside the vehicle, lock the vehicle using the integrated keyfob “LOCK” button
.
3. Press and hold both the “LOCK”
and “UN-
LOCK”buttons for 10 seconds.
4. Within 3 seconds, press and hold the driver’s
3-4Pre-driving checks and adjustments
Page 92 of 297
Downloaded from www.Manualslib.com manuals search engine door outside lock switch until the direction indi-
cators flash to confirm the setting mode. Then
release the driver’s door outside lock switch.
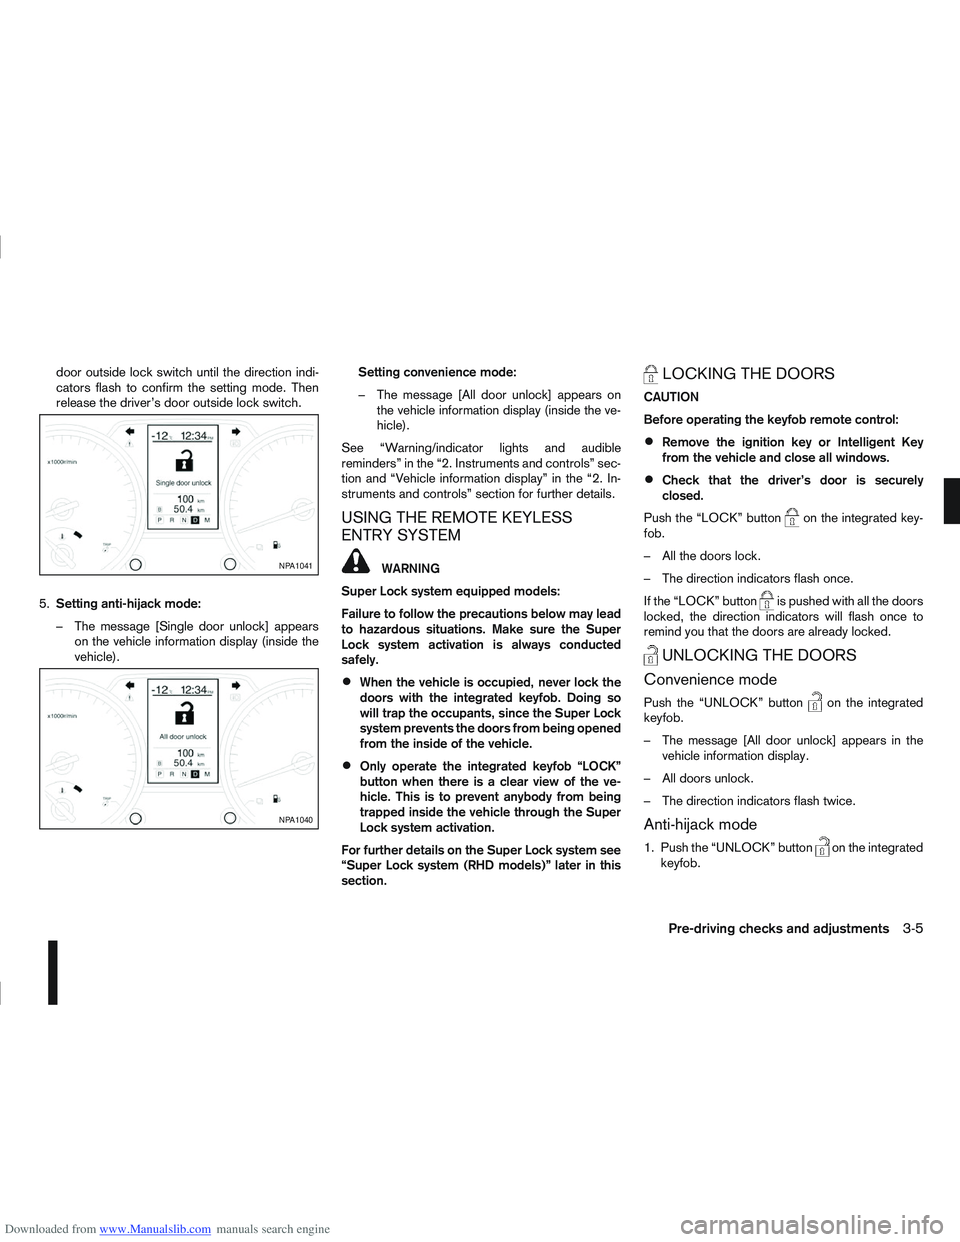
5. Setting anti-hijack mode:
– The message [Single door unlock] appears on the vehicle information display (inside the
vehicle). Setting convenience mode:
– The message [All door unlock] appears on
the vehicle information display (inside the ve-
hicle).
See “Warning/indicator lights and audible
reminders” in the “2. Instruments and controls” sec-
tion and “Vehicle information display” in the “2. In-
struments and controls” section for further details.
USING THE REMOTE KEYLESS
ENTRY SYSTEM
WARNING
Super Lock system equipped models:
Failure to follow the precautions below may lead
to hazardous situations. Make sure the Super
Lock system activation is always conducted
safely.
When the vehicle is occupied, never lock the
doors with the integrated keyfob. Doing so
will trap the occupants, since the Super Lock
system prevents the doors from being opened
from the inside of the vehicle.
Only operate the integrated keyfob “LOCK”
button when there is a clear view of the ve-
hicle. This is to prevent anybody from being
trapped inside the vehicle through the Super
Lock system activation.
For further details on the Super Lock system see
“Super Lock system (RHD models)” later in this
section.
LOCKING THE DOORS
CAUTION
Before operating the keyfob remote control:
Remove the ignition key or Intelligent Key
from the vehicle and close all windows.
Check that the driver’s door is securely
closed.
Push the “LOCK” button
on the integrated key-
fob.
– All the doors lock.
– The direction indicators flash once.
If the “LOCK” button
is pushed with all the doors
locked, the direction indicators will flash once to
remind you that the doors are already locked.
UNLOCKING THE DOORS
Convenience mode
Push the “UNLOCK” buttonon the integrated
keyfob.
– The message [All door unlock] appears in the vehicle information display.
– All doors unlock.
– The direction indicators flash twice.
Anti-hijack mode
1. Push the “UNLOCK” buttonon the integrated
keyfob.
NPA1041
NPA1040
Pre-driving checks and adjustments3-5
Page 93 of 297
![NISSAN QASHQAI 2010 Owners Manual Downloaded from www.Manualslib.com manuals search engine – The message [Single door unlock] appears inthe vehicle information display.
– Only the driver’s door unlocks.
– The direction indicat NISSAN QASHQAI 2010 Owners Manual Downloaded from www.Manualslib.com manuals search engine – The message [Single door unlock] appears inthe vehicle information display.
– Only the driver’s door unlocks.
– The direction indicat](/manual-img/5/56766/w960_56766-92.png)
Downloaded from www.Manualslib.com manuals search engine – The message [Single door unlock] appears inthe vehicle information display.
– Only the driver’s door unlocks.
– The direction indicators flash twice, quickly.
2. Push the “UNLOCK” button
on the integrated
keyfob again.
– All doors unlock.
– The direction indicators flash twice.
Auto-relock:
An auto-relock function will operate 2 minutes after
a full or partial unlock, if no further user action is
taken. The auto-relock will be cancelled if any door
is opened or the key is inserted into the ignition.
KEYFOB OPERATION FAILURE
The keyfob may not work properly if:
The keyfob battery is low. See “Integrated key-
fob/Intelligent Key battery replacement” in the
“8. Maintenance and do-it-yourself” section for
keyfob battery replacement instructions and the
required battery type.
The locking/unlocking system has been used
continuously. An anti lock-abuse system pre-
vents the lock motors from overheating and dis-
ables the keyfob locking operation for a short
period of time if the system is used continuously.
The door handle is being pulled while the
keyfob is being operated.
The vehicle’s battery is dead. NOTE
See Intelligent Key detection warning, Intelligent
Key low battery warning or Intelligent Key system
fault warning in “Vehicle information display” ear-
lier in this section for more information.
The Intelligent Key system is a convenient keyless
entry system that allows you to operate your vehicle
without using an actual key.
WARNING
Radio waves could adversely affect electric medi-
cal equipment. Those who use a pacemaker
should contact the electric medical equipment
manufacturer for the possible influences before
use.
INTELLIGENT KEY OPERATING
RANGE
The Intelligent Key functions can only be used when
the Intelligent Key is within the specified operating
range from the request switch
j1.
When the Intelligent Key battery is discharged or
strong radio waves are present near the operating
location, the Intelligent Key system’s operating
range becomes narrower, and the Intelligent Key
may not function properly.
NPA1042NPA1018
INTELLIGENT KEY SYSTEM
(where fitted)
3-6Pre-driving checks and adjustments