2010 NISSAN MURANO battery
[x] Cancel search: batteryPage 161 of 425
Black plate (157,1)
Model "Z51-D" EDITED: 2009/ 8/ 3
pinching, keep hands and fingers
away from lift gate opening.
. Do not let children operate the lift
gate.
SPA1915
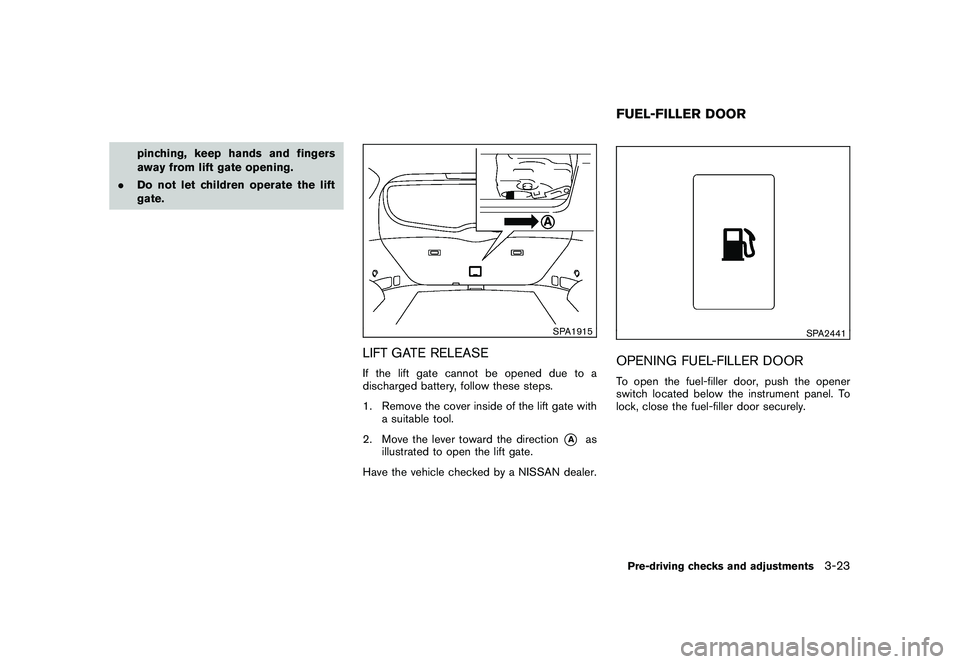
LIFT GATE RELEASEIf the lift gate cannot be opened due to a
discharged battery, follow these steps.
1. Remove the cover inside of the lift gate with
a suitable tool.
2. Move the lever toward the direction
*A
as
illustrated to open the lift gate.
Have the vehicle checked by a NISSAN dealer.
SPA2441
OPENING FUEL-FILLER DOORTo open the fuel-filler door, push the opener
switch located below the instrument panel. To
lock, close the fuel-filler door securely.FUEL-FILLER DOORPre-driving checks and adjustments
3-23
Page 168 of 425
Black plate (164,1)
Model "Z51-D" EDITED: 2009/ 8/ 3
SIC2064
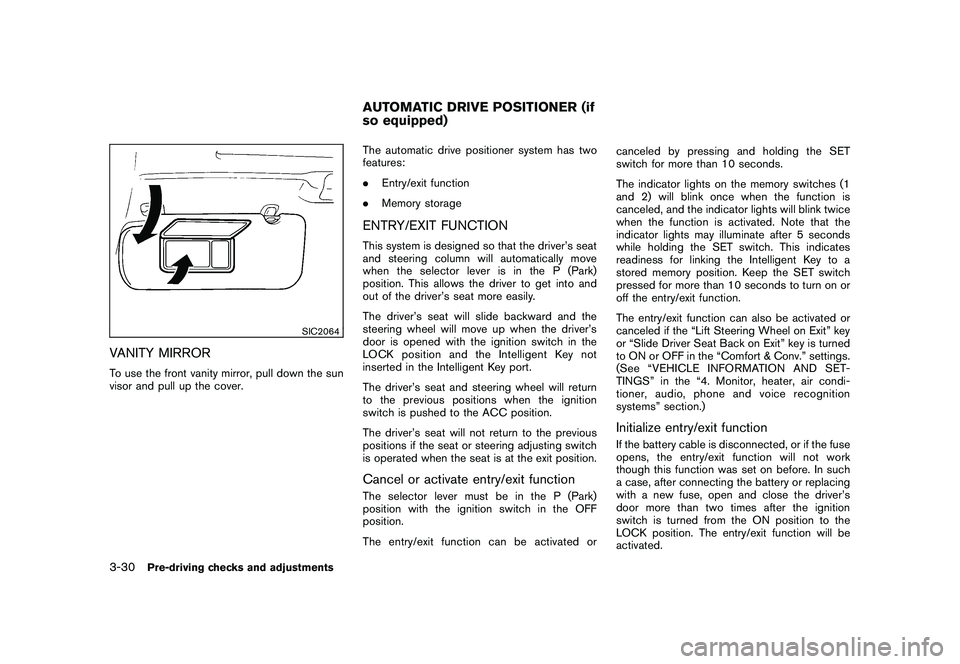
VANITY MIRRORTo use the front vanity mirror, pull down the sun
visor and pull up the cover.The automatic drive positioner system has two
features:
.
Entry/exit function
. Memory storage
ENTRY/EXIT FUNCTIONThis system is designed so that the driver’s seat
and steering column will automatically move
when the selector lever is in the P (Park)
position. This allows the driver to get into and
out of the driver’s seat more easily.
The driver’s seat will slide backward and the
steering wheel will move up when the driver’s
door is opened with the ignition switch in the
LOCK position and the Intelligent Key not
inserted in the Intelligent Key port.
The driver’s seat and steering wheel will return
to the previous positions when the ignition
switch is pushed to the ACC position.
The driver’s seat will not return to the previous
positions if the seat or steering adjusting switch
is operated when the seat is at the exit position.Cancel or activate entry/exit functionThe selector lever must be in the P (Park)
position with the ignition switch in the OFF
position.
The entry/exit function can be activated or canceled by pressing and holding the SET
switch for more than 10 seconds.
The indicator lights on the memory switches (1
and 2) will blink once when the function is
canceled, and the indicator lights will blink twice
when the function is activated. Note that the
indicator lights may illuminate after 5 seconds
while holding the SET switch. This indicates
readiness for linking the Intelligent Key to a
stored memory position. Keep the SET switch
pressed for more than 10 seconds to turn on or
off the entry/exit function.
The entry/exit function can also be activated or
canceled if the “Lift Steering Wheel on Exit” key
or “Slide Driver Seat Back on Exit” key is turned
to ON or OFF in the “Comfort & Conv.” settings.
(See “VEHICLE INFORMATION AND SET-
TINGS” in the “4. Monitor, heater, air condi-
tioner, audio, phone and voice recognition
systems” section.)
Initialize entry/exit functionIf the battery cable is disconnected, or if the fuse
opens, the entry/exit function will not work
though this function was set on before. In such
a case, after connecting the battery or replacing
with a new fuse, open and close the driver’s
door more than two times after the ignition
switch is turned from the ON position to the
LOCK position. The entry/exit function will be
activated.
AUTOMATIC DRIVE POSITIONER (if
so equipped)
3-30
Pre-driving checks and adjustments
Page 169 of 425
Black plate (165,1)
Model "Z51-D" EDITED: 2009/ 8/ 3
SPA2445
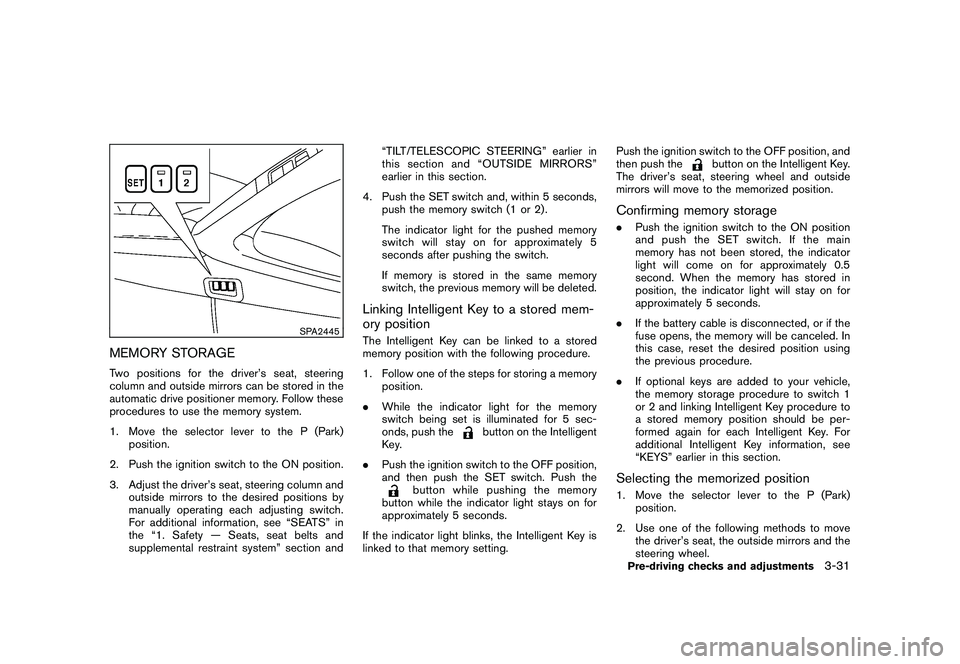
MEMORY STORAGETwo positions for the driver’s seat, steering
column and outside mirrors can be stored in the
automatic drive positioner memory. Follow these
procedures to use the memory system.
1. Move the selector lever to the P (Park)position.
2. Push the ignition switch to the ON position.
3. Adjust the driver’s seat, steering column and outside mirrors to the desired positions by
manually operating each adjusting switch.
For additional information, see “SEATS” in
the “1. Safety — Seats, seat belts and
supplemental restraint system” section and “TILT/TELESCOPIC STEERING” earlier in
this section and “OUTSIDE MIRRORS”
earlier in this section.
4. Push the SET switch and, within 5 seconds, push the memory switch (1 or 2) .
The indicator light for the pushed memory
switch will stay on for approximately 5
seconds after pushing the switch.
If memory is stored in the same memory
switch, the previous memory will be deleted.
Linking Intelligent Key to a stored mem-
ory positionThe Intelligent Key can be linked to a stored
memory position with the following procedure.
1. Follow one of the steps for storing a memoryposition.
. While the indicator light for the memory
switch being set is illuminated for 5 sec-
onds, push the
button on the Intelligent
Key.
. Push the ignition switch to the OFF position,
and then push the SET switch. Push the
button while pushing the memory
button while the indicator light stays on for
approximately 5 seconds.
If the indicator light blinks, the Intelligent Key is
linked to that memory setting. Push the ignition switch to the OFF position, and
then push the
button on the Intelligent Key.
The driver’s seat, steering wheel and outside
mirrors will move to the memorized position.
Confirming memory storage. Push the ignition switch to the ON position
and push the SET switch. If the main
memory has not been stored, the indicator
light will come on for approximately 0.5
second. When the memory has stored in
position, the indicator light will stay on for
approximately 5 seconds.
. If the battery cable is disconnected, or if the
fuse opens, the memory will be canceled. In
this case, reset the desired position using
the previous procedure.
. If optional keys are added to your vehicle,
the memory storage procedure to switch 1
or 2 and linking Intelligent Key procedure to
a stored memory position should be per-
formed again for each Intelligent Key. For
additional Intelligent Key information, see
“KEYS” earlier in this section.Selecting the memorized position1. Move the selector lever to the P (Park)
position.
2. Use one of the following methods to move the driver’s seat, the outside mirrors and the
steering wheel.Pre-driving checks and adjustments
3-31
Page 172 of 425

Black plate (13,1)
4 Monitor, heater, air conditioner, audio,phone and voice recognition systems
Model "Z51-D" EDITED: 2009/ 8/ 3
Safety note ....................................................... 4-2
Center multi-function control panel
(models with color display screen) ......................... 4-2
How to use multi-function controller ................... 4-4
How to use touch screen
(models with navigation system) ........................ 4-4
Start-up screen (models with navigation system) . . . 4-6
Start menu (models with navigation system) ......... 4-6
How to select menus on the screen ................... 4-7
Vehicle information and settings ............................. 4-8
How to use STATUS button .............................. 4-8
How to use brightness control and display ON/
OFF button ................................................... 4-8
How to use INFO button. ................................. 4-8
How to use SETTING button .......................... 4-12
Rearview monitor (if so equipped) ........................ 4-19
How to read the displayed lines ....................... 4-20
How to park with predicted course lines ............ 4-20
Difference between predicted and actual
distances ................................................... 4-22
How to adjust the screen ............................... 4-24
Operating tips ............................................. 4-24
Ventilators ...................................................... 4-25
Heater and air conditioner .................................. 4-26
Automatic operation ...................................... 4-28
Manual operation ......................................... 4-29
To turn the system ON/OFF ........................... 4-30 Operating tips
............................................. 4-30
In-cabin microfilter ........................................ 4-30
Servicing air conditioner ................................ 4-30
Audio system .................................................. 4-31
Audio operation precautions ........................... 4-31
FM-AM radio with Compact Disc (CD)
changer ..................................................... 4-39
FM-AM-SAT radio with Compact Disc (CD)
changer ..................................................... 4-44
CompactFlash (CF) player operation
(models with navigation system) ...................... 4-49
iPod
®player operation (if so equipped) .............. 4-51
“MUSIC BOX” hard-disk drive
(models with navigation system) ...................... 4-52
CD/CF (CompactFlash) care and cleaning ......... 4-59
Steering-wheel-mounted controls for audio ........ 4-61
Antenna ..................................................... 4-62
NISSAN Mobile Entertainment System (MES)
(if so equipped) ............................................... 4-63
DVD player operation precautions .................... 4-63
Digital Versatile Disc (DVD) system
components ................................................ 4-64
Remote controller and headphones battery
replacement ................................................ 4-68
Before operating the DVD entertainment
system ....................................................... 4-68
Playing a Digital Versatile Disc (DVD) ............... 4-69
Page 175 of 425
Black plate (171,1)
Model "Z51-D" EDITED: 2009/ 8/ 3
SAA1846
Without navigation system
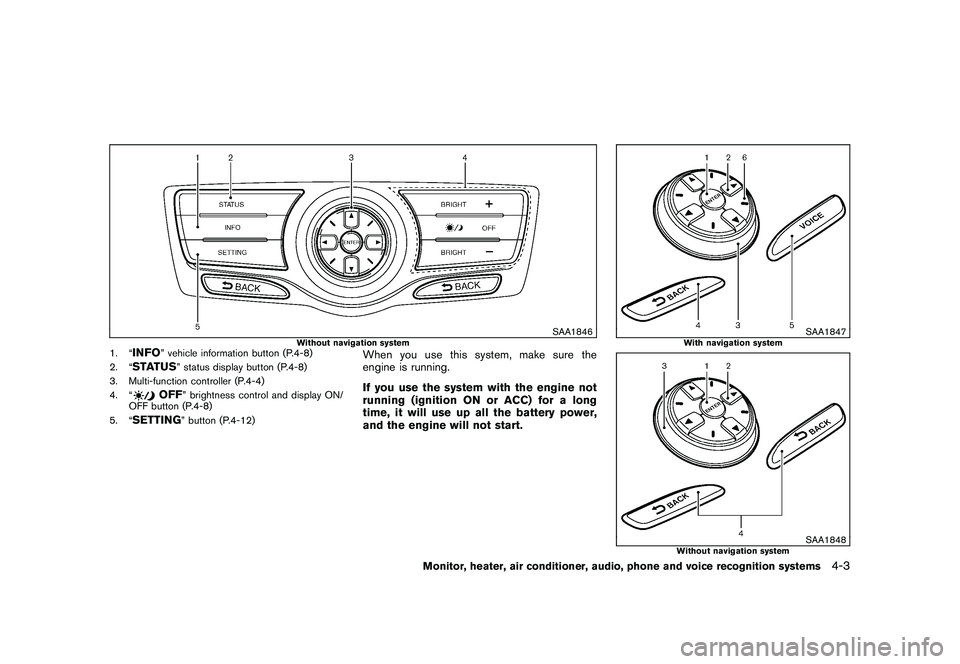
1. “
INFO
” vehicle information button (P.4-8)
2. “
STATUS
” status display button (P.4-8)
3. Multi-function controller (P.4-4)
4. “
OFF
” brightness control and display ON/
OFF button (P.4-8)
5. “
SETTING
” button (P.4-12)
When you use this system, make sure the
engine is running.
If you use the system with the engine not
running (ignition ON or ACC) for a long
time, it will use up all the battery power,
and the engine will not start.
SAA1847
With navigation system
SAA1848
Without navigation system
Monitor, heater, air conditioner, audio, phone and voice recognition systems
4-3
Page 193 of 425

Black plate (189,1)
Model "Z51-D" EDITED: 2009/ 8/ 3
.On a snow-covered or slippery road,
there may be a difference between
the predicted course line and the
actual course line.
. If the battery is disconnected or
becomes discharged, the predicted
course lines may be displayed in-
correctly. If this occurs, please per-
form the following procedures:
— Turn the steering wheel from
lock to lock while the engine is
running.
— Drive the vehicle on a straight road for more than 5 minutes.
. When the steering wheel is turned
with the ignition switch in the ACC
position, the predicted course lines
may be displayed incorrectly.
. The displayed lines will appear
slightly off to the right because the
rear view camera is not installed in
the rear center of the vehicle.
. The distance guide line and the
vehicle width line should be used
as a reference only when the vehicle
is on a level paved surface. The
distance viewed on the monitor is
for reference only and may be different than the actual distance
between the vehicle and displayed
objects.
. When backing-up the vehicle up a
hill objects viewed in the monitor
are further than they appear. When
backing-up the vehicle down a hill,
objects viewed in the monitor are
closer than they appear. Use the
inside mirror or glance over your
shoulder to properly judge dis-
tances to other objects.
The vehicle width and predicted course
lines are wider than the actual width and
course.
SAA1897
1. Visually check that the parking space is safe before parking your vehicle.
2. The rear view of the vehicle is displayed on the screen
*A
when the selector lever is
moved to the R (Reverse) position.
Monitor, heater, air conditioner, audio, phone and voice recognition systems
4-21
Page 204 of 425
Black plate (200,1)
Model "Z51-D" EDITED: 2009/ 8/ 3
Static and flutter: During signal interference from
buildings, large hills or due to antenna position,
usually in conjunction with increased distance
from the station transmitter, static or flutter can
be heard. This can be reduced by lowering the
treble setting to reduce the treble response.
Multipath reception: Because of the reflective
characteristics of FM signals, direct and re-
flected signals reach the receiver at the same
time. The signals may cancel each other,
resulting in momentary flutter or loss of sound.
AM radio reception:
AM signals, because of their low frequency, can
bend around objects and skip along the ground.
In addition, the signals can be bounced off the
ionosphere and bent back to earth. Because of
these characteristics. AM signals are also
subject to interference as they travel from
transmitter to receiver.
Fading: Occurs while the vehicle is passing
through freeway underpasses or in areas with
many tall buildings. It can also occur for several
seconds during ionospheric turbulence even in
areas where no obstacles exist.
Static: Caused by thunderstorms, electrical
power lines, electric signs and even traffic lights.Satellite radio reception (if so equipped):
When the satellite radio is first installed or the
battery has been replaced, the satellite radio
may not work properly. This is not a malfunction.
Wait more than 10 minutes with satellite radio
ON for satellite radio to receive all of the
necessary data.
The satellite radio mode requires an active XM
®
satellite radio service subscription. Satellite
radio is not available in Alaska, Hawaii and
Guam.
Satellite radio performance may be affected if
cargo carried on the roof blocks the satellite
radio signal.
If possible, do not put cargo near the satellite
antenna.
A build up of ice on the satellite radio antenna
can affect satellite radio performance. Remove
the ice to restore satellite radio reception.
SAA0480
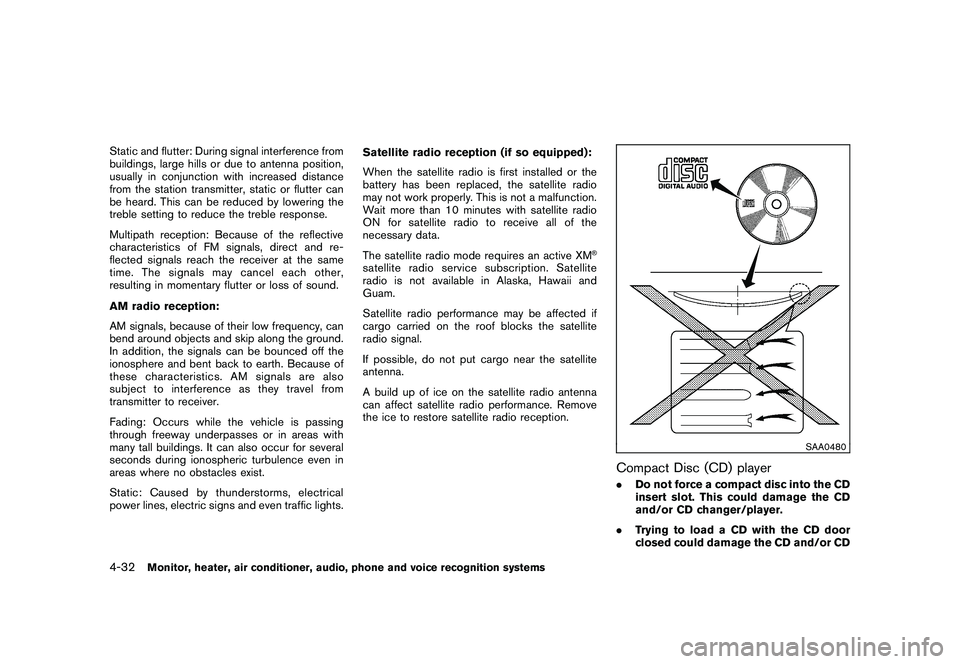
Compact Disc (CD) player.
Do not force a compact disc into the CD
insert slot. This could damage the CD
and/or CD changer/player.
. Trying to load a CD with the CD door
closed could damage the CD and/or CD
4-32
Monitor, heater, air conditioner, audio, phone and voice recognition systems
Page 213 of 425
Black plate (209,1)
Model "Z51-D" EDITED: 2009/ 8/ 3
buttons
*1
to
*6
until a beep sound is
heard. (The radio mutes when the select
button is pushed.)
4. The channel indicator will then come on and the sound will resume. Memorizing is now
complete.
5. Other buttons can be set in the same manner.
If the battery cable is disconnected, or if the fuse
blows, the radio memory will be erased. In that
case, reset the desired stations.
Compact Disc (CD) changer operationPush the ignition switch to the ACC or ON
position, push the LOAD button and insert the
compact disc into the slot with the label side
facing up. The compact disc will be guided
automatically into the slot and start playing.
After loading the disc, the number of tracks on
the disc and the play time will appear on the
display.
If the radio is already operating, it will auto-
matically turn off and the compact disc will play.
If the system has been turned off while the
compact disc was playing, pushing the
ON·OFF/VOL control knob will start the com-
pact disc.
CD LOAD:
To insert a CD in the CD changer, push the
LOAD button for less than 1.5 seconds. Select
the loading position by pushing the CD insert
select button
*1
to*6, then insert the CD.
To insert 6 CDs to the CD changer in
succession, push the LOAD button for more
than 1.5 seconds.
The inserted slot numbers will illuminate on the
display.
PLAY:
When the DISC (CD play) button is pushed with
the system off and the compact disc loaded, the
system will turn on and the compact disc will
start to play.
When the DISC button is pushed with the
compact disc loaded and the radio playing, the
radio will automatically be turned off and the
compact disc will start to play.
CD PLAY INFORMATION:
When the DISP button is pushed for less than
1.5 seconds while the CD is being played, the
disc information display will change as follows:
CD:
CD with MP3 or WMA:
FF (Fast Forward) , REW (Re-
wind)/APS (Automatic Pro-
gram Search) FF, APS REW:
When the(fast forward) or
(rewind)
button is pushed for more than 1.5 seconds
while the compact disc is being played, the
compact disc will play while fast forwarding or
rewinding. When the button is released, the
compact disc will return to normal play speed.
When the
or
button is pushed for less
than 1.5 seconds while the compact disc is
being played, the next track or the beginning of
Monitor, heater, air conditioner, audio, phone and voice recognition systems
4-41