2010 NISSAN MURANO closed system
[x] Cancel search: closed systemPage 130 of 425
Black plate (126,1)
Model "Z51-D" EDITED: 2009/ 8/ 3
operation, push either of the OPEN
*1, CLOSE
*2
or UP
*5
of the switch.
Tilting moonroofTo tilt up the moonroof, push the moonroof
switch to the up position
*5.
To tilt down the moonroof, push the switch to the
up position
*5
or push the CLOSE side
*2
of
the switch.
When the moonroof is tilted up, push the
CLOSE side of the moonroof switch to the
second detent
*4. The moonroof will tilt down
and the sunshades will close.
Auto reverse function
WARNING
There are some small distances imme-
diately before the closed position which
cannot be detected. Make sure that all
passengers have their hands, etc., in-
side the vehicle before closing the
moonroof.
If the control unit detects something caught in
the moonroof and sunshades when they are
closing, the moonroof will be immediately
opened. The auto reverse function can be activated when
the moonroof and sunshades are closed by
automatic operation when the ignition switch is
in the ON position or for about 45 seconds after
the ignition switch is pushed to the OFF
position.
If the moonroof and sunshades cannot be
closed automatically when the auto reverse
function activates due to a malfunction, push
and hold the CLOSE side
*2
of the moonroof
switch.
Depending on the environment or driving
conditions, the auto reverse function may
be activated if an impact or load similar to
something being caught in the moonroof
occurs.
If the moonroof does not operateIf the moonroof does not operate properly,
perform the following procedure to initialize the
moonroof operation system.
1. If the moonroof is open, close it fully by
pushing the CLOSE side
*2
of the moon-
roof switch.
2. Push and hold the CLOSE side*2
of the
moonroof switch.
3. Release the moonroof switch after the moonroof or sunshade moves slightly to
the closed position. 4. Push and hold the CLOSE side
*2
of the
moonroof switch for 10 seconds.
5. The moonroof and sunshades will fully open and then close.
6. Check if the moonroof switch operates normally.
If the moonroof does not operate properly after
performing the procedure above, have your
vehicle checked by a NISSAN dealer.
2-52
Instruments and controls
Page 132 of 425
Black plate (128,1)
Model "Z51-D" EDITED: 2009/ 8/ 3
— remain on for about 15 seconds.
. doors are unlocked by pushing the UN-
LOCK button on the Intelligent Key or door
handle request switch with the ignition
switch in the LOCK position
— remain on for about 15 seconds.
. any door is opened and then closed with the
ignition switch in the LOCK position
— remain on for about 15 seconds.
. any door is opened with the ignition switch
in the ACC or ON position
— remain on while the door is opened. When the door is closed, the lights go off.
The lights will also turn off after 30
minutes when the lights remain illumi-
nated after the ignition switch has been
pushed to the OFF or LOCK position to
prevent the battery from becoming dis-
charged.
When the auto interior illumination is set to the
OFF position (see “VEHICLE INFORMATION
AND SETTINGS” in the “4. Monitor, heater, air
conditioner, audio, phone and voice recognition
systems” section) , the lights will illuminate under
the following condition:
. any door is opened with the ignition switch
in any position — remain on while the door is opened.
When the door is closed, the lights go off.
OFF positionWhen the switch is in the OFF position
*3, the
lights will not illuminate, regardless of the
condition.
CAUTION
Do not use for extended periods of time
with the engine stopped. This could
result in a discharged battery.
SIC3599
Map lights
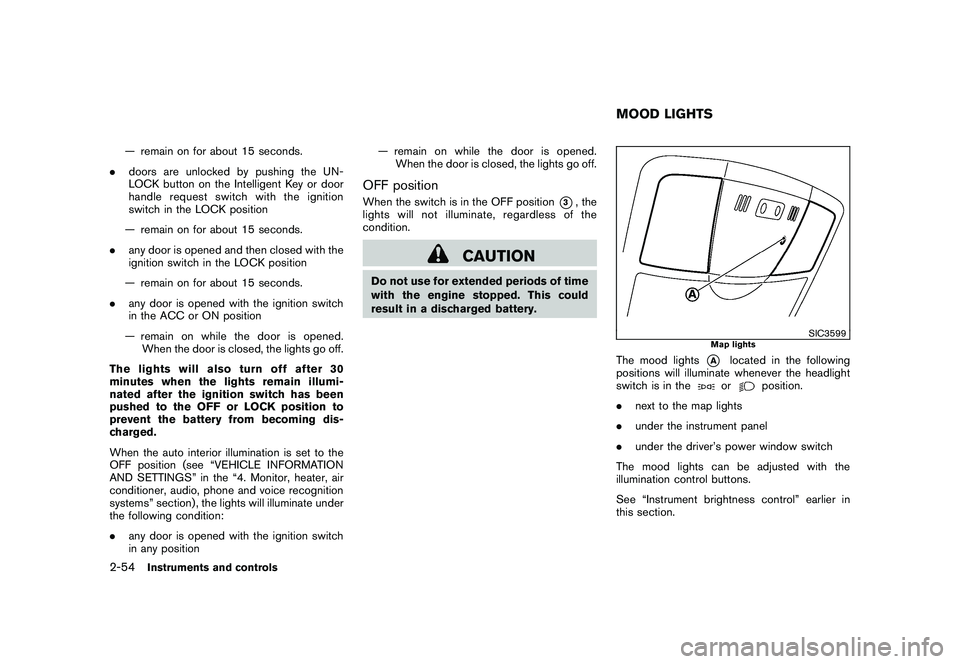
The mood lights
*A
located in the following
positions will illuminate whenever the headlight
switch is in theor
position.
. next to the map lights
. under the instrument panel
. under the driver’s power window switch
The mood lights can be adjusted with the
illumination control buttons.
See “Instrument brightness control” earlier in
this section.
MOOD LIGHTS
2-54
Instruments and controls
Page 133 of 425
Black plate (129,1)
Model "Z51-D" EDITED: 2009/ 8/ 3
SIC2064
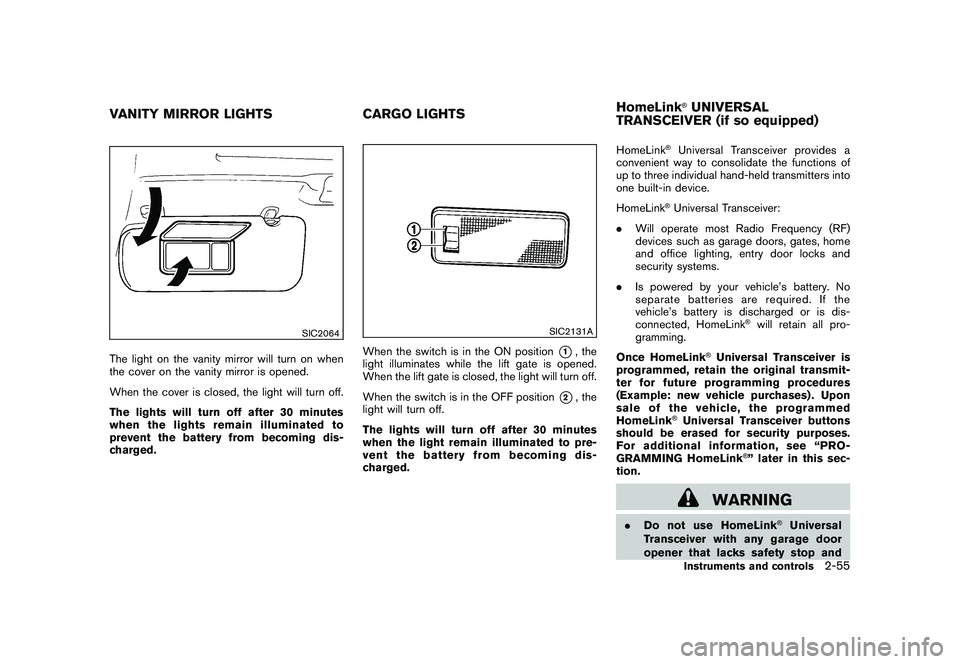
The light on the vanity mirror will turn on when
the cover on the vanity mirror is opened.
When the cover is closed, the light will turn off.
The lights will turn off after 30 minutes
when the lights remain illuminated to
prevent the battery from becoming dis-
charged.
SIC2131A
When the switch is in the ON position
*1, the
light illuminates while the lift gate is opened.
When the lift gate is closed, the light will turn off.
When the switch is in the OFF position
*2, the
light will turn off.
The lights will turn off after 30 minutes
when the light remain illuminated to pre-
vent the battery from becoming dis-
charged. HomeLink
®Universal Transceiver provides a
convenient way to consolidate the functions of
up to three individual hand-held transmitters into
one built-in device.
HomeLink®Universal Transceiver:
. Will operate most Radio Frequency (RF)
devices such as garage doors, gates, home
and office lighting, entry door locks and
security systems.
. Is powered by your vehicle’s battery. No
separate batteries are required. If the
vehicle’s battery is discharged or is dis-
connected, HomeLink
®will retain all pro-
gramming.
Once HomeLink
®Universal Transceiver is
programmed, retain the original transmit-
ter for future programming procedures
(Example: new vehicle purchases) . Upon
sale of the vehicle, the programmed
HomeLink
®Universal Transceiver buttons
should be erased for security purposes.
For additional information, see “PRO-
GRAMMING HomeLink
®” later in this sec-
tion.
WARNING
. Do not use HomeLink
®Universal
Transceiver with any garage door
opener that lacks safety stop and
VANITY MIRROR LIGHTS CARGO LIGHTSHomeLink
®UNIVERSAL
TRANSCEIVER (if so equipped)Instruments and controls
2-55
Page 144 of 425

Black plate (140,1)
Model "Z51-D" EDITED: 2009/ 8/ 3
SPA2300
LOCKING WITH POWER DOOR LOCK
SWITCHOperating the power door lock switch will lock
or unlock all the doors. The switches are located
on the driver’s and front passenger’s door
armrests.
To lock the doors, push the power door lock
switch to the lock position
*1
with the driver’s
or front passenger’s door open, then close the
door.
When locking the door this way, be certain
not to leave the Intelligent Key inside the
vehicle.
To unlock the doors, push the power door lock switch to the unlock position
*2.
Lockout protectionWhen the power door lock switch (driver or front
passenger) is moved to the lock position with
the Intelligent Key in the port and any door open,
all doors will lock and unlock automatically. With
the Intelligent Key left in the vehicle (not in the
Intelligent Key port) and any door open, all doors
will unlock automatically and a chime will sound
after the door is closed.
These functions help to prevent the Intelligent
Key from being accidentally locked inside the
vehicle.AUTOMATIC DOOR LOCKS.
All doors will be locked automatically when
the vehicle speed reaches 15 MPH (24
km/h) .
. All doors will be unlocked automatically
when the ignition switch is pushed to the
OFF position.
The automatic lock and unlock functions
can be deactivated or activated indepen-
dently of each other.
To deactivate or activate the automatic lock or
unlock system, perform the following procedure:
1. Close all doors. 2. Pushtheignitionswitchtothe“ON”
position.
3. Do one of the following within 20 seconds of performing step 2:
.To change AUTO UNLOCK settings:
push and hold the power door lock
switch to the
position (UNLOCK)
for more than 5 seconds.
. To change AUTO LOCK settings: push
and hold the power door lock switch to
the
position (LOCK) for more than
5 seconds.
4. When activated, the hazard indicator will flash twice. When deactivated, the hazard
indicator will flash once.
5. The ignition must be placed in the OFF and ON position again between each setting
change.
3-6
Pre-driving checks and adjustments
Page 151 of 425

Black plate (147,1)
Model "Z51-D" EDITED: 2009/ 8/ 3
Switching procedure:
Push the LOCK
*1
and UNLOCK
*2
buttons simultaneously for more than 2 seconds
to switch the mode from one to the other.
When pushing the buttons to set the hazard
indicator mode, the hazard indicator flashes 3
times.
When pushing the buttons to set the hazard
indicator and horn mode, the hazard indicator
flashes once and the horn chirps once.
BATTERY SAVER SYSTEMWhen all the following conditions are met for 60
minutes, the battery saver system will cut off the
power supply to prevent battery discharge.
.The ignition switch is in the ACC position,
and
. All doors are closed, and
. The selector lever is in the P (Park) position.WARNING SIGNALSTo help prevent the vehicle from moving
unexpectedly by erroneous operation of the
Intelligent Key listed on the following chart or
to help prevent the vehicle from being stolen,
chime or beep sounds inside and outside the
vehicle and a warning displays in the dot matrix
liquid crystal display.
When a chime or beep sounds or the warning
displays, be sure to check the vehicle and
Intelligent Key.
See “TROUBLESHOOTING GUIDE” later in
this section and “DOT MATRIX LIQUID CRYS-
TAL DISPLAY” in the “2. Instruments and
controls” section.
Pre-driving checks and adjustments
3-13
Page 154 of 425

Black plate (150,1)
Model "Z51-D" EDITED: 2009/ 8/ 3
*1
LOCK button
*2
UNLOCK button
*3
Power lift gate button
(if so equipped)
*4
PANIC button
HOW TO USE REMOTE KEYLESS
ENTRY SYSTEMWhen you lock or unlock the doors or the lift
gate, the hazard indicator will flash and the horn
(or the outside chime) will sound as a confirma-
tion. For details, see “Setting hazard indicator
and horn mode” later in this section.Locking doors1. Move the selector lever to the P (Park)position and push the ignition switch to the
OFF position. Make sure you carry the
Intelligent Key with you.*1
2. Close all the doors and lift gate.*2
3. Push the LOCK
button
*1.
4. All the doors and the lift gate will lock.
5. The hazard indicator flashes twice and the horn chirps once.
*1: Doors will lock while the ignition switch is in the ACC or ON position.
*2: Doors will not lock while any door is open.
Unlocking doors1. Push the UNLOCK
button
*2
once.
2. The hazard indicator flashes once. The driver’s door will unlock.
3. Push the UNLOCK
button again within
1 minute.
4. The hazard indicator flashes once again. All the doors and the lift gate will unlock.
All doors will be locked automatically unless one
of the following operations is performed within 1
minute after pushing the UNLOCK button while
the doors are locked. If during this 1-minute time
period, the UNLOCK button is pushed, all doors
will be locked automatically after another 1
minute.
. Opening any door
. Pushing the ignition switch
Opening windowsTo open the windows, push the door UNLOCK
button
*2
forabout 3 seconds after the
door is unlocked.
To stop opening, release the UNLOCK
button.
Windows cannot be closed using the button on
the Intelligent Key. The door windows can be opened or closed by
turning the mechanical key in a door lock. (See
“DOORS” earlier in this section.)
Opening/closing lift gate (if so equipped)1. Push the power lift gate button
*3
for more than 1 second.
2. The lift gate will automatically open.
The hazard indicator flashes 5 times and the
outside chime sounds for approximately 3
seconds.
To close the lift gate, push the power lift gate
button
*3.
The lift gate will automatically close.
If the button*3
is pushed while the lift
gate is being opened or closed, the lift gate will
reverse.
The power lift gate button
*3
cannot be
operated when the ignition switch is in the ON
position.
Using panic alarmIf you are near your vehicle and feel threatened,
you can activate the alarm according to the
following procedure to call attention.
1. Push the PANIC
button
*4
for more
than 1 second.
3-16
Pre-driving checks and adjustments
Page 186 of 425
Black plate (182,1)
Model "Z51-D" EDITED: 2009/ 8/ 3
To turn on the screen, set this item to the ON
position, or push the “
OFF” button.
Brightness/Contrast/Background Color:
To adjust the brightness and contrast of the
screen, select the “Brightness ”or“Contrast ”
key and push the ENTERbutton.
Then, you can adjust the brightness to “Darker”
or “Brighter”, and the contrast to “Lower” or
“Higher” using the multi-function controller.
For information on the “Background Color ”
key, refer to the separate Navigation System
Owner’s Manual.
Navigation settings (models with navi-
gation system)For the details of “Navigation” settings, refer to
the separate Navigation System Owner’s Man-
ual.
SAA1814
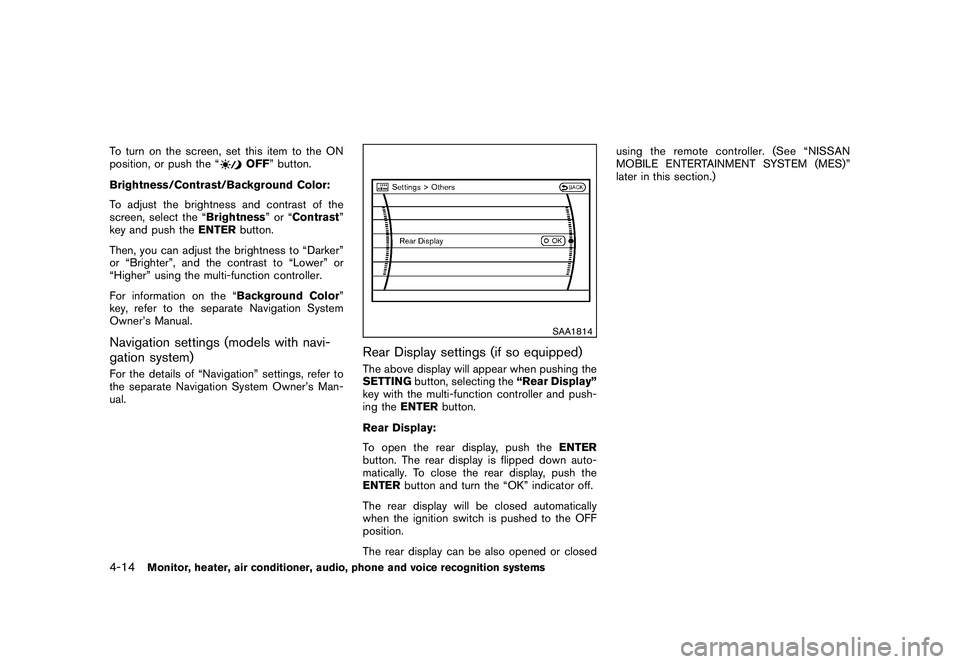
Rear Display settings (if so equipped)The above display will appear when pushing the
SETTING button, selecting the “Rear Display”
key with the multi-function controller and push-
ing the ENTER button.
Rear Display:
To open the rear display, push the ENTER
button. The rear display is flipped down auto-
matically. To close the rear display, push the
ENTER button and turn the “OK” indicator off.
The rear display will be closed automatically
when the ignition switch is pushed to the OFF
position.
The rear display can be also opened or closed using the remote controller. (See “NISSAN
MOBILE ENTERTAINMENT SYSTEM (MES)”
later in this section.)
4-14
Monitor, heater, air conditioner, audio, phone and voice recognition systems
Page 191 of 425
Black plate (187,1)
Model "Z51-D" EDITED: 2009/ 8/ 3
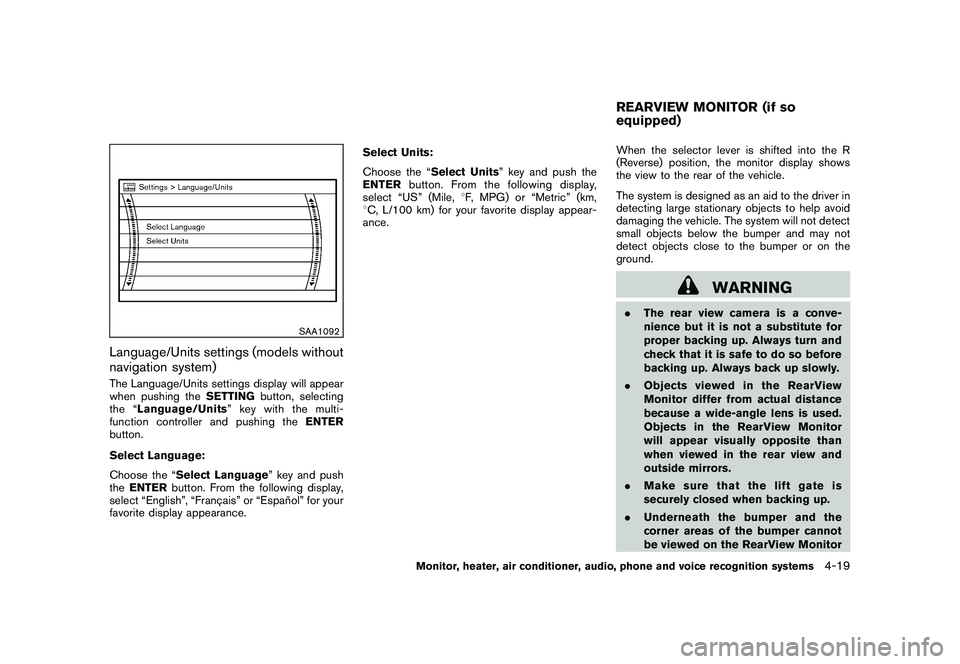
SAA1092
Language/Units settings (models without
navigation system)The Language/Units settings display will appear
when pushing theSETTINGbutton, selecting
the “ Language/Units ”keywiththemulti-
function controller and pushing the ENTER
button.
Select Language:
Choose the “Select Language” key and push
the ENTER button. From the following display,
select “English”, “Franc¸ ais” or “Espan ˜
ol” for your
favorite display appearance. Select Units:
Choose the “Select Units” key and push the
ENTER
button. From the following display,
select “US” (Mile, 8F, MPG) or “Metric” (km,
8 C, L/100 km) for your favorite display appear-
ance. When the selector lever is shifted into the R
(Reverse) position, the monitor display shows
the view to the rear of the vehicle.
The system is designed as an aid to the driver in
detecting large stationary objects to help avoid
damaging the vehicle. The system will not detect
small objects below the bumper and may not
detect objects close to the bumper or on the
ground.
WARNING
.
The rear view camera is a conve-
nience but it is not a substitute for
proper backing up. Always turn and
check that it is safe to do so before
backing up. Always back up slowly.
. Objects viewed in the RearView
Monitor differ from actual distance
because a wide-angle lens is used.
Objects in the RearView Monitor
will appear visually opposite than
when viewed in the rear view and
outside mirrors.
. Make sure that the lift gate is
securely closed when backing up.
. Underneath the bumper and the
corner areas of the bumper cannot
be viewed on the RearView MonitorREARVIEW MONITOR (if so
equipped)
Monitor, heater, air conditioner, audio, phone and voice recognition systems
4-19