2010 NISSAN CUBE battery
[x] Cancel search: batteryPage 168 of 329
Black plate (172,1)
Model "Z12-D" EDITED: 2009/ 9/ 17
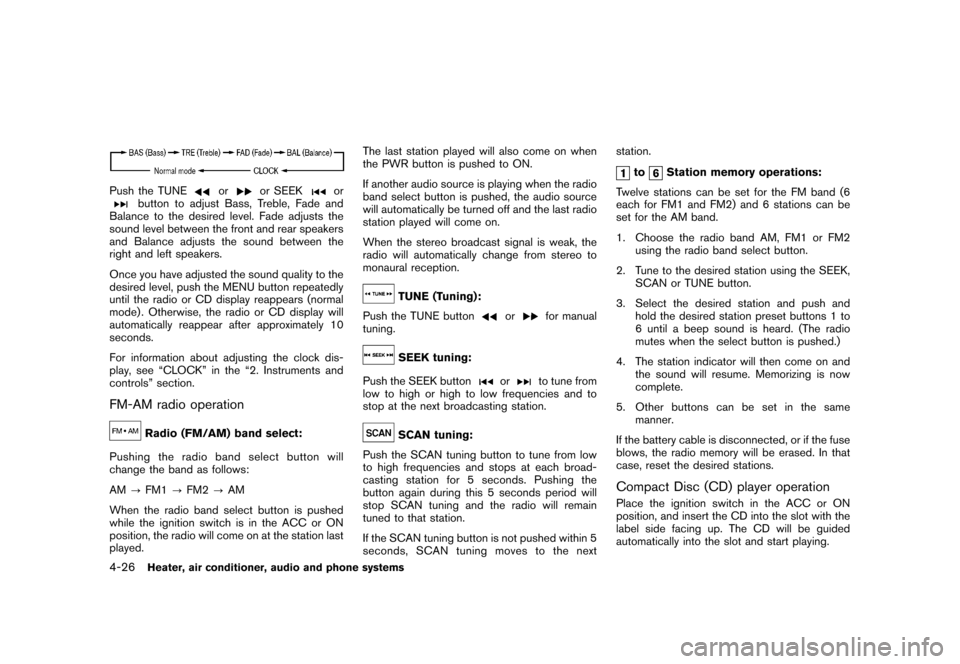
Push the TUNE
or
or SEEK
or
button to adjust Bass, Treble, Fade and
Balance to the desired level. Fade adjusts the
sound level between the front and rear speakers
and Balance adjusts the sound between the
right and left speakers.
Once you have adjusted the sound quality to the
desired level, push the MENU button repeatedly
until the radio or CD display reappears (normal
mode) . Otherwise, the radio or CD display will
automatically reappear after approximately 10
seconds.
For information about adjusting the clock dis-
play, see “CLOCK” in the “2. Instruments and
controls” section.
FM-AM radio operation
Radio (FM/AM) band select:
Pushing the radio band select button will
change the band as follows:
AM ?FM1 ?FM2 ?AM
When the radio band select button is pushed
while the ignition switch is in the ACC or ON
position, the radio will come on at the station last
played. The last station played will also come on when
the PWR button is pushed to ON.
If another audio source is playing when the radio
band select button is pushed, the audio source
will automatically be turned off and the last radio
station played will come on.
When the stereo broadcast signal is weak, the
radio will automatically change from stereo to
monaural reception.
TUNE (Tuning):
Push the TUNE button
or
for manual
tuning.
SEEK tuning:
Push the SEEK button
or
to tune from
low to high or high to low frequencies and to
stop at the next broadcasting station.
SCAN tuning:
Push the SCAN tuning button to tune from low
to high frequencies and stops at each broad-
casting station for 5 seconds. Pushing the
button again during this 5 seconds period will
stop SCAN tuning and the radio will remain
tuned to that station.
If the SCAN tuning button is not pushed within 5
seconds, SCAN tuning moves to the next station.
to
Station memory operations:
Twelve stations can be set for the FM band (6
each for FM1 and FM2) and 6 stations can be
set for the AM band.
1. Choose the radio band AM, FM1 or FM2 using the radio band select button.
2. Tune to the desired station using the SEEK, SCAN or TUNE button.
3. Select the desired station and push and hold the desired station preset buttons 1 to
6 until a beep sound is heard. (The radio
mutes when the select button is pushed.)
4. The station indicator will then come on and the sound will resume. Memorizing is now
complete.
5. Other buttons can be set in the same manner.
If the battery cable is disconnected, or if the fuse
blows, the radio memory will be erased. In that
case, reset the desired stations.
Compact Disc (CD) player operationPlace the ignition switch in the ACC or ON
position, and insert the CD into the slot with the
label side facing up. The CD will be guided
automatically into the slot and start playing.
4-26
Heater, air conditioner, audio and phone systems
Page 173 of 329
Black plate (177,1)
Model "Z12-D" EDITED: 2009/ 9/ 17
2. Tune to the desired station using the SEEK,SCAN or TUNE button.
3. Push and hold the desired radio station preset button
to
until a beep sound is
heard. (The radio mutes when the radio
station preset button is pushed.)
4. The station indicator will then come on and the sound will resume. Memorizing is now
complete.
5. Other buttons can be set in the same manner.
If the battery cable is disconnected, or if the fuse
opens, the radio memory will be erased. In that
case, reset the desired stations.
Radio Data System (RDS):
RDS stands for Radio Data System, and is a
data information service transmitted by some
radio stations on the FM band (not AM band)
encoded within a regular radio broadcast.
Currently, most RDS stations are in large cities,
but many stations are now considering broad-
casting RDS data.
RDS can display:
. Station call sign, such as “WHFR 98.3”.
. Station name, such as “The Groove”.
. Music or programming type such as “Clas- sical”, “Country” or “Rock”.
. Traffic reports about delays or construction.
If the station broadcasts RDS information, the
RDS icon is displayed.
RADIO DISPLAY change:
When the DISP button is pushed during the FM
radio mode, the radio display will change in the
following order.
FM radio:
Frequency ↔PS/PTY
In the FM radio mode, pressing the DISP button
will switch the frequency display to the PTY
display (if available) , and if the DISP button is
not pushed again within 5 seconds, it will
automatically switch to the PS display. If PTY
is not available, pressing the DISP button will
only switch between the frequency display and
the PS display.
Compact Disc (CD) player operationPlace the ignition switch in the ACC or ON
position, and insert the CD into the slot with the
label side facing up. The CD will be guided
automatically into the slot and start playing.
After loading the disc, the number of tracks on
the disc will appear on the display. If the radio is already operating, it will auto-
matically turn off and the CD will play.
If the system has been turned off while the CD
was playing, pushing the PWR button will start
the CD.
Do not use 3.1 in (8 cm) discs.
CD PLAY:
When the CD button is pushed with the system
off and the CD loaded, the system will turn on
and the CD will start to play.
When the CD button is pushed with the CD
loaded and the radio playing, the radio will
automatically be turned off and the CD will start
to play.CD play information:
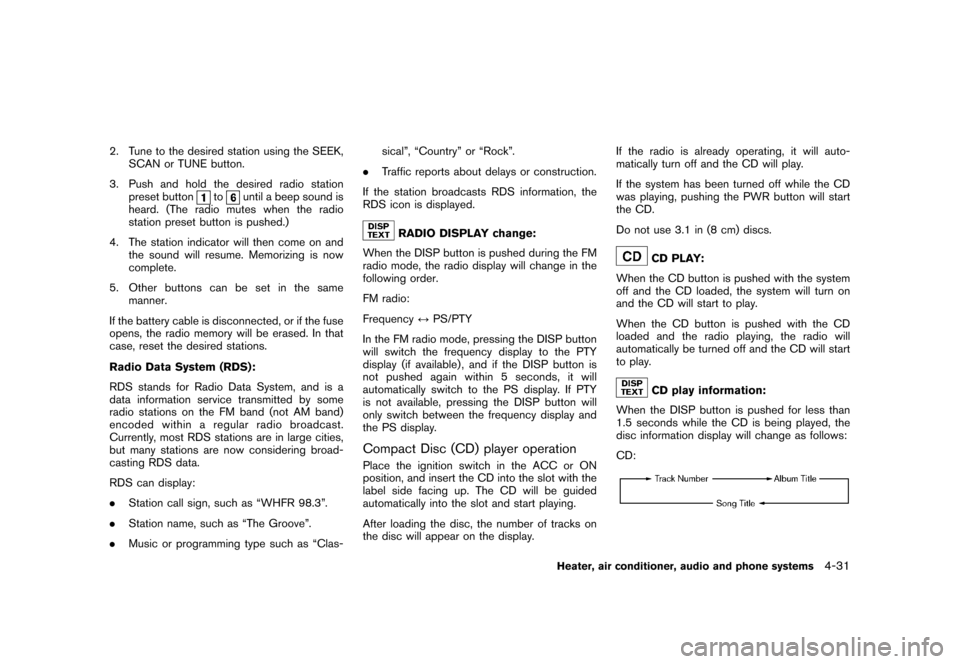
When the DISP button is pushed for less than
1.5 seconds while the CD is being played, the
disc information display will change as follows:
CD:
Heater, air conditioner, audio and phone systems
4-31
Page 175 of 329
Black plate (179,1)
Model "Z12-D" EDITED: 2009/ 9/ 17
SAA2352
Interface system for iPod
®operation
Connecting iPod
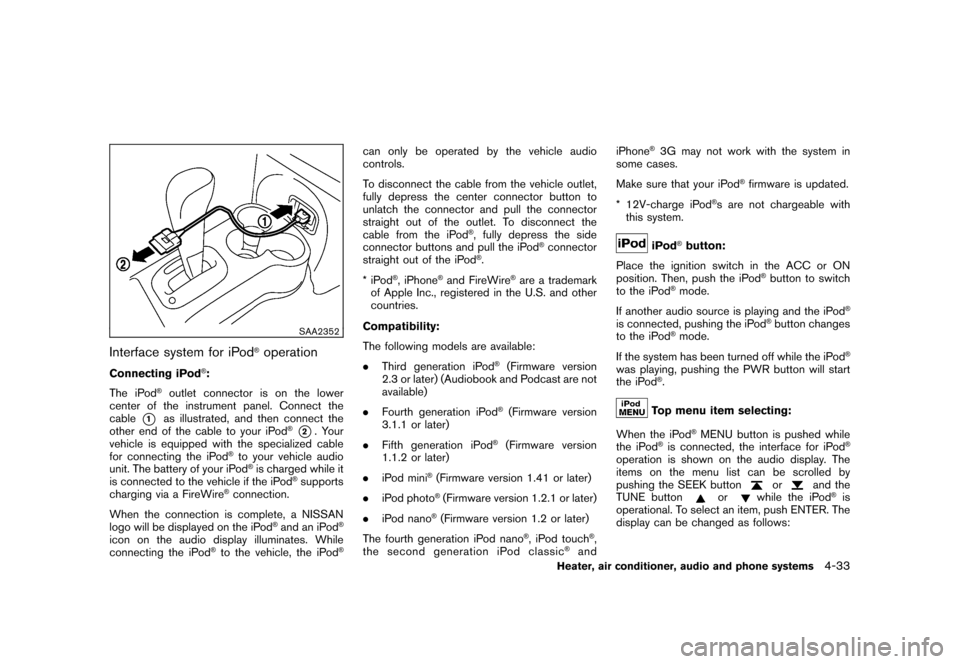
®:
The iPod
®outlet connector is on the lower
center of the instrument panel. Connect the
cable
*1
as illustrated, and then connect the
other end of the cable to your iPod
®*2. Your
vehicle is equipped with the specialized cable
for connecting the iPod
®to your vehicle audio
unit. The battery of your iPod®is charged while it
is connected to the vehicle if the iPod
®supports
charging via a FireWire
®connection.
When the connection is complete, a NISSAN
logo will be displayed on the iPod
®and an iPod
®
icon on the audio display illuminates. While
connecting the iPod
®to the vehicle, the iPod
®
can only be operated by the vehicle audio
controls.
To disconnect the cable from the vehicle outlet,
fully depress the center connector button to
unlatch the connector and pull the connector
straight out of the outlet. To disconnect the
cable from the iPod
®, fully depress the side
connector buttons and pull the iPod
®connector
straight out of the iPod
®.
*iPod
®, iPhone
®and FireWire
®are a trademark
of Apple Inc., registered in the U.S. and other
countries.
Compatibility:
The following models are available:
. Third generation iPod
®(Firmware version
2.3 or later) (Audiobook and Podcast are not
available)
. Fourth generation iPod®(Firmware version
3.1.1 or later)
. Fifth generation iPod
®(Firmware version
1.1.2 or later)
. iPod mini
®(Firmware version 1.41 or later)
. iPod photo®(Firmware version 1.2.1 or later)
. iPod nano®(Firmware version 1.2 or later)
The fourth generation iPod nano
®, iPod touch
®,
the second generation iPod classic
®and iPhone
®3G may not work with the system in
some cases.
Make sure that your iPod
®firmware is updated.
* 12V-charge iPod
®s are not chargeable with
this system.
iPod
®button:
Place the ignition switch in the ACC or ON
position. Then, push the iPod
®button to switch
to the iPod
®mode.
If another audio source is playing and the iPod
®
is connected, pushing the iPod
®button changes
to the iPod
®mode.
If the system has been turned off while the iPod
®
was playing, pushing the PWR button will start
the iPod
®.Top menu item selecting:
When the iPod
®MENU button is pushed while
the iPod
®is connected, the interface for iPod
®
operation is shown on the audio display. The
items on the menu list can be scrolled by
pushing the SEEK button
or
and the
TUNE button
or
while the iPod
®is
operational. To select an item, push ENTER. The
display can be changed as follows:
Heater, air conditioner, audio and phone systems
4-33
Page 179 of 329
Black plate (183,1)
Model "Z12-D" EDITED: 2009/ 9/ 17
SEEK tuning/CATEGORY
(CAT):
. For AM and FM radio
Push the SEEK button
or
to tune
from low to high or high to low frequencies
and to stop at the next broadcasting station.
. For XM Satellite Radio
Push the SEEK button
or
to tune
to the first channel of the next or previous
category.
SCAN tuning:
Push the SCAN tuning button to tune from low
to high frequencies and stop at each broad-
casting station/channel for 5 seconds. Pushing
the button again during this 5 seconds period
will stop SCAN tuning and the radio will remain
tuned to that station/channel.
If the SCAN tuning button is not pushed within 5
seconds, SCAN tuning moves to the next
station/channel.
*1
to
*6
Station memory operations:
12 stations/channels can be set for the FM band
(6 each for FM1 and FM2) , 12 for XM radio (6
each for XM1 and XM2) and 6 stations can be
set for the AM band. 1. Choose the radio band using the radio band
select button.
2. Tune to the desired station/channel using the SEEK/CAT, SCAN button or the radio
TUNE dial.
3. Push and hold the desired station preset button
*1
to*6
until the radio mutes.
4. The station indicator will then come on and the sound will resume. Memorizing is now
complete.
5. Other buttons can be set in the same manner.
If the battery cable is disconnected, or if the fuse
opens, the radio memory will be erased. In that
case, reset the desired stations/channels.
Compact Disc (CD) player operationPush the ignition switch to the ACC or ON
position and insert the Compact Disc (CD) into
the slot with the label side facing up. The CD will
be guided automatically into the slot and start
playing.
After loading the CD, the number of tracks on
the CD and the play time will appear on the
display.
If the radio is already operating, it will auto-
matically turn off and the CD will play. If the system has been turned off while the CD
was playing, pushing the ON·OFF button will
start the CD.
Do not use 3.1 in (8 cm) discs.
PLAY:
When the CD button is pushed with the system
off and the CD loaded, the system will turn on
and the CD will start to play.
When the CD button is pushed with the CD
loaded and the radio playing, the radio will
automatically be turned off and the CD will start
to play.
Next/Previous Track and Fast
Forward/Rewind:
When the(fast forward) or
(rewind)
button is pushed for more than 1.5 seconds
while the CD is being played, the CD will play
while fast forwarding or rewinding. When the
button is released, the CD will return to normal
play speed.
When the
or
button is pushed for less
than 1.5 seconds while the CD is being played,
the next track or the beginning of the current
track on the CD will be played.
Heater, air conditioner, audio and phone systems
4-37
Page 181 of 329
Black plate (185,1)
Model "Z12-D" EDITED: 2009/ 9/ 17
If another audio source is playing and a USB
memory is inserted, push the AUX button
repeatedly until the center display changes to
the USB memory mode.
Next/Previous File and Fast
Forward/Rewind:
When the(Rewind) or
(Fast Forward)
button is pushed for more than 1.5 seconds
while a USB memory is being played, the USB
memory will play while forwarding or rewinding.
When the button is released, the USB memory
will return to normal play speed.
When the
or
button is pushed for less
than 1.5 seconds while the USB memory is
being played, the next track or the beginning of
the current track on the USB memory will be
played.
The multi-function controller can also be used to
select tracks when the USB memory is being
played.
Folder selection:
To change to another folder in the USB memory,
turn the folder selector or choose a folder
displayed on the screen using the multi-function
controller.
REPEAT (RPT):
When the RPT button is pushed while the USB
memory is played, the play pattern can be
change as follows.
To change the play mode, push the RPT button
repeatedly and the mode will change as follows.
Normal ?1 Folder Repeat ?1 Track Repeat ?
NormalRANDOM (RDM):
When the RDM button is pushed while a USB
memory is being played, the play pattern can be
changed as follows.
To change the play mode, push the RDM button
repeatedly, and the mode will change as follows.
Normal ?All Random ?1 Folder Random ?
Normal
SAA2781
iPod
®player operation
Connecting iPod
®:
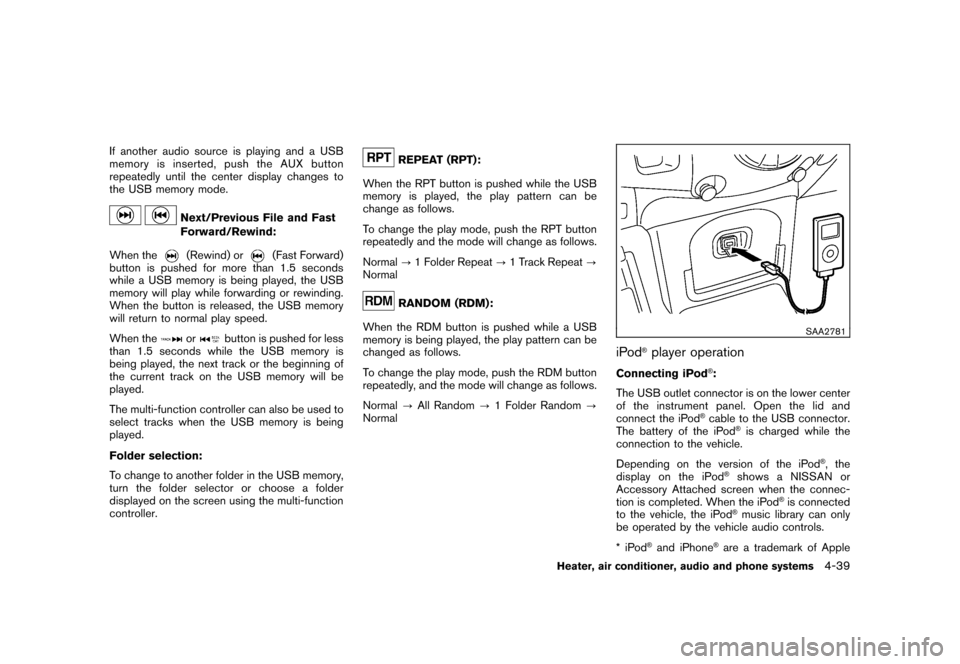
The USB outlet connector is on the lower center
of the instrument panel. Open the lid and
connect the iPod®cable to the USB connector.
The battery of the iPod
®is charged while the
connection to the vehicle.
Depending on the version of the iPod
®, the
display on the iPod
®shows a NISSAN or
Accessory Attached screen when the connec-
tion is completed. When the iPod
®is connected
to the vehicle, the iPod
®music library can only
be operated by the vehicle audio controls.
*iPod
®and iPhone
®are a trademark of Apple
Heater, air conditioner, audio and phone systems
4-39
Page 186 of 329
Black plate (190,1)
Model "Z12-D" EDITED: 2009/ 9/ 17
When installing a car phone or a CB radio in
your NISSAN, be sure to observe the following
precautions, otherwise the new equipment may
adversely affect the electronic control modules
and electronic control system harness.
WARNING
.A cellular telephone should not be
used while driving so full attention
may be given to vehicle operation.
Some jurisdictions prohibit the use
of cellular telephones while driving.
. If you must make a call while your
vehicle is in motion, the hands-free
cellular phone operational mode (if
so equipped) is highly recom-
mended. Exercise extreme caution
at all times so full attention may be
given to vehicle operation.
. If a conversation in a moving vehicle
requires you to take notes, pull off
the road to a safe location and stop
your vehicle before doing so.
CAUTION
.Keep the antenna as far away as
possible from the electronic control
modules.
. Keep the antenna wire more than 8
in (20 cm) away from the electronic
control system harness. Do not
route the antenna wire next to any
harness.
. Adjust the antenna standing-wave
ratio as recommended by the man-
ufacturer.
. Connect the ground wire from the
CB radio chassis to the body.
. For details, consult a NISSAN deal-
er.
WARNING
.Use a phone after stopping your
vehicle in a safe location. If you
have to use a phone while driving,
exercise extreme caution at all
times so full attention may be given
to vehicle operation.
. If you find yourself unable to devote
full attention to vehicle operation
while talking on the phone, pull off
the road to a safe location and stop
your vehicle before doing so.
CAUTION
To avoid draining the vehicle battery,
use a phone after starting the engine.
CAR PHONE OR CB RADIO BLUETOOTH
®HANDS-FREE PHONE
SYSTEM (if so equipped)
4-44
Heater, air conditioner, audio and phone systems
Page 188 of 329

Black plate (192,1)
Model "Z12-D" EDITED: 2009/ 9/ 17
surrounded by metal or far away from the in-
vehicle phone module to prevent tone quality
degradation and wireless connection dis-
ruption.
. While a cellular phone is connected through
the Bluetooth
®wireless connection, the
battery power of the cellular phone may
discharge quicker than usual. The Blue-
tooth
®Hands-Free Phone System cannot
charge cellular phones.
. If the Bluetooth
®Hands-Free Phone System
seems to be malfunctioning, see “Trouble-
shooting guide” later in this section. You can
also visit www.nissanusa.com/bluetooth for
troubleshooting help.
. Some cellular phones or other devices may
cause interference or a buzzing noise to
come from the audio system speakers.
Storing the device in a different location
may reduce or eliminate the noise.
. Refer to the cellular phone Owner’s Manual
regarding battery charging, cellular phone
antenna, etc.
This wireless hands-free car kit is based on
Bluetooth technology.
* Frequency: 2402 MHz - 2480 MHz
* Output power: 7,94 dBm E.I.R.P * Modulation: FHSS GFSK 8DPSK,
p/
4DQPSK
* Number of channels: 79
* This wireless equipment cannot be used for any services related to life safety because
there is the possibility of radio interference.
REGULATORY INFORMATIONBluetooth trademark:
BLUETOOTH
®is a trademark
owned by Bluetooth SIG, Inc.,
U.S.A. and licensed to Visteon
Corporation.
FCC Regulatory information— CAUTION: To maintain compliance with FCC’s RF exposure guidelines, use only
the supplied antenna. Unauthorized antenna,
modification, or attachments could damage
the transmitter and may violate FCC regula-
tions.
— Operation is subject to the following two conditions:
1) this device may not cause interference and
2) this device must accept any interference, including interference that may cause un-
desired operation of the device
IC Regulatory information— Operation is subject to the following twoconditions: (1) this device may not cause
interference, and (2) this device must accept
any interference, including interference that
may cause undesired operation of the
device.
— This Class B digital apparatus meets all requirements of the Canadian Interference-
Causing Equipment Regulations.USING THE SYSTEMThe NISSAN Voice Recognition system allows
hands-free operation of the Bluetooth
®Hands-
Free Phone System.
If the vehicle is in motion, some commands may
not be available so full attention may be given to
vehicle operation.
InitializationWhen the ignition switch is pushed to the ON
position, NISSAN Voice Recognition is initia-
lized, which takes a few seconds. If thebutton is pushed before the initialization com-
pletes, the system will not accept any command.Operating tipsTo get the best performance out of the NISSAN
Voice Recognition system, observe the follow-
ing:
4-46
Heater, air conditioner, audio and phone systems
Page 201 of 329
Black plate (16,1)
5 Starting and driving
Model "Z12-D" EDITED: 2009/ 9/ 17
Precautions when starting and driving..................... 5-2
Exhaust gas (carbon monoxide) ......................... 5-2
Three-way catalyst .......................................... 5-2
Tire Pressure Monitoring System (TPMS) ............. 5-3
Avoiding collision and rollover ........................... 5-5
Off-road recovery ........................................... 5-5
Rapid air pressure loss .................................... 5-6
Drinking alcohol/drugs and driving ...................... 5-6
Ignition switch
(models without Intelligent Key system) ................... 5-7
Continuously Variable Transmission (CVT) ............ 5-7
Manual Transmission (MT) ................................ 5-8
Key positions ................................................ 5-8
Push-button ignition switch
(models with Intelligent Key system) ....................... 5-9
Operating range for engine start function ............. 5-9
Push-button ignition switch operation. ............... 5-10
Push-button ignition switch positions ................ 5-10
Intelligent Key battery discharge ...................... 5-11
Before starting the engine .................................. 5-12
Starting the engine ........................................... 5-12
Models without Intelligent Key system ............... 5-12
Models with Intelligent Key system ................... 5-13Driving the vehicle
............................................ 5-14
Continuously Variable Transmission (CVT) .......... 5-14
Manual Transmission (MT) .............................. 5-18
Parking brake .................................................. 5-20
Cruise control (if so equipped) ............................ 5-20
Precautions on cruise control .......................... 5-20
Cruise control operations ............................... 5-21
Break-in schedule ............................................ 5-22
Increasing fuel economy .................................... 5-23
Parking/parking on hills ...................................... 5-24
Electric power steering system ............................ 5-25
Brake system .................................................. 5-26
Braking precautions ...................................... 5-26
Anti-lock Braking System (ABS) ...................... 5-26
Vehicle Dynamic Control (VDC) system ................. 5-28
Cold weather driving ......................................... 5-29
Freeing a frozen door lock .............................. 5-29
Anti-freeze .................................................. 5-29
Battery ...................................................... 5-29
Draining of coolant water ............................... 5-29
Tire equipment ............................................ 5-30
Special winter equipment ............................... 5-30
Driving on snow or ice .................................. 5-30
Engine block heater (if so equipped) ................. 5-30