2010 NISSAN CUBE headlight
[x] Cancel search: headlightPage 98 of 329
Black plate (98,1)
Model "Z12-D" EDITED: 2009/ 9/ 17
SIC3669
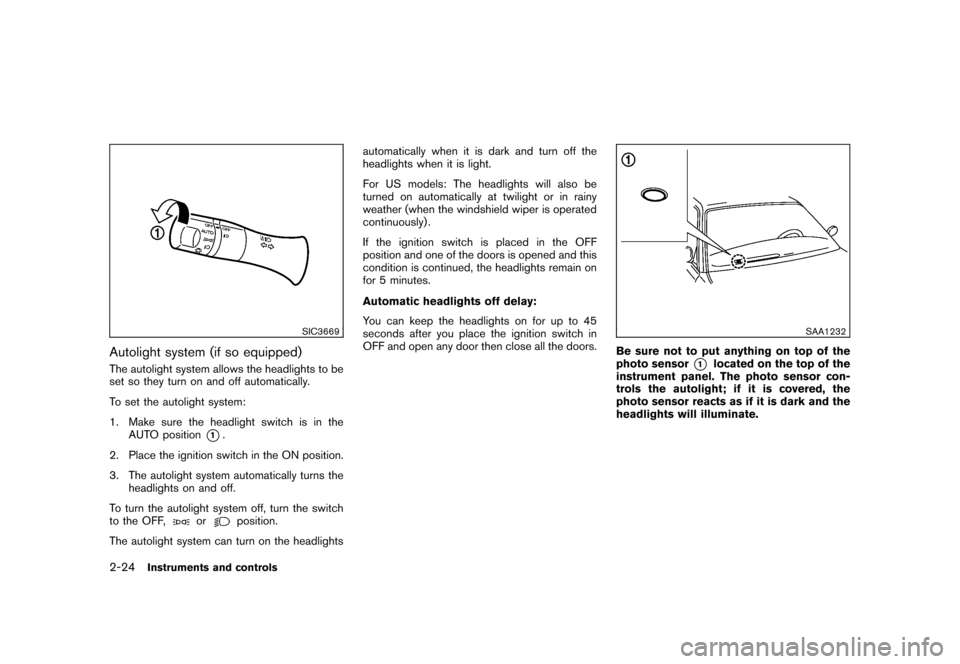
Autolight system (if so equipped)The autolight system allows the headlights to be
set so they turn on and off automatically.
To set the autolight system:
1. Make sure the headlight switch is in theAUTO position
*1.
2. Place the ignition switch in the ON position.
3. The autolight system automatically turns the headlights on and off.
To turn the autolight system off, turn the switch
to the OFF,
or
position.
The autolight system can turn on the headlights automatically when it is dark and turn off the
headlights when it is light.
For US models: The headlights will also be
turned on automatically at twilight or in rainy
weather (when the windshield wiper is operated
continuously) .
If the ignition switch is placed in the OFF
position and one of the doors is opened and this
condition is continued, the headlights remain on
for 5 minutes.
Automatic headlights off delay:
You can keep the headlights on for up to 45
seconds after you place the ignition switch in
OFF and open any door then close all the doors.
SAA1232
Be sure not to put anything on top of the
photo sensor
*1
located on the top of the
instrument panel. The photo sensor con-
trols the autolight; if it is covered, the
photo sensor reacts as if it is dark and the
headlights will illuminate.
2-24
Instruments and controls
Page 99 of 329
Black plate (99,1)
Model "Z12-D" EDITED: 2009/ 9/ 17
SIC3670
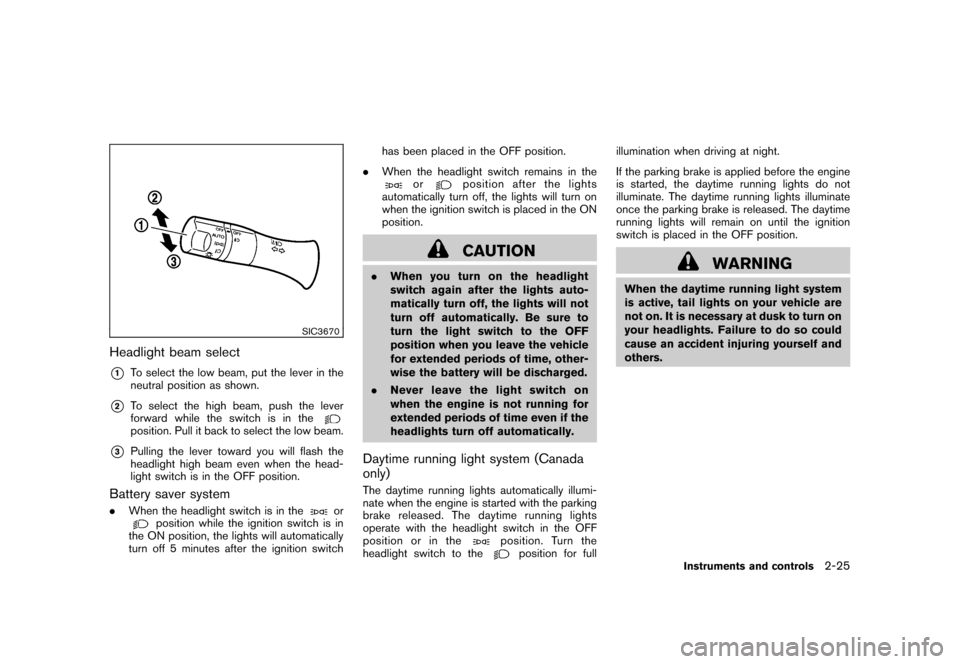
Headlight beam select*1
To select the low beam, put the lever in the
neutral position as shown.
*2
To select the high beam, push the lever
forward while the switch is in theposition. Pull it back to select the low beam.
*3
Pulling the lever toward you will flash the
headlight high beam even when the head-
light switch is in the OFF position.
Battery saver system.When the headlight switch is in the
or
position while the ignition switch is in
the ON position, the lights will automatically
turn off 5 minutes after the ignition switch has been placed in the OFF position.
. When the headlight switch remains in the
or
position after the lights
automatically turn off, the lights will turn on
when the ignition switch is placed in the ON
position.CAUTION
. When you turn on the headlight
switch again after the lights auto-
matically turn off, the lights will not
turn off automatically. Be sure to
turn the light switch to the OFF
position when you leave the vehicle
for extended periods of time, other-
wise the battery will be discharged.
. Never leave the light switch on
when the engine is not running for
extended periods of time even if the
headlights turn off automatically.Daytime running light system (Canada
only)The daytime running lights automatically illumi-
nate when the engine is started with the parking
brake released. The daytime running lights
operate with the headlight switch in the OFF
position or in the
position. Turn the
headlight switch to the
position for full illumination when driving at night.
If the parking brake is applied before the engine
is started, the daytime running lights do not
illuminate. The daytime running lights illuminate
once the parking brake is released. The daytime
running lights will remain on until the ignition
switch is placed in the OFF position.
WARNING
When the daytime running light system
is active, tail lights on your vehicle are
not on. It is necessary at dusk to turn on
your headlights. Failure to do so could
cause an accident injuring yourself and
others.
Instruments and controls
2-25
Page 101 of 329
Black plate (101,1)
Model "Z12-D" EDITED: 2009/ 9/ 17
SIC3672
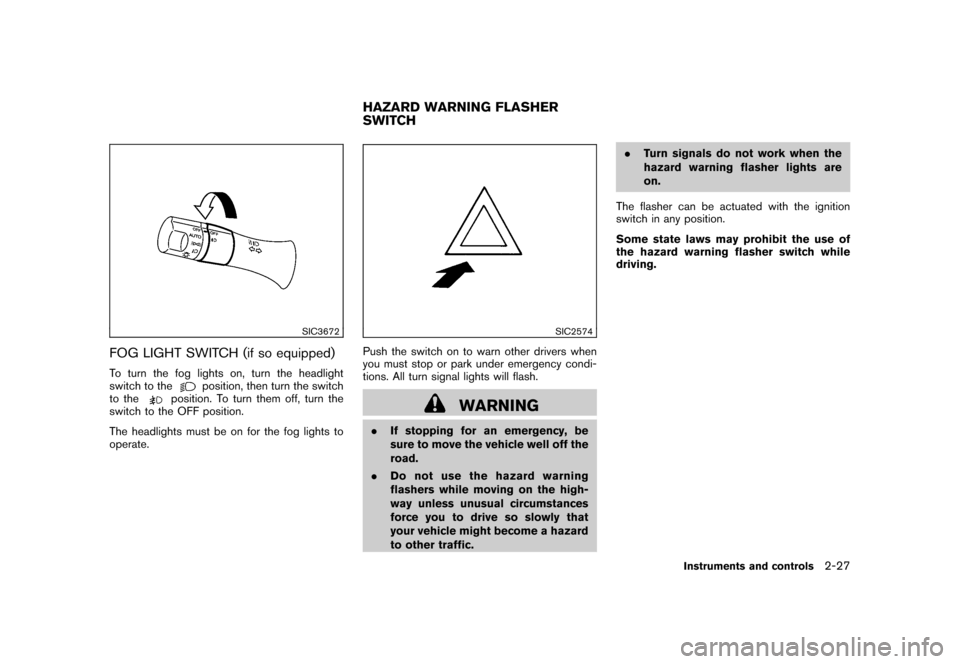
FOG LIGHT SWITCH (if so equipped)To turn the fog lights on, turn the headlight
switch to the
position, then turn the switch
to the
position. To turn them off, turn the
switch to the OFF position.
The headlights must be on for the fog lights to
operate.
SIC2574
Push the switch on to warn other drivers when
you must stop or park under emergency condi-
tions. All turn signal lights will flash.
WARNING
. If stopping for an emergency, be
sure to move the vehicle well off the
road.
. Do not use the hazard warning
flashers while moving on the high-
way unless unusual circumstances
force you to drive so slowly that
your vehicle might become a hazard
to other traffic. .
Turn signals do not work when the
hazard warning flasher lights are
on.
The flasher can be actuated with the ignition
switch in any position.
Some state laws may prohibit the use of
the hazard warning flasher switch while
driving.HAZARD WARNING FLASHER
SWITCH
Instruments and controls
2-27
Page 105 of 329
Black plate (105,1)
Model "Z12-D" EDITED: 2009/ 9/ 17
SIC4132
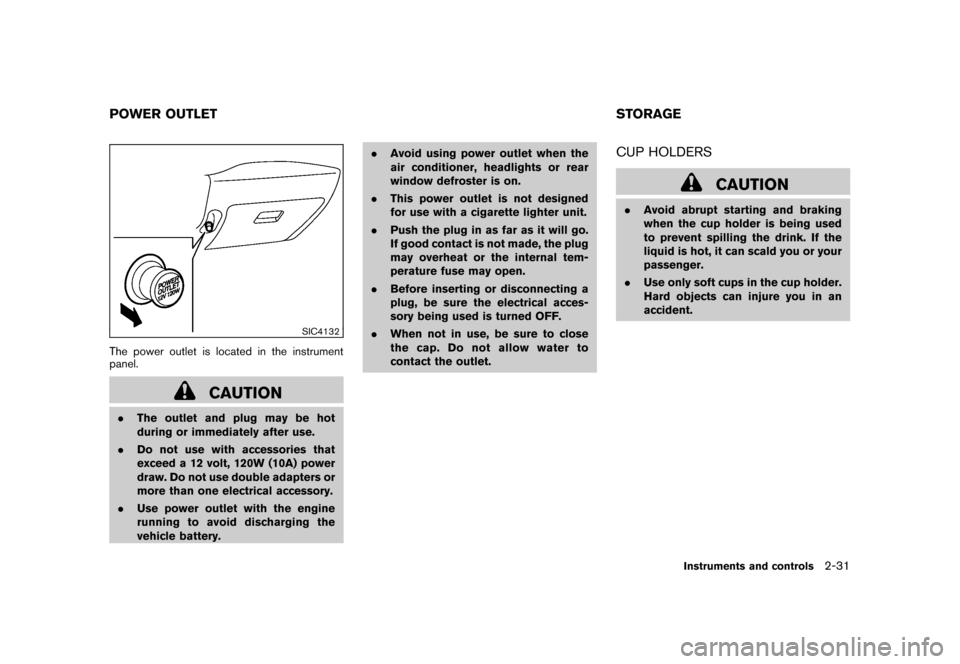
The power outlet is located in the instrument
panel.
CAUTION
.The outlet and plug may be hot
during or immediately after use.
. Do not use with accessories that
exceed a 12 volt, 120W (10A) power
draw. Do not use double adapters or
more than one electrical accessory.
. Use power outlet with the engine
running to avoid discharging the
vehicle battery. .
Avoid using power outlet when the
air conditioner, headlights or rear
window defroster is on.
. This power outlet is not designed
for use with a cigarette lighter unit.
. Push the plug in as far as it will go.
If good contact is not made, the plug
may overheat or the internal tem-
perature fuse may open.
. Before inserting or disconnecting a
plug, be sure the electrical acces-
sory being used is turned OFF.
. When not in use, be sure to close
the cap. Do not allow water to
contact the outlet.
CUP HOLDERS
CAUTION
.Avoid abrupt starting and braking
when the cup holder is being used
to prevent spilling the drink. If the
liquid is hot, it can scald you or your
passenger.
. Use only soft cups in the cup holder.
Hard objects can injure you in an
accident.
POWER OUTLET STORAGE
Instruments and controls
2-31
Page 122 of 329
Black plate (124,1)
Model "Z12-D" EDITED: 2009/ 9/ 17
remains open.
5. The hazard indicator flashes twice and the horn chirps once.
. When the LOCK
button is pushed with
all doors locked, the hazard indicator flashes
twice and the horn chirps once as a
reminder that the doors are already locked.
. Operate the door handles to confirm that the
doors have been securely locked.
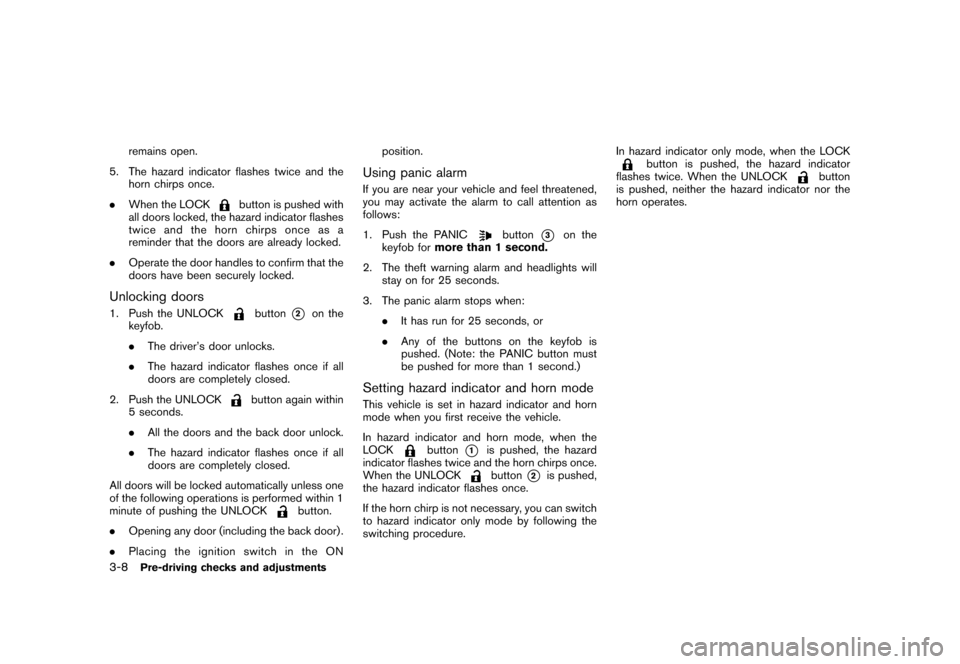
Unlocking doors1. Push the UNLOCK
button
*2
on the
keyfob.
. The driver’s door unlocks.
. The hazard indicator flashes once if all
doors are completely closed.
2. Push the UNLOCK
button again within
5 seconds.
. All the doors and the back door unlock.
. The hazard indicator flashes once if all
doors are completely closed.
All doors will be locked automatically unless one
of the following operations is performed within 1
minute of pushing the UNLOCK
button.
. Opening any door (including the back door) .
. Placing the ignition switch in the ON position.
Using panic alarmIf you are near your vehicle and feel threatened,
you may activate the alarm to call attention as
follows:
1. Push the PANIC
button
*3
on the
keyfob for more than 1 second.
2. The theft warning alarm and headlights will stay on for 25 seconds.
3. The panic alarm stops when: .It has run for 25 seconds, or
. Any of the buttons on the keyfob is
pushed. (Note: the PANIC button must
be pushed for more than 1 second.)
Setting hazard indicator and horn modeThis vehicle is set in hazard indicator and horn
mode when you first receive the vehicle.
In hazard indicator and horn mode, when the
LOCK
button
*1
is pushed, the hazard
indicator flashes twice and the horn chirps once.
When the UNLOCKbutton
*2
is pushed,
the hazard indicator flashes once.
If the horn chirp is not necessary, you can switch
to hazard indicator only mode by following the
switching procedure. In hazard indicator only mode, when the LOCK
button is pushed, the hazard indicator
flashes twice. When the UNLOCK
button
is pushed, neither the hazard indicator nor the
horn operates.
3-8
Pre-driving checks and adjustments
Page 132 of 329
Black plate (134,1)
Model "Z12-D" EDITED: 2009/ 9/ 17
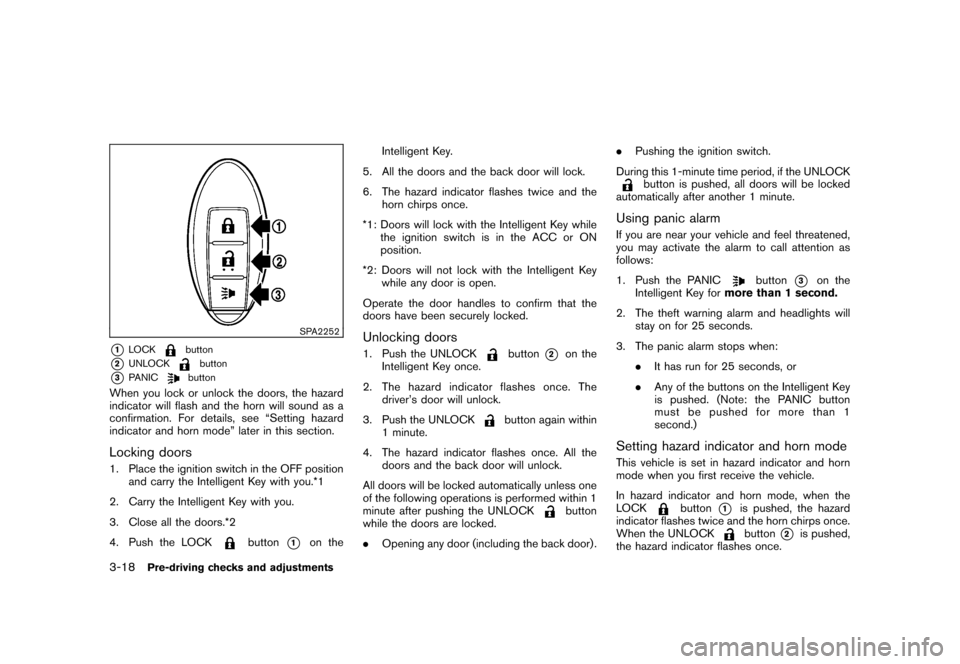
SPA2252
*1
LOCK
button
*2
UNLOCK
button
*3
PANIC
button
When you lock or unlock the doors, the hazard
indicator will flash and the horn will sound as a
confirmation. For details, see “Setting hazard
indicator and horn mode” later in this section.Locking doors1. Place the ignition switch in the OFF positionand carry the Intelligent Key with you.*1
2. Carry the Intelligent Key with you.
3. Close all the doors.*2
4. Push the LOCK
button
*1
on the Intelligent Key.
5. All the doors and the back door will lock.
6. The hazard indicator flashes twice and the horn chirps once.
*1: Doors will lock with the Intelligent Key while the ignition switch is in the ACC or ON
position.
*2: Doors will not lock with the Intelligent Key while any door is open.
Operate the door handles to confirm that the
doors have been securely locked.
Unlocking doors1. Push the UNLOCK
button
*2
on the
Intelligent Key once.
2. The hazard indicator flashes once. The driver’s door will unlock.
3. Push the UNLOCK
button again within
1 minute.
4. The hazard indicator flashes once. All the doors and the back door will unlock.
All doors will be locked automatically unless one
of the following operations is performed within 1
minute after pushing the UNLOCK
button
while the doors are locked.
. Opening any door (including the back door) . .
Pushing the ignition switch.
During this 1-minute time period, if the UNLOCK
button is pushed, all doors will be locked
automatically after another 1 minute.
Using panic alarmIf you are near your vehicle and feel threatened,
you may activate the alarm to call attention as
follows:
1. Push the PANIC
button
*3
on the
Intelligent Key for more than 1 second.
2. The theft warning alarm and headlights will stay on for 25 seconds.
3. The panic alarm stops when: .It has run for 25 seconds, or
. Any of the buttons on the Intelligent Key
is pushed. (Note: the PANIC button
must be pushed for more than 1
second.)
Setting hazard indicator and horn modeThis vehicle is set in hazard indicator and horn
mode when you first receive the vehicle.
In hazard indicator and horn mode, when the
LOCK
button
*1
is pushed, the hazard
indicator flashes twice and the horn chirps once.
When the UNLOCKbutton
*2
is pushed,
the hazard indicator flashes once.
3-18
Pre-driving checks and adjustments
Page 141 of 329
Black plate (143,1)
Model "Z12-D" EDITED: 2009/ 9/ 17
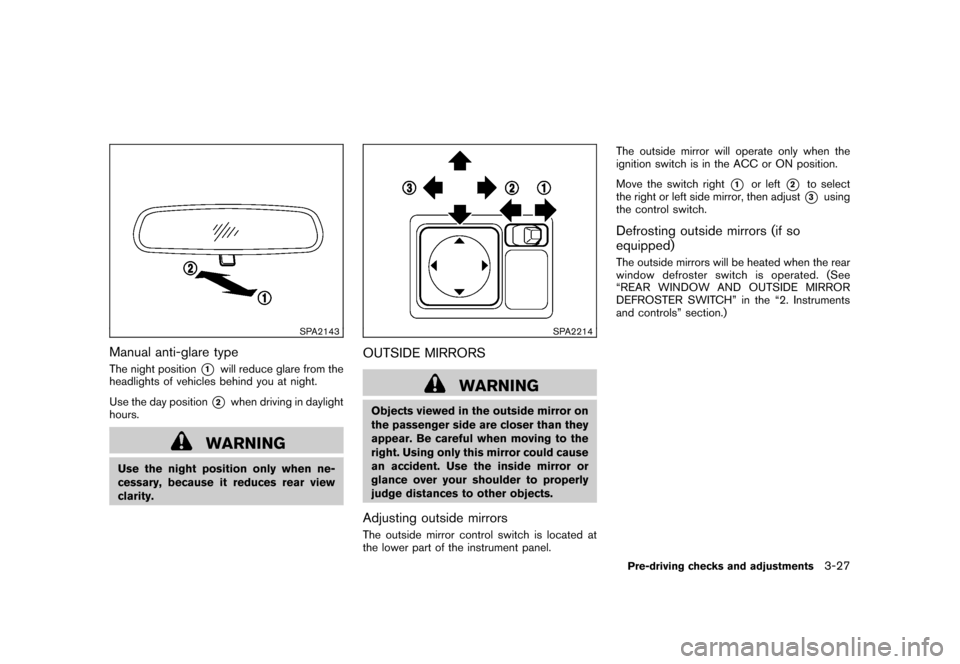
SPA2143
Manual anti-glare typeThe night position
*1
will reduce glare from the
headlights of vehicles behind you at night.
Use the day position*2
when driving in daylight
hours.
WARNING
Use the night position only when ne-
cessary, because it reduces rear view
clarity.
SPA2214
OUTSIDE MIRRORS
WARNING
Objects viewed in the outside mirror on
the passenger side are closer than they
appear. Be careful when moving to the
right. Using only this mirror could cause
an accident. Use the inside mirror or
glance over your shoulder to properly
judge distances to other objects.Adjusting outside mirrorsThe outside mirror control switch is located at
the lower part of the instrument panel. The outside mirror will operate only when the
ignition switch is in the ACC or ON position.
Move the switch right
*1
or left
*2
to select
the right or left side mirror, then adjust*3
using
the control switch.
Defrosting outside mirrors (if so
equipped)The outside mirrors will be heated when the rear
window defroster swi tch is operated. (See
“REAR WINDOW AND OUTSIDE MIRROR
DEFROSTER SWITCH” in the “2. Instruments
and controls” section.)Pre-driving checks and adjustments
3-27
Page 241 of 329
Black plate (245,1)
Model "Z12-D" EDITED: 2009/ 9/ 17
protectors (for example, goggles or
industrial safetyspectacles) and
remove rings, metal bands, or any
other jewelry. Do not lean over the
battery when jump starting.
. Do not attempt to jump start a
frozen battery. It could explode
and cause serious injury.
. Your vehicle has an automatic en-
gine cooling fan. It could come on at
any time. Keep hands and other
objects away from it.
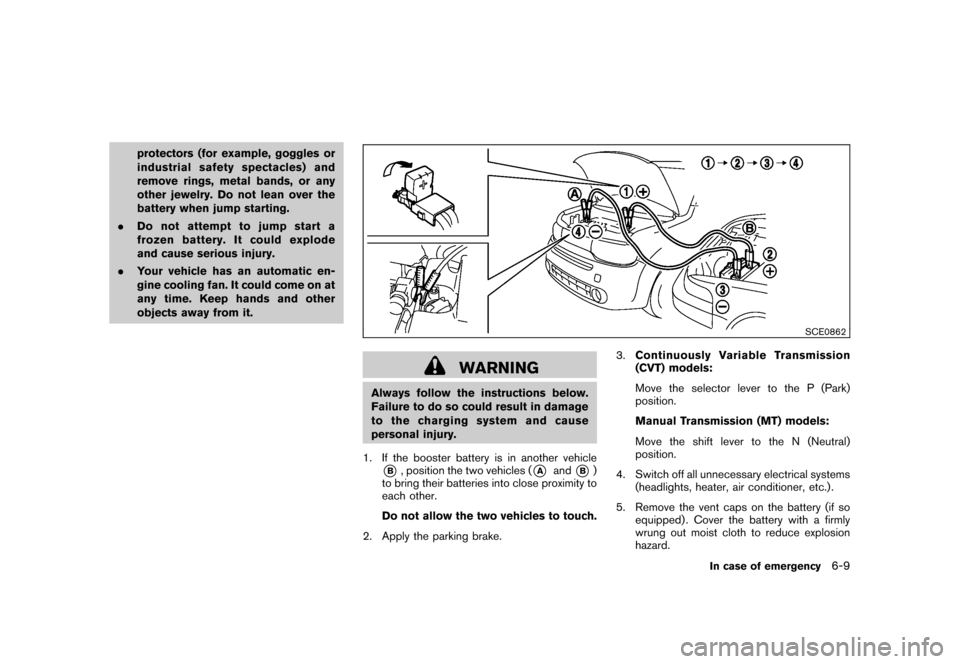
SCE0862
WARNING
Always follow the instructions below.
Failure to do so could result in damage
to the charging system and cause
personal injury.
1. If the booster battery is in another vehicle*B, position the two vehicles (
*A
and
*B)
to bring their batteries into close proximity to
each other.
Do not allow the two vehicles to touch.
2. Apply the parking brake. 3.
Continuously Variable Transmission
(CVT) models:
Move the selector lever to the P (Park)
position.
Manual Transmission (MT) models:
Move the shift lever to the N (Neutral)
position.
4. Switch off all unnecessary electrical systems (headlights, heater, air conditioner, etc.) .
5. Remove the vent caps on the battery (if so equipped) . Cover the battery with a firmly
wrung out moist cloth to reduce explosion
hazard.
In case of emergency
6-9