Page 257 of 472
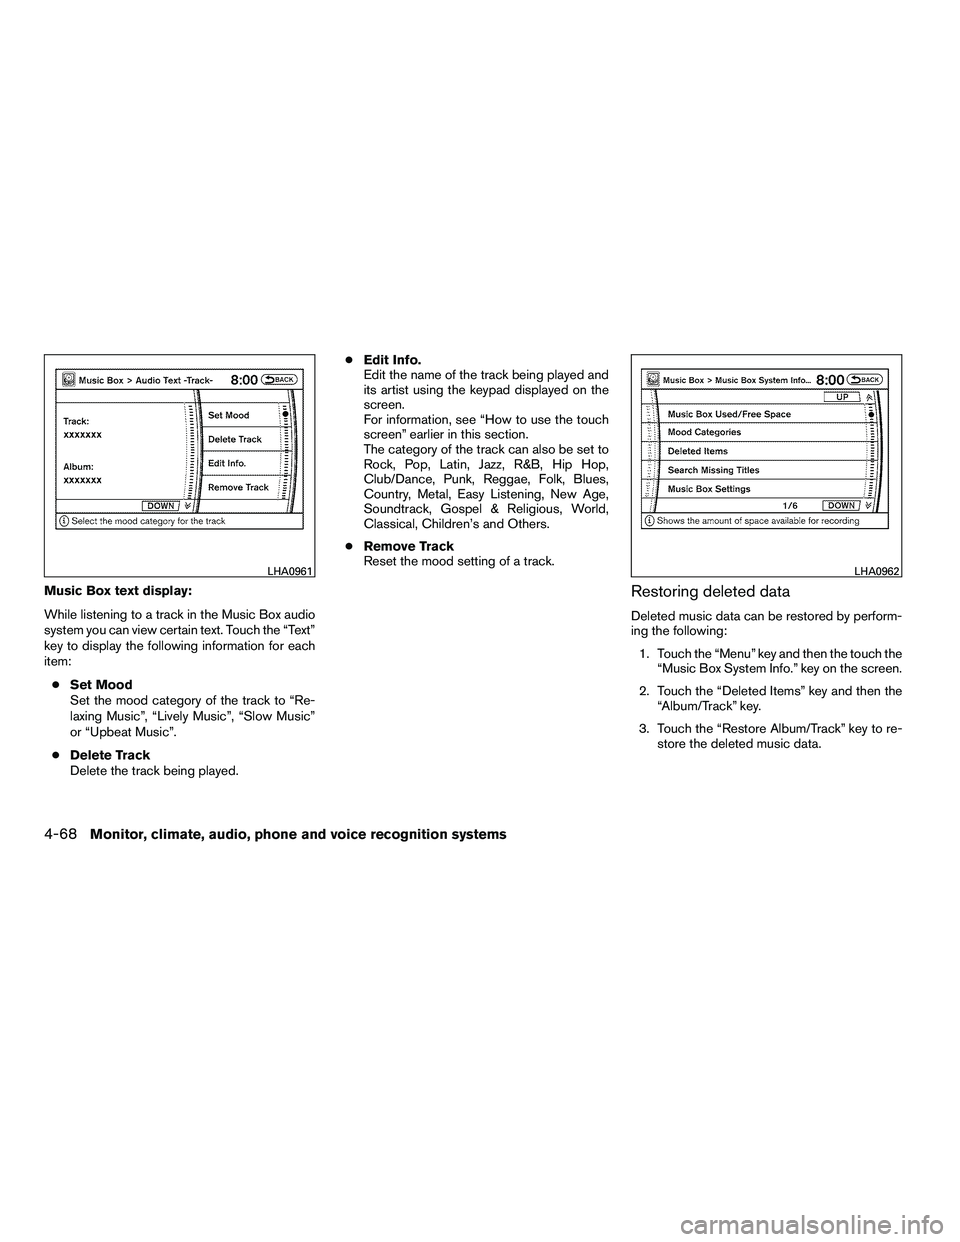
Music Box text display:
While listening to a track in the Music Box audio
system you can view certain text. Touch the “Text”
key to display the following information for each
item:● Set Mood
Set the mood category of the track to “Re-
laxing Music”, “Lively Music”, “Slow Music”
or “Upbeat Music”.
● Delete Track
Delete the track being played. ●
Edit Info.
Edit the name of the track being played and
its artist using the keypad displayed on the
screen.
For information, see “How to use the touch
screen” earlier in this section.
The category of the track can also be set to
Rock, Pop, Latin, Jazz, R&B, Hip Hop,
Club/Dance, Punk, Reggae, Folk, Blues,
Country, Metal, Easy Listening, New Age,
Soundtrack, Gospel & Religious, World,
Classical, Children’s and Others.
● Remove Track
Reset the mood setting of a track.Restoring deleted data
Deleted music data can be restored by perform-
ing the following:
1. Touch the “Menu” key and then the touch the “Music Box System Info.” key on the screen.
2. Touch the “Deleted Items” key and then the “Album/Track” key.
3. Touch the “Restore Album/Track” key to re- store the deleted music data.
Page 262 of 472
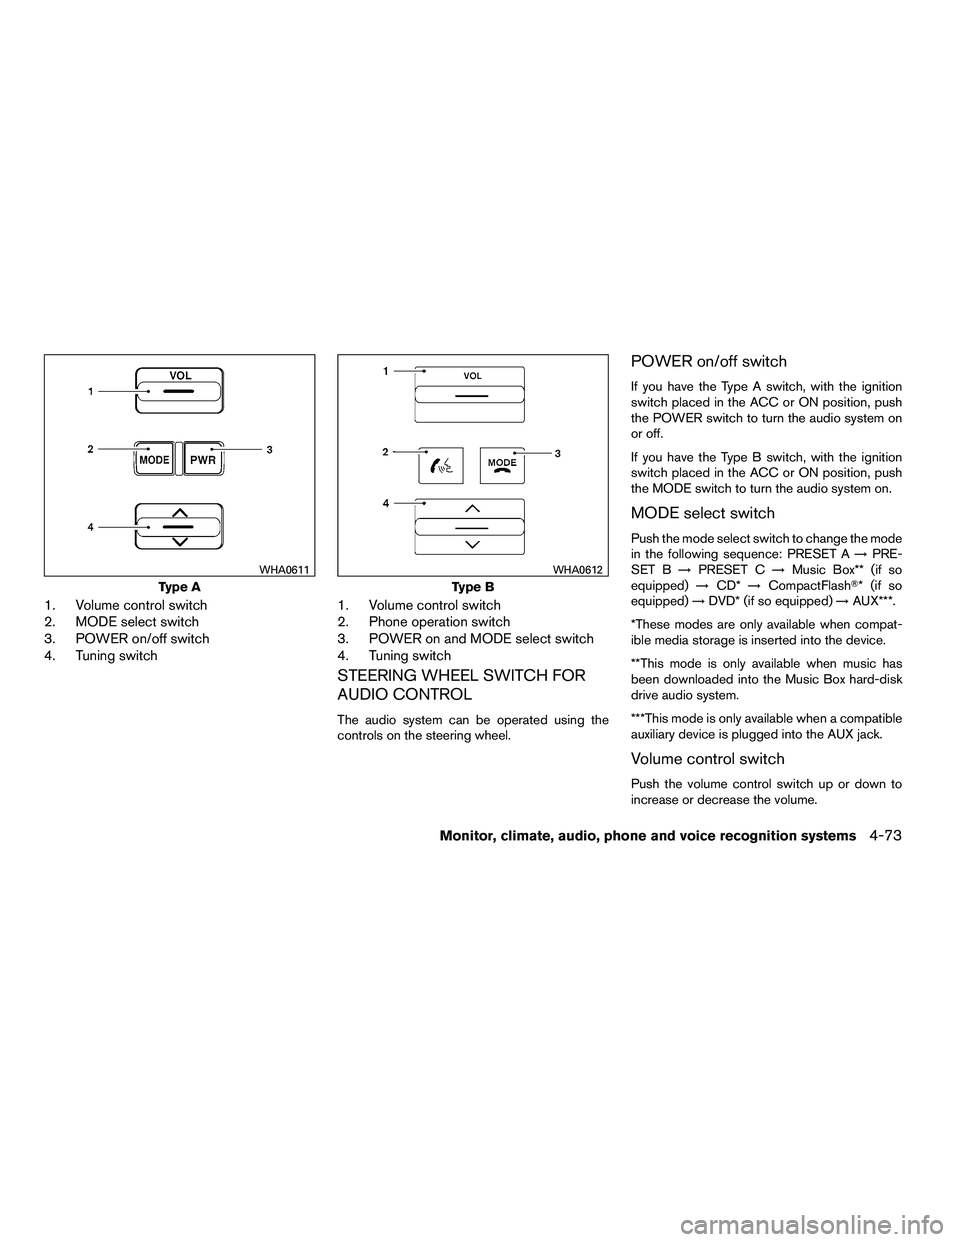
1. Volume control switch
2. MODE select switch
3. POWER on/off switch
4. Tuning switch1. Volume control switch
2. Phone operation switch
3. POWER on and MODE select switch
4. Tuning switch
STEERING WHEEL SWITCH FOR
AUDIO CONTROL
The audio system can be operated using the
controls on the steering wheel.
POWER on/off switch
If you have the Type A switch, with the ignition
switch placed in the ACC or ON position, push
the POWER switch to turn the audio system on
or off.
If you have the Type B switch, with the ignition
switch placed in the ACC or ON position, push
the MODE switch to turn the audio system on.
MODE select switch
Push the mode select switch to change the mode
in the following sequence: PRESET A
→PRE-
SET B →PRESET C →Music Box** (if so
equipped) →CD* →CompactFlash�* (if so
equipped) →DVD* (if so equipped) →AUX***.
*These modes are only available when compat-
ible media storage is inserted into the device.
**This mode is only available when music has
been downloaded into the Music Box hard-disk
drive audio system.
***This mode is only available when a compatible
auxiliary device is plugged into the AUX jack.
Volume control switch
Push the volume control switch up or down to
increase or decrease the volume.
Page 263 of 472
Tuning
Memory change (radio):
While in one of the preset radio station banks (A,
B or C) , push the tuning switch
Page 279 of 472
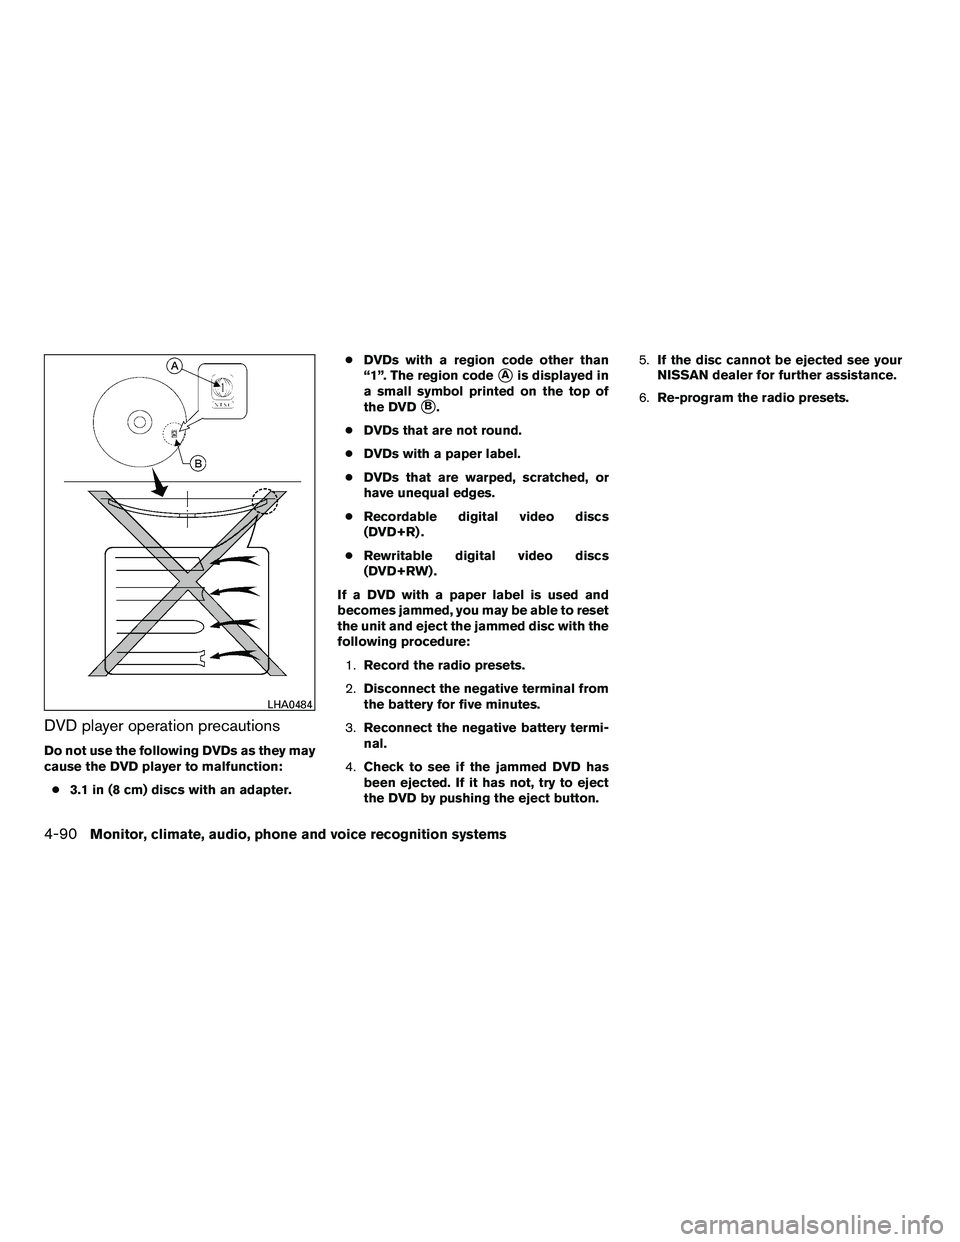
DVD player operation precautions
Do not use the following DVDs as they may
cause the DVD player to malfunction:● 3.1 in (8 cm) discs with an adapter. ●
DVDs with a region code other than
“1”. The region code
�Ais displayed in
a small symbol printed on the top of
the DVD
�B.
● DVDs that are not round.
● DVDs with a paper label.
● DVDs that are warped, scratched, or
have unequal edges.
● Recordable digital video discs
(DVD+R) .
● Rewritable digital video discs
(DVD+RW) .
If a DVD with a paper label is used and
becomes jammed, you may be able to reset
the unit and eject the jammed disc with the
following procedure: 1. Record the radio presets.
2. Disconnect the negative terminal from
the battery for five minutes.
3. Reconnect the negative battery termi-
nal.
4. Check to see if the jammed DVD has
been ejected. If it has not, try to eject
the DVD by pushing the eject button. 5.
If the disc cannot be ejected see your
NISSAN dealer for further assistance.
6. Re-program the radio presets.
Page 330 of 472
Speaker Adaptation function settings
Edit Name:
Edit the user name using the keypad displayed on
the screen.
Store Result:
When this item is turned to ON, the Voice Rec-
ognition system can easily recognize the user’s
voice that it has learned.
Reset Result:
Resets the user’s voice that the Voice Recogni-
tion system has learned.Continuous Learning:
When this item is turned to ON, you can have the
system learn the voice commands in succession,
without selecting commands one by one.
Page 336 of 472

WARNING
●If the low tire pressure warning light
illuminates while driving, avoid sudden
steering maneuvers or abrupt braking,
reduce vehicle speed, pull off the road
to a safe location and stop the vehicle
as soon as possible. Driving with under-
inflated tires may permanently damage
the tires and increase the likelihood of
tire failure. Serious vehicle damage
could occur and may lead to an acci-
dent and could result in serious per-
sonal injury. Check the tire pressure for
all four tires. Adjust the tire pressure to
the recommended COLD tire pressure
shown on the Tire and Loading Informa-
tion label to turn the low tire pressure
warning light OFF. If you have a flat tire,
replace it with a spare tire as soon as
possible. (See “Flat tire” in the “In case
of emergency” section for changing a
flat tire.) ●
When a spare tire is mounted or a wheel
is replaced, tire pressure will not be
indicated, the TPMS will not function
and the low tire pressure warning light
will flash for approximately 1 minute.
The light will remain on after 1 minute.
Contact your NISSAN dealer as soon as
possible for tire replacement and/or
system resetting.
● Replacing tires with those not originally
specified by NISSAN could affect the
proper operation of the TPMS.
● Do not inject any tire liquid or aerosol
tire sealant into the tires, as this may
cause a malfunction of the tire pressure
sensors.
Page 350 of 472
CRUISE CONTROL OPERATIONS
The cruise control allows driving at a speed be-
tween 25 - 89 MPH (40 - 144 km/h) without
keeping your foot on the accelerator pedal.
To turn on the cruise control,push the
ON·OFF switch on. The CRUISE indicator light in
the vehicle information display will illuminate.
To set cruising speed, accelerate the vehicle to
the desired speed, push the COAST/SET switch
and release it. The SET indicator light in the
vehicle information display will illuminate. Take
your foot off the accelerator pedal. Your vehicle
maintains the set speed.
● To pass another vehicle, depress the ac-
celerator pedal. When you release the
pedal, the vehicle returns to the previously
set speed.
● The vehicle may not maintain the set speed
when going up or down steep hills. If this
happens, drive without the cruise control.
To cancel the preset speed, use one of the
following three methods.
● Push the CANCEL button; the SET indicator
light in the vehicle information display goes
out.
● Tap the brake pedal; the SET indicator light
goes out. ●
Push the ON·OFF switch off. Both the
CRUISE indicator light and SET indicator
light in the vehicle information display go out.
The cruise control is automatically canceled and
the SET light in the vehicle information display
goes out if: ● you depress the brake pedal while pushing
the ACCEL/RES or SET/COAST switch.
The preset speed is deleted from memory.
● the vehicle slows down more than 8 MPH
(13 km/h) below the set speed.
● you move the shift selector to N (Neutral) .
To reset at a faster cruising speed, use one
of the following three methods.
● Depress the accelerator pedal. When the
vehicle attains the desired speed, push and
release the COAST/SET switch.
● Push and hold the ACCEL/RES switch.
When the vehicle attains the speed you de-
sire, release the switch.
● Push and release the ACCEL/RES switch.
Each time you do this, the set speed in-
creases by about 1 MPH (1.6 km/h) . To reset at a slower cruising speed,
use one
of the following three methods.
● Lightly tap the brake pedal. When the ve-
hicle attains the desired speed, push the
COAST/SET switch and release it.
● Push and hold the COAST/SET switch. Re-
lease the switch when the vehicle slows to
the desired speed.
● Push and release the COAST/SET switch.
Each time you do this, the set speed de-
creases by about 1 MPH (1.6 km/h) .
To resume the preset speed, push and re-
lease the ACCEL/RES switch. The vehicle re-
turns to the last set cruising speed when the
vehicle speed is over 25 MPH (40 km/h) .
Starting and driving5-19
�REVIEW COPY—2010 Armada (wzw)
Owners Manual (owners)—USA_English (nna)
02/17/09—debbie
�
Page 460 of 472
If you believe that your vehicle has a de-
fect which could cause a crash or could
cause injury or death, you should immedi-
ately inform the National Highway Traffic
Safety Administration (NHTSA) in addi-
tion to notifying NISSAN.
If NHTSA receives similar complaints, it
may open an investigation, and if it finds
that a safety defect exists in a group of
vehicles, it may order a recall and remedy
campaign. However, NHTSA cannot be-
come involved in individual problems be-
tween you, your dealer, or NISSAN.
To contact NHTSA, you may call the Ve-
hicle Safety Hotline toll-free at 1-888-
327-4236 (TTY: 1-800-424-9153); go
to http://www.safercar.gov; or write to:
Administrator, NHTSA, 400 Seventh
Street, SW., Washington, D.C. 20590.
You can also obtain other information
about motor vehicle safety from
http://www.safercar.gov.
You may notify NISSAN by contacting our
Consumer Affairs Department, toll-free, at
1-800-NISSAN-1.Due to legal requirements in some states and
Canadian Provinces, your vehicle may be re-
quired to be in what is called the “ready condi-
tion” for an Inspection/Maintenance (I/M) test of
the emission control system.
The vehicle is set to the “ready condition” when it
is driven through certain driving patterns. Usually,
the ready condition can be obtained by ordinary
usage of the vehicle.
If a powertrain system component is repaired or
the battery is disconnected, the vehicle may be
reset to a “not ready” condition. Before taking the
I/M test, check the vehicle’s
inspection/maintenance test readiness condi-
tion. Turn the ignition switch ON without starting
the engine. If the Malfunction Indicator Light
(MIL) comes on steady for 20 seconds and then
blinks for 10 seconds , the I/M test condition is
“not ready”. If the MIL does not blink after 20
seconds, the I/M test condition is “ready”. If the
MIL indicates the vehicle is in a “not ready” con-
dition, drive the vehicle through the following
pattern to set the vehicle to the ready condition. If
you cannot or do not want to perform the driving
pattern, a NISSAN dealer can conduct it for you.