Page 9 of 438
1. Top tether strap anchor (P. 1-28)
2. Rear seat belts (P. 1-15)
3. Roof-mounted curtain side-impactsupplemental air bag (P. 1-42)
4. Front seat-mounted side-impact
supplemental air bag (P. 1-42)
5. Head Restraints (P. 1-11 )
6. Front seat belts (P. 1-15)
7. Supplemental front-impact air bags
(P. 1-42)
8. Seats (P. 1-2)
9. Occupant classification sensor
(pattern sensor) (P. 1-50)
10. Seat belt with pretensioner (P. 1-55)
11. LATCH (Lower Anchors and Tethers for
CHildren) system (P. 1-26)
See the page number indicated in paren-
theses for operating details.
Page 39 of 438

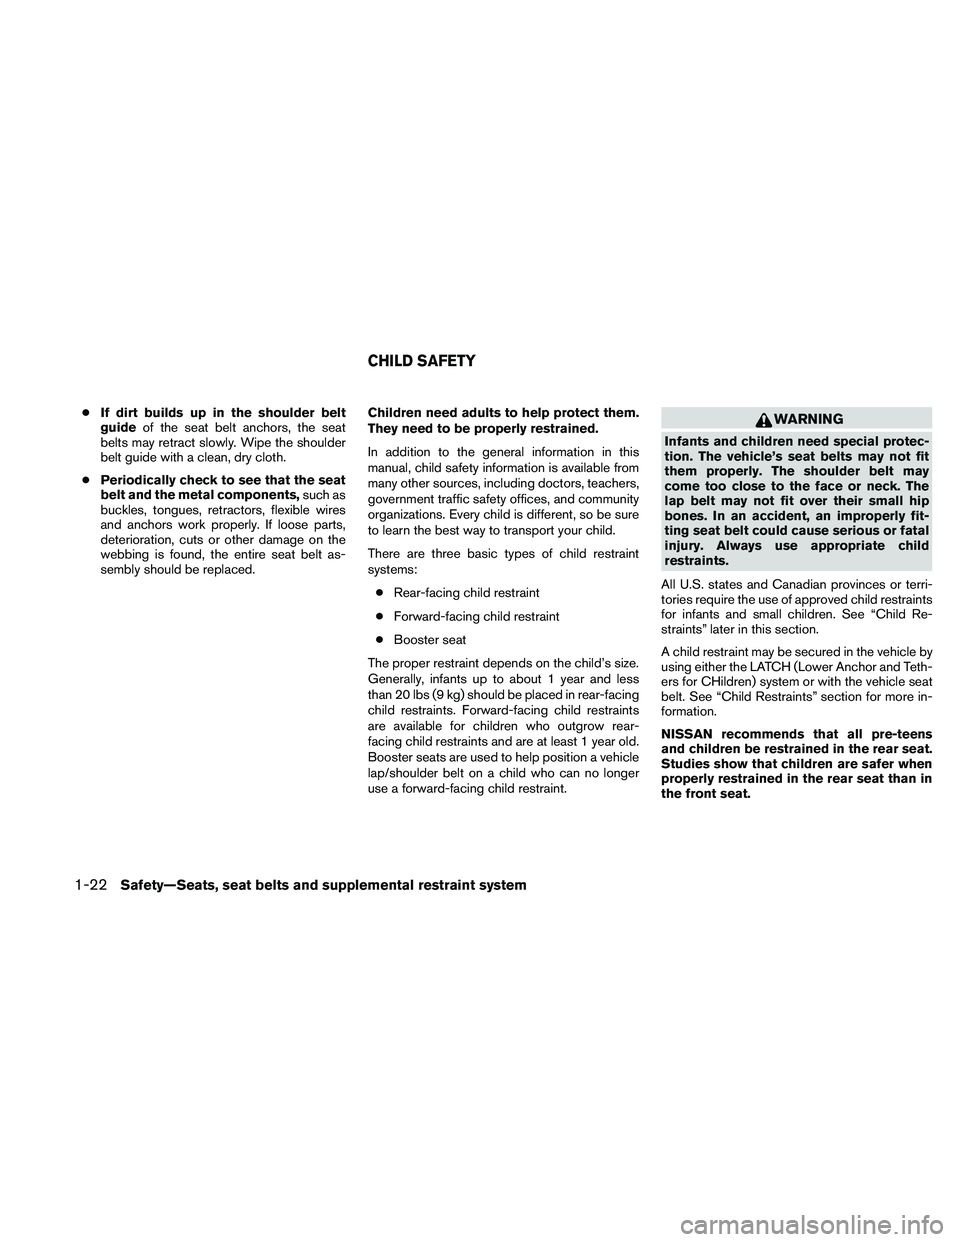
Unfastening the seat belts
�1To unfasten the seat belt, press the button on
the buckle. The seat belt automatically re-
tracts.
Checking seat belt operation
Seat belt retractors are designed to lock seat belt
movement by two separate methods:
● When the seat belt is pulled quickly from the
retractor.
● When the vehicle slows down rapidly. To increase your confidence in the seat belts,
check the operation as follows:
● Grasp the shoulder belt and pull forward
quickly. The retractor should lock and re-
strict further belt movement.
If the retractor does not lock during this check or
if you have any questions about seat belt opera-
tion, see a NISSAN dealer.
Shoulder belt height adjustment
(Sedan, front seats)
The shoulder belt anchor height should be ad-
justed to the position best for you. See “Precau-
tions on seat belt usage” earlier in this section. To
adjust, pull out the adjustment button
�1and
move the shoulder belt anchor to the desired
position
�2, so the belt passes over the center of
the shoulder. The belt should be away from your
face and neck, but not falling off your shoulder.
Release the adjustment button to lock the shoul-
der belt anchor into position.
Page 41 of 438

●If dirt builds up in the shoulder belt
guide of the seat belt anchors, the seat
belts may retract slowly. Wipe the shoulder
belt guide with a clean, dry cloth.
● Periodically check to see that the seat
belt and the metal components, such as
buckles, tongues, retractors, flexible wires
and anchors work properly. If loose parts,
deterioration, cuts or other damage on the
webbing is found, the entire seat belt as-
sembly should be replaced. Children need adults to help protect them.
They need to be properly restrained.
In addition to the general information in this
manual, child safety information is available from
many other sources, including doctors, teachers,
government traffic safety offices, and community
organizations. Every child is different, so be sure
to learn the best way to transport your child.
There are three basic types of child restraint
systems:
● Rear-facing child restraint
● Forward-facing child restraint
● Booster seat
The proper restraint depends on the child’s size.
Generally, infants up to about 1 year and less
than 20 lbs (9 kg) should be placed in rear-facing
child restraints. Forward-facing child restraints
are available for children who outgrow rear-
facing child restraints and are at least 1 year old.
Booster seats are used to help position a vehicle
lap/shoulder belt on a child who can no longer
use a forward-facing child restraint.
Page 50 of 438

WARNING
The three-point seat belt with Automatic
Locking Retractor (ALR) must be used
when installing a child restraint. Failure to
use the ALR mode will result in the child
restraint not being properly secured. The
restraint could tip over or be loose and
cause injury to a child in a sudden stop or
collision. Also, it can change the opera-
tion of the front passenger air bag. See
“Front passenger air bag and status light”
later in this section.Refer to all Warnings and Cautions in the “Child
Safety” and “Child Restraint” sections before in-
stalling a child restraint.
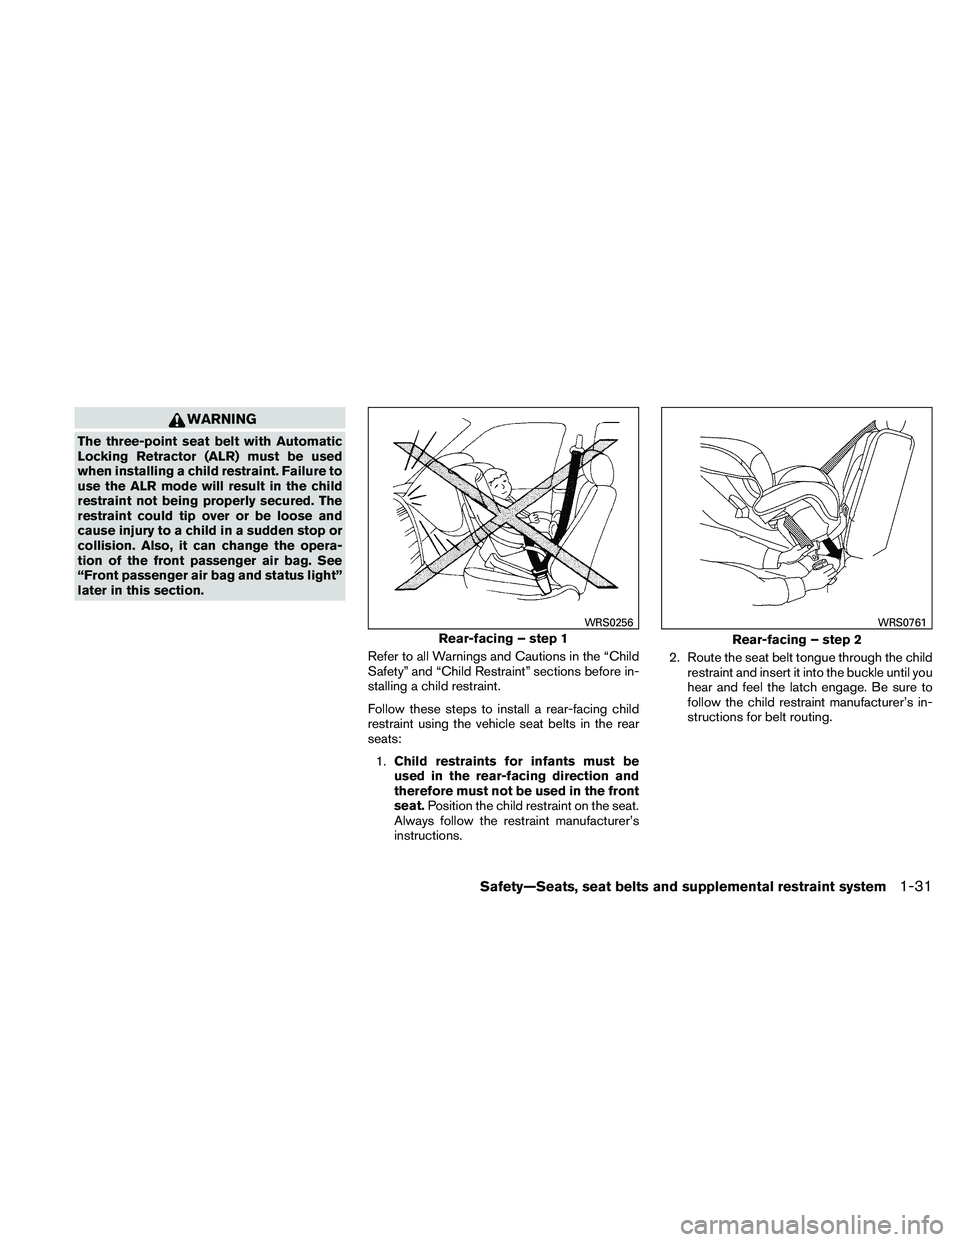
Follow these steps to install a rear-facing child
restraint using the vehicle seat belts in the rear
seats:1. Child restraints for infants must be
used in the rear-facing direction and
therefore must not be used in the front
seat. Position the child restraint on the seat.
Always follow the restraint manufacturer’s
instructions. 2. Route the seat belt tongue through the child
restraint and insert it into the buckle until you
hear and feel the latch engage. Be sure to
follow the child restraint manufacturer’s in-
structions for belt routing.
Page 58 of 438
4. Tighten the tether strap according to themanufacturer’s instructions to remove any
slack.
If you have any questions when installing a
top tether strap, consult your NISSAN
dealer for details.
BOOSTER SEATS
Precautions on booster seats
Page 59 of 438
All U.S. states and Canadian provinces or
territories require that infants and small
children be restrained in an approved child
restraint at all times while the vehicle is
being operated.
The instructions in this section apply to booster
seat installation in the rear seats or the front
passenger seat.
Booster seat installation
Page 61 of 438

PRECAUTIONS ON
SUPPLEMENTAL RESTRAINT
SYSTEM
This Supplemental Restraint System (SRS) sec-
tion contains important information concerning
the following systems:● Driver and passenger supplemental front-
impact air bag (NISSAN Advanced Air Bag
System)
● Front seat-mounted side-impact supple-
mental air bag
● Roof-mounted curtain side-impact supple-
mental air bag
● Seat belt with pretensioner
Supplemental front-impact air bag system:
The NISSAN Advanced Air Bag System can help
cushion the impact force to the head and chest of
the driver and front passenger in certain frontal
collisions.
Front seat-mounted side-impact supple-
mental air bag system: This system can help
cushion the impact force to the chest and pelvic
area of the driver and front passenger in certain
side-impact collisions. The side air bags are de-
signed to inflate on the side where the vehicle is
impacted. Roof-mounted curtain side-impact supple-
mental air bag system:
This system can help
cushion the impact force to the head of occu-
pants in front and rear outboard seating positions
in certain side-impact collisions. The curtain air
bags are designed to inflate on the side where
the vehicle is impacted.
These supplemental restraint systems are de-
signed to supplement the crash protection pro-
vided by the driver and front passenger seat belts
and are not a substitute for them. Seat belts
should always be correctly worn and the occu-
pant seated a suitable distance away from the
steering wheel, instrument panel and door finish-
ers. (See “Seat belts” earlier in this section for
instructions and precautions on seat belt usage.)
The supplemental air bags operate only
when the ignition switch is placed in the
ON position.
After placing the ignition switch in the ON
position, the supplemental air bag warning
light illuminates. The supplemental air bag
warning light will turn off after about 7
seconds if the system is operational.
SUPPLEMENTAL RESTRAINT
SYSTEM
1-42Safety—Seats, seat belts and supplemental restraint system
Page 66 of 438
WARNING
●The seat belts, the side air bags and
curtain air bags are most effective when
you are sitting well back and upright in
the seat with both feet on the floor. The
side air bag and curtain air bag inflate
with great force. Do not allow anyone to
place their hand, leg or face near the
side air bag on the side of the seatback
of the front seat or near the side roof
rails. Do not allow anyone sitting in the
front seats or rear outboard seats to
extend their hand out of the window or
lean against the door. Some examples
of dangerous riding positions are
shown in the previous illustrations.