Page 236 of 438

Connecting iPod�
To connect an iPod�to the vehicle so that the
iPod� can be controlled with the audio system
controls and display screen")
iPod�* PLAYER OPERATION WITH
NAVIGATION SYSTEM (if so
equipped)
Connecting iPod�
To connect an iPod�to the vehicle so that the
iPod� can be controlled with the audio system
controls and display screen, use the USB jack
located in the center console. Open the protec-
tive cover
�1on the USB jack in the center
console. Then connect the iPod�-specific end of
the cable to the iPod� and the USB end of the
cable to the USB jack on the vehicle. If your iPod�
supports charging via a USB connection, its bat- tery will be charged while connected to the ve-
hicle with the ignition switch in the ACC or ON
position.
While connected to the vehicle, the iPod�
can
only be operated by the vehicle audio controls.
To disconnect the iPod� from the vehicle, remove
the USB end of the cable from the USB jack on
the vehicle, then remove the cable from the
iPod�.
*iPod �is a trademark of Apple Inc., registered in
the U.S. and other countries.
Compatibility
The following models are available:
● iPod� 5th Generation version 1.2.1
● iPod� Classic - version 1.1.1
● iPod� Touch - version 2.0.0
● iPod� Nano - 1st generation version 1.3.1
● iPod� Nano - 2nd generation version 1.1.3
● iPod� Nano - 3rd generation version 1.1
● iPod� Nano - 4thgeneration version 1.0.2
Make sure that your iPod� firmware is updated.Audio main operation
Place the ignition switch in the ACC or ON
position. Press the DISC·AUX button repeatedly
to switch to the iPod�mode.
If the system has been turned off while the iPod�
was playing, pressing the VOL/ON·OFF control
knob will start the iPod�.
DISC·AUX button:
When the DISC·AUX button is pressed with the
system off and the iPod� connected, the system
will turn on. If another audio source is playing and
the iPod� is connected, press the DISC·AUX
button repeatedly until the center display
changes to the iPod� mode.
Page 240 of 438

Automatic recording:
If the “Automatic Recording” function is turned to
ON, recording starts when a CD is inserted. For
more information, see “Music Box settings” in this
section.
Stopping recording:
To stop the recording, touch the “Stop REC” key
on the screen. If the CD is ejected, the audio
system is turned off or the ignition switch is
placed in the OFF position, the recording also
stops.
Playing recorded songs
Select the Music Box audio system by using one
of the following methods:● Press the SOURCE select switch on the
steering wheel.
For information, see “Steering wheel switch
for audio control” in this section.
● Press the DISC·AUX button repeatedly until
the center display changes to the Music Box
mode. ●
Give voice commands.
For information, see “NISSAN Voice Recog-
nition system” in this section.
Stopping playback:
The system stops playing when: ● Another mode (radio, CD, USB, Bluetooth�
Audio or AUX) is selected.
● The audio system is turned off.
● The ignition switch is placed in the OFF
position.
Seeking button:
Press the
Page 247 of 438
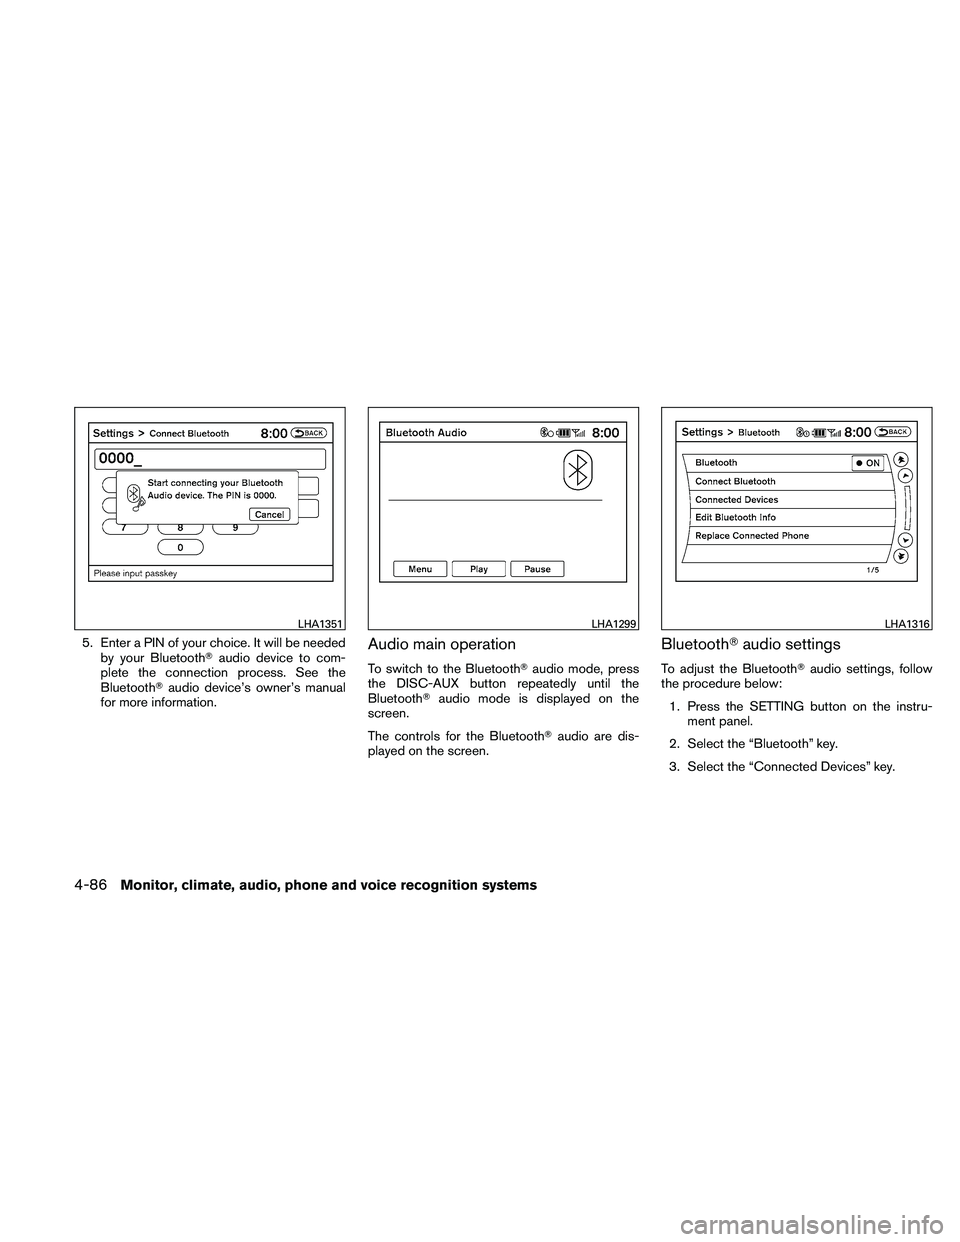
5. Enter a PIN of your choice. It will be neededby your Bluetooth� audio device to com-
plete the connection process. See the
Bluetooth� audio device’s owner’s manual
for more information.Audio main operation
To switch to the Bluetooth� audio mode, press
the DISC-AUX button repeatedly until the
Bluetooth� audio mode is displayed on the
screen.
The controls for the Bluetooth� audio are dis-
played on the screen.
Bluetooth� audio settings
To adjust the Bluetooth� audio settings, follow
the procedure below:
1. Press the SETTING button on the instru- ment panel.
2. Select the “Bluetooth” key.
3. Select the “Connected Devices” key.
Page 249 of 438
CD CARE AND CLEANING
●Handle a CD by its edges. Do not bend the
disc. Never touch the surface of the disc.
● Always place the discs in the storage case
when they are not being used.
● To clean a disc, wipe the surface from the
center to the outer edge using a clean, soft
cloth. Do not wipe the disc using a circular
motion.
● Do not use a conventional record cleaner or
alcohol intended for industrial use. ●
A new disc may be rough on the inner and
outer edges. Remove the rough edges by
rubbing the inner and outer edges with the
side of a pen or pencil as illustrated.1. Source select and Power on switch
2. Tuning switch
3. Volume control switch
Page 250 of 438
1. Source select and Power on switch
2. Tuning switch
3. Volume control switch1. Source select and Power on switch
2. Menu control switch/ENTER button
3. Volume control switch
STEERING WHEEL SWITCH FOR
AUDIO CONTROL (if so equipped)
POWER on switch
With the ignition switch in the ACC or ON posi-
tion, push the SOURCE switch to turn the audio
system on.
SOURCE select switch
Push the source select switch to change the
mode in the following sequence:
Type A Switch:
PRESET BANK A
→PRESET BANK B →PRE-
SET BANK C →CD* →AUX* →PRESET BANK
A.
* These modes are only available when compat-
ible media storage is inserted into the device.
While in one of the preset radio station banks (A,
B or C) , use the tuning switch
Page 251 of 438
Type C Switch:
AM→FM1 →FM2 →XM1 →XM2 →XM3
(satellite radio, if so equipped) →CD/DVD*→
Music Box** →USB/iPod�* →Bluetooth� Au-
dio* →AUX* →AM.
* These modes are only available when compat-
ible media storage is inserted into the device.
** This mode is only available when music has
been downloaded into the Music Box system.
Volume control switch
Push the volume control switch to increase or
decrease the volume.
Page 252 of 438

DVD:● Tilt up/down for less than 1.5 seconds to
increase or decrease the track number.
● Tilt up/down for more than 1.5 seconds to
increase or decrease the title number.
● Press the ENTER button to select an item
from the DVD display.
● When the transparent operation menu ap-
pears, the switch will control the menu.
USB: ● Tilt up/down for less than 1.5 seconds to
increase or decrease the track number.
● Tilt up/down for more than 1.5 seconds to
increase or decrease the folder number.
● Press the ENTER button to show the USB
Menu.
Music Box: ● Tilt up/down for less than 1.5 seconds to
increase or decrease the track number.
● Tilt up/down for more than 1.5 seconds to
increase or decrease the album (folder)
number (if playing compressed audio files) .
● Press the ENTER button to show the Music
Box Menu. Bluetooth�
Audio:
● Tilt up/down for less than 1.5 seconds to
increase or decrease the track number.
AUX: ● Press the ENTER button to show the AUX
Menu.
ANTENNA
Window antenna
The antenna pattern is printed inside the rear
window.
Page 254 of 438

Your NISSAN is equipped with the Bluetooth�
Hands-Free Phone System. If you have a com-
patible Bluetooth�enabled cellular phone, you
can set up the wireless connection between your
cellular phone and the in-vehicle phone module.
With Bluetooth� wireless technology, you can make or receive a hands-free telephone call with
your cellular phone in the vehicle.
Once your cellular phone is connected to the in-
vehicle phone module, no other phone connecting
procedure is required. Your phone is automatically
connected with the in-vehicle phone module when the ignition switch is placed in the ON position with
the previously connected cellular phone turned on
and carried in the vehicle.
You can connect up to 5 different Bluetooth
�
cellular phones to the in-vehicle phone module.
However, you can talk on only one cellular phone
at a time.
Before using the Bluetooth� Hands-Free Phone
System, refer to the following notes.
● Set up the wireless connection between a
compatible cellular phone and the in-vehicle
phone module before using the hands-free
phone system.
● Some Bluetooth� enabled cellular phones
may not be recognized by the in-vehicle
phone module. Please visit
www.nissanusa.com/bluetooth for a recom-
mended phone list and connecting.
● You will not be able to use a hands-free
phone under the following conditions:
– Your vehicle is outside of the cellular ser- vice area.
– Your vehicle is in an area where it is difficult to receive a cellular signal; such
as in a tunnel, in an underground parking
garage, near a tall building or in a moun-
tainous area.