Page 504 of 658
Comfort controls
5-97
5 Antenna
N00734200383
Roof antenna (except for vehicles equipped with
SIRIUS satellite radio)When listening to the radio, fold the antenna toward the rear of
the vehicle until you hear it click.
To r e m o v eTurn the pole (A) counterclockwise.To i n s t a l lScrew the pole (A) clockwise into the base (B) until it is
securely retained.NOTE�
Be sure to remove the roof antenna in the following cases:
When using an automatic car wash
When covering your vehicle with a car cover
�
Before driving into a structure that has a low ceiling, fold
down the antenna toward the front of the vehicle to pre-
vent it from hitting the ceiling.
BK0103001US.book 97 ページ 2009年8月20日 木曜日 午前10時45分
Page 505 of 658
5-98 Comfort controls
5
Roof antenna (for vehicles equipped with SIRIUS
satellite radio)For securing the best satellite reception, the angle of the
antenna is fixed.
To r e m o v eTurn the pole (A) counterclockwise.To i n s t a l lScrew the pole (A) clockwise into the base (B) until it is
securely retained.NOTE�
Be sure to remove the roof antenna in the following cases:
When entering a place with low clearance
When using an automatic car wash
When covering your vehicle with a car cover
BK0103001US.book 98 ページ 2009年8月20日 木曜日 午前10時45分
Page 506 of 658

N00755000052
The time is displayed when the ignition switch is in the “ON”
or “ACC” position.To set the time1. Press and hold the CLOCK")
Comfort controls
5-99
5 Digital clock
(if so equipped)
N00755000052
The time is displayed when the ignition switch is in the “ON”
or “ACC” position.To set the time1. Press and hold the CLOCK button and the clock display
flashes.
2. Press the various buttons to adjust.3. When the time is set, press the DISP button to stop the
clock display from flashing. After time signal setting,
however, the clock display automatically stops flashing.
NOTE�
Reset the time after the battery terminals are disconnected
and reconnected.
�
Seconds do not appear in the clock display, but after
adjusting the “Minutes” setting and time signal setting,
the clock begins to operate from 0 seconds.
H — “Hour” setting
Press this button to fast-forward the “hours”.
M — “Minutes” setting
Press this button to fast-forward the “minutes”.
CLOCK DISP H M :00
:00 — Time signal setting
At the same time the button is pressed, the fol-
lowing modifications are made.
10:00 - 10:29 ......Change to 10:00
10:30 - 10:59 ......Change to 11:00
BK0103001US.book 99 ページ 2009年8月20日 木曜日 午前10時45分
Page 515 of 658

6-6 For emergencies
6
5. If you do not see steam or spray coming from under the
hood, leave the engine on until the bar graph for the
engine coolant temperature warning display on the multi-
information display goes down. When it is in the middle
of the normal zone, you can start driving again. If the bar
graph stays in the red zone, turn off the engine.
6. When you do not see any more steam or spray, open the
hood. Look for obvious leaks, such as a split radiator
hose. Be careful as components will be hot. Any leak
source must be repaired.
7. If there is no obvious leak source, check the coolant level
in the reserve tank. If there is none, or if it is too low,
slowly add coolant.8. If the reserve tank needs coolant, you will probably also
need to add coolant to the radiator. Do not loosen or
remove the radiator cap until the engine has cooled down.
9. Start the engine, and slowly add coolant, up to the bottom
of the filler neck. Use plain water if you have to (and
replace it with the right coolant as soon as possible).
10. Replace the radiator cap and tighten it fully. Check the
engine coolant temperature display on the multi-informa-
tion display. You can start driving again when the bar
graph for the engine coolant temperature display returns
to the normal zone.
11. Have your vehicle checked by your authorized Mitsubishi
Motors dealer or a repair facility of your choice.
WA R N I N G
!�
Before raising the engine hood, check to see if there
is steam or spray coming from under the hood.
Steam or spray coming from an overheated engine
could seriously scald you.
Do not open the hood until there is no steam or
spray.
WA R N I N G
!�
Removing the radiator cap could scald you with
escaping hot water or steam. When checking the
radiator level, cover the cap with a cloth before try-
ing to remove it. Turn it slowly counterclockwise,
without pressing down, to the first notch. The pres-
sure in the system will then be let out. When the
pressure is COMPLETELY LET OUT, press down
and keep turning the cap counterclockwise until it
will come off.
BK0103001US.book 6 ページ 2009年8月20日 木曜日 午前10時45分
Page 520 of 658
For emergencies
6-11
6
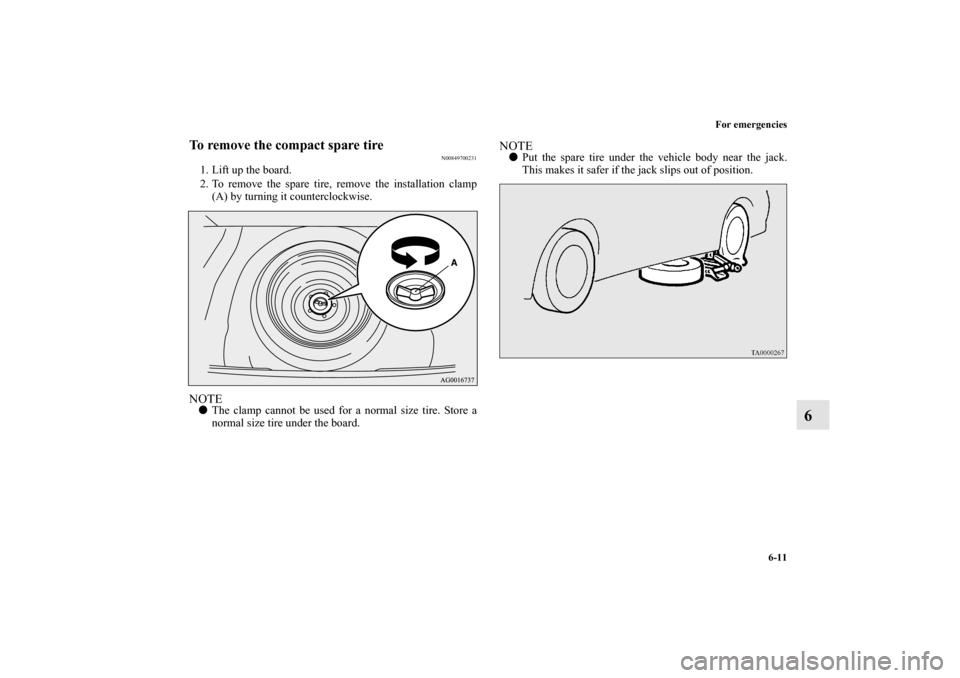
To remove the compact spare tire
N00849700231
1. Lift up the board.
2. To remove the spare tire, remove the installation clamp
(A) by turning it counterclockwise.NOTE�
The clamp cannot be used for a normal size tire. Store a
normal size tire under the board.
NOTE�
Put the spare tire under the vehicle body near the jack.
This makes it safer if the jack slips out of position.
BK0103001US.book 11 ページ 2009年8月20日 木曜日 午前10時45分
Page 525 of 658
6-16 For emergencies
6
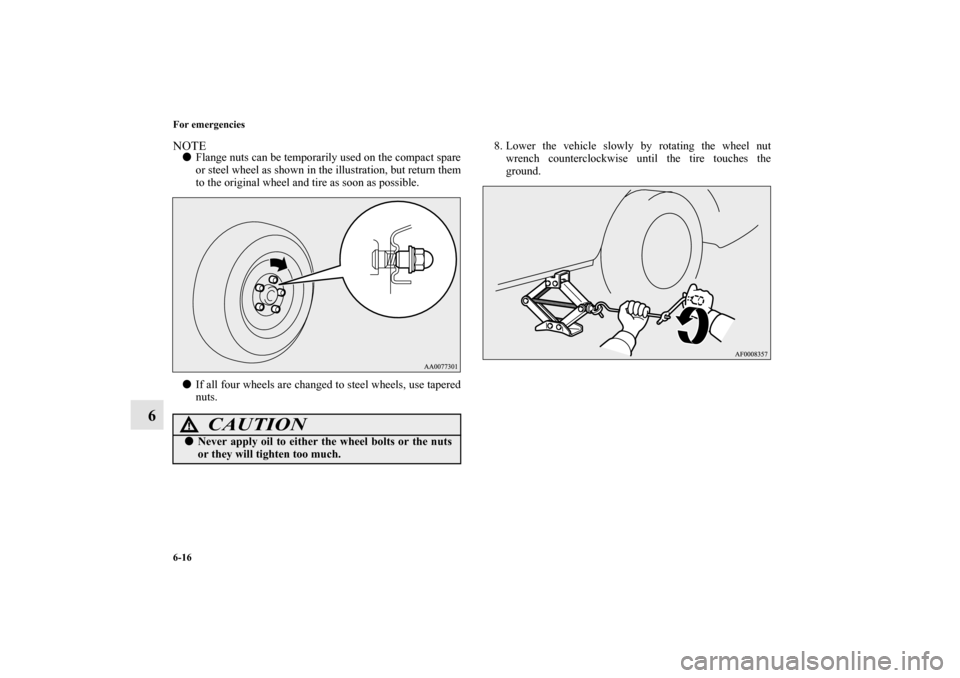
NOTE�
Flange nuts can be temporarily used on the compact spare
or steel wheel as shown in the illustration, but return them
to the original wheel and tire as soon as possible.
�
If all four wheels are changed to steel wheels, use tapered
nuts.8. Lower the vehicle slowly by rotating the wheel nut
wrench counterclockwise until the tire touches the
ground.
CAUTION
!�
Never apply oil to either the wheel bolts or the nuts
or they will tighten too much.
BK0103001US.book 16 ページ 2009年8月20日 木曜日 午前10時45分
Page 555 of 658
7-24 Vehicle care and maintenance
7
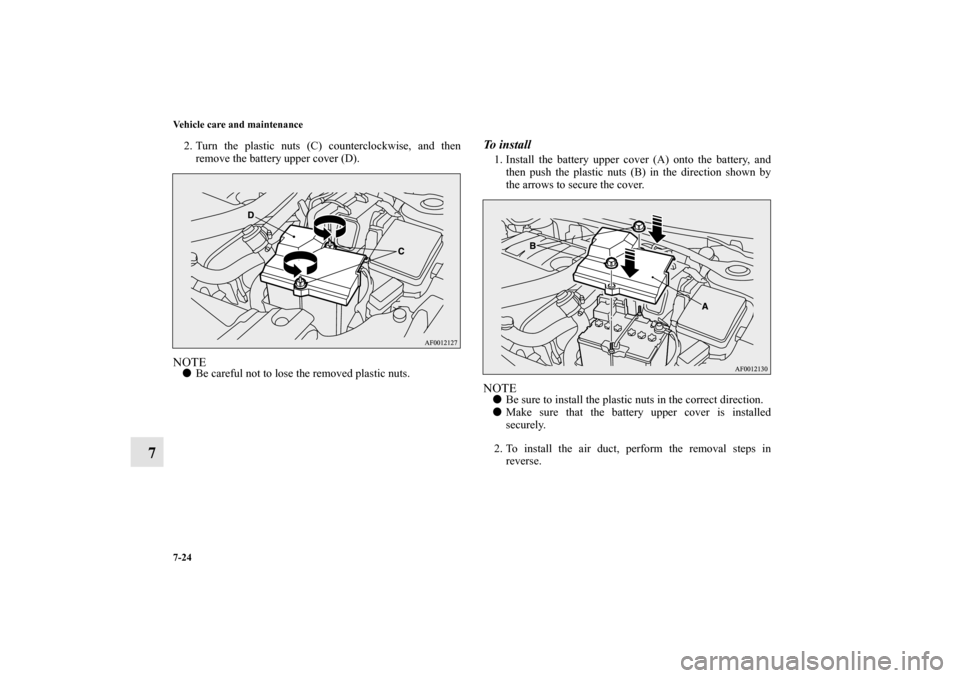
2. Turn the plastic nuts (C) counterclockwise, and then
remove the battery upper cover (D).NOTE�
Be careful not to lose the removed plastic nuts.
To i n s t a l l1. Install the battery upper cover (A) onto the battery, and
then push the plastic nuts (B) in the direction shown by
the arrows to secure the cover.NOTE�
Be sure to install the plastic nuts in the correct direction.
�
Make sure that the battery upper cover is installed
securely.
2. To install the air duct, perform the removal steps in
reverse.
BK0103001US.book 24 ページ 2009年8月20日 木曜日 午前10時45分
Page 593 of 658
7-62 Vehicle care and maintenance
7
2. For vehicles equipped with turbocharger, when replacing
the bulb on the passenger’s side, lift up the engine coolant
reservoir (B).3. Turn the bulb (C) counterclockwise, and then remove the
headlight bulb with holder.*- Front of the vehicle
*- Front of the vehicle
BK0103001US.book 62 ページ 2009年8月20日 木曜日 午前10時45分
When listening to the radio, fold the antenna toward the rear of
the vehicle until")
For securing the best satellite reception, the angle of the
antenna is fixed.
To r e m o v eTurn the pole (A)")
.3. Turn the bulb (C) counter")