Page 87 of 369
Instruments
E00500100876Type AType B1- Tachometer
2-
Speedometer
3- Fuel gauge 4- Odometer/Tripmeter
5-
Tripmeter reset button/Daytime dipper button*
6- Water temperature gauge Instruments and controls
3-02
3
OCRE12E1
Page 88 of 369

Speedometer
E00500200880
Indication for km/h
The
speedometer indicates the vehicle’s speed in
kilometers per hour (km/h). Indication for km/h and mph
The
speedometer indicates the vehicle’s speed in
miles per hour (mph) and kilometers per hour
(km/h). Tachometer
E00500300780
The
tachometer indicates the engine speed (r/min).
The tachometer can help you obtain more economi-
cal driving and also warns you of excessive engine
speeds. CAUTION
l
When
driving, watch the tachometer to
make sure that the engine speed indica-
tion does not rise into the red zone (exces-
sive engine rpm). Odometer/Tripmeter
E00500601113
When
the ignition switch is in the “ON” position,
odometer and tripmeter indications are given.
Type 1 Type 2 A- Odometer
B-
Tripmeter
C- Reset button
Odometer
The odometer indicates the total distance the vehi-
cle has travelled.
Tripmeter
The tripmeter indicates the distance travelled dur-
ing a particular trip or period.
There are two tripmeter displays: TRIP and
.
TRIP can be used to measure the distance trav-
elled
since the current trip began. At the same time,
TRIP can be used to measure the distance from
an intermediate location. Instruments and controls
3-03 3
OCRE12E1
Page 89 of 369

Every time the reset button (C) is pressed lightly
(less
than 1 second), the tripmeter display changes
(between TRIP and ).
Type 1
Type 2
To reset the tripmeter
To
return the display to “0”, press the reset button
(C) for more than 1 second. Only the currently dis-
played value will be reset. If TRIP is dis-
played, for example, only TRIP will be reset.NOTE
l Display TRIP and each have a maxi-
mum distance of 999.9 km
(999.9 miles).
l When disconnecting the battery terminal for
a long time, the memory of tripmeter display
TRIP and are cleared, and the dis-
play returns to “0”.
Fuel gauge E00500700902
The fuel gauge indicates the fuel level in the fuel
tank
when the ignition switch is in the “ON” position. F- Full
E- Empty
NOTE l When
the engine on diesel-powered vehicles
fails to operate due to running out of fuel, it
may sometimes be difficult to start after refu-
eling. This is due to air entering the fuel sys-
tem. Therefore, air must be bled from the sys-
tem. (Refer to “Bleeding the fuel system” on
page 6-05.) Fuel lid mark
The
fuel lid mark (A) indicates that the fuel tank fill-
er door is located on the left side of the vehicle (Re-
fer to “Filling the fuel tank” on page 02).
Low fuel warning lamp E00508100739
The warning lamp (A) comes on when the fuel lev-
el
is getting low (approx. 11 litres) with the igni-
tion switch in the “ON” position. Refuel as soon as
possible. NOTE
l On
inclines or curves, due to the movement
of fuel in the tank, the low fuel warning lamp
may indicate incorrectly. Instruments and controls
3-04
3
OCRE12E1
Page 90 of 369
Water temperature gauge
E00500800479
The
water temperature gauge indicates the engine
coolant temperature when the ignition switch is in
the “ON” position. CAUTION
l
If
the indication needle enters the H zone
while the engine is running, it indicates
that the engine is possibly overheating. Im-
mediately park your vehicle in a safe
place and make the necessary correc-
tions. (Refer to “Engine overheating” on
page 6-04.)
While driving, care should always be tak-
en to maintain the normal operating tem-
perature.
Daytime dipper button (meter illumi-
nation control)* E00508800273
The rheostat can be adjusted while the headlamps
or tail lamps turn on. Turn the dial to adjust the illumination (meter, mul-
ti
centre display, audio system’s control panel, heat-
er control panel, etc.) to the desired brightness. 1- To reduce brightness
2-
To increase brightness Instruments and controls
3-05 3
OCRE12E1
Page 98 of 369
1-
Audio information ® p. 5-13
2- Average fuel consumption
® p. 3-14
3- Driving range ® p. 3-14
4- Average speed ® p. 3-15
5- Outside temperature ® p. 3-16
6- Altimeter ® p. 3-16
7- Barometer ® p. 3-17
8- Calendar ® p. 3-18
9- Clock-only ® p. 3-18
10- Blank ® p. 3-18 Instruments and controls
3-13 3
OCRE12E1
Page 101 of 369

NOTE
l The
average speed can be reset separately for
the auto reset mode and for the manual reset
mode.
l When you turn the ignition switch to the
“ON” position about 4 hours (or more) after
turning it from the “ON” position to the
“ACC” or “LOCK” position in the auto reset
mode, the average speed indication will auto-
matically be reset.
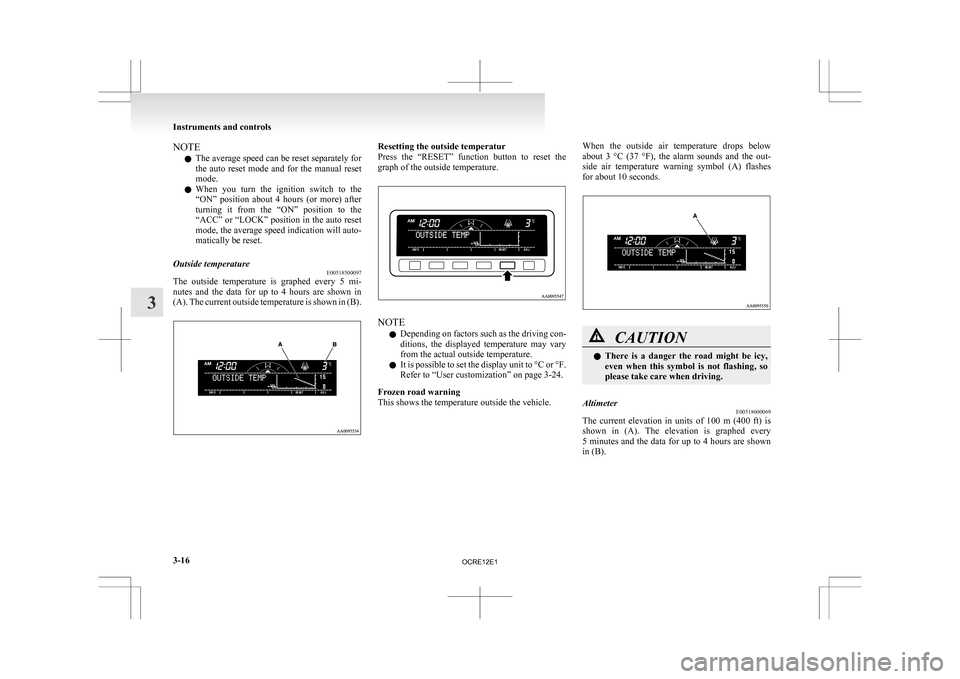
Outside temperature E00518500097
The outside temperature is graphed every 5 mi-
nutes
and the data for up to 4 hours are shown in
(A). The current outside temperature is shown in (B). Resetting the outside temperatur
Press
the “RESET” function button to reset the
graph of the outside temperature. NOTE
l Depending
on factors such as the driving con-
ditions, the displayed temperature may vary
from the actual outside temperature.
l It is possible to set the display unit to °C or °F.
Refer to “User customization” on page 3-24.
Frozen road warning
This shows the temperature outside the vehicle. When the outside air temperature drops below
about
3 °C (37 °F), the alarm sounds and the out-
side air temperature warning symbol (A) flashes
for about 10 seconds. CAUTION
l
There
is a danger the road might be icy,
even when this symbol is not flashing, so
please take care when driving.
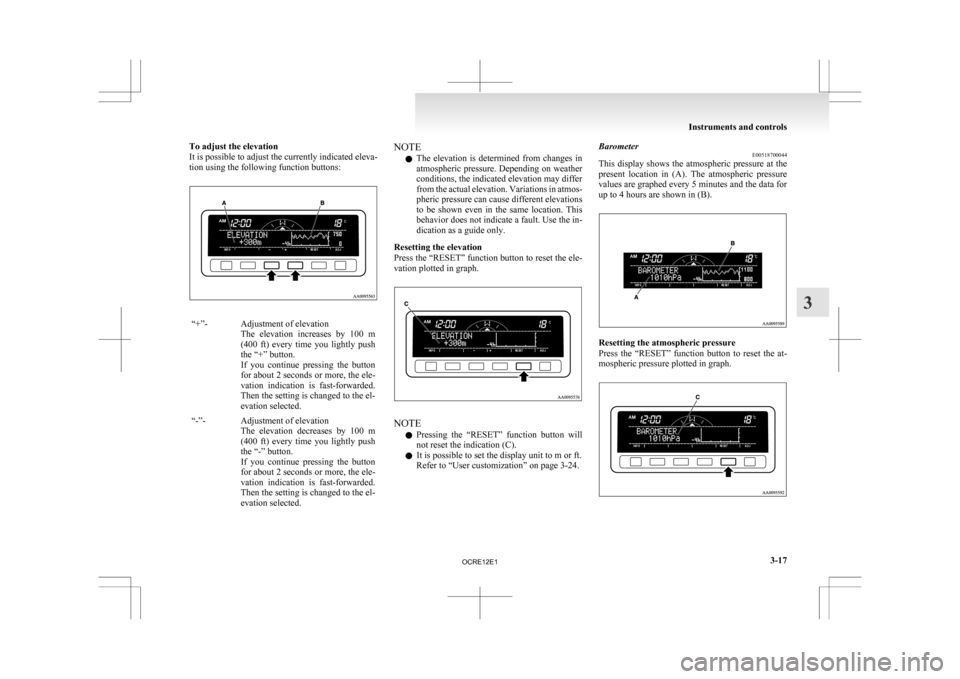
Altimeter E00518600069
The current elevation in units of 100 m (400 ft) is
shown
in (A). The elevation is graphed every
5 minutes and the data for up to 4 hours are shown
in (B). Instruments and controls
3-16
3
OCRE12E1
Page 102 of 369

To adjust the elevation
It is possible to adjust the currently indicated eleva-
tion using the following function buttons:
“+”- Adjustment of elevation
The elevation increases by 100 m
(400 ft) every time you lightly push
the “+” button.
If you continue pressing the button
for about 2 seconds or more, the ele-
vation indication is fast-forwarded.
Then the setting is changed to the el-
evation selected.
“-”- Adjustment of elevation The
elevation decreases by 100 m
(400 ft) every time you lightly push
the “-” button.
If you continue pressing the button
for about 2 seconds or more, the ele-
vation indication is fast-forwarded.
Then the setting is changed to the el-
evation selected. NOTE
l The
elevation is determined from changes in
atmospheric pressure. Depending on weather
conditions, the indicated elevation may differ
from the actual elevation. Variations in atmos-
pheric pressure can cause different elevations
to be shown even in the same location. This
behavior does not indicate a fault. Use the in-
dication as a guide only.
Resetting the elevation
Press the “RESET” function button to reset the ele-
vation plotted in graph. NOTE
l Pressing
the “RESET” function button will
not reset the indication (C).
l It is possible to set the display unit to m or ft.
Refer to “User customization” on page 3-24. Barometer
E00518700044
This
display shows the atmospheric pressure at the
present location in (A). The atmospheric pressure
values are graphed every 5 minutes and the data for
up to 4 hours are shown in (B). Resetting the atmospheric pressure
Press
the “RESET” function button to reset the at-
mospheric pressure plotted in graph. Instruments and controls
3-17 3
OCRE12E1
Page 103 of 369

NOTE
l Pressing
the “RESET” function button will
not reset the indication (C).
l It is possible to set the display unit to hPa,
mb, kPa, or inHg.
Refer to “User customization” on page 3-24.
Calendar E00518800032
The date is shown. The calendar pattern can be
changed to your desired setting.
Refer
to “Changing the calendar setting” on page
3-23. Clock-only
E00518900033
Only the clock is shown. The time notation can be
changed to your desired setting. (12 hour/24 hour) Refer to “User customization” on page 3-24.
Blank
E00519000015
The whole display can be turned into blank. In this
case, buttons remain illuminated. NOTE
l If
you operate the audio system, the audio dis-
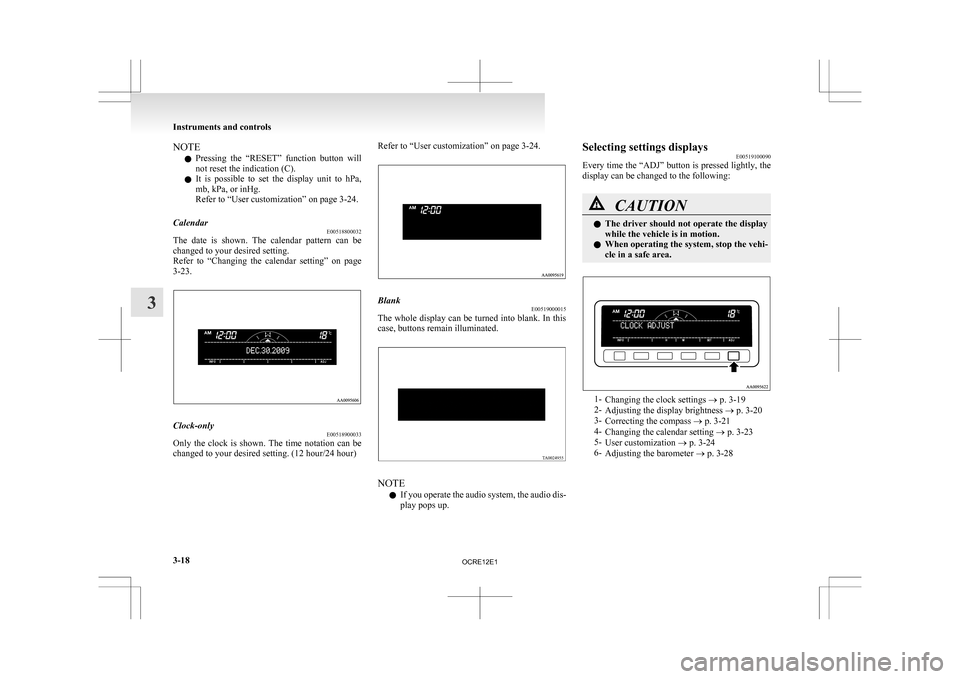
play pops up. Selecting settings displays
E00519100090
Every
time the “ADJ” button is pressed lightly, the
display can be changed to the following: CAUTION
l
The
driver should not operate the display
while the vehicle is in motion.
l When operating the system, stop the vehi-
cle in a safe area. 1-
Changing the clock settings
® p. 3-19
2- Adjusting the display brightness ® p. 3-20
3- Correcting the compass ® p. 3-21
4- Changing the calendar setting ® p. 3-23
5- User customization ® p. 3-24
6- Adjusting the barometer ® p. 3-28 Instruments and controls
3-18
3
OCRE12E1